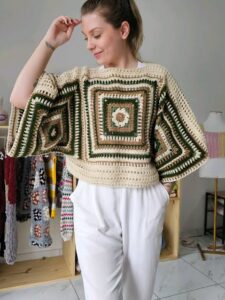
Granny Crochet Fanny Pack Waist Bag Pattern
A mustard daisy sits at the center of every black square in the Granny Crochet Fanny Pack Waist Bag Pattern, and four of those motifs fold into one compact pouch for keys, cards, and other pocket-sized essentials.
Each motif starts life as a small daisy granny square. After that, it picks up black rounds and a mustard cluster band, which turns into a frame once all four pieces meet. Below, you’ll find every stage of the granny square bag build, from the first ring to folding the pouch and adding a strap, so even a first bag feels manageable.

Granny Crochet Fanny Pack Waist Bag Pattern Overview
The bag is built from four matching granny squares. Each one has a mustard center, four white petals, black granny rounds, and a mustard band running along two neighboring sides.
First, you arrange the squares in a T shape and join them. Then you fold and seam the piece into a pouch. Finally, a closure and a waist strap finish it off.
Because every square repeats the same rounds, the Granny Crochet Fanny Pack Waist Bag Pattern suits anyone comfortable with double crochet, chain spaces, color changes, and basic seaming. If you’ve already made our easy crochet granny bow, the cluster rounds here will feel familiar too.
Materials for Your Crochet Fanny Pack Waist Bag
- Worsted weight acrylic yarn in black, mustard, and white
- A crochet hook that suits your yarn (worsted usually pairs with 5 mm / H-8)
- Tapestry needle and scissors
- Stitch markers or locking clips, since loose pieces shift while you seam
- A zipper or other closure, sized to your finished opening
- Waist strap: crocheted, or cotton webbing with a buckle
- Cotton fabric for lining, too, if you want a smoother inside
Black takes the most yardage because it forms most of each square. Mustard and white, however, are needed only in small amounts.
Abbreviations (US Terms)
All terms below follow US conventions, so UK readers will know dc here as treble (tr).
- ch – chain
- sl st – slip stitch
- dc – double crochet
- ch-sp – chain space
- rnd – round
Time Box
- Prep: about 15 minutes to wind yarn and gather tools
- Squares: roughly 2 to 4 hours for all four, depending on your pace
- Joining and folding: about 1 hour
- Closure, strap, and lining: 1 to 2 hours, especially if you hand-sew the lining
Still, treat these as rough guides rather than timed results.
How to Crochet the Granny Fanny Pack Step by Step
Work all four squares for the Granny Crochet Fanny Pack Waist Bag Pattern first, then move on to joining, because matching squares make the rest of the build much easier.
Step 1: Start the Mustard Magic Ring
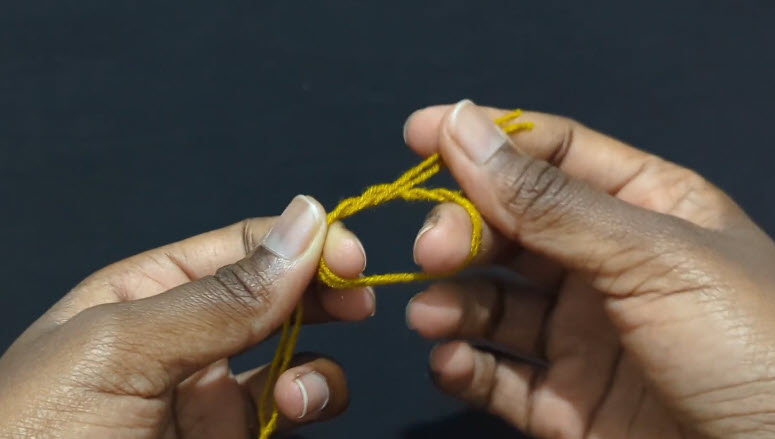
Wrap the mustard yarn around your fingers to form a magic ring, keeping the working yarn behind. Leave a tail of several inches and don’t trim it short, since you’ll pull on it later to close the center. Also, keep the ring loose at first so the hook slides in easily.
Step 2: Work the Center Round
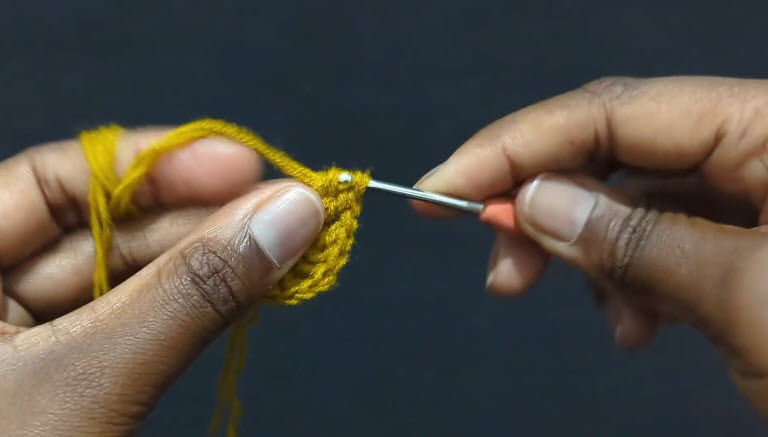
Chain up, then work your first stitches directly into the ring. Keep the stitches snug against each other, with small chain gaps between the groups as the pattern directs.
Meanwhile, hold the ring steady with your thumb so it doesn’t twist as you go around.
Step 3: Close the Center and Fasten Off
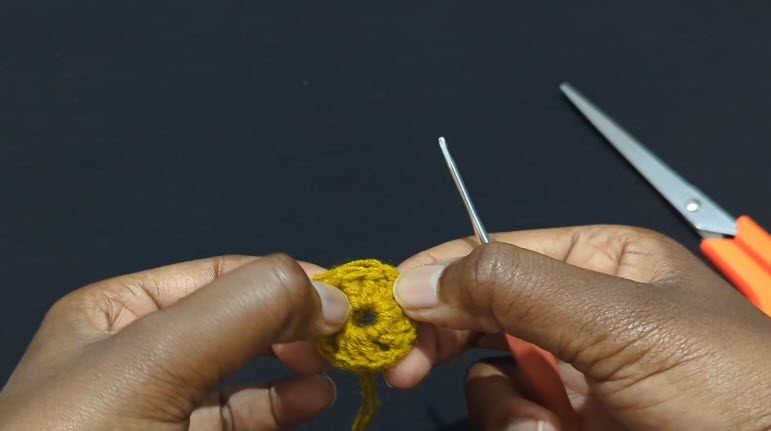
Pull the tail to tighten the ring, join with a sl st, and fasten off. When you’re done, the center should look like a small flat circle with even gaps around it.
Count now: make sure the gaps are evenly spaced, because the petals anchor there and a missing gap means a missing petal.
Step 4: Add the White Petals
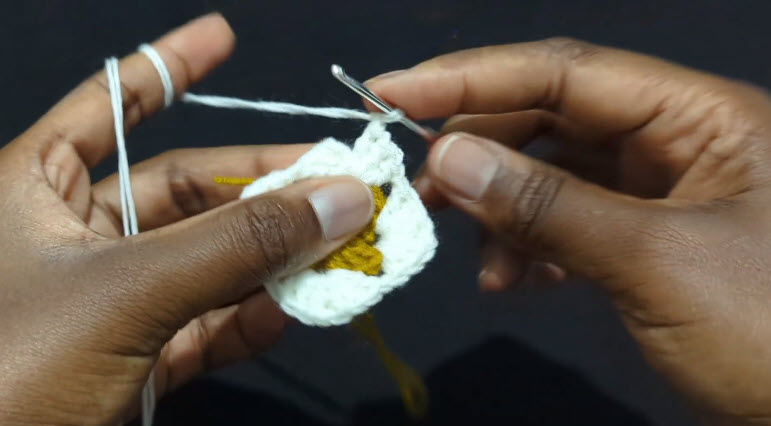
Join white yarn into a gap and work the petal round. Drape the white yarn over your index finger for steady tension, as shown in the photo. As a result, the finished daisy gets four even white petals around the mustard center.
Keep every petal the same size; otherwise, a tight petal beside a loose one will make the square lean.
Step 5: Build the Black Rounds and the Mustard Band
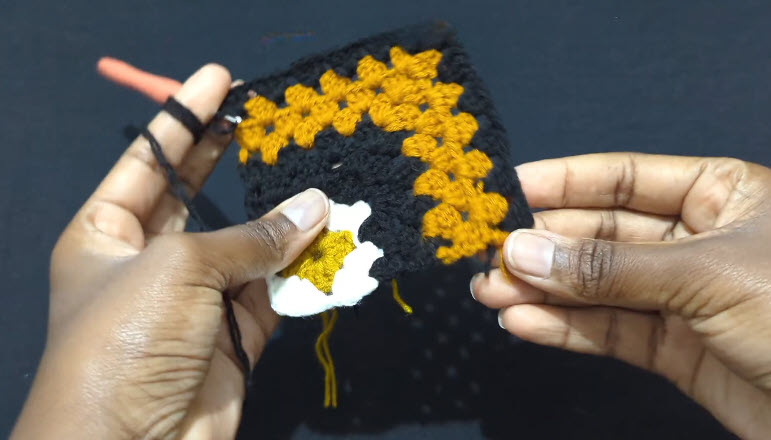
Switch to black and work granny rounds outward from the daisy, placing dc clusters into the chain spaces. The mustard band runs along two neighboring sides of the square in an L shape, while black continues around it.
After you finish each new square, compare it against your first one. All four should have the band in the same spot relative to the daisy; otherwise, the frame won’t line up later.
Pro tip: Lay square one flat and hold each new square on top of it before weaving in ends. If the edges don’t match, fix it right away, since blocking won’t hide a round that’s off by a cluster.
Step 6: Lay Out and Join the Four Squares
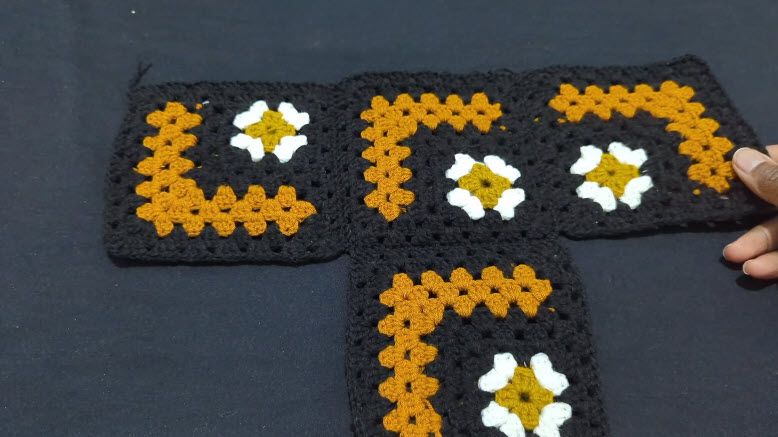
Place three squares side by side and the fourth under the middle one to form a T. Then rotate each square so the mustard bands create one continuous design across the layout.
Layout test: photograph the arrangement before joining, because it’s easy to rotate a square by mistake when you pick it up to seam.
Finally, join with black yarn using a sl st or whipstitch so the seams blend into the background.
Step 7: Shape the Pouch
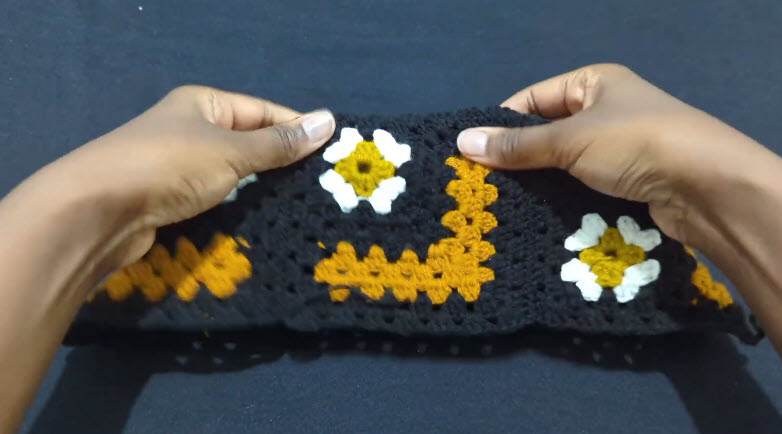
Hold the joined piece with the daisies facing out and check that the front looks balanced. After that, fold the side squares and the lower square toward the center to form the pouch.
Shape check: clip the edges together and test the fold before seaming. Fill it with your usual essentials, too, so you know the size works.
When the fit feels right, seam the edges in black and leave the top open for the closure.
Step 8: Add the Closure and Strap
Measure the opening, then hand-sew a matching zipper just inside the top edge. Next, attach the strap to both upper corners and stitch through several layers so it can carry weight.
Fit test: wrap the strap around your waist or across your body before the final stitches, because the length is easiest to change at that point.
Common Mistakes With a Granny Crochet Fanny Pack
- Uneven center gaps: they lead to lopsided petals, so recount before adding white.
- Bands facing the wrong way: check the whole layout first, since a turned square is hard to spot later.
- Loose joining: gaps along the seams weaken the bag, so keep your tension firm.
- Skipping the test fold: seaming the wrong edges means unpicking black yarn from black stitches, which is slow and fiddly work.
Caring for Your Crochet Waist Bag
Hand wash in cool water with mild soap, press out the water in a towel, and dry flat. If you prefer the machine, however, remove or cover the zipper first. Acrylic holds its shape well; still, keep it away from hot dryers.
Color Ideas to Try
- Navy base with a coral band and cream petals
- Forest green base with a gold band for autumn
- Cream base with a rust band for a softer look
- Scrap version: a different daisy color in each square, which also uses up leftover yarn
FAQs About the Crochet Fanny Pack Waist Bag Pattern
How many squares does the Granny Crochet Fanny Pack need?
Four in total. You arrange them in a T shape first and then fold them into the pouch.
Can I use cotton yarn?
Yes. Cotton gives a firmer bag with less stretch. However, check your square size, since cotton may work up a little smaller.
Do I have to add a zipper?
No. A button loop, magnetic snap, or flap also works. Still, a zipper is the most secure choice for a bag you’ll wear all day.
Can I wear the Granny Crochet Fanny Pack Waist Bag Pattern as a crossbody bag?
Yes. Simply lengthen the strap so it sits across your chest instead of around your waist.
Will small items fall through the granny holes?
They can, so a fabric lining is worth adding (see the bonus section below).
Bonus: Lining the Pouch So Small Items Stay Put
Granny clusters leave openings that coins and earbuds can slip through. To fix that, cut cotton fabric to the size of the folded pouch plus a small seam allowance, then sew it into a matching pouch shape and slip it inside.
After that, hand-stitch the lining to the top edge just below the zipper. No sewing machine is required. Also, dark fabric keeps the lining invisible through the black squares.
Styling Ideas for Your Finished Waist Bag
Once the strap is on, the pouch works in more ways than you might expect.
- Wear it at the waist for markets and fairs, when you want both hands free.
- Sling it across your body on travel days, since it holds a phone, cards, and keys.
- Clip a small charm to the zipper pull, for example our crochet round bear keychain.
- Tuck a slim crochet pink wallet with cash pockets inside, so cards and notes stay organised.
- Pair it with a crochet fairy long-tailed pouch as well, and you have a sweet handmade gift set.

Your Daisy Pouch, Stitched and Ready
Four daisy squares, careful rotation, and one test fold are all the Granny Crochet Fanny Pack Waist Bag Pattern asks of you. So take your time with the layout, and the mustard bands will line up into a bag that looks planned from every angle.
Afterward, if you’d like another handmade piece to wear, browse our crochet wearables collection for skirts, shorts, and tops.