

Crochet is my favorite kind of slow joy: hook in hand, yarn gliding through your fingers, and a tiny character taking shape before you even realize it. Each loop feels calming, and somehow your few quiet minutes turn into something soft, bright, and cheerful you can carry around. That little rush of pride at the end never gets old.
If you’re craving a quick, smile-inducing make, this miniature SpongeBob amigurumi keychain is it. More than a cute trinket, it’s a practical tag for keys, backpacks, or zipper pulls, with bold colors and a friendly face that pop even at pocket size. It’s the kind of playful, everyday companion that makes a fun gift and an even better keepsake.
The pattern is beginner-friendly yet satisfying for seasoned crocheters. You’ll use simple stitches and straightforward shaping, practice clean color changes, and add personality with a few embroidered details. Customize the cheeks, tie, or pant edges to match your style. New makers will love the quick win, while experienced crafters can focus on neat tension and polished finishing.
Materials & Tools
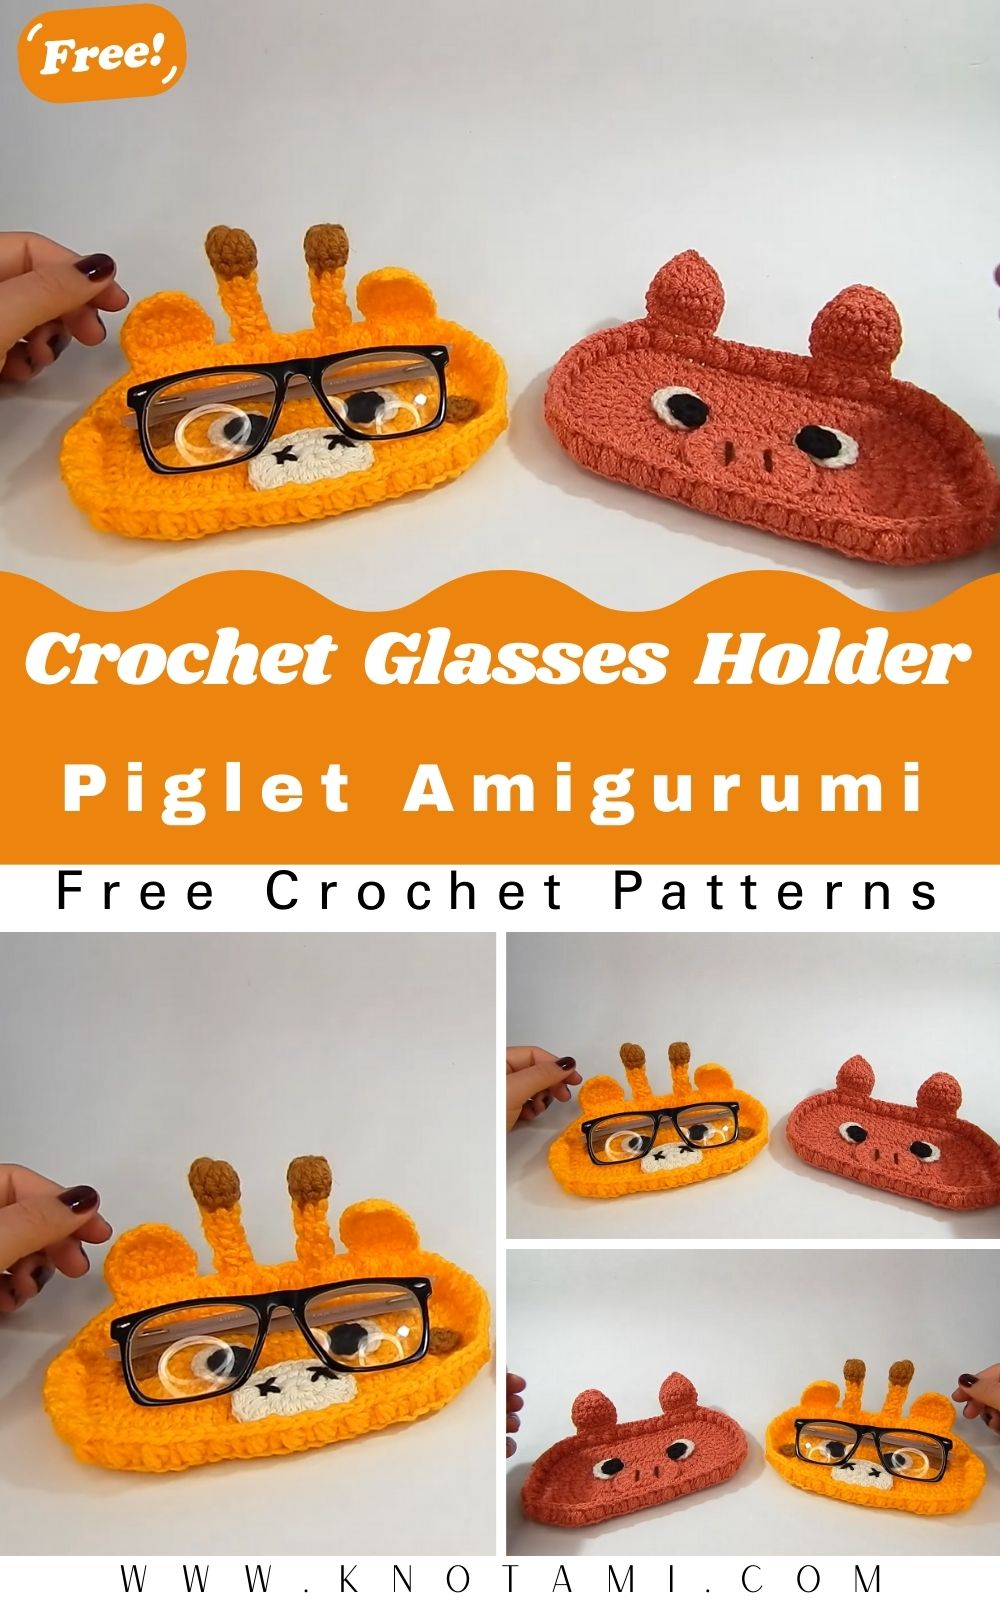
To make your Mini Crochet Glasses Holder Giraffe Piglet Amigurumi, gather the following materials. You can adjust yarn type and hook size depending on your preferred texture or size outcome.
Materials List
-
Yarn: Soft plush or velvet yarn (e.g., Himalaya Dolphin Baby, Bernat Velvet, or YarnArt Dolce)
-
For Giraffe: Light yellow, brown, and cream
-
For Piglet: Baby pink and rose
-
-
Yarn Weight: Super Bulky (Weight 6)
-
Hook Size: 4.0 mm or 4.5 mm crochet hook
-
Stuffing: Polyester fiberfill (for plush, bouncy texture)
-
Safety Eyes: 8 mm (optional; can be embroidered for baby-safe toys)
-
Tapestry Needle: For sewing parts and weaving in ends
-
Scissors: Sharp, precise for cutting yarn cleanly
-
Stitch Markers: Essential for tracking rounds
-
Pins: Optional for assembling before stitching
Yarn & Color Tips
For a classic look, use soft pastel shades of yellow and brown for the giraffe, pink and rose for the piglet. You can also experiment with fantasy tones like mint, lilac, or sky blue for a modern twist. Velvet yarn adds plush texture and luxury, while cotton yarn offers firmness and definition for structured shapes. Always use a hook one size smaller than usual to ensure tight stitches that prevent stuffing from showing through.
Step-by-Step Crochet Instructions
Below is a complete walkthrough for crafting your cute and functional mini giraffe or piglet glasses holder. The general structure and shaping remain the same for both, with small details added to distinguish each animal.
Step 1: Crochet the Head
-
Start with a Magic Ring.
Make 6 single crochets (sc) into the ring and tighten. -
Increase Round: 2 sc in each stitch (12).
-
Next Rounds: Continue increasing until you reach 24–30 stitches, depending on the desired head size.
-
Even Rounds: Crochet several rounds with no increases to form the head’s depth.
-
Decreasing: Begin gradual decreases to shape the back of the head.
-
Stuffing: Add fiberfill gradually, shaping as you go to create a soft, rounded head form.
Tip: Use firm, even stuffing at the front so the face holds shape when the glasses rest on it.
Step 2: Form the Neck and Upper Body
-
Continue from the head or attach a new yarn strand at the base.
-
Crochet 12–15 rounds evenly (no increases) to create the neck cylinder.
-
For giraffe: alternate 2 rounds yellow, 1 round brown for a spotted pattern.
-
Stuff lightly as you go to maintain shape without overfilling.
Pro Tip: Keep neck stuffing medium-firm enough to support the head but flexible enough for a soft tilt.
Step 3: Build the Main Body
-
From the neck, increase gradually (1 sc, inc around) until the base reaches about 36 stitches.
-
Continue crocheting evenly for 8–10 rounds for body height.
-
Add stuffing little by little, shaping the plush cylinder.
-
For piglet: use all pink yarn; for giraffe, alternate colors or add brown dots randomly.
Balancing Tip: The body acts as the foundation that holds the gglasses’arms. Keep stuffing dense at the bottom for steady balance.
Step 4: Shape or Attach the Base
The base provides stability and gives the plush its cute, chubby appearance.
-
Crochet a separate flat circle using this pattern:
-
Round 1: Magic ring, 6 sc
-
Round 2: inc in each (12)
-
Round 3: (sc, inc) repeat (18)
-
Round 4: (2 sc, inc) repeat (24), continue until size fits body base
-
-
Once flat, sew it securely to the bottom of the body.
-
Add a small weight (optional), like glass beads or pebbles,s inside before closing to enhance balance.
Step 5: Create the Limbs and Tail
For Giraffe:
-
Ears: Two small teardrop shapes (start with 4 sc, increase to 8, then decrease).
-
Horns (Ossicones): Small brown tubes made of 5–6 rounds each.
-
Tail: Short strand finished with a tiny tuft using dark yarn.
For Piglet:
-
Ears: Triangle-shaped, start with 4 sc and increase over 3–4 rows.
-
Tail: A small spiral chain coiled tightly for a curly tail look.
Stuff ears lightly (if at all), and sew all parts symmetrically.
Step 6: Assembly and Positioning
-
Pin before Sewing: Lay out head, body, ears, and limbs to check balance.
-
Attach Head: Sew firmly using invisible or ladder stitch.
-
Add Limbs: Place front legs slightly forward; they’ll help support the glasses.
-
Fix Tail: Attach at the back for finishing detail.
-
Stuff Check: Adjust fiberfill inside if any area feels uneven.
Positioning Tip: Slightly tilt the head upward so the nose area aligns with your glasses’ bridge, perfect for holding frames securely.
Step 7: Add Final Touches & Accessories
-
Insert safety eyes or embroider tiny sleepy eyes.
-
Stitch a small smile for a cute, friendly face.
-
Add mini bows, scarves, or flowers for decoration.
-
For the glasses rest, use the head’s snout or forehead area as the anchor point.
Optional Add-ons:
-
Small bell necklace for the giraffe
-
Polka-dot ribbon for the piglet
-
Felt blush cheeks for a kawaii touch
Customization Ideas
This adorable project offers endless creative possibilities!
Color & Style Variations
-
Classic Piglet: Light pink body, rose snout, white inner ears.
-
Elegant Giraffe: Yellow base, light brown spots, cream accents.
-
Fantasy Theme: Unicorn pastels lavender, mint, peach.
-
Holiday Edition: Red and green for Christmas, orange and black for Halloween.
Yarn Experiments
-
Velvet Yarn: Soft, plush, and luxurious feel.
-
Cotton Yarn: Crisp and durable finish, perfect for detailed shaping.
-
Acrylic Yarn: Budget-friendly with vibrant colors.
Accessories & Props
-
Mini crochet bowtie
-
Tiny crocheted heart
-
Name tag or initials embroidery
-
Little felt hat or flower crown
Personalize each amigurumi to reflect the recipient’s favorite colors or season, perfect for gifting or collecting!
Advanced Tips & Troubleshooting
Take your amigurumi craftsmanship to the next level with these expert insights:
-
Invisible Decreases: Insert hook in front loops of two stitches, yarn over, pull through both, yarn over again, complete sc no bumps visible.
-
Even Tension: Relax your wrist and keep consistent yarn feed — uneven tension distorts shape.
-
Prevent Twisting in Rounds: Use stitch markers to track the first stitch of each round.
-
Stuff Gradually: Add small handfuls of stuffing to maintain even firmness.
-
Fix Loose Stitches: If gaps appear, weave yarn back through neighboring stitches to close them.
-
Perfect Shape: Massage the stuffed piece to distribute fiberfill evenly after closing.
-
Seamless Joins: Use ladder stitch with matching yarn for invisible part connections.
-
Avoid Fuzz Pulling: When using velvet yarn, don’t over-rip it, as it can shed fibers.
-
Pattern Abbreviations: Keep a quick list handy:
-
Sc (single crochet), inc (increase), dec (decrease), sl st (slip stitch), ch (chain)
-
-
Flat Base Fix: If your amigurumi wobbles, remove a bit of stuffing or add a weight disc inside.
Conclusion
The Mini Crochet Glasses Holder Giraffe Piglet Amigurumi Pattern is proof that creativity has no limit. It’ss playful, practical, and irresistibly cute. Whether you make it for yourself or as a heartfelt gift, each stitch carries your time, love, and imagination. It’s the perfect project for slow crafting sessions, relaxing, fulfilling, and joyfully productive.
As your tiny giraffe or piglet takes shape, you’ll realize you’re not just crocheting, you’re crafting a little companion that brings smiles every day. So grab your hook, pick your yarn, and start this adorable journey today.