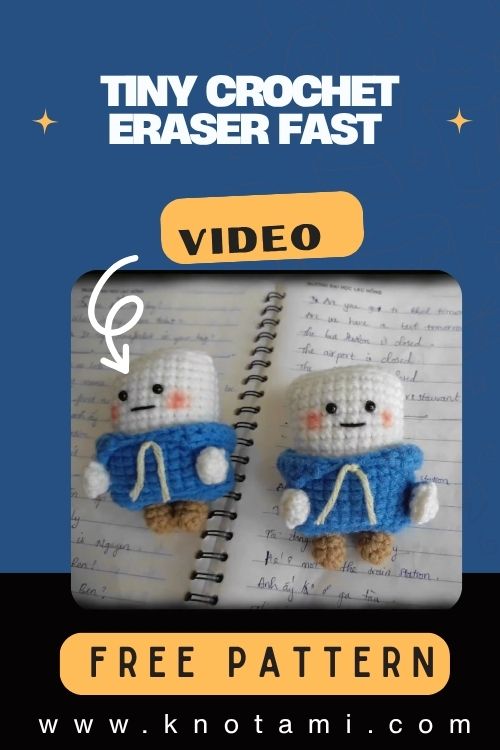
Tiny Crochet Eraser Fast & Adorable Amigurumi Pattern
There’s something truly magical about the art of crochet that satisfying moment when a simple strand of yarn transforms into something tangible, delightful, and full of character. With every loop and stitch, you’re not only crafting an object but also weaving calmness and creativity into your day. Whether you’re a beginner picking up your first hook or a seasoned crocheter chasing that next adorable pattern, handmade projects always bring warmth, joy, and personality to life.
Today’s project the Tiny Crochet Eraser Fast & Adorable Amigurumi Pattern captures the heart of that handmade charm. Inspired by classic school supplies, this tiny crochet eraser brings a nostalgic yet whimsical vibe to your craft table. It’s a perfect mix of cuteness, creativity, and simplicity — a quick project that results in a delightful miniature plush that’s small enough to sit on your desk or hang from a keychain.
One of the best things about this pattern is that it’s suitable for all skill levels. Beginners can easily follow along and finish it in under an hour, while experienced crocheters will appreciate the clean design, fast progress, and creative potential for customization. It’s a wonderful way to use up yarn scraps and turn them into something adorable and functional.
Crocheting this eraser isn’t just about creating a cute object it’s also about the mindful rhythm of the process itself. Every stitch invites you to slow down, breathe, and enjoy the gentle repetition that turns yarn into art. Whether you’re crafting it as a tiny gift, a decorative desk piece, or just for fun, this project reminds you how rewarding it feels to bring your imagination to life through your hands.

Materials & Tools
Before we start crocheting, let’s gather everything you’ll need for this charming project.
Materials:
-
Yarn: Worsted weight (4-ply) cotton or acrylic yarn in three colors light pink (eraser body), gray (middle band), and white (top part).
-
Hook: 2.5 mm or 3.0 mm crochet hook (adjust based on your yarn thickness).
-
Stuffing: Polyester fiberfill or any soft stuffing material for shaping.
-
Safety eyes: 5 mm (optional) if you’d like to add a cute face.
-
Tapestry needle: For sewing ends and assembling parts.
-
Scissors: Sharp pair for clean trimming.
-
Stitch markers: Useful for marking rounds, especially if you’re a beginner.
Optional Additions:
-
Keychain ring or magnet base for functionality.
-
Blush or pink yarn embroidery thread for cheeks.
Yarn Tips:
For the best result, choose smooth-textured yarn it helps your stitches look neat and defined. Cotton yarn gives the eraser a crisp, clean look, while acrylic offers a softer and slightly fluffier finish. As for color, you can go with classic pink and white for a traditional eraser vibe or explore fun pastels, rainbow tones, or even neon shades for a playful twist!
Step-by-Step Crochet Instructions
Ready to make your tiny eraser come to life? Let’s go step-by-step.
Step 1: Making the Eraser Base
Start with the light pink yarn (or your chosen eraser color).
-
Begin with a magic ring.
-
Round 1: 6 single crochets (sc) into the ring.
-
Round 2: Increase in each stitch (12 sc total).
-
Rounds 3–8: Continue in single crochet around, maintaining 12 stitches in each round.
This forms the base and body of your eraser.
Expert Tip:
Keep your tension even and check that the shape remains cylindrical, not bulging. Use a stitch marker at the start of each round to stay on track.
Step 2: Creating the Gray Middle Band
Switch to gray yarn to mimic the traditional metal band on a real eraser-pencil combo.
-
Round 9–10: Single crochet around with gray yarn.
-
Make sure your color transition is smooth; use the invisible color change method for a cleaner look.
Pro Tip:
Pull the old color tight before switching to the new one it prevents gaps or uneven edges between color sections.
Step 3: Forming the White Top (Eraser Head)
Now, attach the white yarn for the final section.
-
Round 11–13: Continue single crocheting around evenly.
-
Slightly decrease in the final round to taper the top a bit (optional).
-
Finish off and close the top neatly.
Step 4: Stuffing the Eraser
Before closing the last stitch, insert stuffing through the opening.
-
Add just enough to hold shape but not too much overstuffing can distort the edges.
-
Distribute the filling evenly using your fingers or a chopstick.
Pro Tip:
If you want a “flat” eraser shape, use a bit less stuffing and gently shape the sides as you close.
Step 5: Adding the Cute Face (Optional)
This is where your eraser gets its personality!
-
Insert safety eyes between the pink and gray sections.
-
Embroider a small smile with black thread or yarn.
-
Use blush or a small dab of pink yarn for rosy cheeks.
Step 6: Assembly and Finishing Touches
Once stuffed and decorated, close your final round tightly.
Weave in all yarn ends with a tapestry needle, making sure everything looks neat.
If desired, attach a keychain ring or small magnet on the back using hot glue or sewing thread.
Your tiny crochet eraser is now complete fast, fun, and incredibly cute!
Customization Ideas
Part of the fun in amigurumi crafting is adding your own creative flair. Here are some ways to make your eraser truly yours:
-
Color Variations: Try mint green, lavender, or yellow for a pastel look. You could even make a rainbow set for your desk.
-
Textures: Use velvet or plush yarn for a soft, squishy finish.
-
Themes: Create special editions holiday red and white, back-to-school sets, or even galaxy-inspired color fades.
-
Add Accessories: Give your eraser a tiny bow tie, scarf, or glasses for an extra dose of charm.
-
Keychains & Magnets: Turn it into a backpack charm, fridge magnet, or desk accessory.
This project’s versatility means you can make one for every mood, season, or friend!
Advanced Tips & Troubleshooting
Want to take your amigurumi skills to the next level? Here are 10 pro tips for success:
-
Invisible Decrease: Insert hook into the front loops of two stitches and pull yarn through both this keeps decreases clean.
-
Even Stitch Tension: Keep your yarn hand relaxed; tight stitches can warp the shape.
-
Round Alignment: Always mark your round’s starting point. Missing a stitch can cause uneven stacking.
-
Color Transitions: Switch colors in the last yarn-over of the previous stitch for smoother joins.
-
Stuffing Smart: Add stuffing gradually to prevent lumps.
-
Fixing Gaps: Use your tapestry needle to close any small holes neatly.
-
Seamless Joining: Stitch in the back loops for invisible joins.
-
Abbreviation Reading: SC = single crochet, INC = increase, DEC = decrease, SL ST = slip stitch memorize these for ease.
-
Shape Correction: If your piece leans, lightly tug and massage the edges before final assembly.
-
Finishing Neatly: Always hide yarn ends inside the piece for a professional look.
Care Instructions
Handmade amigurumi deserves gentle care to stay looking new and fresh.
Here’s how to maintain your crochet eraser:
-
Hand Wash Only: Use cool or lukewarm water.
-
Mild Detergent: Choose a gentle, baby-safe soap.
-
Do Not Twist: Gently squeeze out water and pat dry.
-
Air Dry Flat: Avoid dryers direct heat can distort the shape.
-
Avoid Sunlight: Store away from prolonged exposure to prevent color fading.
-
Safe Storage: Keep it in a soft fabric pouch or on display where it won’t collect dust.
Display & Gift Ideas
Your tiny crochet eraser is as versatile as it is adorable. Here are fun ways to display or gift it:
-
Desk Buddy: Place it on your work desk for a pop of handmade cheer.
-
Keychain: Attach to your keys or bag for everyday cuteness.
-
Gift Topper: Use it as a creative add-on to a wrapped gift.
-
Back-to-School Favor: Perfect for students or teachers!
-
Holiday Ornament: Add a loop and hang it on your Christmas tree.
-
Craft Fair Item: Great small item for selling at craft fairs or online shops.
This tiny eraser makes people smile instantly whether it’s a keepsake or a gift, it’s sure to spread joy.
Benefits of Making Crochet Erasers
Crocheting isn’t just a hobby; it’s a wonderful form of self-expression and self-care.
Here’s what this cute little project brings to your life:
-
Relaxation & Mindfulness: The repetitive motion of crocheting calms the mind.
-
Stress Relief: It offers a creative outlet that melts stress away.
-
Sense of Accomplishment: Finishing a project, even a small one, feels deeply rewarding.
-
Sustainable Gifting: Handmade items reduce waste and carry heartfelt value.
-
Connection: Sharing handmade crafts strengthens emotional bonds with loved ones.
Each stitch you make carries intention and joy and that’s what makes crochet so magical.
Photography & Social Media Tips
Want to show off your adorable eraser online? Here’s how to make your photos shine:
-
Natural Light: Shoot near a window for soft, bright lighting.
-
Simple Backgrounds: White, beige, or wooden surfaces help colors pop.
-
Cute Props: Add balls of yarn, crochet hooks, or stationery for storytelling.
-
Angles Matter: Try overhead shots or close-ups to highlight stitch detail.
-
Editing: Brighten slightly but keep colors true to life.
Your handmade eraser deserves its moment in the spotlight make sure it gets one!
Conclusion
There’s something incredibly fulfilling about crafting small, charming pieces like the Tiny Crochet Eraser Amigurumi. In less than an hour, you can turn simple yarn into something adorable, unique, and full of character. Each stitch is a tiny act of creativity a moment where your imagination meets your hands.
Whether you’re making it for yourself, a friend, or simply to enjoy the joy of creating, this project brings instant satisfaction and lasting smiles. So grab your hook, pick your favorite yarn, and let your creativity erase the stress of the day one adorable stitch at a time.
