
Bringing a little piece of whimsy to life with nothing more than yarn, a hook, and your own two hands feels truly magical. Crochet has a special way of turning the simplest materials into heartfelt creations filled with charm and personality. From the soothing rhythm of each stitch to the excitement of watching a character take shape, amigurumi invites us to slow down, relax, and enjoy the creative process. And when you finally hold that finished piece—something real made from imagination, it’s a satisfaction unlike any other.
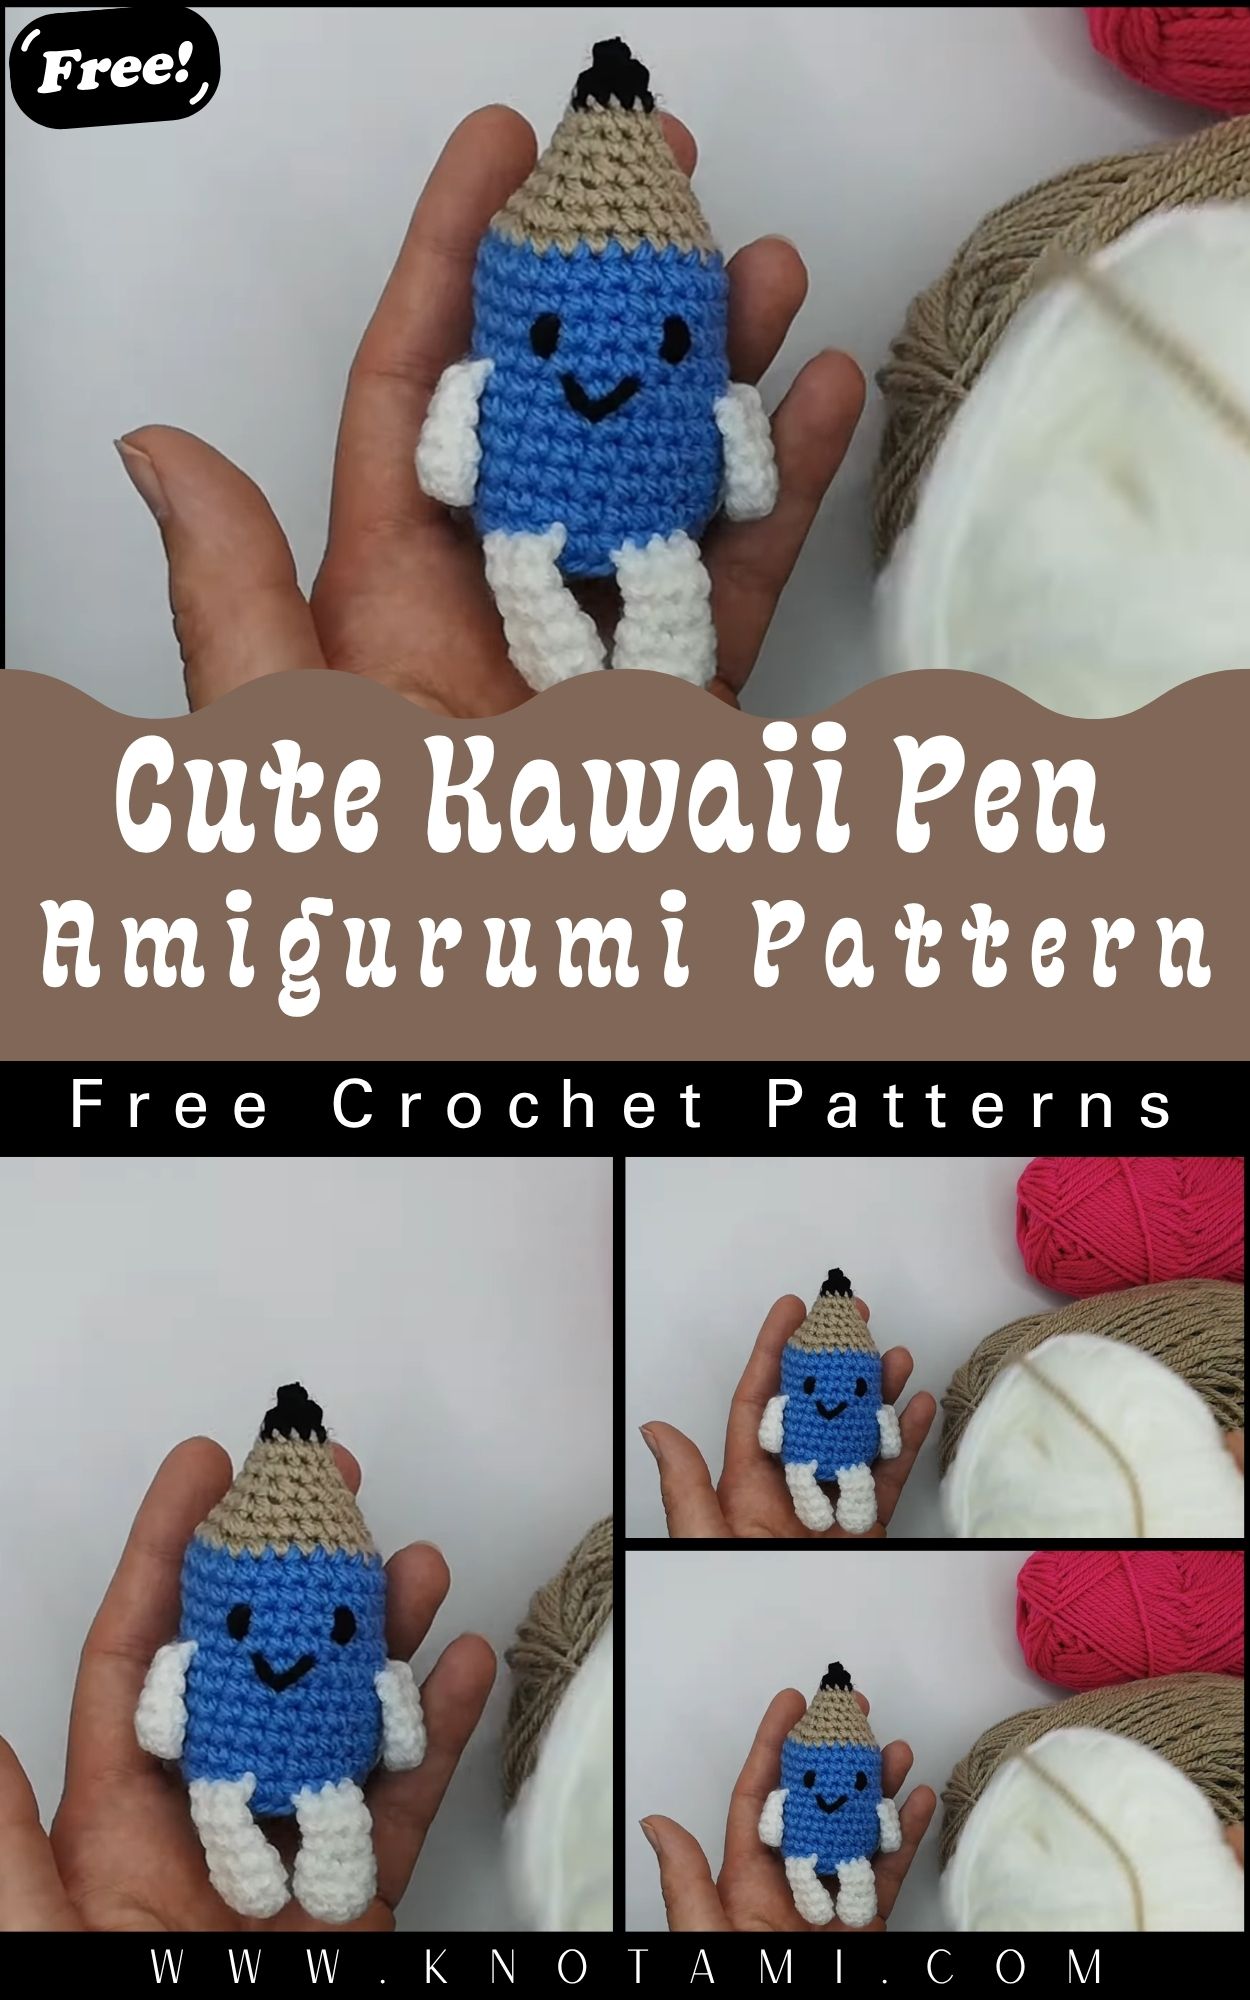
Today’s project, the Crochet Kawaii Pen Amigurumi Pattern, is the epitome of adorable, tiny, and ridiculously fun to make. Inspired by the popular kawaii aesthetic, this crochet pen character combines soft textures with playful features, resulting in a sweet guardian for your desk or a thoughtful handmade gift. Its expressive face, smooth cylindrical body, and playful pen-inspired design make it stand out as a charming and unique amigurumi creation.
Materials & Tools
To crochet this adorable kawaii pen plush, you’ll need a few basic tools and supplies:
Materials List
-
Yarn: Medium weight (4-ply) acrylic yarn in the following colors:
-
Light blue (main body)
-
White (pen tip)
-
Pink (blush or base accents)
-
Black (face embroidery or hair)
-
-
Hook Size: 3.0 mm (or size that matches your yarn)
-
Stuffing: Polyester fiberfill
-
Safety Eyes: 6mm or 8mm size
-
Stitch Markers: To keep track of rounds
-
Tapestry Needle: For sewing and weaving ends
-
Scissors: Sharp and easy to handle
Yarn Selection Tip
For best results, choose soft acrylic or cotton yarn with a smooth texture that gives your stitches definition and holds shape well. Pastel or bright colors bring out the kawaii vibe perfectly, but feel free to explore bold or neutral tones as well.
4. Step-by-Step Crochet Instructions
Let’s bring this cute crochet pen character to life. This step-by-step guide follows a classic amigurumi structure, built in continuous rounds unless otherwise stated.
1. Crochet the Pen Cap (Top Hat)
-
Start with black yarn and a magic ring.
-
Round 1: 6 sc inside the ring.
-
Round 2: 2 sc in each stitch around (12).
-
Round 3: (Sc 1, inc) around (18).
-
Rounds 4–6: Sc in each stitch around.
-
Fasten off and set aside.
Tip: Use a stitch marker to track your rounds and maintain even tension.
2. Making the Head
-
Switch to blue yarn.
-
Round 1: Magic ring, 6 sc.
-
Round 2: Inc in each stitch (12).
-
Round 3: (Sc 1, inc) around (18).
-
Round 4: (Sc 2, inc) around (24).
-
Rounds 5–9: Sc around.
-
Add safety eyes in Round 7, spaced evenly.
-
Lightly stuff the head.
3. Forming the Neck
-
Round 10: (Sc 6, dec) around (21).
-
Round 11: (Sc 5, dec) around (18).
-
Round 12: (Sc 4, dec) around (15).
Tip: Minimal stuffing here keeps the neck structured but flexible.
4. Building the Pen Body
-
Rounds 13–25: Switch to light blue or your pen’s main shade.
-
Sc in each stitch around to desired length.
-
Begin stuffing gradually to maintain shape.
5. Shaping the Pen Tip
-
Switch to white yarn.
-
Round 26: (Sc 4, dec) around (12).
-
Round 27: (Sc 2, dec) around (9).
-
Round 28: Sc around.
-
Fasten off, leaving a long tail for closing the tip.
6. Assembly & Positioning
-
Sew the pen cap on top of the head firmly.
-
Embroider mouth and blush using black and pink yarn.
-
Optional: Add tiny accessories like a bow or flower.
7. Final Touches
-
Check for loose ends or uneven stuffing.
-
Adjust safety eyes and smiles for symmetry.
-
Customize your plush with tiny embroidered details or stickers.
5. Customization Ideas
Make your kawaii pen plush truly one of a kind! Here are a few fun ideas:
-
Pastel Pen: Use muted tones like mint, lavender, or peach for a soft, dreamy aesthetic.
-
Holiday Pen: Swap colors for festive red and green and add a tiny Santa hat.
-
Nature Pen: Crochet tiny flowers to wrap around the pen body.
-
Rainbow Pen: Make the body striped with bright rainbow hues.
-
Office Buddy: Add a tiny felt tie or glasses for a cute work-themed plush.
6. Advanced Tips & Troubleshooting
Here are some expert pointers to help you master this pattern:
-
Invisible Decrease: Use the front loops only method to keep decreases neat and unnoticeable.
-
Even Tension: Maintain a consistent grip on your yarn to avoid uneven rows.
-
Avoid Twisting Rounds: Use a stitch marker and count each round to stay on track.
-
Smooth Shaping: Stuff lightly and evenly for a professional finish.
-
Stitch Gaps: If stuffing shows through, use a smaller hook or tighter stitch.
-
Joining Parts: Whip stitch works best for clean, discrete seams.
-
Pattern Reading: Pay attention to (inc), (dec), and bracket pattern repeats.
-
Yarn Splitting: Choose high-quality yarn to prevent your hook from catching strands.
-
Skipping Stitches: Count often to avoid accidental increases or decreases.
-
Face Embroidery: Mark with pins before stitching to ensure even placement.
7. Care Instructions
Handmade amigurumi needs special care. Here’s how to keep your plush looking new:
-
Hand Wash Only: Use lukewarm water and mild soap.
-
No Machine Dry: Air dry flat on a towel.
-
Avoid Sunlight: Exposure can fade yarn colors.
-
Store Carefully: Keep plush in a dust-free box or on a shelf away from moisture.
8. Display & Gift Ideas
This plush is more than just yarn it’s full of charm and personality! Here’s how to make the most of your creation:
-
Home Décor: Place it on a shelf with plants or books for a cozy vibe.
-
Nursery Accessory: Perfect for adding sweetness to a child’s room.
-
Desk Buddy: Keep it next to your notepad or keyboard for cute motivation.
-
Handmade Gift: Add a custom tag for a personalized, meaningful present.
-
Christmas Ornament: Add a loop and hang it from your tree!
9. Benefits of Crafting a Kawaii Pen Amigurumi
Crocheting isn’t just about stitches it’s about creating joy. Here’s what you get when you make this plush:
-
Mindfulness & Calm: Repetitive crocheting supports stress relief.
-
Artistic Expression: Customize colors and details to reflect your style.
-
Meaningful Gifts: Handmade plushies show love and thought.
-
Eco-Friendly: Reduce waste by making long-lasting, reusable toys.
-
Emotional Boost: Feel the joy of turning yarn into a lovable character.
10. Photography & Social Media Tips
Want to show off your cute pen character on Instagram or Pinterest? Try these tips:
-
Natural Light: Daylight gives your crochet the best glow.
-
Add Props: Use yarn balls, plants, or tiny stationery for context.
-
Close-Ups: Highlight stitches and textures to impress fellow crafters.
-
Soft Backgrounds: Neutral backdrops make the plush stand out.
11. Project Summary Table
| Category | Details |
|---|---|
| Skill Level | Easy–Intermediate |
| Estimated Time | 6–8 hours |
| Finished Size | 10–14 inches (depending on yarn) |
| Estimated Cost | $10–15 |
12. Conclusion
There’s nothing quite like the feeling of crafting something cute, meaningful, and full of personality all from a simple strand of yarn. This Crochet Kawaii Pen Amigurumi Pattern brings joy to the maker and anyone who sees it, reminding us that creativity is a gift meant to be shared. Whether you make it as a gift, a décor piece, or for your own collection, this lovable pen plush will bring smiles and warmth wherever it goes. So grab your yarn and hook your next adorable creation is just a stitch away