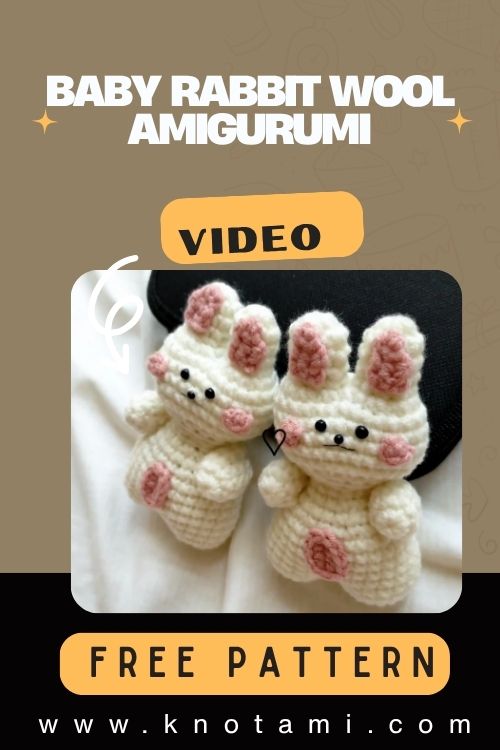
Cute Crochet Baby Rabbit Wool Amigurumi Pattern
There’s something beautifully magical about the art of crochet the quiet rhythm of looping yarn through your fingers, transforming it into something soft, tangible, and full of heart. Whether it’s the joy of watching a character take shape or the meditative calm of each stitch, crochet is more than just a craft it’s an act of creativity and love. Every handmade creation carries a piece of its maker’s warmth, patience, and imagination.
The Cute Crochet Baby Rabbit Wool Amigurumi Pattern is a perfect example of that magic. With its floppy ears, chubby cheeks, and cozy wool texture, this little bunny is both adorable and comforting. Its soft and squishy design makes it ideal as a baby toy, nursery décor, or a heartfelt handmade gift. The pattern brings out the gentle innocence of a baby rabbit, creating a plush that looks like it hopped right out of a storybook.
Whether you’re a beginner or an experienced crocheter, this project is an absolute delight. It combines easy-to-learn techniques with a few creative stitches to help you practice shaping and structure while keeping things fun and stress-free. You’ll enjoy watching the bunny’s personality emerge stitch by stitch a wonderful balance of simplicity and artistry.
Crocheting this little rabbit is more than just a weekend hobby it’s an invitation to slow down, relax, and reconnect with your creative side. As your hook dances through the yarn, you’ll find peace in the repetition and satisfaction in crafting something meaningful. This amigurumi bunny is a celebration of soft textures, handmade charm, and the simple joy of creating something with love.

Materials & Tools
Before you begin, gather your materials so you can enjoy a smooth, uninterrupted crocheting session.
What You’ll Need
-
Yarn: Soft wool or acrylic blend (DK or light worsted weight). Choose pastel shades such as white, cream, blush pink, or baby blue for a gentle, cuddly look.
-
Crochet Hook: 2.5 mm – 3.0 mm (depending on your yarn weight).
-
Stuffing: Polyester fiberfill or organic cotton filling for softness.
-
Safety Eyes: 6mm–8mm black plastic eyes or embroidered eyes for babies.
-
Tapestry Needle: For sewing pieces together and weaving in ends.
-
Scissors: Sharp pair for clean cuts.
-
Stitch Markers: To mark the start of each round.
Yarn & Color Tips
Wool-blend yarn gives a soft, warm texture that makes your rabbit extra cuddly. If you prefer a smoother finish, cotton yarn gives neat stitches and durability. For whimsical results, use variegated or speckled yarns that mimic natural fur tones. You can also combine cream and light gray for a realistic bunny look, or pastel pinks and lilacs for a dreamy touch.
Pro Tip: When making amigurumi for children, always use tightly spun yarn to avoid fiber shedding.
Step-by-Step Crochet Instructions
Step 1: Making the Head
-
Begin with a magic ring and crochet 6 single crochets (sc) into it.
-
Increase in each round evenly (12, 18, 24 stitches) until you get a round shape that forms the top of the head.
-
Work several rounds even to build height.
-
Start decreasing gradually to close the lower part of the head, but pause before finishing to insert safety eyes between Rounds 6 and 7.
-
Lightly stuff the head with fiberfill and continue decreasing to close.
Tip: Shape the cheeks by gently adjusting the stuffing to make them plump and symmetrical.
Step 2: Forming the Neck and Upper Body
-
Attach your yarn to the base of the head to continue downward.
-
Work several rounds of even single crochet to form the neck.
-
Gradually increase stitches as you move down to create a soft, rounded belly.
-
Continue until the body is about twice the length of the head.
-
Lightly stuff the neck to keep it firm but flexible.
Expert Tip: Insert a small piece of yarn at the top of the neck as a guide for centering the body and head alignment during assembly.
Step 3: Building the Main Body
-
Keep crocheting in the round, increasing evenly to form the lower body.
-
Once you’ve reached the desired width, work several rounds even.
-
Begin decreasing gradually toward the bottom to give the bunny a rounded base.
-
Stuff as you go, keeping the shape firm but not overstuffed.
-
Close with a slip stitch and weave in the end neatly.
Pro Tip: Use small amounts of stuffing at a time and shape with your fingers to keep the belly smooth.
Step 4: Shaping the Legs and Arms
Front Legs:
-
Start with a magic ring and 6 sc.
-
Increase to 12 stitches, then continue several rounds even for the cylindrical leg shape.
-
Lightly stuff and close the top with a slip stitch.
-
Make two identical pieces.
Back Legs:
-
Work similar to the front legs but slightly larger in diameter.
-
You can curve the back legs slightly for a sitting position.
Arms:
-
Crochet two small tubes (6 sc → 12 sc → 6 sc), lightly stuff, and close.
-
Attach them slightly below the head or on the sides of the upper body.
Tip: Sew limbs symmetrically for a balanced, professional look.
Step 5: Creating the Ears
-
Begin with a magic ring and 6 sc.
-
Gradually increase to 12–15 stitches depending on your preferred size.
-
Work several rounds even to form long, soft ears.
-
For added realism, switch to a lighter shade for the inner ear after a few rows.
-
Do not stuff instead, flatten slightly and sew both ears on top of the head.
Pro Tip: For floppy ears, use softer yarn and skip reinforcement; for upright ears, insert a bit of pipe cleaner inside (for decoration only).
Step 6: Assembly and Positioning
-
Position the head and body evenly, sewing them together with small, tight stitches.
-
Attach arms and legs securely, adjusting the angle to achieve a natural sitting posture.
-
Sew the ears symmetrically, tilting them slightly outward for a cute look.
-
Embroider a small V-shaped nose using pink yarn and add a delicate mouth.
Expert Tip: Pin the parts in place before sewing to check proportions small adjustments make a big difference!
Step 7: Adding Final Touches and Accessories
-
Add a tiny bow around the neck using satin ribbon or crochet a mini scarf.
-
Stitch a little tail using a pom-pom or crocheted ball.
-
Use blush or fabric paint to lightly tint the cheeks for extra cuteness.
-
Embroider a few whiskers using fine thread for a charming detail.
Customization Ideas
Make your bunny unique with these fun variations:
-
Classic Cream Bunny: White wool with pink details for a timeless look.
-
Fantasy Bunny: Use pastel rainbow yarn or add sparkly threads for a magical effect.
-
Holiday Theme: Red scarf and green accents for Christmas; pastel hues for Easter.
-
Textured Fur: Use brushed mohair or eyelash yarn for a fluffy baby rabbit.
-
Personal Touch: Add initials on the paw or a tiny crochet carrot accessory.
Pro Tip: Play with yarn weights smaller hooks and thin yarns create mini bunnies perfect as keychains or ornaments!
Advanced Tips & Troubleshooting
Even if you’re experienced, these techniques will take your amigurumi to the next level:
-
Invisible Decreases: Work through the front loops only for a seamless finish.
-
Consistent Tension: Keep your grip relaxed tight stitches make stuffing harder.
-
Avoid Twisting Rounds: Always use a stitch marker to mark the start of each round.
-
Fix Uneven Shapes: Massage the stuffed areas gently to reshape.
-
Proper Stuffing Balance: Use small tufts of fiberfill for a smooth surface.
-
Join Parts Seamlessly: Sew with the same color yarn for invisible seams.
-
Reading Abbreviations: Familiarize yourself with common terms sc (single crochet), inc (increase), dec (decrease).
-
Neat Color Changes: Change yarn at the last loop of a stitch for a clean transition.
-
Pattern Adaptation: Experiment with stitch counts to adjust size without distorting proportions.
-
Blocking for Perfection: Lightly steam to relax the shape once fully assembled.
Care Instructions
Keep your cute bunny soft and cuddly for years to come:
-
Hand Wash Only: Use cold water and mild soap.
-
Rinse Gently: Avoid wringing or twisting the shape.
-
Air Dry Flat: Reshape while damp to maintain form.
-
Avoid Heat & Sunlight: Prevents yarn fading or distortion.
-
Store Properly: Keep in a clean, dry place, away from pets.
Tip: For display bunnies, add a light mist of lavender spray to keep them smelling fresh!
Display & Gift Ideas
This baby rabbit amigurumi makes an adorable addition to any setting:
-
Home Décor: Display on shelves, nurseries, or coffee tables for a cozy vibe.
-
Kid’s Room Companion: Soft, safe, and perfect for bedtime cuddles.
-
Desk Buddy: Add charm to your workspace or crafting area.
-
Holiday Ornament: Use smaller yarn and hang it as a tree decoration.
-
Gift Idea: Pair with a matching crochet blanket or tiny carrot plush for a handmade gift set.
Benefits of Crocheting a Baby Rabbit
Crocheting isn’t just about making something cute it’s about wellness and creativity.
-
Mindful Relaxation: The repetitive motion calms the mind and reduces anxiety.
-
Stress Relief: Focusing on soft textures and steady stitches brings peace and focus.
-
Accomplishment & Joy: Finishing your bunny feels rewarding and confidence-boosting.
-
Eco-Friendly Gifting: Handmade items are sustainable, heartfelt alternatives to store-bought toys.
-
Emotional Connection: Each stitch carries love making every bunny truly one-of-a-kind.
Photography & Social Media Tips
Capture your handmade bunny in the best light!
-
Natural Daylight: Shoot near a window for soft, diffused light.
-
Neutral Background: Use a pastel or white cloth for a clean, bright look.
-
Props: Add a ball of yarn, mini carrots, or flowers for a cozy vibe.
-
Close-Up Shots: Highlight textures like the ears, face, and stitches.
-
Angles: Try top-down for full-body shots and side views for shape.
-
Editing: Slight brightness and contrast boosts bring your soft tones to life.
Conclusion
Creating your Cute Crochet Baby Rabbit Wool Amigurumi is an experience filled with creativity, peace, and joy. Each stitch tells a story of time well spent, of handmade love, and of art that comes alive in your hands.
As you finish your soft, snuggly bunny, you’ll not only have a charming piece to cherish or gift, but also the sweet satisfaction of transforming yarn into something meaningful and full of life. Whether it sits proudly on a nursery shelf or in someone’s heart as a gift, this little rabbit will always carry your warmth and creativity in every loop and stitch.