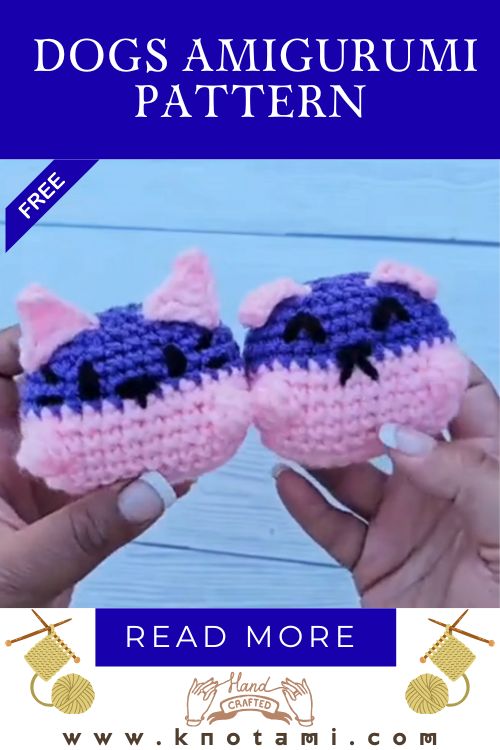
Easy Crochet Cat Wearing Headphones Amigurumi Pattern
There’s a certain magic in the art of crochet the way a single strand of yarn can transform into something soft, three-dimensional, playful, and full of love. From the quiet working of your hands to the soothing rhythm of repetitive stitches, there’s a deep sense of satisfaction in turning your imagination into something tangible. Every handmade piece is a treasure infused not just with fiber, but also with emotion, intention, and creativity.
That’s exactly what makes today’s crochet project so special: the Crochet Cat Wearing Headphones. Cute, quirky, and irresistibly charming, this amigurumi piece is perfect for anyone who loves cats, music, and creativity rolled into one. Whether you’re making it as a keychain, plush, desk décor, or a gift for a music-loving friend, this tiny headphone-wearing cat is guaranteed to steal hearts.
What’s wonderful about this pattern is that it’s suitable for both beginners and experienced crocheters. If you’re new to amigurumi, you’ll learn simple techniques step by step. If you’ve been crocheting for a while, you’ll love the freedom to get creative with colors, accessories, and textures. And with a few thoughtful variations, you can even customize the headphones for a jazzy, rock, K-pop, or pastel aesthetic!
Crocheting is not just a craft it’s a calm pause in a fast-paced world. It gives you room to breathe, create, and simply be. Whether you’re unwinding at the end of the day or setting aside time for mindful crafting on a weekend, this cute cat project is the perfect companion. There’s no rush just the joy of creating something soft, adorable, and totally handmade.

Materials & Tools Needed
Before we begin our mindful crochet adventure, let’s gather all the materials and tools we’ll be using:
Supplies List:
-
Yarn: Medium-weight (Category 4) cotton or acrylic yarn
-
Main color: For the cat body (e.g., grey, white, orange, black)
-
Secondary color: For headphone band and ear pads
-
Accent color: For face details or shirt
-
-
Hook Size: 2.5 mm or 3.0 mm crochet hook
-
Stuffing: Polyester fiberfill (or eco-friendly alternative)
-
Safety Eyes: 6mm or 8mm round plastic eyes
-
Tapestry Needle: For sewing pieces and weaving ends
-
Scissors: Small, sharp yarn scissors
-
Stitch Markers: To mark the beginning of rounds
-
Optional: Fabric glue, blush, embroidery thread for mouth or accents
Yarn Choices
-
Cotton yarn holds shape well and gives a neat look.
-
Acrylic yarn is more flexible and plush.
-
Choose neutral or pastel shades for kawaii style, or bold main colors for extra charm.
-
Use contrasting yarn for the headphones to make them pop visually.
4. Step-by-Step Crochet Instructions
This cute cat is crocheted in separate parts: head, body, limbs, tail, and headphones. We will work in continuous rounds unless specified otherwise. Let’s begin!
Part 1: Crochet the Cat’s Head
-
Round 1: Magic ring, 6 sc (6)
-
Round 2: inc in each stitch around (12)
-
Round 3: (1 sc, inc) x 6 (18)
-
Round 4: (2 sc, inc) x 6 (24)
-
Rounds 5–8: sc around (24 each round)
-
Round 9: (2 sc, dec) x 6 (18)
-
Insert safety eyes between Rounds 6–7, spaced about 4 stitches apart.
-
Round 10: (1 sc, dec) x 6 (12)
-
Stuff firmly
-
Round 11: dec around (6) and close completely.
Expert Tip: When attaching safety eyes, place a small piece of felt or crocheted circle behind the eyes inside the head before locking them in this prevents the eyes from popping through the stitches and adds a soft touch.
Part 2: Crochet the Body
-
Round 1: Magic ring, 6 sc (6)
-
Round 2: 2 sc in each stitch (12)
-
Round 3: (1 sc, inc) x 6 (18)
-
Rounds 4–6: sc around (18)
-
Round 7: (1 sc, dec) x 6 (12)
-
Round 8: sc around (12)
-
Stuff and fasten off, leaving a long tail for sewing.
Part 3: Arms & Legs (Make 2 of Each)
Arms:
-
Magic ring, 5 sc
-
Rounds 2–4: sc around (5)
-
Lightly stuff and fasten off
Legs:
-
Magic ring, 6 sc
-
Rounds 2–5: sc around (6)
-
Stuff more firmly, fasten off
Sew arms to the sides of the body and legs at the base for a sitting posture.
Part 4: Tail
-
Magic ring, 5 sc
-
Rounds 2–6: sc around (5)
-
Leave long tail and sew onto the back of the body.
Ears (Make 2)
-
Magic ring, 3 sc
-
Round 2: (1 sc, inc) x 1 (4)
-
Round 3: sc around (4)
-
Fasten off and sew onto head at slight angles
Part 6: Crochet the Headphones
Band:
-
Chain 14 (or size fitting the head), sc across, fasten off
-
Curve the band and pin to the head for placement
Ear Pads (Make 2):
-
Magic ring, 5 sc
-
Round 2: inc around (10)
-
Fasten with a long tail
-
Sew one on each side of the head, connecting both with the band.
Pro Tip: Use a thicker yarn or fluff for the ear pads to create a cushion-like effect.
Part 7: Assembly
-
Sew head to body, aligning structures so the cat looks upright.
-
Add arms, legs, and tail.
-
Position and secure the headphones. Add a dab of fabric glue if needed for extra stability.
-
Embroider a tiny mouth, nose, and whiskers with black thread.
Part 8: Final Touches
-
Add blush on cheeks using a tiny makeup brush or pink yarn.
-
Make tiny accessories: a tiny shirt, bowtie, or charm.
-
Add a keychain ring or backpack clip to make it portable.
5. Customization Ideas
One of the best things about crochet is how personal it can be:
-
Customize fur color: grey, ginger tabby, pure white, black cat, calico
-
Mix up headphone styles: retro, beats-inspired, gaming headset
-
Rainbow version: Use variegated yarn for a colorful cat
-
Holiday theme: Red-and-green headphones with a tiny Santa hat
-
K-Pop or cosplay cat: Give the cat a tiny BTS shirt or Pikachu hoodie
Don’t be afraid to let your imagination run wild the Cat Wearing Headphones is a perfect base for playful creativity!
6. Advanced Tips & Troubleshooting
Here are pro-level suggestions to enhance your project:
-
Invisible Decrease: Use front-loop-only stitch to avoid bumps.
-
Avoid Twist: Keep stitch markers at the start of each round.
-
Even Stuffing: Insert stuffing slowly and firmly to prevent lumps.
-
Shape Details: Use pins before sewing to get symmetrical placement.
-
Control Tension: Relax wrist and keep yarn slip consistent.
-
Seamless Joins: Ladder stitch works best for joining parts invisibly.
-
Embroidery Practice: Use satin stitch instead of French knot for neat faces.
-
Fixing Gaps: Use a smaller hook or tighter tension next time.
7. Care Instructions
This handmade plushie can last for years with the right care:
-
Gently hand wash with mild soap
-
Air dry on a towel (don’t wring or tumble dry)
-
Keep away from direct sunlight to preserve colors
-
For display, store in a clean, dry space
-
For gifting, wrap carefully in tissue or a fabric pouch
8. Display & Gift Ideas
This adorable Crochet Cat is perfect for:
-
Desk buddy for home office
-
Keychain or bag charm
-
Children’s room décor
-
Christmas ornament
-
Handmade birthday or holiday gift for a music lover
Pair it with a playlist card or music-themed note for extra personal charm.
9. Benefits of Crocheting This Project
Crochet isn’t just a hobby it’s purpose, passion, and wellness woven into every stitch:
-
Encourages mindfulness and reduces stress
-
Boosts creativity through custom designs
-
Gives a deep sense of accomplishment
-
A sustainable alternative to store-bought gifts
-
Builds emotional connection when gifted
There’s simply nothing like the power of handmade.
10. Photography & Social Media Tips
Want to show off your crochet masterpiece online? Here’s how:
-
Use natural window light
-
Place the plush on clean backgrounds (wood, linen, cloud blankets)
-
Add props: yarn basket, coffee mug, music notes
-
Use close-up shots to highlight texture, details, and headphones!
Try using a flat lay setup or stage a cozy creative corner shot to make your cat shine!
11. Project Summary Table
| Category | Details |
|---|---|
| Skill Level | Easy / Beginner-Friendly |
| Estimated Time | 4–6 hours (depending on speed) |
| Finished Size | 3–6 inches (with 2.5mm hook) |
| Estimated Cost | $5–10 (depending on materials) |
12. Conclusion
There’s nothing more uplifting than watching a handmade amigurumi come to life stitch by stitch, round by round. This Crochet Cat Wearing Headphones is more than just a cute plushie; it’s a reminder of what joy, creativity, and connection feel like. Whether you’re gifting it, keeping it as a desk buddy, or using it to practice new techniques, this amigurumi pattern is packed with fun, love, and endless personalization.
So grab your yarn and hook, press play on your favorite playlist, and let this adorable cat bring a little soundtrack to your crafting journey. Happy hooking!