Crochet Easy Low-Sew Cow Amigurumi Pattern
There’s something truly magical about turning a simple strand of yarn into a lovable character that feels alive in your hands. Crochet isn’t just a hobby it’s a creative meditation where each stitch becomes a tiny part of a bigger story. Whether we’re making a cozy scarf, a cute keychain, or a full-sized amigurumi plush toy, the process brings immense joy and satisfaction. The rhythmic movement of yarn gliding through fingertips, the softness of newly-formed shapes, and the little moments of I made this! all play a big part in why crochet continues to be such a beloved craft.
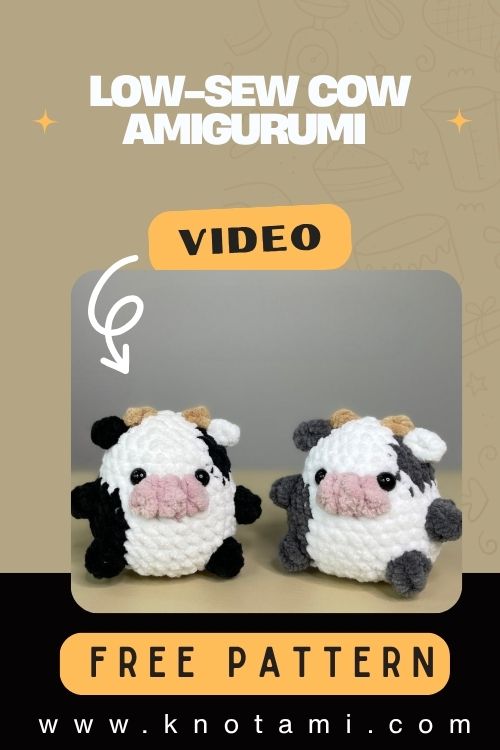
Meet the Crochet Easy Low-Sew Cow
Today’s project, the Crochet Easy Low-Sew Cow, is a true gem for anyone who wants adorable results without the stress of sewing too many parts together. With its squishy body, blushing cheeks, floppy ears, and cute tail, this little cow is the perfect blend of simple and stylish. With minimal sewing required, this crochet cow pattern makes things easier, faster, and perfect for crafters who want cleaner, more seamless results in less time.
Perfect for Every Skill Level
Whether you’re a beginner learning the basics of amigurumi or an advanced crocheter looking for a relaxing and low-pressure project, this plush cow has something for you. The pattern offers a great chance to practice rounds, simple increases and decreases, and finishing touches all while building a 3D plush toy that feels professionally made. The best part? You can personalize it with endless color combinations and playful accessories.
A Craft for the Slow and Serene
Many people turn to crochet not just to create, but to unwind. The calming rhythm of looping yarn, the peace of working in your own space, and the joy that blooms as your cow takes shape stich by stitch these are the gifts of amigurumi. This cow project invites you to slow down, enjoy your craft, and maybe even share the love by gifting your soft creation to someone special.

Materials & Tools
To make the Crochet Easy Low-Sew Cow Amigurumi, you’ll need:
-
Yarn: Medium-weight (4) acrylic or cotton yarn in white/cream for body, pink for nose and cheeks, brown or black for horns and spots (or any of your preferred cow colors)
-
Hook Size: 3.0mm or 3.5mm crochet hook (depending on yarn thickness)
-
Stuffing: Polyester fiberfill
-
Safety Eyes: 8mm or 10mm black safety eyes (or use yarn embroidery for younger children)
-
Stitch Markers: Required to keep count of stitches as you work in the round
-
Tapestry Needle: For attaching parts and weaving in ends
-
Scissors: To snip yarn ends
-
Optional: Blush for cheeks, keychain ring, ribbon or felt accessories
Choosing the Best Yarn
For the softest result, opt for plush or velvet yarns but even classic acrylic gives a clean, structured look that holds great shape. Pick colors based on the cow style you like: traditional black-and-white, brown Jersey style, or pastel pink or rainbow cow for a whimsical twist!
4. Step-by-Step Crochet Instructions
Let’s walk through the steps to create your Crochet Easy Low-Sew Cow. The beauty of this pattern is that most of the pieces are joined as you go, meaning very little sewing at the end!
1. Crochet the Head
-
Begin with a magic ring or chain 2 start
-
Work in continuous rounds
-
Gradually increase to form a round sphere
-
Insert safety eyes between the rounds once the head is halfway stuffed
-
Add nose and embroidered mouth before fully closing and stuffing
Expert Tip: Insert safety eyes while there’s enough space to position them. Use a stitch marker to mark the top center so you align the face perfectly.
2. Form the Neck and Upper Body
-
Without fastening off the head, continue crocheting downward
-
Slightly decrease to shape the neck, then increase to create the top of the round body
-
Stuff as you go for neat shaping
3. Build the Main Body
-
Crochet a bulb-like shape by adding more rounds and increases
-
Add color changes for cow spots or switch to a different shade for a belly patch
-
Fill evenly with stuffing, ensuring it’s not lumpy or too tight
4. Attach Base or Legs
-
If cow stands: Create 4 stubby legs separately and attach securely at the bottom
-
If it’s a sitting/plush cow: Shape the base by decreasing until closed, or sew on a flat circle
-
In a low-sew version, you can crochet the legs right into the front loops of the body as you go
5. Create Horns, Ears, and Tail
-
Horns: Use small cones or tubes in a brown or tan color
-
Ears: Crochet flat or slightly curved shapes, attach just behind the horns
-
Tail: Create a chain and add fringe tie securely to bottom back
6. Assembly & Positioning
-
Pin or hold parts in place before final stitching
-
Use matching yarn colors for invisible seams
-
Balance weight evenly by adjusting stuffing
7. Final Touches
-
Add embroidered cheeks or use soft blush powder
-
Optional: Add a felt flower crown, ribbon, or tiny bell
-
Weave in all final ends neatly
5. Customization Ideas
Creativity Has No Limits Try These Fun Customizations!
-
Classic Cow: Black spots, white body, pink snout and cheeks
-
Brown Jersey Cow: Light beige body with darker brown spots or accents
-
Rainbow Cow: Use a pastel rainbow yarn for the body adorably whimsical!
-
Holiday Cow: Make a red Santa hat, Halloween pumpkin hat, or a flower wreath
-
Miniature Keychain Cow: Resize the pattern with a smaller hook and thinner yarn
-
Farm Friends Set: Customize as sheep, chicken, or pig using the same base
You can even add tiny props like a heart pillow, tiny scarf, milk jug, or a name tag!
6. Advanced Tips & Troubleshooting
Here are some pro-friendly solutions and hacks:
-
Invisible Decreases: Use the front loop technique to avoid bumps.
-
Keep Stitch Tension Even: Avoid tight gripping relax wrists to maintain smooth rows.
-
Twisting Rounds: Always work with a stitch marker in the first stitch of each round.
-
Uneven Stuffing: Use small tufts of stuffing to avoid lumps.
-
Crooked Face Placement: Use pin markers before attaching final face parts.
-
Loose Ends: Weave in securely inside main body so yarn ends don’t pop.
-
Gaps Between Stitches: Go down a hook size if your fabric looks too holey.
-
Stitch Counting: Count each stitch or invest in a digital row counter.
-
Combining Yarn Types: Pair acrylic with cotton for structural integrity.
7. Care Instructions
Handmade crochet plushies need a little extra love:
-
Only hand wash with mild soap and lukewarm water
-
Air dry flat do not wring or tumble dry
-
Keep out of direct sunlight to retain yarn color
-
For gifting, store plush wrapped in tissue inside a breathable cloth bag
8. Display & Gift Ideas
-
Shelf or windowsill home décor
-
Photography prop for baby or kids’ rooms
-
Personalized birthday or holiday gift
-
Dorm room desk buddy
-
Baby shower gift ideal for a cow-themed nursery
-
Add to your handcrafted farm collection or market stall!
9. Benefits of Making This Cow
Hand-crafting your own plush toy comes with so many benefits:
-
Mindfulness: The soothing rhythm of crochet slows the mind and reduces stress
-
Personal Pride: Watching your character come alive stitch-by-stitch is priceless
-
Eco-Friendly: Sustainable gift-giving means less plastic, more heart
-
Connection: Handmade toys add warmth and love that store-bought can’t
-
Creative Expression: You get to showcase your style with cute yarn and accessories
10. Photography & Social Media Tips
Want to share your cute cow with the world? Here’s how:
-
Photograph in natural light (near a window)
-
Use a clean, soft background neutral colors let the cow stand out
-
Use props like balls of yarn, mini hay bale, crochet hooks, or fake grass
-
Try close-ups showing stitch texture and embroidered nose
11. Project Summary Table
| Category | Details |
|---|---|
| Skill Level | Beginner-friendly |
| Estimated Time | 6–8 hours |
| Finished Size | 10–14 inches (based on yarn + hook) |
| Estimated Cost | $10–15 |
12. Conclusion
There’s no feeling quite like turning a pile of yarn into a stitched-together little friend with personality and charm you crafted all by yourself. Whether you’re a crochet beginner looking for a quick and adorable project or an experienced maker wanting a calming, low-sew pattern, this Crochet Easy Low-Sew Cow is sure to bring joy both during the making and when gifting it to someone you love.
Start today, love every stitch, and don’t forget to show off your sweet little cow to the world!