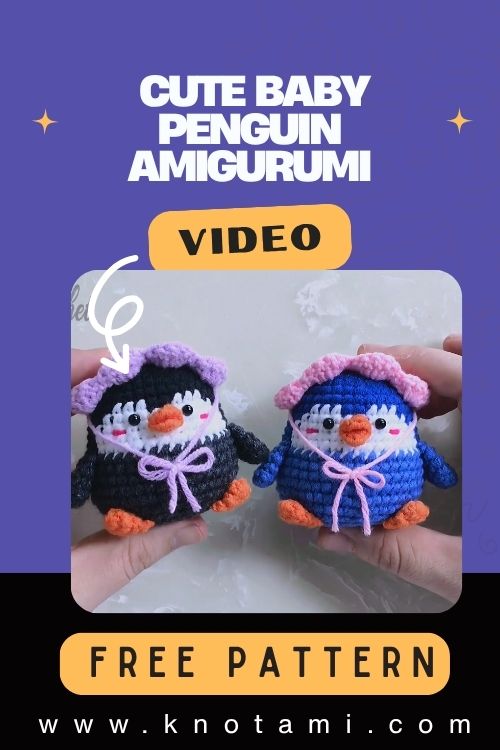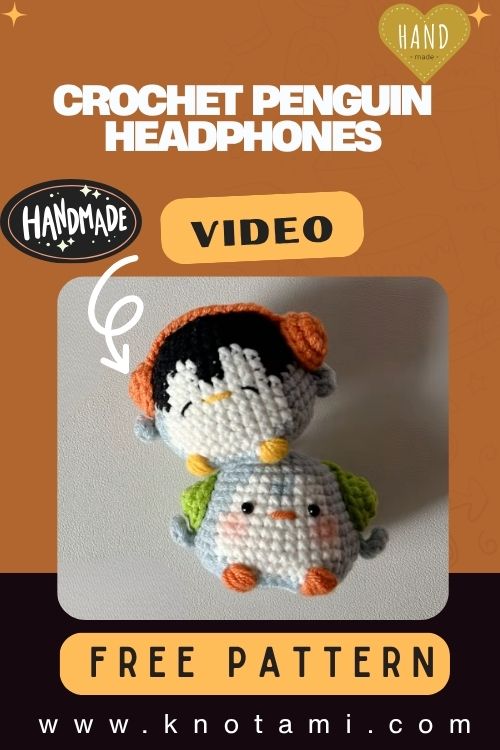
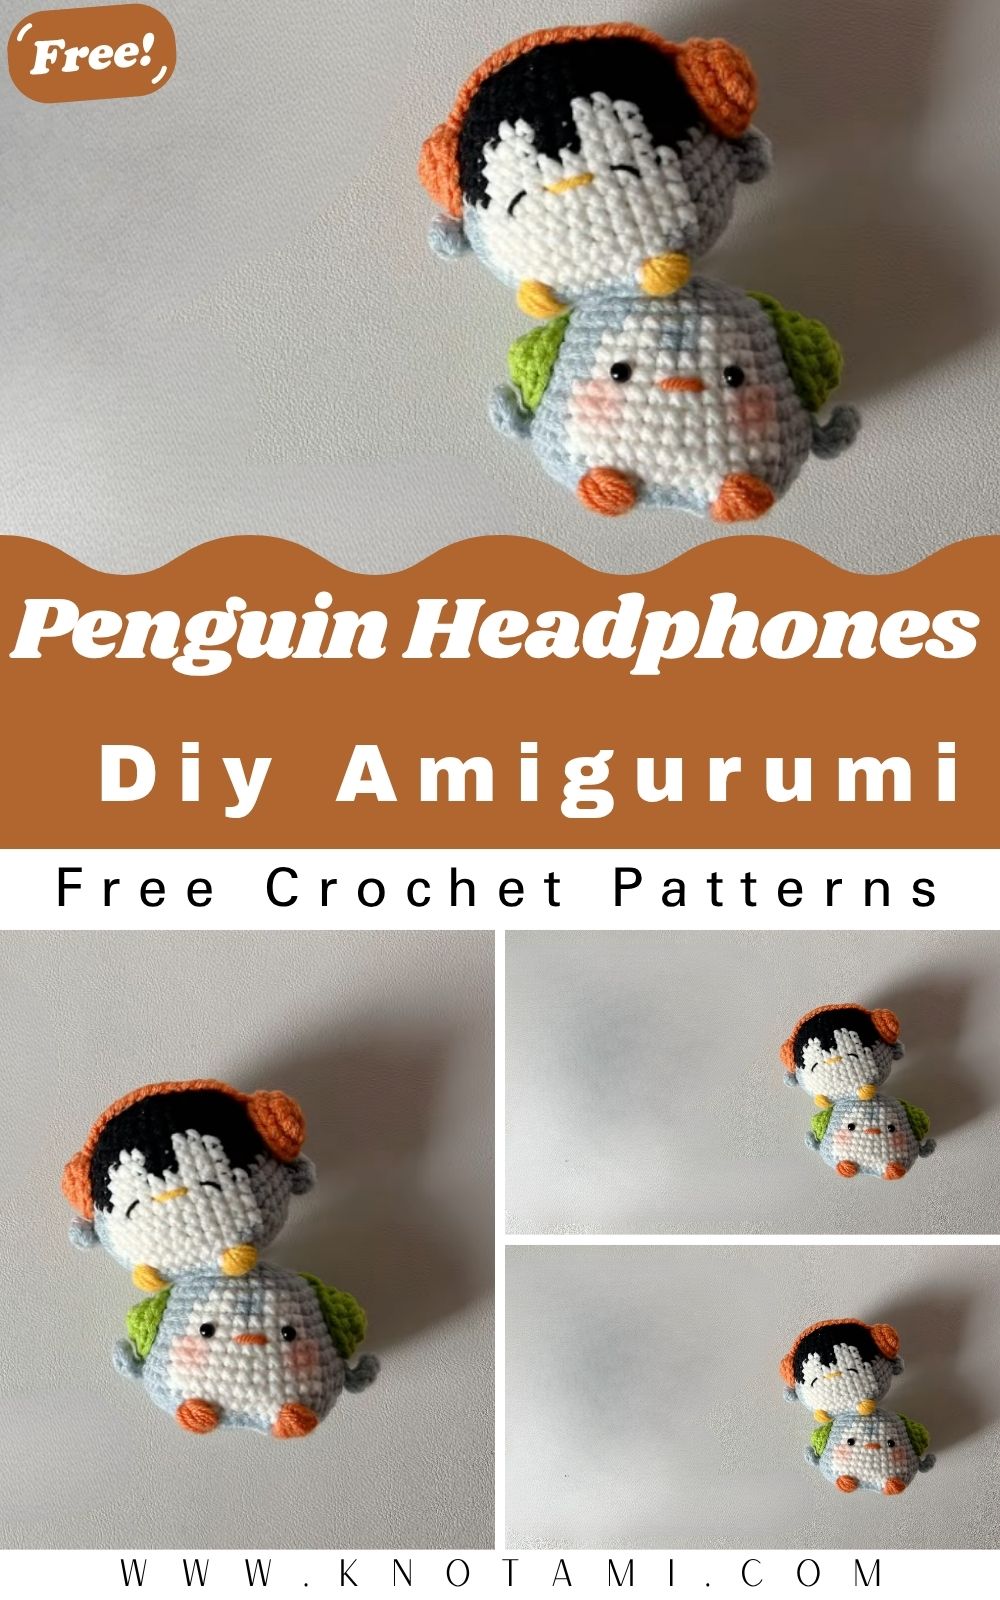
DIY Crochet Penguin Headphones Amigurumi Pattern Plush
There’s something truly magical about taking a simple skein of yarn and transforming it into a soft, lovable creation. Whether you’ve been crocheting for years or just recently picked up the hook, the repetitive rhythm of stitches, the colors intertwining, and the anticipation of seeing your vision take shape all add to the joy of crafting. Each completed piece feels like a small celebration a moment of pride you can hold in your hands or gift to someone special.
That’s what makes this project so delightful. Today, we’re diving into the world of DIY Crochet Penguin Headphones, a playful and modern twist on classic amigurumi designs. With its adorable little beak, chubby body, and stylish headphones, this penguin plush isn’t just cutem it’s packed with personality. Whether you want to bring a smile to someone’s face or simply enjoy the whimsy of creating it, this crochet penguin is sure to steal hearts.
This project is wonderfully suited for crocheters of all experience levels. Beginners will love its easy-to-follow parts and straightforward shapes, while more experienced makers can have fun adding details, experimenting with textures, or trying new techniques like invisible decreases or seamless joins. With simple structuring and creative embellishment options, it’s also a great way to enhance your crochet skills.
And best of all, this is a mindful and calming project. Crocheting piece by piece allows your mind to relax into the process, focusing on each stitch as your hands work the yarn into something beautiful. Whether you’re crafting slowly over a few evenings or in one dedicated weekend, the sense of accomplishment you’ll feel at the end is priceless. This penguin plush makes a thoughtful gift, a lovely décor addition, or a cute handmade treasure to keep by your side.
Materials & Tools
To begin this Crochet Penguin Headphones Amigurumi project, gather the following supplies:
Yarn
-
Weight: DK (light worsted) or worsted (medium) weight acrylic or cotton yarn
-
Colors:
-
Black (body)
-
White (belly and face)
-
Yellow or orange (beak and feet)
-
Any color for the headphones try red, blue, or neon for fun pop!
-
You can also use chunky yarn for a larger plush or sport weight for a mini version.
Crochet Hook
-
3.5 mm (E) or 4.0 mm (G) hook depending on yarn thickness
-
Choose a hook size that gives you firm, tight stitches to avoid stuffing poking out.
Additional Supplies
-
Polyester fiberfill stuffing
-
8–10 mm safety eyes
-
Tapestry needle for sewing pieces
-
Scissors
-
Stitch markers
-
Embroidery thread (optional for mouth or eyebrows)
Yarn Picking Tip: For plushies, avoid overly soft or fuzzy yarns for smaller details stick to standard acrylic or cotton blends for structure and stitch definition. You can mix fiber types for texture, such as using chenille yarn for the headphones.
4. Step-by-Step Crochet Instructions
Below you’ll find a complete crochet pattern guide for designing your plush penguin with headphones. For reference, this project aligns with basic amigurumi construction, worked mostly in continuous rounds.
1. Making the Head
-
Start with a magic ring in black yarn.
-
Crochet in increases to form a sphere shape.
-
At around round 6–8, insert safety eyes with spacing appropriate to your penguin’s face.
-
Switch to white yarn for the front facial area.
Pro Tip: To get smooth color changes, use the invisible color change technique (finish the last stitch of one color with the next).
2. Forming the Neck and Upper Body
-
Continue rounds from the head without breaking yarn to craft the neck area.
-
Work slight decreases to give neck shaping.
3. Building the Main Body
-
Switch back to black yarn for the body.
-
Increase for a slightly round, chubby torso.
-
Alternate increases and straight rounds for desired height and width.
4. Shaping the Base and Feet
-
Flatten bottom rounds slightly and work a small circular base.
-
Create two flat or slightly curved feet in yellow/orange yarn.
-
Attach carefully at the base with sewing.
5. Creating the Arms and Beak
-
Make two small wings with black yarn, working a tapered oval.
-
Create an adorable tiny beak: small triangle shape in orange/yellow, sewn in place between the eyes.
6. Making the Headphones
-
Crochet two small discs in a fun color. Stuff slightly.
-
Make a small thin band for the top.
-
Sew or glue these neatly onto the head just above the eyes.
7. Assembly & Final Touches
-
Stuff each part as you go firmly but without overpacking.
-
Sew the head to body, wings to sides, and legs to base.
-
Add little embroidered details: a smile, rosy cheeks, etc.
Shaping Tip: Use pins to mark placement before sewing, ensuring everything lines up and looks symmetrical.
5. Customization Ideas
Why settle for just one version when you can express your personality through crochet?
-
Alternative Color Schemes: Try pastel penguins, all-white arctic penguins, or even rainbow headphones.
-
Yarn Types: Use fluffy chenille yarn for an extra squishy plush or cotton for a polished look.
-
Holiday Themes: Add a Santa hat for Christmas, heart headphones for Valentine’s Day, or a graduation cap for a handmade gift.
-
Accessories: Tiny scarf, crocheted music note prop, or even little flipper mittens.
6. Advanced Tips & Troubleshooting
-
Use invisible decreases to maintain seamless shaping especially for round areas.
-
Mark rounds with a stitch marker to avoid losing track.
-
Keep your tension consistent: not too loose, not too tight.
-
If your plush leans to one side, adjust stuffing distribution or reinforce base.
-
Avoid gapping in stitches by using smaller hooks for tighter amigurumi.
-
Use whip stitch or ladder stitch for clean joins.
-
Check each piece against others before assembly to ensure balance and symmetry.
-
Learn basic pattern abbreviations (sc = single crochet, inc = increase, dec = decrease).
-
Use curved or bent needles for tight spaces.
-
If your piece puckers or twists, block gently with steam or reshape before stuffing.
7. Care Instructions
To keep your penguin plush looking new and clean:
-
Hand wash gently in cold or lukewarm water with mild detergent.
-
Avoid harsh scrubbing or excessive wringing.
-
Rinse thoroughly and squeeze water out lightly.
-
Lay flat to dry in indirect sunlight.
-
Store in a dry, cool place if gifting or displaying.
-
Avoid excess dust use a soft brush or lint roller to clean.
8. Display & Gift Ideas
Your crochet penguin makes a delightful addition to:
-
Kids’ rooms or study tables for a dose of cheer
-
Office desks as a stress-relief buddy
-
Holiday décor when styled with seasonal accessories
-
Personal gifts for birthdays, graduations, or holidays
-
DIY craft market booths or charity auctions
-
Photography props or cozy Instagram content creators
-
A thoughtful surprise for a friend who loves music or penguins!
9. Benefits of Making a Crochet Penguin Plush
Crafting doesn’t just leave you with cute creations it nourishes your mind and soul.
-
Encourages relaxation and mindful focus
-
Supports stress relief and emotional balance
-
Boosts creativity and problem-solving skills
-
Promotes eco-friendly, sustainable gift-giving
-
Builds joy and connection when shared with loved ones
-
Helps hone fine motor skills and artistic expression
-
Creates meaningful keepsakes with personal value
10. Photography & Social Media Tips
Want to share your adorable penguin plush online? Here are some photo tips:
-
Use soft, natural daylight near a window is ideal.
-
Add props like knitting needles, yarn balls, or small book stacks.
-
Use plain or lightly textured backgrounds to highlight your plush.
-
Try close-up shots showing stitches and facial details.
-
Photograph at different angles: straight on slightly above, or cozy in a basket.
11. Conclusion
There’s nothing quite like the feeling of turning yarn into something filled with charm, character, and joy. With this DIY Crochet Penguin Headphones Amigurumi Pattern, you can bring a little piece of happiness into your hands and into the world. Whether it becomes a gift, décor piece, or personal treasure, this penguin plush is full of love and creativity, ready to brighten someone’s day. So grab your hook, pick your colors, and stitch at your own pace. The journey is just as rewarding as the sweet penguin waiting at the end.