DIY Crochet Perry Platypus Easy Amigurumi Pattern Plush Toy
There’s a certain kind of magic that happens when you take a simple ball of yarn and turn it into something full of life, color, and character. The beauty of crochet comes from the soothing rhythm of hooking stitches together and watching your creation grow stitch by stitch. There’s a sense of joy in being able to turn imagination into something real, something you can hold in your hands. Whether it’s for gifting or keeping, crochet offers the perfect blend of calmness, artistry, and satisfaction.
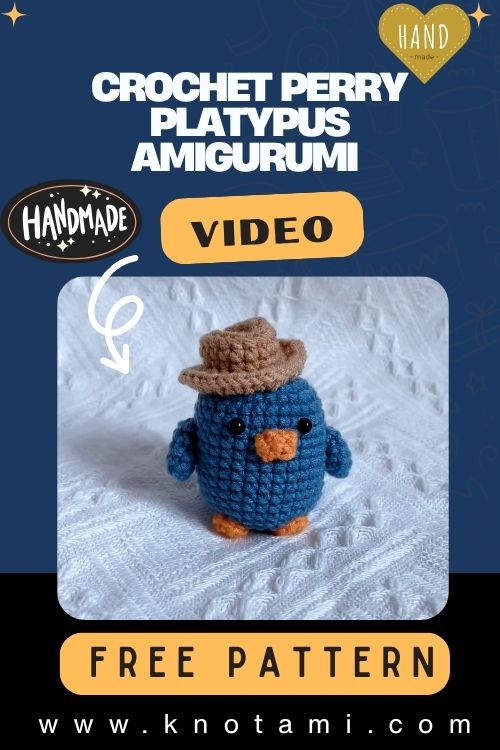
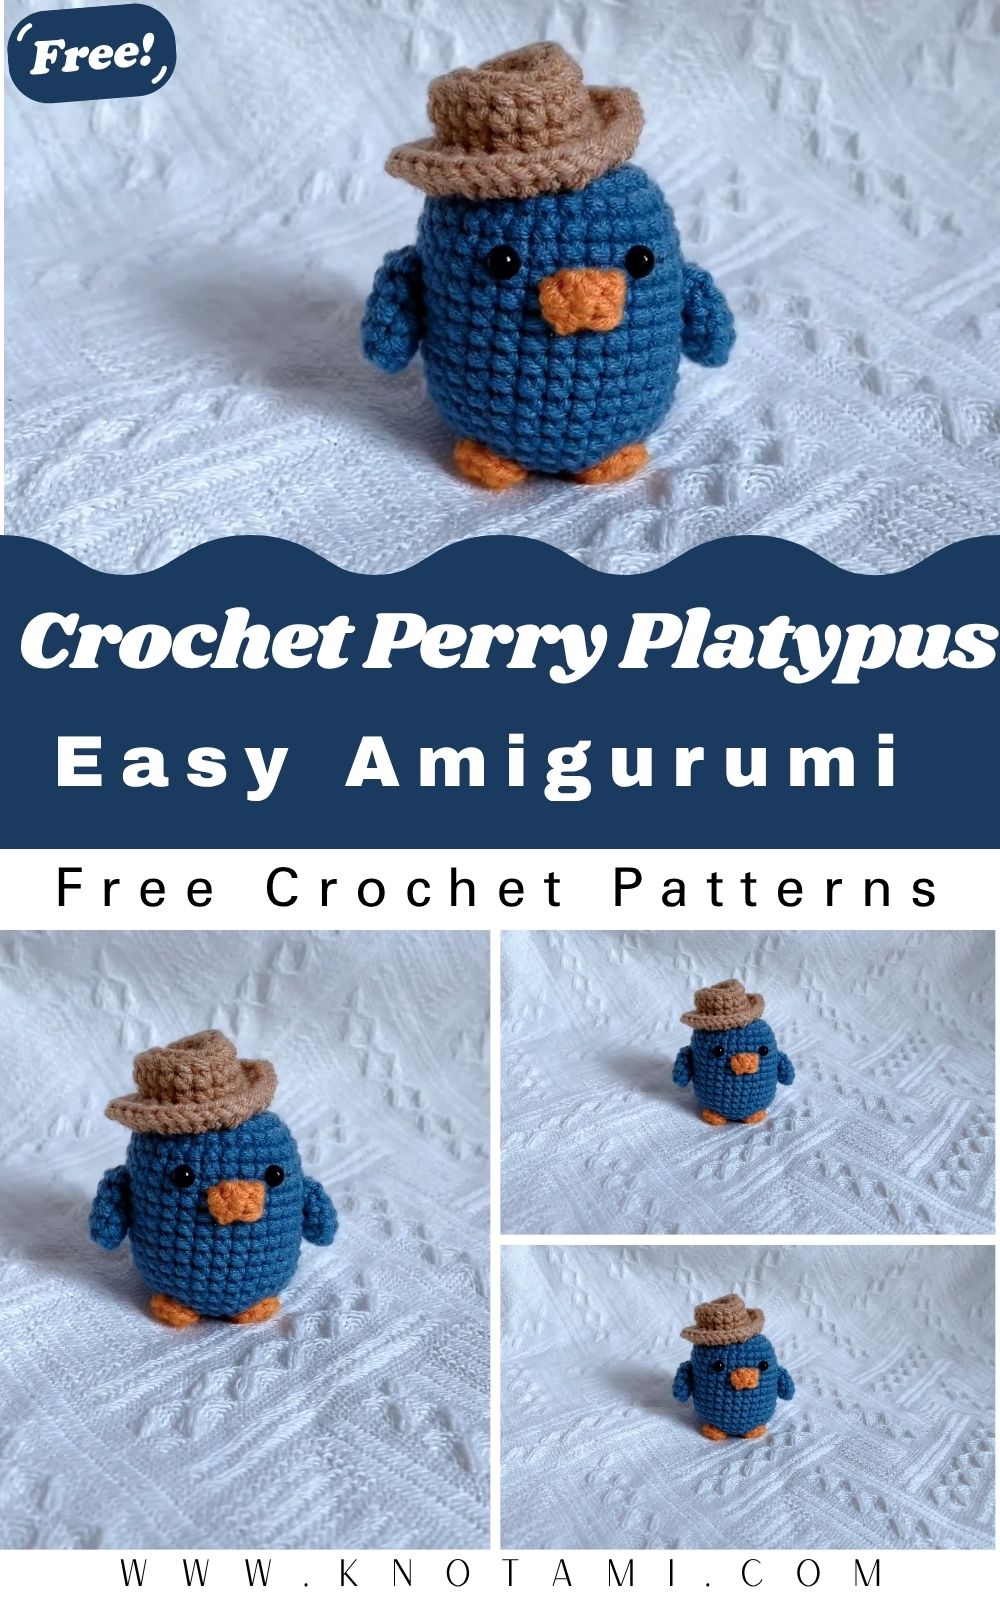
Today’s project offers all of that magic and more: a DIY Crochet Perry Platypus Amigurumi Plush Toy. Inspired by the beloved and quirky cartoon character, this pattern is bursting with personality featuring Perry’s teal beanie-like hat, wide sleepy eyes, and signature duckbill and tail. Whether you’re a fan of Phineas and Ferb or simply love cute crochet creatures, this pattern is bound to be a hit.
What makes this project so fun and approachable is how it balances simplicity with adorable detail. The shape is easy to follow, the stitches are beginner-friendly, and the small size makes it a quick weekend project. Yet, there’s just enough detail like the contrasting bill and tail and the poseable shape to keep even experienced crocheters entertained and engaged.
Plus, crocheting Perry is more than just a craft project; it’s a form of mindfulness and creative expression. Sitting down with your yarn, hook, and a bit of patience offers a type of quiet joy you’ll want to return to. And when it’s finished? You’ve got a charming handmade plush toy that’s perfect for gifting, decorating, or simply enjoying on your desk as a little reminder of crafty joy.
Materials & Tools Section
Before you start stitching your Crochet Perry Platypus into life, you’ll need the right materials. Here’s everything required to make your own lovable amigurumi plush:
Yarn
-
Yarn Weight: Medium/Category 4 worsted-weight yarn
-
Colors Needed:
-
Teal or turquoise (for the body)
-
Light brown or tan (for the beak and tail)
-
Off-white or beige (for the belly – optional)
-
Black (for embroidery details or optional hat band)
-
Crochet Hook
-
Hook Size: 3.5 mm (E-4) or 4.0 mm (G-6) depending on your tension and yarn
<br>Tip: For amigurumi, use a hook slightly smaller than recommended to keep stitches tight and stuffing hidden.
Other Materials
-
Safety eyes (6–8 mm) or black yarn for embroidered eyes
-
Polyester fiber stuffing
-
Tapestry needle
-
Stitch markers
-
Scissors
Choosing the Right Yarn:
-
Use smooth, non-fuzzy acrylic yarn for crisp stitch definition and a long-lasting finish.
-
For a softer, plushier effect, try using velvet yarn (but adjust hook size accordingly).
-
If making the toy a gift for babies or young children, embroider the eyes and facial features for safety.
4. Step-by-Step Crochet Instructions
(Create Perry Platypus from Head to Tail)
Let’s dive into the fun part! This guide will walk you through every stitch, rounding each piece into Perry’s lovable form. Feel free to adjust colors and personality along the way.
1. Crochet the Head & Body (Continuous Tube Shape)
-
Start with the head color (turquoise/teal):
Make a magic ring and crochet 6 single crochets (sc) into it. Pull tight. -
Increase evenly in spiral rounds:
Build up the head for about 6–7 rounds, increasing by 6 sc each round (e.g. 6, 12, 18, 24, 30, 36). -
Form the face shape:
Continue stitching rounds without increases for 5–7 rows until a slight face bulge forms. Insert safety eyes between rows 6–7, about 5 stitches apart. -
Stuff the head firmly:
Fill with fiber stuffing before moving onto the neck and body.
Expert Tip:
Stuff as you go to avoid gaps. Press stuffing into corners with a blunt end of your hook or chopstick.
2. Form the Neck and Upper Body
-
After completing the head shape, decrease slightly to form a rounded neck.
-
Gradually increase once more for the upper body area, aiming for about 30–36 stitches in the round.
-
Continue stitching 10–12 rounds for a pleasing cylindrical body shape.
Tip: This is the perfect point to insert a bit of weighted stuffing (optional) to make Perry sit up.
3. Shaping the Lower Body & Mini Legs
-
Flatten the body slightly and add a few decreasing rounds to taper the base.
-
Crochet 2 small tube-shaped legs using light brown yarn. Make a magic ring of 6, increase one round to 9, then crochet 3 rounds even. Bind off and sew to the bottom.
4. Create the Duckbill (Signature Feature)
-
Using the tan/brown yarn, chain 6. Work single crochets around both sides of the chain to form an oval.
-
After 2–3 rounds of increasing, switch to flat single crochet rows to form the beak shape.
-
Stuff lightly and attach just below the eyes at the head’s front.
5. Add Perry’s Flat Tail
-
Create a flat rectangle with tan yarn:
-
Chain 8
-
Crochet sc rows back and forth until the piece is about 2–2.5 inches long
-
-
For added texture, use cross-hatching stitches or crisscross embroidery on top.
-
Flatten and sew securely to the back of the body.
6. Add the Indiana Jones–Style Hat (Optional but Cute!)
Use brown or dark green yarn:
-
Create a magic ring and increase rounds until 24 sc
-
Add one or two rounds for the brim edge (fpdc or increase stitches for effect)
-
Place on top slightly tilted before stitching down
7. Final Touches & Assembly
-
Sew all pieces securely using a yarn needle.
-
Add embroidered nostrils on the beak.
-
Blush the cheeks lightly with cosmetic blush or fabric-safe paint.
-
Optional: Add a tiny detective journal or magnifying glass prop!
5. Customization Ideas
Don’t hesitate to have fun making this Crochet Perry Platypus uniquely yours! Here are some ideas:
Color Variations
-
Pastel Perry (mint, peach, lavender)
-
Rainbow Perry (striped body)
-
Holiday Perry (red hat + green belly)
Yarn Choices
-
Chenille yarn for the soft, marshmallow-plush effect
-
Cotton yarn for sharp stitch detail and durability
Add Accessories
-
Tiny scarf, bow tie, or even sunglasses
-
Embroidered detective badge or monogrammed initials
6. Advanced Tips & Troubleshooting
Even with a simple plush like this, the little details make a big difference. Here’s how to elevate your work:
-
Use Invisible Decreases: Clean finish = professional look.
-
Keep Tension Even: Too loose? Drop a hook size.
-
Avoid Gaps in Body Rounds: Use continuous (spiral) rounds, not joined rounds.
-
Fix Uneven Shapes: Add more stuffing or use shaping stitches.
-
Look for Stiff/Stretched Yarn: Replace or crochet tighter.
-
Join Parts Cleanly: Use whip stitch or ladder stitch for invisible seams.
-
Safety Eyes Before Stuffing: Always place and secure before closing.
-
Don’t Overstuff Limbs: Too much = stiff toy
7. Care Instructions
Your finished Crochet Perry Platypus is made with love treat it gently to ensure it lasts.
-
Hand wash with mild detergent.
-
Never wring or stretch; press water out gently.
-
Lay flat to air dry.
-
Keep from direct sunlight to preserve yarn color.
-
Store in a cool, dry space when not on display.
8. Display & Gift Ideas
Your finished plush is perfect for:
-
Desk Buddy: Lighten up your workspace with this goofy platypus!
-
Nursery Toy: Add soft color to your child’s room.
-
Pop Culture Decor: Great for fans of nostalgic cartoons.
-
Handmade Gift: Wrap in a gift box with printed care tag and yarn bow.
-
Holiday Ornament: Add a hanging loop and place him in a Christmas tree!
9. Benefits Section
Crocheting this Perry Platypus isn’t just a hobby it’s an experience.
-
Promotes calm, mindfulness, and stress reduction.
-
Creates meaningful, eco-friendly handmade gifts.
-
Boosts creative confidence and skill mastery.
-
Spreads love through handmade art that lasts forever.
10. Photography & Social Media Tips
Planning to share your creation? These photo tips elevate your posts:
-
Use soft, natural daylight near a window.
-
Neutral background + small props (yarn, plants, notebook).
-
Try close-ups to show texture and stitch detail.
11. Conclusion
Taking a simple ball of yarn and turning it into something so full of life like this Crochet Perry Platypus is both magical and empowering. Each stitch is a moment of calm, of focus, and of creativity. When you’re done, you’re left with more than just a plush toy; it’s a reminder of what your hands are capable of creating.
So grab your yarn and hook, settle into your favorite cozy corner, and let this little platypus be your next crochet companion. With every stitch, you’ll be crafting joy one loop at a time.