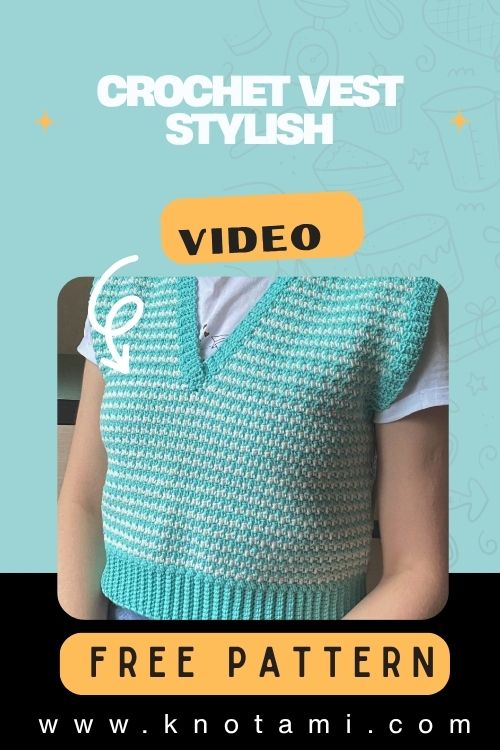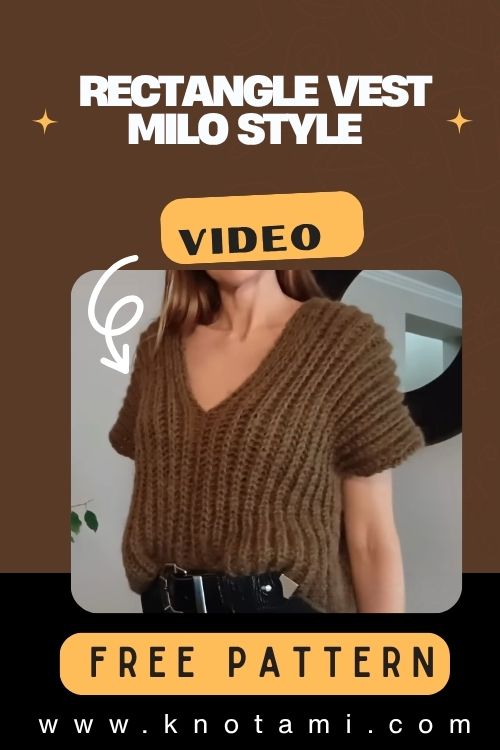
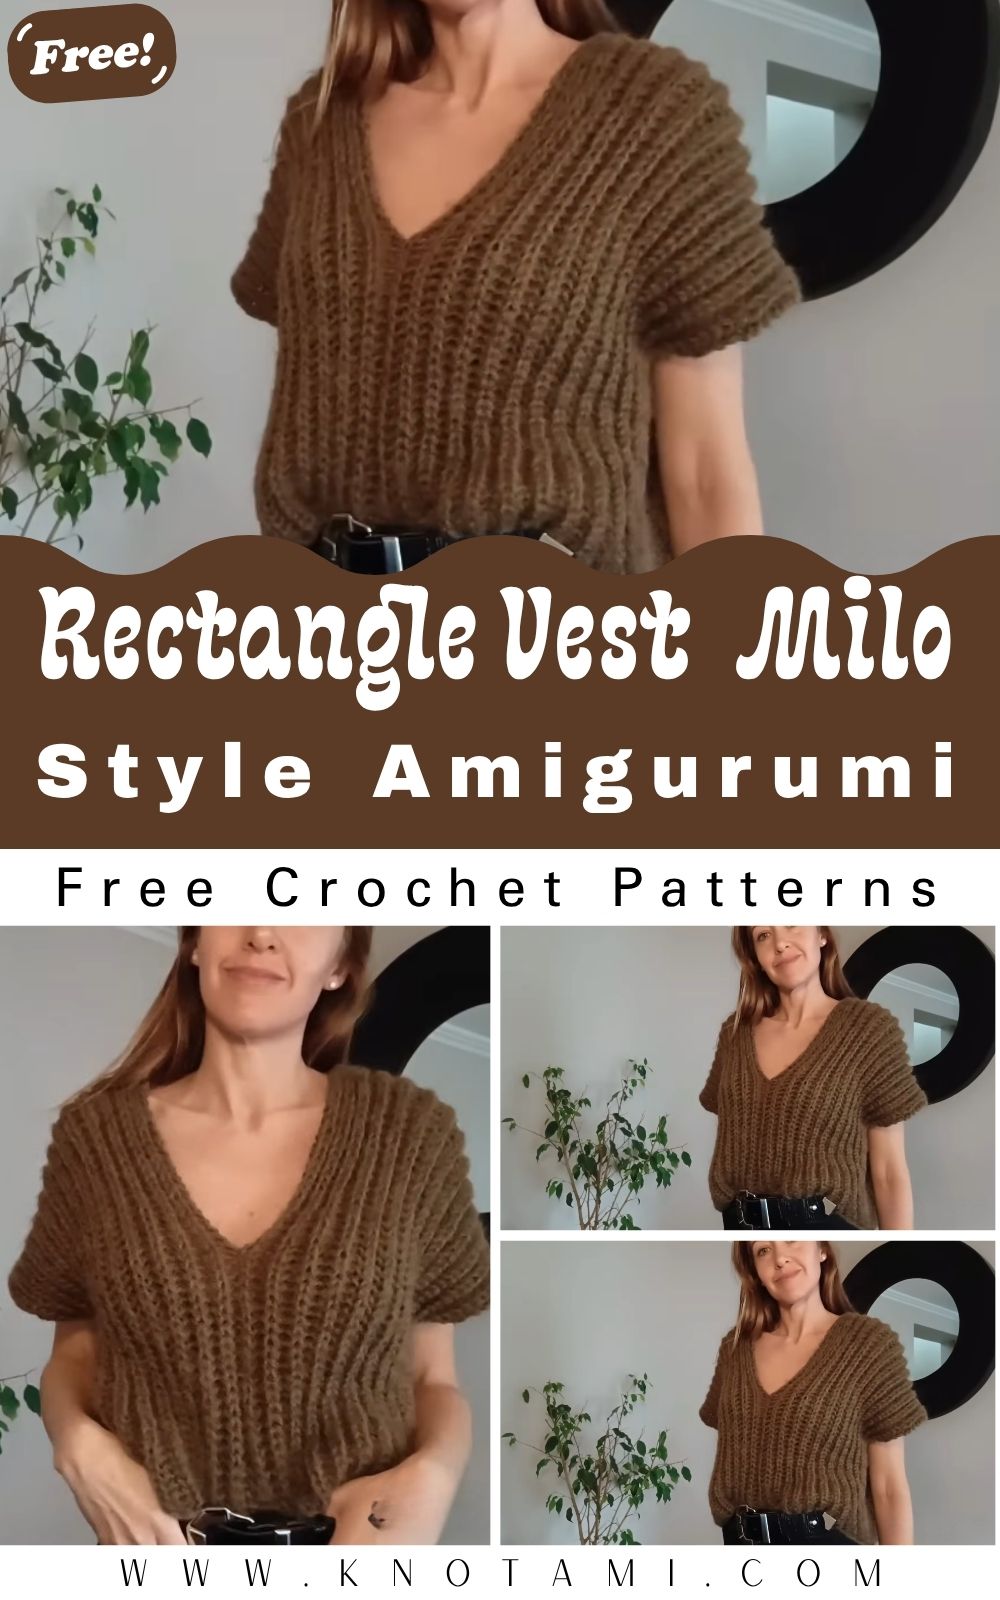
Crochet Rectangle Vest Milo Style Amigurumi Beginner Pattern
The Beauty of Crafting from Yarn
There’s something truly magical about taking a simple strand of yarn and turning it into something beautiful, soft, and full of life. The rhythmic motion of your hook, the colors blending through your fingers, and the texture slowly forming beneath your hands it’s one of life’s quiet joys. Crochet connects creativity with mindfulness, allowing you to make something tangible and heartwarming, one stitch at a time. It’s more than just a hobby it’s a way to express love, patience, and artistry.
Introducing the Crochet Rectangle Vest Milo Style
Among the many crochet projects to try, the Crochet Rectangle Vest Milo Style Amigurumi Beginner Pattern stands out as a perfect mix of comfort and charm. Its rectangular base gives it a modern and versatile look, while the Milo-style design adds a handmade touch of uniqueness. This vest is not just practical it’s a fashion statement made from yarn, combining style and coziness effortlessly.
Perfect for Beginners and Experienced Crafters
Whether you’ve just picked up your first crochet hook or have been crafting for years, this project is an absolute joy. The construction is simple — two rectangles joined together but the possibilities for color and texture are endless. Advanced crocheters can experiment with yarn weights and decorative stitches, while beginners can practice foundational techniques without feeling overwhelmed.
The Calm and Joy of Handmade Art
Crocheting is more than creating clothes; it’s about slowing down and savoring the process. As you crochet your vest, you’ll experience the soothing rhythm of stitches coming together, bringing relaxation and focus. By the time you fasten off that final stitch, you’ll not only have a beautiful handmade garment but also the satisfaction of crafting something meaningful a piece infused with time, effort, and joy.
Materials & Tools
To bring your Crochet Rectangle Vest Milo Style to life, you’ll need the following materials and tools.
Materials List
-
Yarn: Medium weight (Category 4) acrylic or cotton yarn
-
Crochet Hook: 5.0 mm (H-8)
-
Scissors: For trimming yarn
-
Tapestry Needle: For weaving in ends and joining panels
-
Stitch Markers: To help keep track of edges or armholes
-
Measuring Tape: To ensure your rectangles are the same size
-
Buttons (optional): For added design or closure
-
Safety Pins or Clips: To hold the pieces together before seaming
Yarn & Color Selection Tips
Choosing the right yarn can make a huge difference in how your vest looks and feels. For a soft, breathable vest, use cotton or bamboo yarns. For something cozier and warmer, acrylic or wool blends are excellent. When it comes to color, try neutral tones for everyday wear, or go bold with pastel, striped, or gradient yarns for a more artistic statement. You can even use leftover yarn scraps to create a unique patchwork effect.
Step-by-Step Crochet Instructions
Here’s a step-by-step guide to making your Crochet Rectangle Vest Milo Style. This project is designed with simplicity in mind, perfect for beginners yet stylish enough for advanced makers.
1. Creating the Foundation Rectangles
Start by crocheting two large rectangles one for the back and one for the front.
-
Foundation Chain: Measure from shoulder to waist for desired length. Chain that many stitches (e.g., 80–100 depending on size).
-
Rows: Work rows of half double crochet (hdc) until you reach the desired width for your vest (around 40–50 rows).
-
Keep edges straight by counting stitches at the end of each row.
Tip: To make the edges neat and even, crochet into the top of the turning chain each time.
2. Forming the Neck and Armholes
Once your rectangles are complete:
-
Lay them flat side by side.
-
Fold slightly inward to create the armholes and neckline.
-
Use stitch markers to hold the sections where you’ll join the shoulders later.
For a loose fit, leave wider openings; for a snug fit, make smaller ones.
3. Joining the Panels
Use your tapestry needle or slip stitch to seam the shoulders and sides. Make sure the vest can slip over your head comfortably. You can also leave the sides partially open for a breezier style.
Expert Tip: Use the whip stitch or mattress stitch for invisible seams.
4. Adding Ribbed Borders (Optional)
To give your vest a professional finish:
-
Crochet a ribbed edge along the neckline, bottom, and armholes using single crochet or front-post/back-post double crochet stitches.
-
This adds structure and polish to your piece.
5. Adding a Pom-Pom or Decorative Tie (Optional)
For a playful touch, you can attach a pom-pom tie or small crocheted belt around the waist.
6. Finishing Touches
-
Weave in all loose ends with the tapestry needle.
-
Block your vest by lightly dampening it and shaping it to your desired dimensions.
Pro Tip: Blocking enhances the drape and helps even out stitches.
Customization Ideas
One of the joys of crochet is personalizing your work. Here are some creative ways to make your Milo Style Rectangle Vest truly your own.
Color Play
-
Neutral elegance: Use beige, cream, or gray for timeless simplicity.
-
Vibrant pop: Try coral, mustard, or teal for modern flair.
-
Ombre blend: Use gradient yarns for a smooth color transition.
Themed Versions
-
Holiday Edition: Red and green for Christmas, or orange and black for Halloween.
-
Boho Chic: Use multicolor yarns and fringe along the bottom.
-
Pastel Dream: Soft pinks, mints, and lavenders for spring or Easter.
Add-Ons
-
Add buttons or a front tie for function and decoration.
-
Sew on patches or small crochet appliqués like flowers or hearts.
-
Crochet a matching hat or scarf to complete the outfit.
Advanced Tips & Troubleshooting
Even though this is a beginner project, here are some expert techniques to make your vest look professional.
-
Invisible Decrease: When shaping edges, use invisible decreases to avoid bumps and keep stitches smooth.
-
Maintain Even Tension: Keep your yarn flow consistent to ensure uniform stitches.
-
Prevent Curling: If edges curl, block your rectangles or add a single crochet border.
-
Fix Uneven Edges: Count stitches in each row consistency is key.
-
Check Measurements Often: Try on the vest as you go for the perfect fit.
-
Join Neatly: Always seam with the wrong sides facing to hide joins.
-
Weaving Ends: Use a sharp tapestry needle and weave in multiple directions.
-
Avoid Stretching: Don’t pull your stitches too tightly allow the fabric to drape.
-
Understand Abbreviations: Keep a crochet abbreviation chart handy.
-
Add Reinforcement: For delicate yarns, reinforce joins with a backstitch seam.
Care Instructions
To keep your Crochet Rectangle Vest looking beautiful for years:
-
Hand wash gently in cold or lukewarm water.
-
Use a mild detergent suitable for delicate fabrics.
-
Avoid wringing the vest press gently to remove excess water.
-
Air dry flat on a towel to maintain shape.
-
Avoid direct sunlight to prevent color fading.
-
Store folded in a drawer or breathable bag (avoid hanging to prevent stretching).
Display & Gift Ideas
Your Milo Style Rectangle Vest is not just a wearable piece it’s a wonderful handmade creation that can be gifted or displayed beautifully.
Creative Ways to Use or Gift It
-
Home Décor Accent: Hang it on a vintage hanger as part of a cozy home setup.
-
Wardrobe Essential: Pair it with jeans and a long-sleeved top for everyday comfort.
-
Handmade Gift: Wrap it with a tag that says “Made with Love” perfect for birthdays or holidays.
-
Charity Projects: Crochet several vests for donation drives or shelters.
-
Matching Outfits: Create a parent-child vest duo for adorable matching looks!
Benefits of Making a Crochet Rectangle Vest
Crocheting this vest offers more than just a wearable item it nurtures creativity and mindfulness.
Relaxation & Mindfulness
The repetitive rhythm of crochet helps reduce anxiety and promote calmness. It’s like meditation in motion.
Stress Relief
Every stitch releases tension, giving your mind something soothing to focus on.
Sense of Accomplishment
Watching your vest take shape row by row brings immense satisfaction a reward for patience and creativity.
Eco-Friendly & Sustainable
Handmade clothing reduces waste and promotes slow fashion. You’re crafting with purpose.
Emotional Connection
Giving a handmade vest to someone is like gifting a piece of your heart. It carries warmth, time, and care.
Photography & Social Media Tips
Show off your beautiful crochet creation with style!
Best Photography Practices
-
Natural Light: Shoot in the morning or late afternoon for soft, warm tones.
-
Clean Background: Use a white wall, wooden table, or cozy bedspread.
-
Include Props: Add yarn balls, hooks, or plants for a homey vibe.
-
Close-Up Shots: Highlight stitches and textures for detail lovers.
-
Flat Lays: Arrange the vest neatly with accessories for Instagram-worthy photos.
Social Media Tips
-
Use hashtags like #CrochetVest #MiloStyleVest #CrochetFashion #HandmadeWardrobe.
-
Tag your yarn brand or favorite crochet creators for community engagement.
-
Share progress photos people love seeing the journey from yarn to finished piece.
Conclusion
Crocheting the Rectangle Vest in Milo Style is more than just making a garment it’s an experience of mindfulness, creativity, and self-expression. Each stitch represents time, love, and patience, turning simple yarn into something wearable and beautiful.
Whether you’re crocheting for yourself, a loved one, or just to unwind after a busy day, this vest brings both comfort and joy. So grab your hook, pick your favorite yarn, and start crafting your own cozy masterpiece. You’ll find that the journey is as rewarding as the final creation a handmade vest that not only keeps you warm but fills your heart with pride.