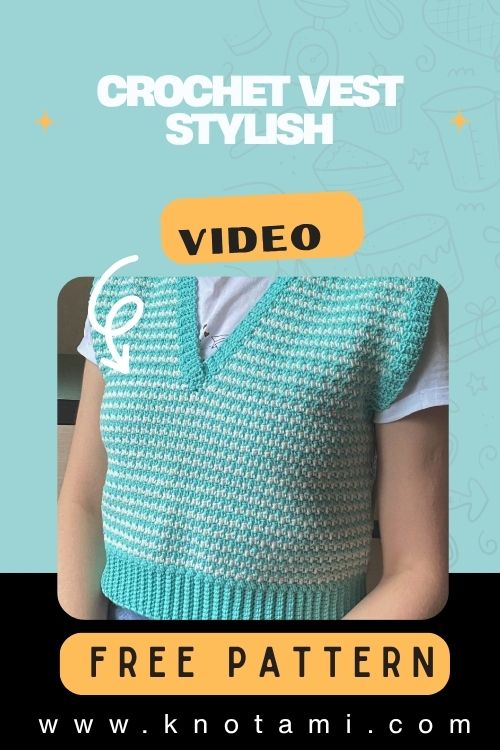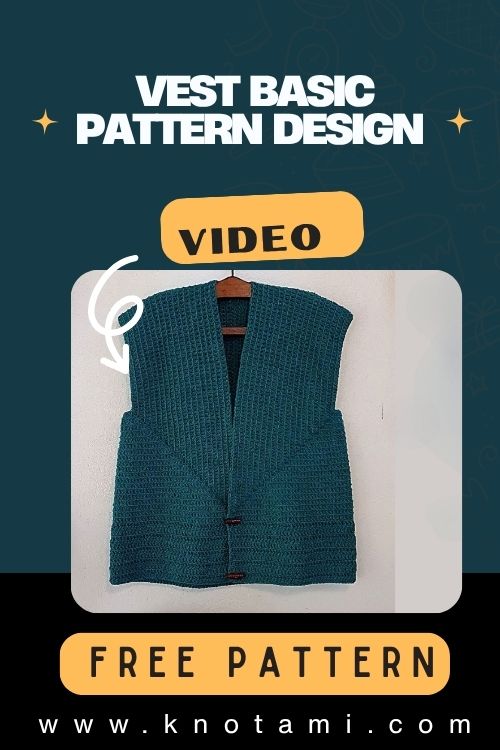
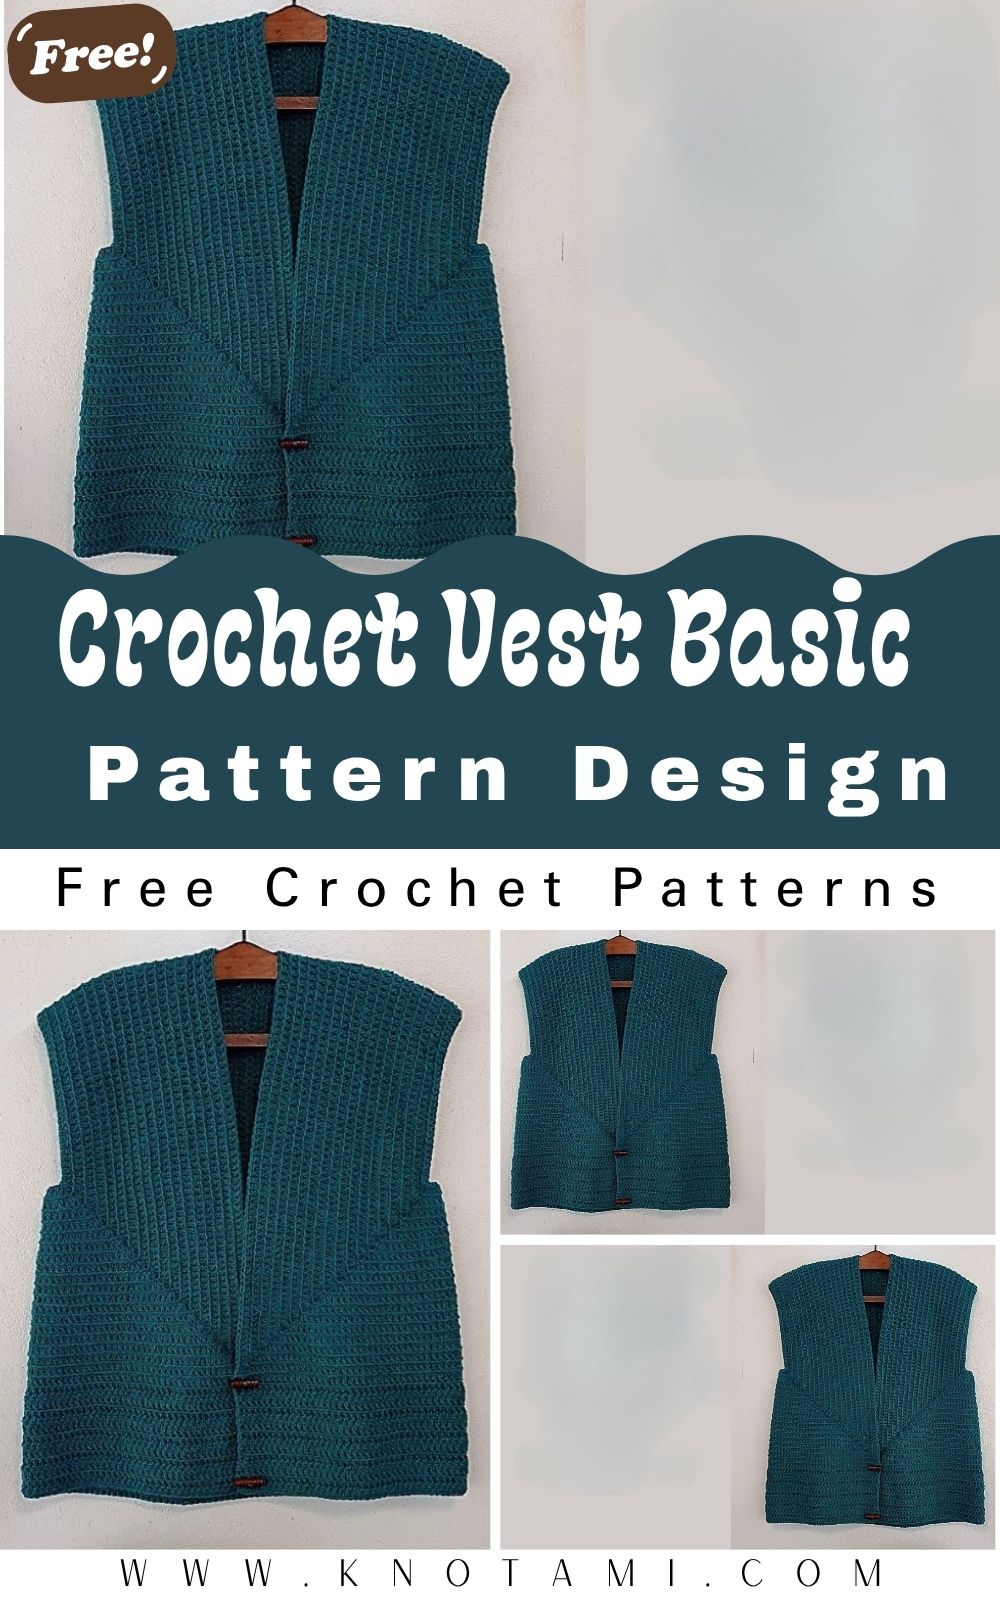
Easy Crochet Vest Basic Pattern Design for Everyday Wear
There’s something incredibly satisfying about taking a simple ball of yarn and transforming it into a cozy, wearable work of art. The gentle rhythm of each stitch, the softness of the yarn sliding through your fingers, and the joy of seeing a project come to life crochet offers a rare blend of creativity and calm. It’s not just about crafting clothes; it’s about weaving comfort, love, and a little bit of magic into something you can proudly wear.
The Easy Crochet Vest Basic Pattern Design for Everyday Wear embodies all of that magic. It’s a charming and functional project that adds warmth and handmade beauty to your daily outfits. With its timeless look and minimalistic appeal, this vest is both fashionable and practical perfect for layering over shirts, dresses, or turtlenecks. The best part? It’s designed for simplicity, making it ideal for anyone who loves crochet, from curious beginners to seasoned crafters.
This vest pattern strikes a perfect balance between accessibility and creativity. You don’t need advanced techniques or special stitches just basic crochet skills, a bit of patience, and your favorite yarn. Yet, it still offers plenty of creative freedom: you can experiment with textures, mix and match colors, or adjust the fit to match your personal style.
Crocheting a vest is also a meditative, soothing process. The repetitive motion calms the mind, while watching the fabric grow gives a deep sense of accomplishment. Whether you’re crafting it for yourself or gifting it to someone special, the Easy Crochet Vest captures everything wonderful about slow, intentional handmade living a piece that’s stylish, heartfelt, and made entirely by you.
Materials & Tools You’ll Need
Before you start, gather the essentials to make your crochet vest project smooth and enjoyable.
Yarn
-
Type: Soft acrylic, cotton blend, or light wool yarn
-
Weight: Worsted (medium 4) or DK (light 3)
-
Quantity: Approximately 400–600 grams depending on size
-
Color: Choose one solid shade for a classic look or combine two for a modern contrast
Tip:
Select yarn that feels comfortable against your skin. Cotton yarns offer breathability and structure, while acrylic blends provide warmth and elasticity. For a trendy touch, mix earthy neutrals like beige, taupe, or gray, or go bold with mustard, teal, or berry tones.
Hook Size
-
Recommended: 4.0 mm (G/6) or 4.5 mm (7) hook
Check your gauge before beginning different yarns can slightly affect sizing.
Other Tools
-
Scissors: For cutting yarn neatly
-
Tapestry Needle: To weave in ends
-
Stitch Markers: Helpful for marking armholes and row counts
-
Measuring Tape: Essential for sizing accuracy
-
Buttons (optional): For added style or closure
Pro Tip: Always have a few extra stitch markers and a notebook to jot down measurements or customizations.
Step-by-Step Crochet Instructions
Let’s break down the steps to make your Easy Crochet Vest simple, structured, and enjoyable to follow.
1. Creating the Back Panel
-
Foundation Chain:
-
Start with a chain that matches the width of your desired vest back (measure shoulder to shoulder).
-
For an adult medium, chain about 70–80 stitches (adjust based on your yarn and gauge).
-
-
Row 1:
-
Work a half double crochet (hdc) into the second chain from the hook and across the row. Chain 1, turn.
-
-
Rows 2–40 (or until desired length):
-
Continue working in half double crochet stitches to create a smooth, even fabric.
-
Maintain consistent tension for a neat finish.
-
Tip:
Measure from shoulder to waist to determine how long you want your vest to be. You can add or remove rows to customize it.
2. Making the Front Panels
-
Create two panels for the front of the vest.
-
Each panel should be half the width of your back panel (for example, if your back is 80 stitches, each front panel is 40).
-
Work in hdc stitches for the same number of rows as the back panel.
-
Optionally, you can add a v-neck shaping by decreasing 1 stitch at the neckline edge every 2 rows starting halfway through the panel.
Expert Tip:
Use stitch markers to keep both front panels symmetrical. Mark where you’ll start decreasing for the neckline on each side.
3. Joining the Panels (Assembly)
-
Lay the back panel flat, and position both front panels on top, aligning shoulders and sides.
-
Join shoulders together using a slip stitch seam or whip stitch.
-
Leave openings for the armholes (approximately 7–9 inches for an adult size).
-
Seam down the sides from underarm to hem.
Tip:
Use the same yarn for joining to make your seams invisible and flexible.
4. Adding the Edging
To give your vest a polished look:
-
Attach your yarn to the bottom hem.
-
Work single crochet stitches evenly around all edges (bottom, neckline, and armholes).
-
Add 2–3 rows for a thicker border if desired.
Optional: Use a contrasting color for a stylish trim.
5. Adding Buttons or Ties (Optional)
-
For a buttoned vest, space out buttonholes evenly along one front edge (every 2–3 inches).
-
On the opposite panel, sew matching buttons.
-
Alternatively, crochet small cord ties or leave the vest open for a relaxed, draped look.
6. Fitting and Adjustments
Try your vest on after seaming.
-
If it feels loose, you can cinch the waist with a small crochet belt.
-
If it’s too tight, add a side panel by crocheting a strip and sewing it into the seam.
Pro Tip:
Steam-block your vest gently once finished to relax stitches and improve drape.
7. Finishing Touches
-
Weave in all yarn ends securely with a tapestry needle.
-
Add a handmade label or tag to personalize your piece.
-
Lightly steam or iron (on low heat) to smooth edges.
Customization Ideas
Your crochet vest can be as unique as your personality! Here are some creative ways to personalize it:
1. Color Schemes
-
Classic Chic: Neutral tones like beige, ivory, and camel for an elegant look.
-
Bold & Bright: Play with jewel tones — emerald, sapphire, or ruby.
-
Boho Vibes: Use variegated or gradient yarns for a dreamy ombré effect.
-
Monochrome Magic: Stick to one shade but vary the texture for subtle sophistication.
2. Yarn Types
-
Cotton: Light and breathable great for summer layering.
-
Wool Blend: Soft and warm for fall or winter.
-
Acrylic: Budget-friendly, easy to wash, and available in endless colors.
3. Add-ons & Style Tweaks
-
Crochet pockets for functionality and charm.
-
Add a fringe hem or bobble border for playful texture.
-
Stitch a floral motif or granny square panel into the back for a vintage twist.
-
Use metallic thread for a touch of sparkle.
Advanced Tips & Troubleshooting
Even a basic pattern can shine when you apply professional finishing techniques.
-
Keep Even Stitch Tension: Maintain a steady rhythm; inconsistent tension affects size and drape.
-
Prevent Twisting: Check that your rows and seams stay aligned as you join panels.
-
Invisible Seams: Join through back loops only for flat, clean edges.
-
Block Properly: Steam-block after finishing to even out tension and enhance fit.
-
Fix Uneven Edges: Add a row of single crochet to straighten borders.
-
Measure as You Go: Try the vest on periodically for real-time fitting.
-
Avoid Bulky Joins: Weave in ends neatly and avoid knotting thick yarns.
-
Adjust Necklines Easily: Use stitch markers to test where your neckline shaping looks best before committing.
-
Read Abbreviations: Keep a quick chart sc = single crochet, hdc = half double crochet, ch = chain, sl st = slip stitch.
-
Yarn Substitution: Always check gauge when changing yarn types or brands.
Care Instructions
To keep your crochet vest soft and beautiful for years:
-
Hand wash gently in cold or lukewarm water.
-
Use mild detergent (baby shampoo works too).
-
Do not wring; press water out gently.
-
Lay flat to dry, shaping it back to size.
-
Avoid direct sunlight to prevent fading.
-
Store flat or folded neatly in a drawer.
Tip:
If gifting, add a cute care tag so your recipient knows how to preserve their handmade treasure.
Display & Gift Ideas
Your finished vest deserves to be shown off or gifted with love!
-
Wardrobe Staple: Pair it with jeans and a blouse for casual elegance.
-
Office Outfit: Layer over a turtleneck or dress shirt for a polished touch.
-
Gift Idea: Perfect for birthdays, holidays, or “just because.”
-
Craft Fairs: Handmade vests make excellent boutique or Etsy shop items.
-
Photo Props: Use for cozy, cottagecore-inspired photo shoots.
Creative Gift Tip: Roll your vest with a ribbon and attach a handwritten note like, “Made with love, one stitch at a time.”
Benefits of Making the Easy Crochet Vest
Crocheting your own clothes offers so much more than just a new outfit.
-
Relaxation & Mindfulness: Repetitive motions soothe the mind and reduce stress.
-
Stress Relief: Crafting helps focus energy positively, calming anxiety.
-
Confidence Boost: Completing a wearable piece gives an incredible sense of pride.
-
Eco-Friendly: Handmade garments reduce waste and overproduction.
-
Connection & Love: A handmade vest is a meaningful gift that carries emotional warmth and care.
Each stitch is more than yarn it’s a moment of peace, creativity, and expression.
Photography & Social Media Tips
Want to share your beautiful vest with the world? Here’s how to make it shine:
-
Natural Lighting: Photograph near a window or outdoors for soft, even light.
-
Clean Background: Use neutral tones or wooden textures to highlight your work.
-
Add Props: Include yarn balls, crochet hooks, or a cozy mug.
-
Show Texture: Capture close-up shots to display stitch definition.
-
Wear It: Model your vest for lifestyle photos people love seeing handmade fashion in action!
-
Consistency: Edit with similar brightness and tones to build a cohesive Instagram or Pinterest aesthetic.
Conclusion
Crocheting your own vest is more than just a creative pastime it’s an empowering journey from imagination to reality. The Easy Crochet Vest Basic Pattern Design for Everyday Wear combines simplicity with style, letting you create something functional, fashionable, and deeply personal. Whether it’s your first wearable project or your latest handmade masterpiece, each stitch you make adds warmth and meaning.
As you slip on your finished vest, feel proud knowing that your hands crafted it with love, patience, and creativity. It’s not just a garment it’s a reflection of your passion for handmade artistry and slow living. So grab your hook, pick your yarn, and start today your next favorite outfit is waiting to be crocheted!