
In the space of a few quiet stitches, yarn becomes character and charm. Crochet offers an immediate tactile reward: loops become stitches, stitches become shape, and before you know it, you hold something crafted from your hands and imagination. That small, warm feeling when you finish a project is one of the best reasons to pick up the hook.
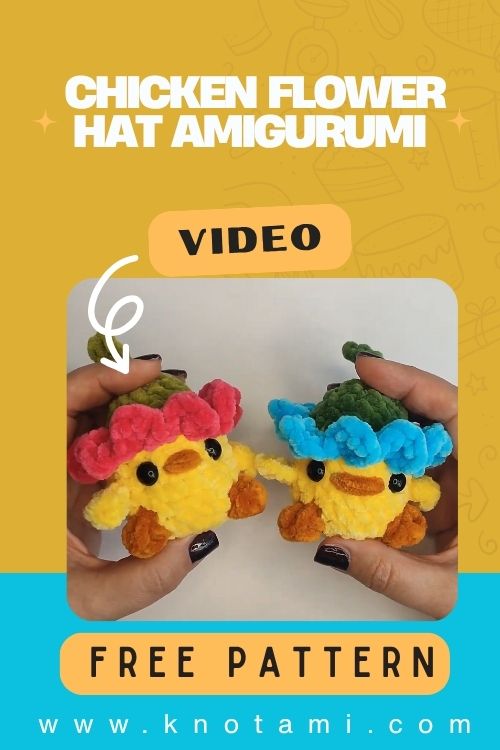
This project, Crochet a Chicken Flower Hat, combines a cute amigurumi chicken body with a tiny floral hat that gives it personality and charm. The design balances playful character with beginner-friendly construction: a round body, simple limbs, a beak and comb, plus a decorative, flower-topped hat that makes it stand out.

Materials & Tools
Gather everything before you start the right tools make a smooth project.
Materials
-
Main yarn (body): Worsted weight (Medium / #4) yarn classic chicken colors: white, cream, or soft pastel for a modern touch.
-
Accent yarns: yellow or orange for beak, red for comb, and 1–2 bright colors for the flower hat (for petals and center).
-
Optional textured yarn for the body (bouclé or fuzzy) if you want a woolly appearance.
Tools
-
Crochet hook: 3.5 mm to 4.0 mm (adjust depending on yarn and desired firmness).
-
Fiberfill stuffing (polyester fiberfill).
-
Safety eyes: 6–10 mm depending on finished size, or embroidery floss for embroidered eyes (safer for baby items).
-
Tapestry needle for sewing parts and weaving ends.
-
Scissors.
-
Stitch markers (for marking start of rounds).
-
Small stitch holder or spare yarn for holding pieces while assembling.
Yarn & color advice
-
Use a slightly smaller hook than the yarn label suggests for amigurumi to keep stitches tight (so stuffing doesn’t show).
-
Smooth acrylic or cotton yarn gives clear stitch definition great for small dolls. Fuzzier yarn (e.g., boucle) gives a fluffy body but can hide details.
-
Pick hat colors that contrast with the body so the flower hat pops.
Abbreviations & Notes
-
ch = chain
-
sc = single crochet
-
st(s) = stitch(es)
-
inc = increase (2 sc in 1 st)
-
dec = decrease (sc2tog or invisible decrease)
-
sl st = slip stitch
-
BLO/FLO = back/front loops only
-
Work in continuous rounds (spiral) unless noted; use a stitch marker.
This pattern describes general shaping rather than strict stitch counts for every size adjust rounds to reach your desired dimensions.
Step-by-Step Crochet Instructions
Below are stepwise instructions to make the chicken body, limbs, hat, and flower. Stitch counts are a guideline for a medium-sized amigurumi (about 4–7 inches tall depending on yarn/hook).
1. Making the Head
Start with the head because it’s the focal point.
-
Magic ring: 6 sc into ring (6).
-
R2: inc around (12).
-
R3: (1 sc, inc) ×6 (18).
-
R4: (2 sc, inc) ×6 (24).
-
R5: (3 sc, inc) ×6 (30).
-
R6–R9: sc around (30) build head height.
-
Insert safety eyes between R7–R8 about 6–8 sts apart (adjust for expression).
-
R10: (3 sc, dec) ×6 (24).
-
R11: (2 sc, dec) ×6 (18).
-
Begin a small stuffing here firm but not overpacked.
Pro tip: Placing the eyes slightly lower gives a cuter, chubbier face. Use a small felt washer behind safety eyes for security.
2. Forming the Neck and Upper Body
-
R12: sc around (18). This starts the neck.
-
R13: (1 sc, inc) around (27) broaden into upper body.
-
R14–R18: sc around (27) establish torso width, adding stuffing gradually.
Keep the shaping symmetrical and add stuffing in small amounts to avoid lumps.
3. Building the Main Body
-
R19: (3 sc, dec) × (reduce count) shape down toward base.
-
R20: (2 sc, dec) around continue tapering.
-
R21–R23: sc or add extra rounds if you want a stouter body.
-
Before final decreases, leave small opening for attaching legs/feet or for finishing.
Shaping tip: For a flat-bottom sitting chicken, make the last round slightly wider and flatten the base while sewing to create a small flat surface. Alternatively, use a small oval base piece for better stability.
4. Making and Attaching the Feet/Legs
Feet (make 2):
-
Magic ring, 6 sc (6).
-
R2–R3: sc around (6) shape into short stubby feet.
-
Flatten and sc into both layers to make a flat base (optional), or stuff lightly and sew to bottom.
Attachment: Pin feet symmetrically and sew through both foot and body loops to secure. Test sit/balance before final stitching.
5. Making the Wings and Tail
Wings (make 2):
-
ch 6, sc across (5), ch 1, turn, sc dec to shape a teardrop (3–4 rows).
-
Fold and place on sides, sew with small stitches so they curve outward.
Tail:
-
Crochet 3 small chains, sc back to create three thin feathers, or make a small oval and sew to rear.
Tip: Slightly curve the wing when sewing to mimic a natural wing resting position.
6. Creating the Beak and Comb
Beak:
-
With yellow or orange, ch 4.
-
sc into 2nd ch from hook, sc into next st, sl st into last create a tiny triangle or wedge.
-
Sew in the center of the face between eyes.
Comb (red):
-
Make 2–3 small petal-shaped humps: ch 4, sc/hdc/dc along chain to form little bump.
-
Sew on top of head. For a layered comb, create 2 pieces and stack.
Embroidered accents: Stitch small nostrils or a smile beneath the beak with dark floss.
7. Assembly and Positioning
-
Ensure all stuffing is evenly distributed.
-
Pin parts in place with safety pins or stitch markers to adjust positioning.
-
Sew head to body with ladder or whip stitch, taking matching loops from both pieces for an invisible seam.
-
Attach wings, feet, tail, beak, and comb.
-
Weave in all ends inside the body.
Balancing tip: If the toy tips over, adjust stuffing in the lower body or slightly reposition the feet. A tiny pouch of beads sewn into the lower base adds weight for stability (optional).
8. Making the Flower Hat
The flower hat is built as a small hat/crown plus petals that attach to the brim. Keep it slightly larger than the head so it sits like a decorative hat rather than a tight cap.
Hat crown:
-
Magic ring, 6 sc (6).
-
R2: inc around (12).
-
R3: (1 sc, inc) around (18).
-
R4: sc around (18) build height, 1–2 rounds.
Brim:
-
Join contrast yarn, ch 1, sc around; next round do increases every 2–3 stitches to flare the brim outward. For a soft scalloped brim: sc, hdc, dc, hdc, sc across sections, sl st to join.
Flower petals (make 5–7):
-
Ch 5, in 2nd ch from hook: sc, hdc, dc, hdc, sc fasten off leaving long tail for sewing.
-
Alternatively, make slightly larger petals (ch 6–7) for fuller flowers.
Assemble flower: Sew petals in a circle and attach to the top of the hat. Add a small puff or contrasting center (a little pompom or a small circle of yellow) to finish.
Hat placement: Sew the hat to the chicken’s head along a few stitches so it stays put. For a removable hat, attach only a few stitches or a small snap.
Final Touches & Accessories
-
Add tiny felt or embroidered cheeks for extra cuteness.
-
Crocheted scarf, tiny bow, or a pocket can add personality.
-
For a hanging ornament, stitch a yarn loop inside the hat crown before attaching.
-
For safety (kids), embroider eyes instead of using safety eyes and ensure all parts are sewn on securely.
Customization Ideas
Make every chicken unique.
-
Color swaps: Pastel body + bright flower for baby gift; black-and-white for a modern look.
-
Textured bodies: Use boucle or eyelash yarn for fluffy bodies (note: adjust hook and counts).
-
Themed hats: Tiny Easter bonnet, Christmas poinsettia, Halloween mini witch hat, or summer sun hat with tiny embroidered sunglasses.
-
Size variations: Use finer yarn and smaller hook for tiny ornaments; bulkier yarn and larger hook for sizeable plushes.
-
Accessories: Micro bunting, tiny maracas, a crochet basket, or a baby chick companion.
Advanced Tips & Troubleshooting (8–10 Expert Tips)
-
Invisible decrease: Use front loop decreases for smoother decreases insert hook through front loops of two sts and sc together.
-
Even tension: Keep a consistent yarn hold; consider using a yarn guide or wrapping yarn around a finger the same way each time.
-
Preventing twists: Mark your first stitch with a stitch marker and move it each round check counts often.
-
Fixing uneven shapes: Add or redistribute stuffing with a chopstick; roll between palms to even out bumps.
-
Proper stuffing balance: Stuff in small increments for control; use small tufts for precise shaping.
-
Joining parts seamlessly: Match stitch counts between parts and use small invisible stitches; pin in place before sewing.
-
Reading patterns: Expand abbreviations and sketch sequence mentally check whether rounds are joined or spiral.
-
Secure tiny parts: Use multiple passes of thread when attaching small parts (beak, comb). Knot and weave tails thoroughly.
-
Hiding yarn ends: Weave ends through multiple rows inside stuffing in a zig-zag to secure.
-
Shaping petals: Wet-block or steam very lightly (only if yarn tolerates heat) to shape petals test a scrap first.
Care Instructions
-
Washing: Hand wash with mild detergent and cool/lukewarm water; avoid agitation.
-
Drying: Gently press to remove water; lay flat to air dry, reshape while damp.
-
Sun exposure: Keep out of prolonged direct sunlight to prevent fading.
-
Storage: Store in a breathable bag away from dust and pests (lavender sachets help deter moths).
-
For gifts: Attach a small care card with washing instructions.
Display & Gift Ideas
-
Nursery décor: A soft version (no loose parts) makes a cute shelf buddy for a nursery.
-
Table décor: Group small chickens in a bowl as seasonal decor.
-
Desk friend: Keep a tiny chicken on your desk for cheerful company.
-
Holiday gift: Make a themed hat (Christmas poinsettia, Easter flower) for seasonal presents.
-
Party favors: Small versions make memorable handmade party gifts.
Benefits of Making Crochet a Chicken Flower Hat
Creating this little amigurumi brings more than a finished toy:
-
Relaxation & mindfulness: The meditative rhythm of single crochet calms the mind.
-
Stress relief: Crafting focuses attention and reduces anxiety.
-
Accomplishment: A finished mini project offers a visible, portable win.
-
Sustainable gifting: Handcrafted gifts reduce waste and show personal effort.
-
Emotional connection: Each stitch holds intention a meaningful present for loved ones.
Photography & Social Media Tips
Make your photos as cute as your chicken.
-
Shoot in natural window light for soft, flattering results.
-
Use simple props: yarn balls, hooks, small flowers or tiny wooden crates.
-
Choose a neutral background (wood, linen, soft pastel paper) to highlight colors.
-
Capture close-ups of texture and facial details.
-
Create flat-lay scenes with the hat and accessories to show pattern components.
Project Summary Table
| Category | Details |
|---|---|
| Skill Level | Easy – Intermediate |
| Estimated Time | 3–8 hours (depends on size & details) |
| Finished Size | 3–8 inches (dependent on yarn/hook) |
| Estimated Cost | $5–15 |
Conclusion
The Crochet a Chicken Flower Hat amigurumi blends playful charm with satisfying technique: a round, huggable body topped by a tiny floral hat that gives it character. It’s an excellent pattern for makers who want a quick, rewarding project that’s full of customization potential. From pastel baby gifts to colorful market pieces, this chicken can be made in endless styles and sizes.
Pick your favorite yarn, pick a soothing playlist or podcast and enjoy the slow, mindful process of making. With each stitch you’re not only crafting an adorable toy you’re creating a small bundle of warmth and personality that will make anyone smile. Happy hooking!