
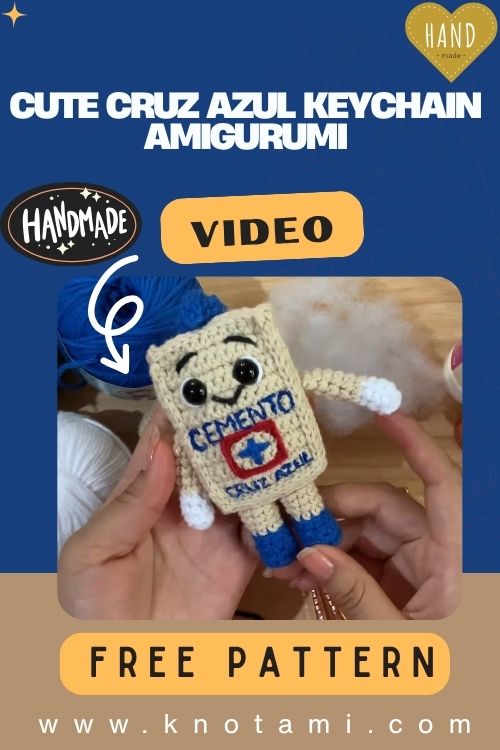
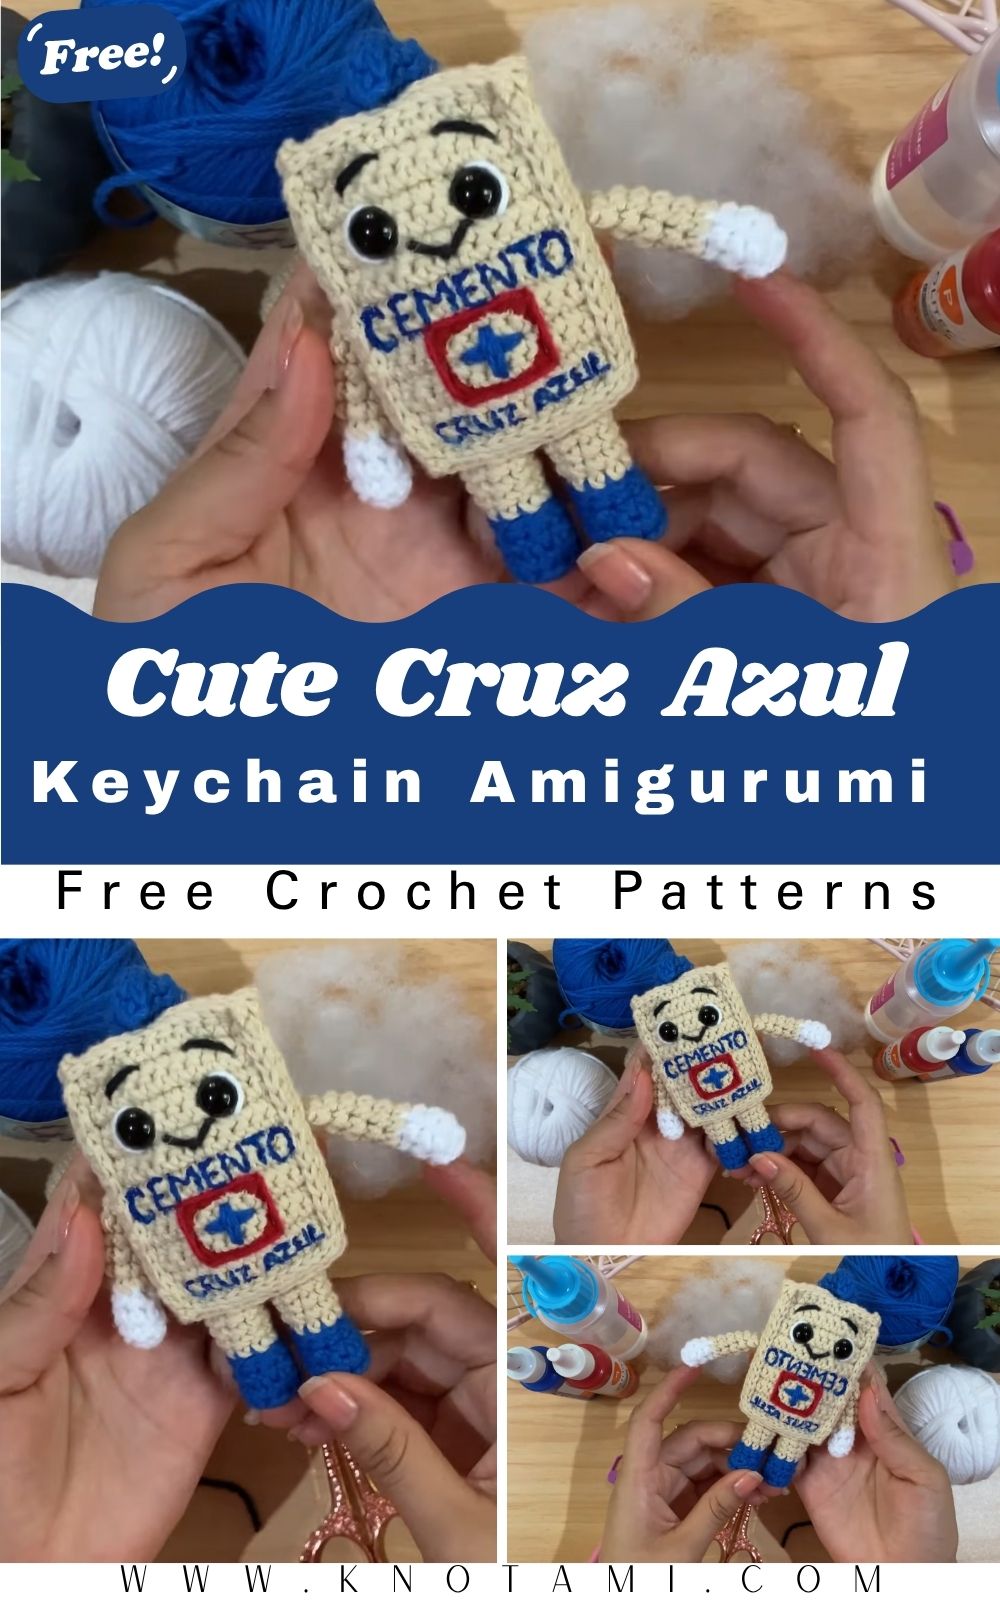
Are you a fan of Mexican soccer or perhaps you are looking for the perfect handmade gift for a sports lover? Today, you are in the right place because I will show you how to create a stunning Crochet Cruz Azul Keychain Amigurumi. This project is inspired by the famous “Costalito” mascot, and it is designed to be both cute and professional. Even if you are relatively new to the world of crochet you will find that this pattern is approachable and fun to work on because we use simple stitches to achieve a great result.
Crocheting your own sports memorabilia adds a personal touch that store bought items simply cannot match. This Crochet Cruz Azul Keychain Amigurumi is small enough to fit on your keys or backpack but detailed enough to show off your team spirit. In this blog post you will find every detail you need from the specific yarn colours to the final assembly of the face. Let us grab our hooks and get started on this exciting creative journey together.
The video embedded above serves as a perfect companion to this written guide. Consequently, seeing the tension of the yarn or the exact placement of the hook often makes all the difference in your final result. You can watch Dareli’s expert hands as she navigates color changes and the assembly process. Furthermore, I recommend watching the video once through to get a feel for the shape of the mascot. Once you have a general idea, you can refer back to the specific timestamps as you follow the written instructions below. In addition, this dual approach ensures that you won’t miss a single stitch while working on your Cruz Azul crochet pattern.
Skill Level: Easy to Intermediate
Although the stitches are basic, the project includes small parts, embroidery, and careful placement so the keychain hangs nicely. Therefore, a bit of patience is required during the assembly phase.
Materials Needed
Before you start your project, make sure you have these supplies ready on your craft table. Specifically, you will need:
-
Yarn Colors: Royal Blue (Azul Rey), White, Beige, and a small amount of Black and Red.
-
Crochet Hook: A 2.5 mm hook for tight, clean stitches. Indeed, a smaller hook prevents stuffing from showing.
-
Safety Eyes: Size 10 mm to give your amigurumi a cute expression.
-
Stuffing: High-quality polyester fiberfill.
-
Tools: Sharp scissors, a yarn needle, and a stitch marker.
-
Adhesives: Cold or hot silicone glue (optional).
-
Final Touches: Textile paint (Red and White) and a keychain ring.
Step-by-Step Guide to Your Amigurumi
1. Crafting the Body Panels
To begin your Crochet Cruz Azul Keychain Amigurumi, you need to create the main body. First, start by making a slip knot and chain 13 with your beige yarn. Next, from the second chain from the hook, work 12 single crochets. Subsequently, you will repeat this for 16 rows in total. Notably, you should always chain one and turn at the end of each row to keep the edges straight. You need to make two identical rectangular pieces. Following this, these will serve as the front and back of your mascot.
In addition to the front and back, you must create the side panels. For instance, for the longer side pieces, chain 17 and work 16 single crochets for 4 rows. Make two of these. Meanwhile, for the top and bottom panels, chain 13 and work 12 single crochets for 4 rows. As a result, these six pieces will eventually form the “costalito” or little sack shape.
2. Shaping the Arms and Legs
Now, let’s work on the limbs. Regarding the arms, start with white yarn in a magic ring of 8 single crochets. After working two rounds of 8 stitches, perform one decrease and then 6 single crochets on row 4. Then, switch to beige yarn and work from row 5 to 9. Importantly, stuff the arm lightly before closing it with 3 single crochets.
On the other hand, for the legs, use the royal blue yarn. Initially, start with a chain of 3. Afterward, work around the chain to create an oval base. Specifically, increase in each stitch until you have 12. To create a flat base, work one row in the back loops only (BLO). Following several rows of decreases to shape the foot, switch to beige yarn to finish. Consequently, you will have two sturdy legs ready for attachment.
3. Creating the Signature Helmet
The little blue helmet is a key feature of this design. To begin, start with a magic ring of 6 stitches using blue yarn. Then, increase in every stitch to reach 12. Moreover, work two more rounds of 12 stitches to give it height. Additionally, you need to crochet a small strip of 8 single crochets to go over the top. In doing so, you add the perfect athletic touch to your amigurumi.
Detailed Assembly and Final Touches
Once all your pieces are crocheted, the assembly phase begins. First and foremost, place the safety eyes on the front panel at row 12. In terms of spacing, leave four stitches of separation. Following this, use slip stitches to join all the body panels together. However, remember to stuff the body firmly before you close the final seam. Otherwise, the mascot might lose its shape over time.
Next, sew the arms to the sides and the legs to the bottom. Specifically, ensure they are symmetrical so the keychain hangs straight. Afterward, use your red yarn to embroider a square in the center of the chest. Inside this square, you will paint the “Cruz” using white textile paint. Furthermore, you can add the word “MEXICO” to make it look official. Finally, attach your keychain ring to the top center.
Common Mistakes to Avoid
Even though this pattern is straightforward, errors can occur. For example, one common error is losing track of the row count. Since the body is made of multiple flat panels, if one panel is shorter, the sack will look lopsided. Therefore, always use your stitch marker.
Another mistake is overstuffing the limbs. If you overstuff the arms, they will stick out awkwardly. In contrast, light stuffing allows them to rest naturally. Additionally, be very careful with the textile paint. Because the paint needs time to set, make sure it is completely dry before handling. If not, you might smudge the logo and ruin your hard work.
Professional Tips for Success
To improve the quality of your amigurumi, consider the following suggestions:
-
Consistent Tension: Above all, keep your tension even. If your stitches are too loose, the stuffing will peek through.
-
Yarn Choice: While cotton yarn is preferred for definition, acrylic yarn is softer. Nevertheless, cotton usually holds the “sack” shape better.
-
Color Swapping: When changing colors, pull the new color through the last two loops of the previous stitch. Consequently, the transition will look seamless.
Frequently Asked Questions
Can I use a different size hook for this project?
Yes, you can use a different hook, but it will change the size. For instance, a larger hook makes a bigger mascot. However, ensure your yarn matches the hook to avoid gaps.
How do I wash my amigurumi keychain?
Because this item has textile paint, I recommend spot cleaning. Specifically, use a damp cloth. In short, do not put it in a washing machine, as the agitation might damage the details.
Is this pattern suitable for absolute beginners?
Absolutely! Provided you know the basic single crochet, you can do this. In fact, the flat rectangles are much easier than working in complex 3D rounds. Thus, it is a perfect entry-level project.
Where should I attach the keychain ring?
Typically, most people prefer the top center. Regardless of your choice, make sure you sew it through several stitches for security.
Conclusion
In conclusion, crafting a Crochet Cruz Azul Keychain Amigurumi is a rewarding experience for any fan. By following this guide, you have learned how to create panels, shape limbs, and assemble a professional-looking mascot. Moreover, you now know how to avoid common pitfalls like uneven tension or smudged paint. Ultimately, whether you keep it for yourself or sell it at a craft fair, this handmade piece is a testament to your skill. So, grab your hook and start your next project today!