
There’s something truly magical about the art of crochet. The gentle rhythm of yarn slipping through your fingers, the satisfying pull of each stitch, and the way colourful strands transform into something warm and tangible, it’s creativity made visible. Crochet isn’t just a craft; it’s a beautiful form of self-expression that blends patience, artistry, and comfort. Every handmade piece tells a story, stitched with care and filled with love.
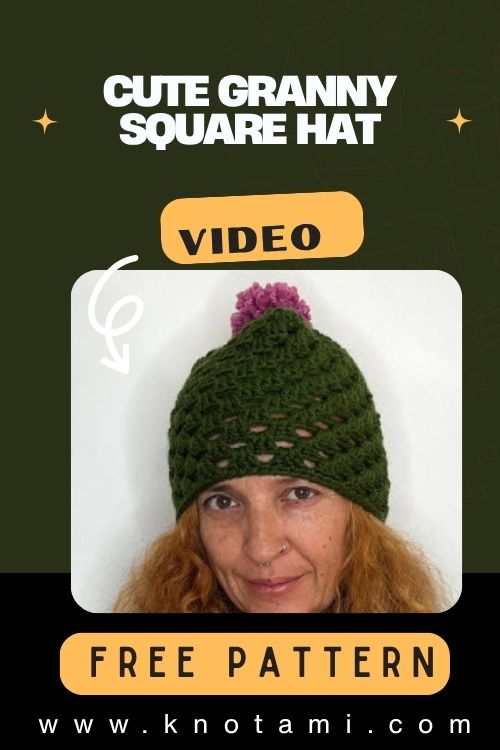
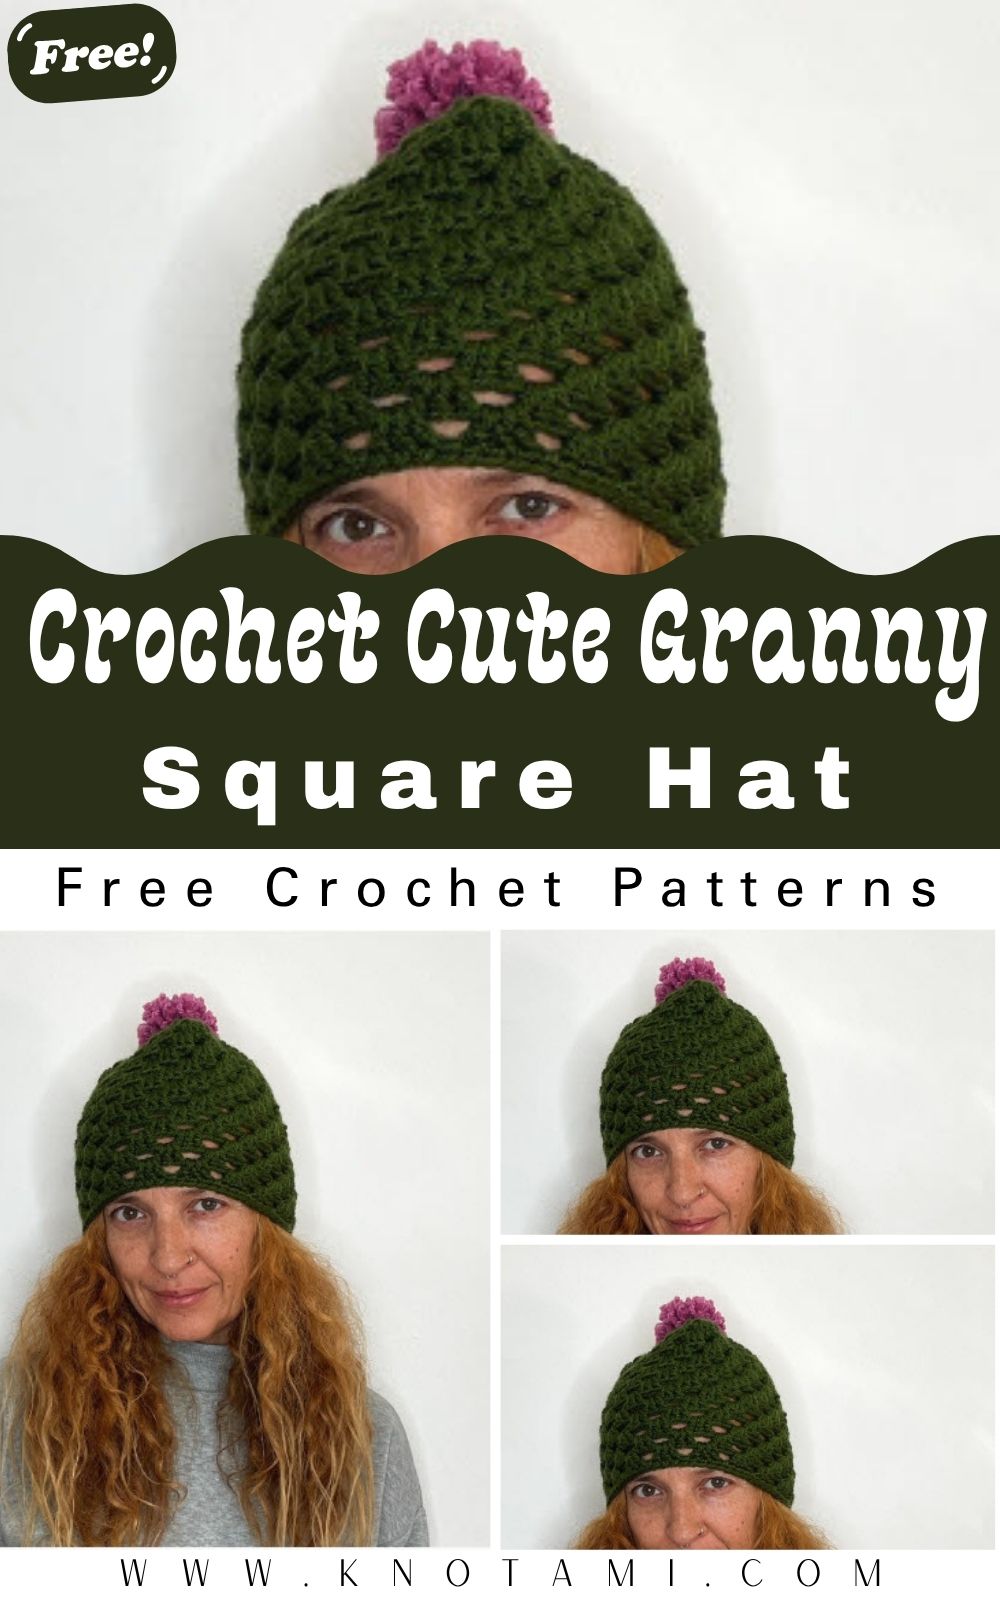
The DIY Crochet Cute Granny Square Hat Pom-Pom Pattern captures that same joy of creation turning simple yarn into a wearable masterpiece. With its classic granny square charm, vibrant color combinations, and the playful addition of a fluffy pom-pom, this hat radiates cozy personality. It’s not only cute and trendy but also a wonderful nod to vintage crochet traditions with a modern twist. Whether you’re heading out for a walk in chilly weather or simply want to show off your handmade style, this granny square hat will make you stand out with cheerful handmade flair.
What makes this project extra special is that it’s suitable for all skill levels. Beginners will love its simple stitches and easy construction, while experienced crocheters can play with patterns, color layouts, and textures. You’ll get to explore new joining techniques, perfect your stitch tension, and enjoy the instant gratification of watching your squares come together into something wearable and delightful.
Beyond the finished hat itself, crocheting is a soothing ritual. The repetitive motion, the soft feel of yarn, and the gradual build-up of your work offer a calming escape from the digital world. Crafting a granny square hat is a perfect slow-living project — one that brings mindfulness, focus, and joy. Whether you keep it for yourself or gift it to someone special, each stitch will carry warmth, love, and the magic of handmade art.
Materials & Tools You’ll Need
To make your Cute Granny Square Hat with Pom-Pom, you’ll need the following materials:
Yarn
-
Type: Acrylic or cotton blend yarn works best for structure and comfort.
-
Weight: Worsted weight (medium/4).
-
Colors: Choose 3–5 coordinating shades for your granny squares (base color, accents, and border).
Tip: Soft acrylic yarns give flexibility and warmth, while cotton offers a crisp, breathable finish.
Crochet Hook
-
Recommended size: 4.0 mm (G/6) or 4.5 mm (7) depending on your yarn’s thickness.
-
Check your gauge before starting to ensure proper sizing.
Pom-Pom Maker
-
Optional but highly recommended for a neat, full pom-pom. Alternatively, you can use a cardboard ring or your hands.
Tapestry Needle
-
For weaving in yarn ends and joining your granny squares.
Scissors
-
A sharp pair for trimming yarn ends and shaping your pom-pom.
Stitch Markers
-
To mark the beginning of rounds or to help align squares evenly during assembly.
Measuring Tape
-
Ensures your hat fits your head comfortably.
Yarn Color Tips:
If you’re going for a modern look, choose pastel tones like blush pink, sage, cream, and mustard. For a classic retro feel, pick bold colors teal, orange, and brown. You can also make a seasonal version — red and green for Christmas or cool blues for winter.
Step-by-Step Crochet Instructions
This crochet project combines the charm of granny squares with a cozy hat shape. Let’s go step by step.
1. Make the Granny Squares
Start by crocheting multiple granny squares these will form the base of your hat.
Step-by-Step:
-
Begin with a magic ring.
-
Round 1: Chain 3 (counts as 1 double crochet), work 2 double crochets, chain 2, (3 dc, ch 2) three times. Join with a slip stitch.
-
Round 2: Slip stitch to the corner, chain 3, (2 dc, ch 2, 3 dc) in each corner space, separated by 1 chain between groups.
-
Round 3–4: Continue expanding with (3 dc, ch 2, 3 dc) corners, separated by chain 1 along sides.
-
Fasten off and weave in ends.
You’ll need 6–8 squares for a regular adult hat (depending on the desired fit).
Pro Tip:
Block your squares before joining them. Lightly steam or pin them flat to make assembly easier and ensure even edges.
2. Joining the Squares
Now it’s time to form the hat’s body.
Step-by-Step:
-
Arrange your granny squares in a ring formation usually four squares around the base, then two on top.
-
Use the slip stitch join or whip stitch method to attach them neatly.
-
Be sure that all color transitions line up cleanly.
-
Once joined, the piece will form a tube-like shape.
Expert Tip:
For a seamless look, use the same color yarn as your square borders. Join through the back loops only to create an almost invisible seam.
3. Shaping the Hat Crown
To shape the top of your hat:
-
With your main color, attach yarn to the top edge of your granny square tube.
-
Crochet single crochet stitches evenly around the top to create a solid edge.
-
Begin decreasing each round by skipping every 5th or 6th stitch.
-
Continue until the top is closed, leaving a small hole for attaching the pom-pom.
Tip: Keep tension even while decreasing to avoid puckering.
4. Creating the Brim
-
Attach yarn to the bottom edge of your hat.
-
Work single crochet or half double crochet stitches around.
-
Add 3–4 rounds for a thick, cozy brim. You can even fold it up for extra warmth.
Optional: Alternate colors for each brim round to give your hat a fun striped finish.
5. Making the Pom-Pom
No granny square hat is complete without a fluffy pom-pom!
Step-by-Step:
-
Wrap yarn around a pom-pom maker (or your hand) about 80–100 times.
-
Tie the center tightly with yarn.
-
Cut along the loops and trim evenly to round it out.
-
Securely attach it to the top of your hat with a double knot.
Tip: For an extra pop, make a multi-colored pom-pom by wrapping two yarn colors together.
6. Assembly and Finishing Touches
-
Weave in all loose ends using a tapestry needle.
-
Steam lightly to shape your hat.
-
Optionally, add a decorative tag or crochet flower.
Expert Tip:
If your hat feels too loose, add a round of elastic yarn inside the brim for a snug, fitted look.
Customization Ideas
One of the best parts of making your own granny square hat is the creative freedom!
Color Variations:
-
Monochrome Magic: Shades of one color from light lavender to deep purple for a sophisticated gradient.
-
Retro Revival: Bold orange, teal, mustard, and cream for vintage vibes.
-
Winter Wonderland: Soft blues and whites for a frosty, cozy appeal.
Yarn Options:
-
Chunky yarn makes a warmer, oversized hat.
-
Cotton yarn gives a light, breathable hat for spring.
-
Alpaca or wool blend adds softness and natural insulation.
Add-ons:
-
Sew on buttons or beads in the square centers.
-
Crochet a matching scarf or fingerless gloves.
-
Make themed versions like pastel Easter tones, holiday red and green, or even rainbow pride colors.
Advanced Tips & Troubleshooting
Here are 10 pro-level tips to elevate your project:
-
Invisible Decrease: Insert hook through front loops of next 2 stitches, yarn over, pull through, yarn over again, pull through both loops this avoids bumps.
-
Even Stitch Tension: Relax your grip and keep consistent yarn flow.
-
Prevent Twisting Rounds: Always check your joining direction before continuing.
-
Avoid Gaps Between Squares: Use slip stitches instead of whip stitch for tighter joins.
-
Fix Uneven Shapes: Gently block or steam with a pressing cloth.
-
Proper Stuffing Balance (for pom-pom): Avoid over-trimming shape gradually.
-
Joining Parts Seamlessly: Work in back loops only to create smooth, flexible seams.
-
Reading Abbreviations: Keep a quick reference sheet sc = single crochet, dc = double crochet, ch = chain, sl st = slip stitch.
-
Consistent Gauge: Make a test square before starting.
-
Finishing Polish: Always weave ends in at least 2–3 directions to secure them tightly.
Care Instructions
Your handmade hat deserves gentle care to last for years.
-
Hand wash only using mild detergent or baby shampoo.
-
Avoid wringing; instead, press gently to remove excess water.
-
Lay flat to air dry, reshaping it as it dries.
-
Keep away from direct sunlight to prevent color fading.
-
Store flat or on a mannequin head to preserve its shape.
Pro Tip:
If gifting, include a small tag with care instructions a lovely touch for any handmade present.
Display & Gift Ideas
Once your granny square hat is ready, there are so many delightful ways to use or gift it!
-
Home Décor: Display it on a hat rack or mannequin as part of your cozy corner setup.
-
Wardrobe Staple: Pair it with a neutral coat or chunky scarf.
-
Children’s Accessory: Use bright, cheerful colors for kids they’ll love the playful pom-pom!
-
Seasonal Gift: Perfect for Christmas, birthdays, or winter holidays.
-
Craft Fair Favorite: Handmade granny hats always sell well add cute packaging or name tags for your brand.
Benefits of Crocheting a Granny Square Hat
Crocheting isn’t just a hobby it’s therapy for the soul.
-
Relaxation & Mindfulness: The repetitive motion of crochet calms the mind.
-
Stress Relief: Focusing on yarn and color patterns helps reduce anxiety.
-
Creativity & Accomplishment: Watching your squares turn into a beautiful hat is deeply satisfying.
-
Eco-Friendly: Handmade items reduce fast fashion waste.
-
Heartfelt Gifting: Nothing beats giving something made with your own hands full of time, thought, and love.
Each hat you make becomes more than an accessory; it’s a token of warmth, connection, and artistry.
Photography & Social Media Tips
Ready to show off your masterpiece? Here’s how to capture it beautifully:
-
Use Natural Light: Soft daylight makes yarn colors pop.
-
Clean Background: A white or wooden surface works great.
-
Add Props: Place balls of yarn, crochet hooks, or a cup of tea beside your hat.
-
Try Flat Lays: Arrange the hat neatly with other crochet items for a cozy aesthetic.
-
Capture Details: Zoom in on stitches or pom-pom texture for Instagram close-ups.
-
Consistency: Use the same filter or lighting style across your photos to create a cohesive crochet feed.
Conclusion
There’s an unmatched sense of joy that comes from turning a few balls of yarn into something beautiful, functional, and full of charm. The DIY Crochet Cute Granny Square Hat Pom-Pom Pattern is more than just a winter accessory it’s a creative expression of warmth, nostalgia, and personality. Every stitch carries the touch of your hands and the rhythm of your heart.
So, grab your hook, choose your colors, and let your imagination guide you. Whether you’re crafting on a quiet Sunday morning or sharing laughs with friends at a crochet night, this project brings happiness stitch by stitch. When you finally place that soft pom-pom on top and slip your new hat over your head, you’ll feel the magic of handmade art cozy, colorful, and completely your own.