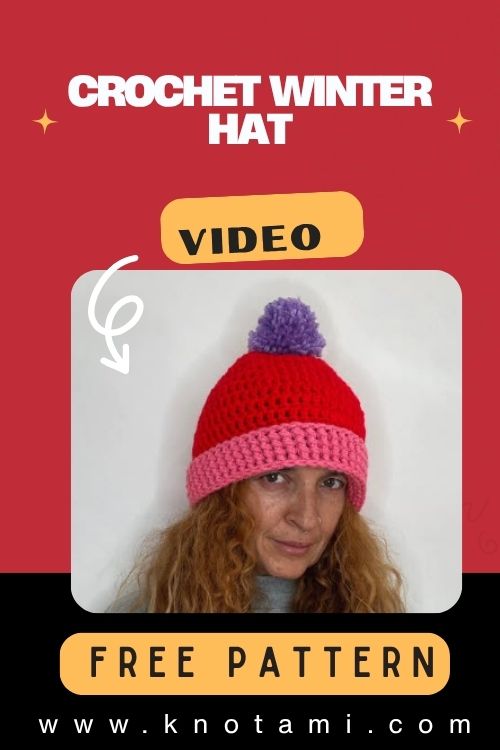
How to Crochet Winter Hat Cozy Pom-Pom Beanie Pattern
There’s something truly magical about the art of crochet how a simple skein of yarn can transform into a piece of warmth, beauty, and creativity. Every loop and stitch carries a little bit of heart, patience, and imagination. Crocheting allows you to turn something soft and ordinary into something extraordinary, and that’s what makes handmade creations so special. Whether it’s a scarf, a toy, or a cozy hat, every project is filled with the warmth of your hands and your spirit.
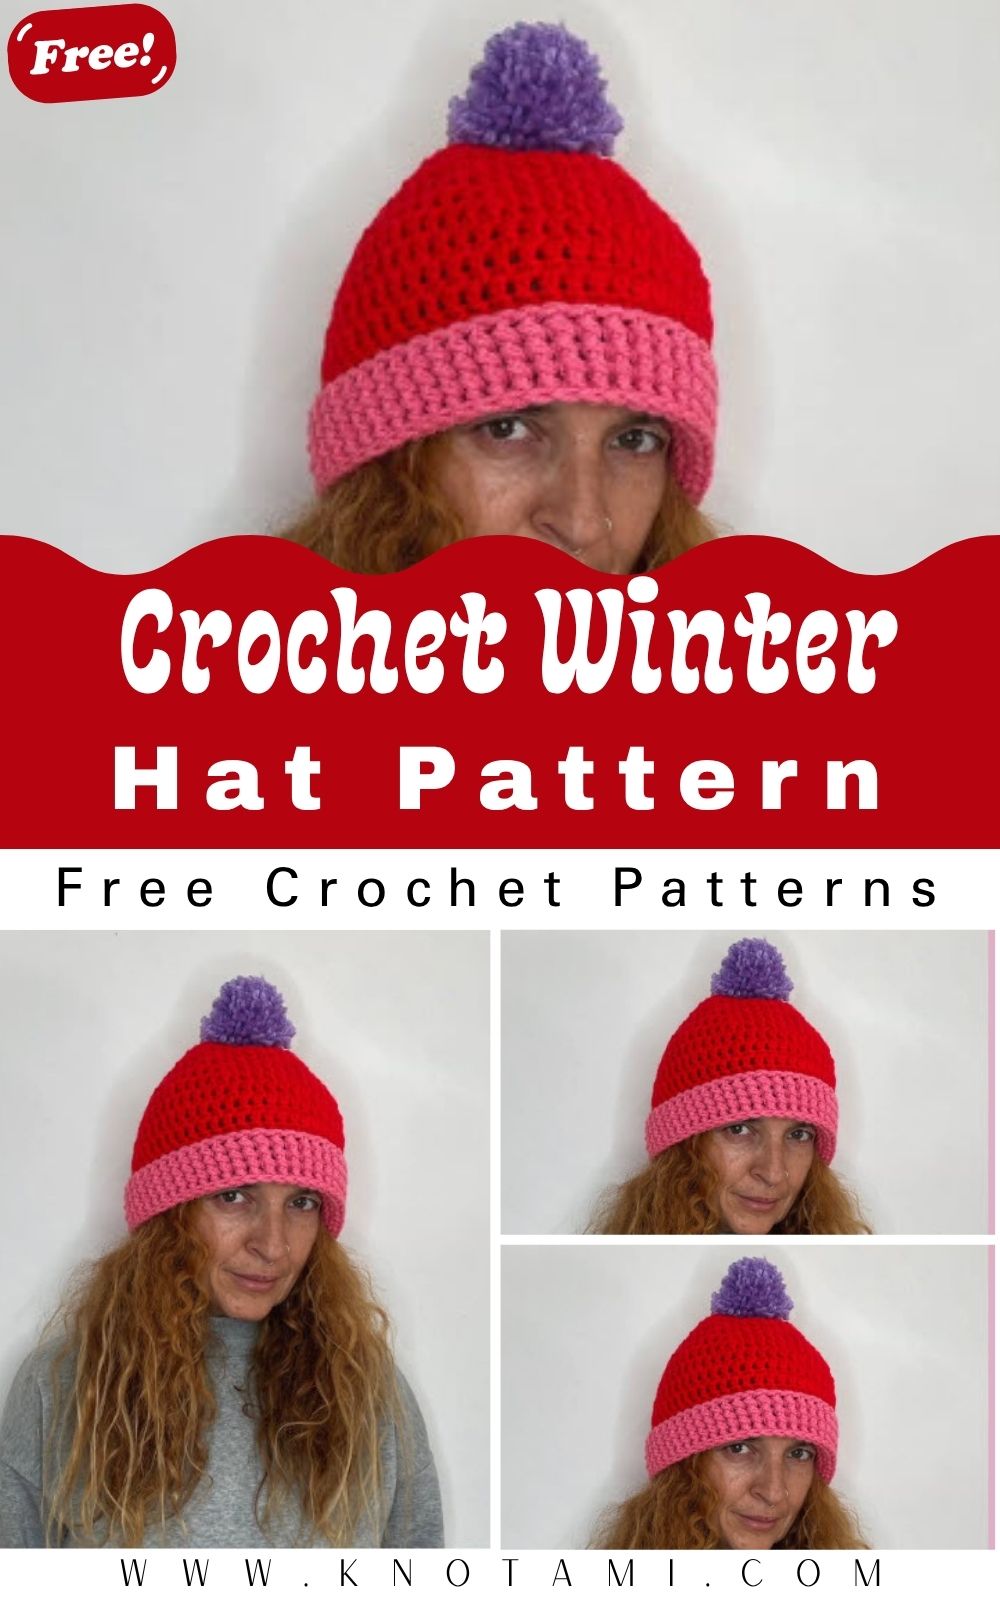
The DIY Crochet Winter Hat Cozy Pom-Pom Beanie Pattern is a perfect example of this creative transformation. This adorable and snug winter accessory is not only practical but also incredibly stylish. The fluffy pom-pom on top adds a touch of playful charm, while the soft yarn wraps your head in comfort. Whether you’re heading out for a chilly walk or want to stay toasty indoors, this crochet beanie will quickly become your favorite winter essential.
One of the best parts about this crochet project is its accessibility. It’s easy enough for beginners to follow yet satisfying for experienced crocheters looking for a quick and cozy project. You’ll explore simple stitches, basic shaping techniques, and a few creative details that make the hat uniquely yours. No complicated patterns just the soothing rhythm of crochet hooks and yarn working together.
Beyond its beauty and practicality, crocheting this winter hat can be an incredibly meditative experience. The repetitive motion of the stitches, the soft texture of the yarn between your fingers, and the growing shape of the hat are all part of a peaceful creative journey. It’s the perfect slow craft ideal for unwinding after a busy day, or for making thoughtful handmade gifts that bring warmth and smiles to loved ones.
Materials & Tools
To make your Crochet Winter Hat Cozy Pom-Pom Beanie, gather the following materials and tools before you begin:
Materials:
-
Yarn: Medium weight (Category 4) acrylic or wool-blend yarn
Tip: Choose a soft, warm yarn that feels good against your skin. Wool blends are perfect for cold weather, while acrylic is easy to care for. -
Hook Size: 5.0 mm (H/8) crochet hook
-
Tapestry Needle: For weaving in ends and sewing parts if necessary
-
Scissors: Sharp scissors for trimming yarn ends
-
Stitch Markers: To mark your round beginnings or key points in the pattern
-
Pom-Pom Maker (optional): For creating the perfect fluffy top
-
Measuring Tape: To check your gauge and ensure the right fit
Choosing the Right Yarn
When choosing yarn, consider both texture and color. A soft, bulky yarn will give your hat a plush, snug look, while lighter yarns make it drapier. Neutrals like cream, beige, and gray give a timeless winter vibe, while bold colors burgundy, mustard, or teal add a trendy pop to your wardrobe. You can even mix two tones for a marbled effect!
Step-by-Step Crochet Instructions
Here’s a step-by-step breakdown of how to make your Cozy Pom-Pom Beanie. The process follows a classic top-down construction that’s both simple and fun.
Step 1: Create the Crown
-
Start with a magic ring and chain 2 (this counts as your first half double crochet).
-
Work 10 half double crochets into the ring.
-
Pull the ring tight and join with a slip stitch to the first stitch.
-
For the next few rounds, increase evenly:
-
Round 2: 2 HDC in each stitch (20 stitches)
-
Round 3: 1 HDC, 2 HDC in next stitch repeat around (30 stitches)
-
Round 4: 2 HDC, 2 HDC in next stitch repeat (40 stitches)
Continue increasing until the circle reaches about 6.5–7 inches in diameter this forms the crown of the hat.
-
Pro Tip: Use a stitch marker to keep track of your round beginnings. Consistent counting helps your hat stay symmetrical.
Step 2: Shape the Body of the Hat
-
Once the crown is the right size, stop increasing and continue working even rounds in half double crochet.
-
This creates the main body of the hat.
-
Continue crocheting until the piece measures around 7–8 inches tall from the crown.
Expert Tip: Try on the hat as you go! This ensures the right depth and snug fit for your head shape.
Step 3: Add the Ribbed Brim
-
Switch to single crochet or front post/back post double crochet to create a ribbed texture.
-
Crochet around the bottom edge for 4–6 rows, depending on your preferred brim thickness.
-
This ribbing gives your hat a professional, stretchy finish.
Styling Tip: You can fold the brim upward for a classic cuffed look or leave it unfolded for a slouchy style.
Step 4: Make and Attach the Pom-Pom
-
Using leftover yarn, wrap it around a pom-pom maker (or your fingers) 60–80 times, depending on desired fluffiness.
-
Tie it tightly in the center, cut the loops, and fluff it into a round shape.
-
Trim uneven ends to neaten it up.
-
Sew the pom-pom securely onto the top of your beanie using your tapestry needle.
Pro Tip: Make sure the pom-pom is tightly fastened you don’t want it flying off during a windy winter day!
Step 5: Final Assembly and Touches
-
Weave in all yarn ends using your tapestry needle.
-
Block your hat gently if needed to smooth out stitches.
-
Optional: Add a faux leather tag, button, or embroidery for a personalized touch.
Customization Ideas
Crochet projects are meant to express creativity and your winter hat is no exception! Here are fun ways to make it your own:
-
Color Variations: Try stripes, ombré yarns, or a two-tone combo.
-
Yarn Choices: Use chunky yarn for extra warmth or velvet yarn for a luxurious finish.
-
Seasonal Themes:
-
Holiday Edition: Red and green with a white pom-pom.
-
Frosty Edition: Light blue and silver for a wintry look.
-
Rainbow Edition: Multicolored yarn for a vibrant statement piece.
-
-
Add Accessories: Sew on a crochet flower, bow, or button. You can even attach ear flaps or braided tassels for a cute twist!
Creative Tip: Match your beanie with a crochet scarf or mittens using the same yarn to create a full handmade winter set.
Advanced Tips & Troubleshooting
Here are some expert crochet tricks to elevate your project:
-
Invisible Decreases: When reducing stitches, use the front loops only to create smooth, nearly invisible transitions.
-
Consistent Tension: Keep your yarn tension steady too tight and your hat will shrink; too loose and it’ll lose shape.
-
Avoid Twisting Rounds: Always check that your stitches stay flat before joining each round.
-
Fix Uneven Edges: If your rounds aren’t even, count stitches carefully and adjust by adding or removing one as needed.
-
Pom-Pom Perfection: Brush your pom-pom gently with a small comb to make it fluffier.
-
Joining Seamlessly: Use the invisible join method to avoid a noticeable seam at the back.
-
Reading Abbreviations: Familiarize yourself with common abbreviations like HDC (half double crochet), SC (single crochet), and SL ST (slip stitch).
-
Gauge Checking: Always crochet a small sample before starting to ensure your hat fits properly.
-
Blocking: Steam blocking can relax stitches for a smoother, professional finish.
-
Customization Fit: Add or subtract rounds in the body section for a perfect, tailored fit.
Care Instructions
Keep your handmade winter hat looking as soft and new as the day you made it:
-
Wash Gently: Hand wash with cold water and mild detergent.
-
Avoid Heat: Never wring or tumble dry; instead, gently squeeze out water.
-
Dry Flat: Lay the hat on a towel to air dry naturally.
-
Avoid Sunlight: Direct sunlight can fade bright yarn colors.
-
Storage: Store in a cool, dry place avoid hanging to prevent stretching.
Bonus Tip: Add a few drops of lavender essential oil to your storage area to keep the hat fresh and moth-free.
Display & Gift Ideas
Your cozy crochet beanie can be used and gifted in countless thoughtful ways:
-
Handmade Gift: Perfect for birthdays, holidays, or winter surprises.
-
Home Décor: Hang it by the fireplace or use it as part of a cozy winter display.
-
For Kids: Make smaller versions for children add tiny animal ears for fun!
-
Desk Accessory: Use it as part of your crochet display or winter workspace aesthetic.
-
Charity: Donate handmade hats to shelters or winter clothing drives a meaningful way to share your craft.
Benefits of Crocheting a Winter Hat
Creating a Crochet Winter Hat Cozy Pom-Pom Beanie goes far beyond just making a piece of clothing:
-
Relaxation & Mindfulness: The rhythmic motion of crochet helps calm the mind and improve focus.
-
Stress Relief: Crafting with yarn releases tension, letting your mind drift peacefully.
-
Sense of Accomplishment: Watching your project grow stitch by stitch brings pure satisfaction.
-
Eco-Friendly Crafting: Handmade accessories reduce fast fashion waste.
-
Connection Through Handmade Gifts: A handmade hat carries love and care that store-bought items can’t match.
Photography & Social Media Tips
If you love sharing your creations online, here’s how to capture your crochet beanie beautifully:
-
Natural Light: Take photos near a window or outside for the best results.
-
Simple Backgrounds: Use soft colors like white, beige, or gray to make your hat pop.
-
Props: Include cozy winter elements yarn skeins, a mug of cocoa, or pinecones.
-
Angles: Try close-ups to highlight texture and stitch detail.
-
Consistency: Use similar lighting and editing styles for a clean social media feed.
Conclusion
Crocheting your own Winter Hat Cozy Pom-Pom Beanie is more than just a project it’s an act of creativity, mindfulness, and love. From the first loop to the final pom-pom, every stitch you make brings comfort and beauty to life. The joy of wearing something handmade especially on chilly days is unmatched.
So, pick your favorite yarn, grab your hook, and start this cozy adventure. Whether it’s for yourself or a loved one, this crochet beanie will warm both your heart and your head. After all, the best kind of winter accessory isn’t just made of yarn it’s made with love.