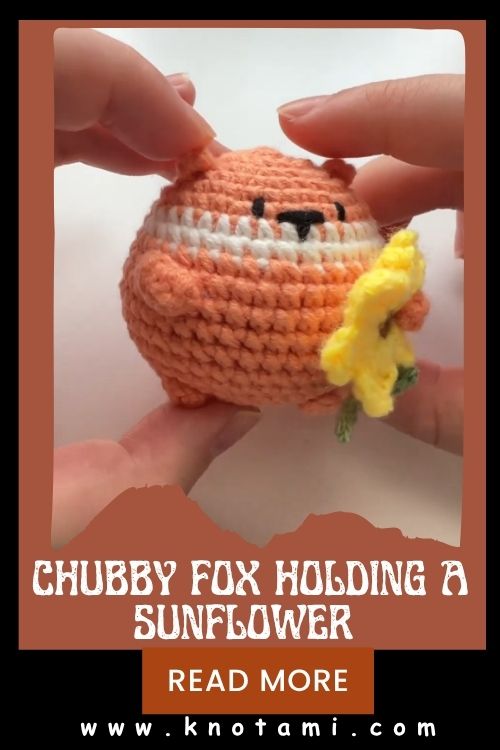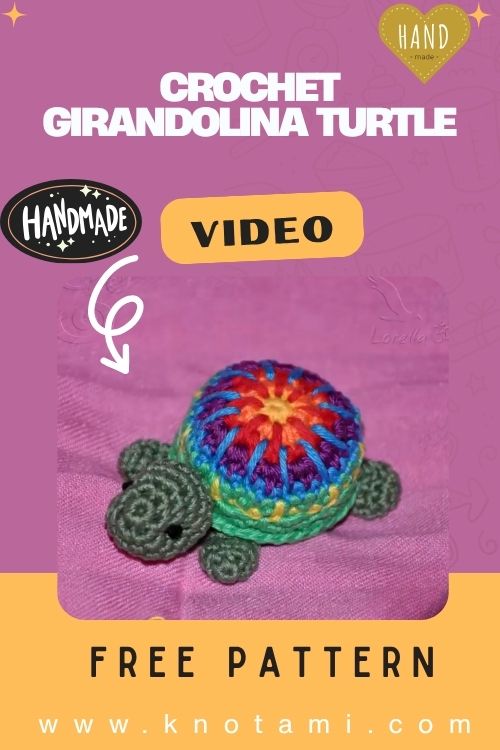
DIY Crochet Girandolina Turtle Amigurumi Plush Toy
There’s something truly magical about taking a strand of yarn a crochet hook and a handful of creative inspiration then transforming them into a soft, playful, and heartwarming creation. Whether you’re a seasoned crocheter or just beginning to explore the world of amigurumi, the act of crafting from scratch invites a peaceful rhythm into your day. Crocheting is more than a hobby it’s a calming ritual, a creative outlet, and a slow, mindful practice that brings fiber to life.
In this tutorial, we’ll be exploring how to make the Crochet Girandolina Turtle, a delightful and colorful soft turtle plush inspired by the beautiful pattern from the YouTube artist behind this project. It has its own playful charm, with a spiral shell, rounded head, and tiny limbs that are irresistibly cute. Whether you’re making this turtle for a child’s room, as a desk buddy, or as a heartfelt crochet gift, it’s sure to spark joy with its personality and gentle aesthetic.
Ideal for both beginners and advanced crocheters, this project combines simple stitches, clever construction techniques, and customizable detailing. From crafting the head and shell to assembling the soft limbs and adding sweet accessories, this plush turtle gives you space to learn, explore, and enjoy the creative journey.
Plus, the meditative flow of working in the round, the joy of shaping tiny pieces with your hands, and the satisfaction of finishing a handmade creature make this project perfect for slow crafting a soothing activity for busy days and a thoughtful way to gift something with personal warmth and care.

Materials & Tools
To create your very own Crochet Girandolina Turtle Amigurumi Plush Toy, here’s what you’ll need:
Yarn
-
Yarn Type: 100% cotton or acrylic yarn (DK or worsted weight)
-
Shell Color: Your main color (e.g., pastel pink, mint green, etc.)
-
Body Color: A complementary shade like beige, green, or cream
-
Accent Colors: For spiral shell effect or accessories
Hook
-
Hook Size: 2.5 mm – 3.5 mm (adjust per yarn weight and tension)
Extras
-
Safety Eyes: 6–10 mm, depending on plush size
-
Stuffing: Polyfill or washable fiberfill
-
Scissors: Small, sharp pair
-
Tapestry Needle: For sewing pieces together
-
Stitch Markers: Helpful for working in continuous rounds
Yarn Selection Tips
-
Soft yarns like cotton or acrylic blends give the turtle a plush feel and great stitch definition.
-
Use contrasting colors for the body and shell to make details pop.
-
For a softer, baby-safe version, choose hypoallergenic yarn with a plush texture.
4. Step-by-Step Crochet Instructions
Below is a step-by-step guide to help you make the Girandolina Turtle from start to finish. The design uses basic crochet techniques commonly found in amigurumi-style crafting, like working in the round, increasing, and decreasing stitches.
1. Making the Head
-
Start with a Magic Ring, and work 6 single crochets (sc) into the ring.
-
Round 2: Increase in each stitch (12 sc).
-
Continue increasing by 6 stitches each round until you reach the desired head circumference.
-
Rounds 6–10: Work even rounds (no increases) to form a smooth dome.
-
Insert safety eyes between rounds 4 and 5.
-
Gradually decrease to close the head, stuffing lightly before sealing.
Expert Tip: Add a tiny bit more stuffing on the cheeks to give your turtle a cute, rounded face.
2. Forming the Neck and Body
-
Attach yarn under the head and begin working in the round.
-
Increase gradually to form a rounded upper body.
-
Work even rounds for body depth, then start decreasing slightly to shape the turtle’s back.
Tip: Use stitch markers every few rounds to keep rounds even and avoid twisting.
3. Crafting the Spiral Shell
-
Using a contrasting color, start a flat circle with spiral color changes.
-
Alternate 2–3 rows of each color to create the spiral effect.
-
For the 3D effect, work back loop only on the last round, then continue working around the edge to add volume.
-
Stuff firmly before sealing off and attaching to the body.
Pro Tip: Use a color change marker to cleanly switch colors without visible jogs.
4. Shaping the Base and Belly
-
To form the belly, crochet a simple flat circle in the body color.
-
Work increases like the shell but keep it slightly smaller.
-
Sew the belly onto the underside of the body, matching stitches as you go.
5. Creating the Limbs & Tail
-
Legs: Crochet small tube shapes in your chosen body color. Stuff lightly and close with slip stitches to give them a rounded, stubby look.
-
Tail: A tiny, lightly stuffed cone shape done in just a few rounds.
Tip: Make limbs in pairs to help match sizes and fullness easily.
6. Final Assembly
-
Sew head to body securely with yarn and needle.
-
Attach legs evenly on each side for balance.
-
Position and stitch on shell firmly, adjusting the angle and placement.
-
Add additional touches like a little bow or embroidered smile.
Expert Tip: Always pin parts before sewing to visualize placement and prevent misalignment.
5. Customization Ideas
Want to make your Crochet Girandolina Turtle all your own? Here are some creative ideas:
-
Choose Rainbow Colors: Make the shell spirals in gradient or pastel rainbow tones.
-
Holiday Themes: Red and green yarn with gold accents for Christmas.
-
Fantasy Turtle: Use variegated yarn for the shell and bright neons for a whimsical creature.
-
Accessories: Crochet a tiny hat, bow tie, or backpack to make your turtle extra stylish.
-
Texture Play: Use faux fur yarn for the body or a sparkly yarn for the shell.
6. Advanced Tips & Troubleshooting
Here are expert-approved tips to help keep your amigurumi looking neat and professional:
-
Invisible Decreases: Use front-loop-only decreases to avoid visible bumps.
-
Even Tension: Keep yarn wraps consistent and relax your hands periodically.
-
Avoid Twisted Rounds: Always mark your round starts and check alignment.
-
Fix Holes on Decreases: If a hole forms, go back and slip stitch tightly behind it.
-
Proper Stuffing: Fill slowly and gently. Overstuffing can distort your plush shape.
-
Seamless Joining: Use hidden stitches or whip stitch cleanly to attach parts.
-
Counting Stitches: Count after every few rows to catch errors early.
-
Yarn Splitting: Use smoother yarns and avoid overly sharp hooks.
-
Eye Safety: Lock safety eyes tightly before closing the head.
-
Avoid Overworking Stitches: Too many frogging attempts can weaken yarn.
7. Care Instructions
To keep your amigurumi turtle plush looking cuddly and fresh:
-
Hand wash gently in cold water using mild detergent.
-
Press lightly to remove water and reshape.
-
Air dry flat, away from direct heat or sunlight.
-
Store in a clean, dry place when not in use.
-
For plush gifted to kids, check seams occasionally for wear.
8. Display & Gift Ideas
Your finished Crochet Girandolina Turtle is more than just a toy it’s a story, a hand-stitched hug, a unique piece of decor, and a memory in fiber form! Here’s how you can cherish it:
-
As a desk companion to keep you smiling during work.
-
Add to a nursery shelf or playroom for a splash of handmade charm.
-
Include as part of a skincare or book-themed gift basket.
-
Use in a seasonal display near flowers or plants.
-
As a reading buddy or bedtime friend for children.
9. Benefits of Crafting the Crochet Girandolina Turtle
-
Mindfulness: Repeat stitches help you unwind and stay present.
-
Stress Relief: Soft yarn and smooth motions create a calming ritual.
-
Eco-Friendly: DIY plushes reduce reliance on mass-produced gifts.
-
Personalized Gifting: Handmade = from the heart.
-
Creative Joy: Watching your yarn come to life is deeply fulfilling.
10. Photography & Social Media Tips
Want to share your creation online or on Pinterest? Here’s how to make your turtle look picture-perfect:
-
Use natural light avoid harsh artificial lighting.
-
Choose calm backgrounds like white fabric, wood desks, or outdoor greenery.
-
Add props like small plants, thread spools, or yarn baskets.
-
Capture close-up shots of the shell spiral, face details & stitching texture.
-
Try staged shots of the turtle holding a mini sign or flower.
11. Conclusion
The joy of making a Crochet Girandolina Turtle Amigurumi Plush Toy comes not just from the finished plush, but from every stitch, color choice, and creative decision along the way. By using your hands to bring yarn to life, you’re creating something truly special not just a plaything or decor piece, but a piece of art, a keepsake, a reminder of slow living and mindful making.
Whether it becomes a treasured child’s companion, a thoughtful handmade gift, or a sweet desk friend keeping you cozy during long days, this turtle lovingly crafted by you will always carry a piece of your creativity and warmth. So grab your yarn, pick your colors, and start creating your new crochet friend is waiting!