

Crocheting has that power to turn a simple thread into something you can hold gift or display with pride. It’s not just about creating; it’s about experiencing joy, peace and creative expression through every stitch. With each loop of the hook you watch your imagination take shape, forming something tangible and heartwarming, crafted slowly and lovingly by your own hands.
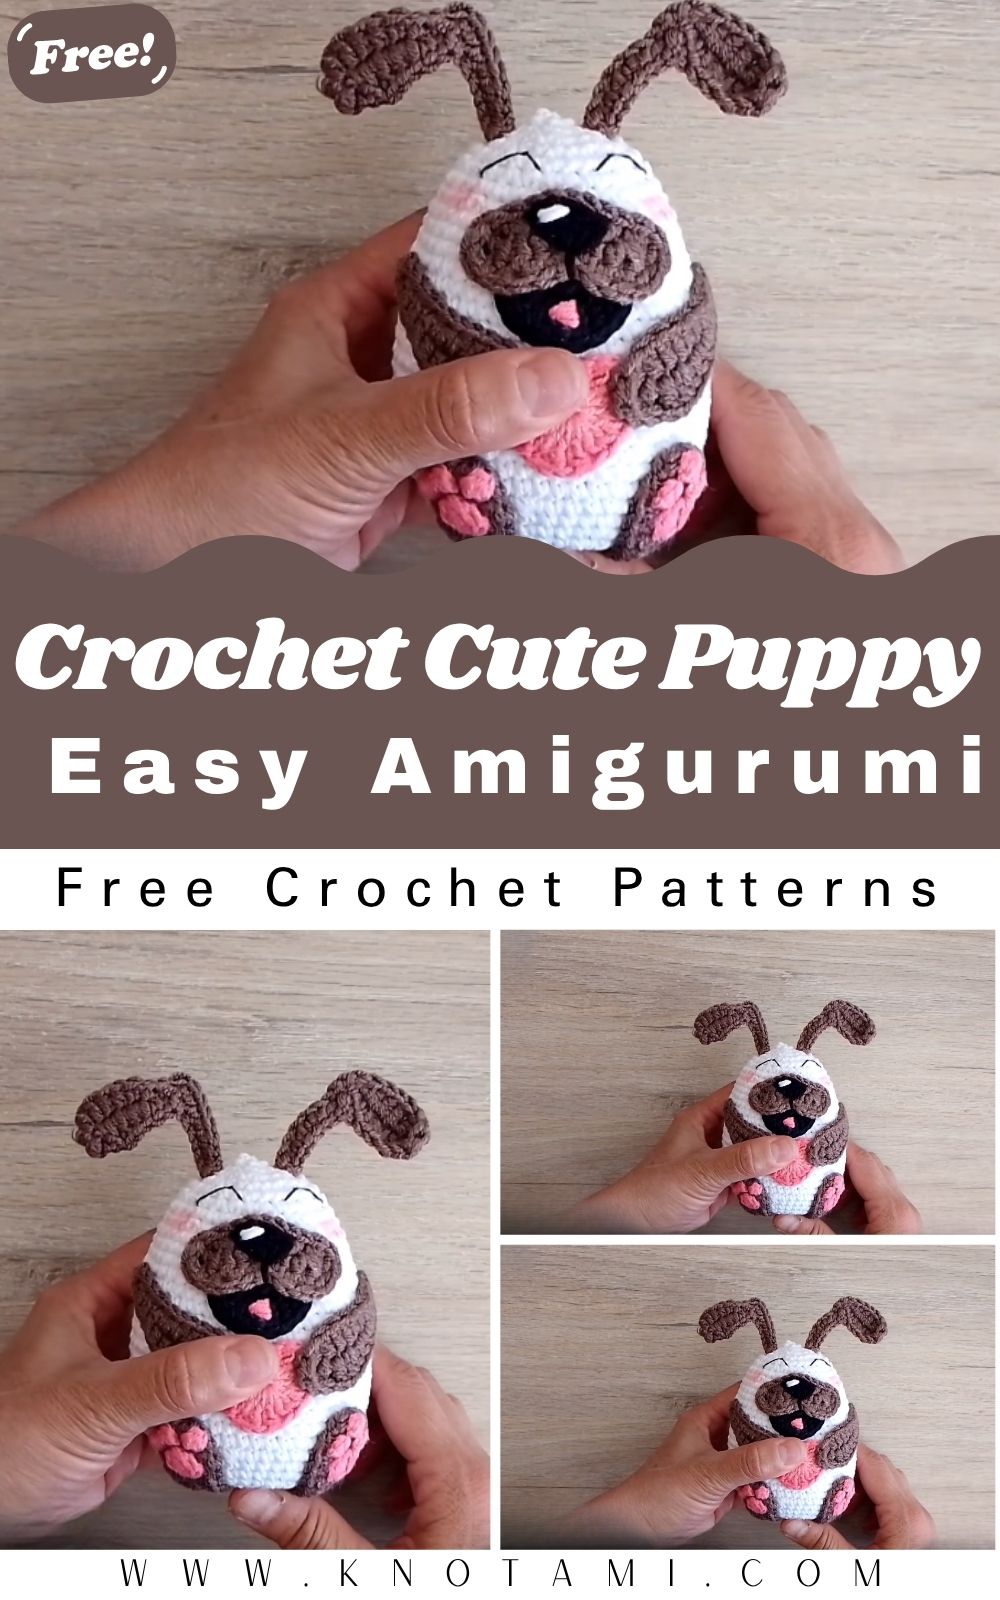
The Crochet Cute Puppy Amigurumi Pattern, a delightful and cuddly dog plush toy that’s just impossible not to hug. With its sweet little nose floppy ears and round yarn-wrapped paws, this crochet puppy is the perfect mix of adorable and classic. Whether you’re looking to make a new friend for a child a keepsake for a pet lover, or simply a charming piece to showcase your crochet skills, this project brings joy both in the process and the result.
Materials & Tools
To make your own crochet puppy amigurumi plush toy gather the following essential tools and supplies:
Yarn
-
Type: 100% acrylic or cotton yarn
-
Weight: DK or worsted (Lightweight for small puppies, medium for larger plush)
-
Colors Needed: Base color (e.g., cream, brown), accent colors for ears, nose, bow, etc.
Yarn Tip: Pick soft yarn in natural shades for classic dogs (like beige, chocolate, or black), or go fun and bold with pastels or rainbow hues for a kawaii look!
🪝 Crochet Hook
-
Size: 2.5mm – 4mm (ideal depending on your yarn weight)
Always go down one hook size from what the yarn recommends for neat amigurumi stitches.
Stuffing
-
Polyester Fiberfill: Soft and durable. Avoid overstuffing to prevent stretching.
Safety Eyes
-
Size: 6mm – 10mm (larger for bigger plush)
-
Backings included to secure
-
Alternatively, embroider eyes for child-safe plush toys
Other Essentials
-
Scissors
-
Stitch marker
-
Tapestry needle for sewing parts
-
Optional: blush powder, fabric glue, ribbon or bow tie
Pro Tip: Use a stitch marker to easily track your rounds—you’ll thank yourself later!
Step-by-Step Crochet Instructions
Follow these instructions to create your cute crochet puppy step by step. This written version is inspired by the tutorial video but expanded and enriched in descriptive detail.
1. Making the Head
Start with a magic ring (MR) and work in continuous rounds.
Tip: Shape the head as you stuff gently, favoring roundness at the top and slight oval toward the snout area for authentic puppy proportions.
2. Forming the Neck and Upper Body
Attach yarn and continue seamlessly or crochet as a separate piece to sew later.
Tip: Don’t overstuff the neck; keep it slightly firm to support the head and keep shape.
3. Building the Main Body
Your body should resemble a gentle oval with a round belly, perfect for seated posing later.
4. Shaping the Ears
Pick your ear style floppy or pointy!
Floppy Ear (Make 2):
Pokémon ears look adorable too play around with sizes and yarn weights for custom looks.
5. Creating the Legs and Tail
Legs (x4)
Tail (optional)
Tail Tip: Leave unstuffed if you want a cute little curl lightly stuff if you want more shape.
6. Assembly & Positioning
Here’s where it all comes together:
-
Sew head to neck firmly using whip stitch
-
Position and sew ears on either side of head (floppy or perky)
-
Attach front legs in sitting position
-
Sew back legs at side or base for realistic posture
-
Add tail at back seam
Expert Tip: Pin parts first to balance alignment before sewing.
7. Adding Final Details & Accessories
-
Embroider a small “V” shape for the nose
-
Add a sleepy or happy embroidered mouth
-
Brush on light blush to the cheeks
-
Crochet a bowtie or add a ribbon around the neck
-
Add a collar with beads or tiny bell for adorable detail
Make It Unique: Try a little felt bone or crochet ball to add to your final display scene.
Customization Ideas
Here are some creative ideas to make your puppy unique:
-
Color Palette: Use variegated baby yarn for a soft rainbow puppy.
-
Breeds: Brown with white patches for a Beagle, black for a Lab, white with tan spots for a Jack Russell.
-
Holiday Style: Add a Santa hat or red scarf for Christmas versions.
-
Wedding Puppies: Make a bride and groom set with veil and tux bow.
-
Fantasy Hybrid: Try unicorn horn, pastel body, and sparkly ears!
With endless customization options, you can create a whole squad of puppies, each with their own charm and personality.
Advanced Tips & Troubleshooting
-
Invisible Decreases: Use FLO method to avoid gaps.
-
Even Tension: Wrap yarn consistently; relax shoulders to prevent tightening.
-
Keep Round Balanced: Use stitch markers and count often!
-
Fix Lopsided Shapes: Adjust stuffing or pull seams tighter.
-
Joining Parts Seamlessly: Use whip stitch and blend color yarns for invisible join.
-
Pattern Abbreviations: sc = single crochet, inc = increase, dec = decrease, MR = magic ring.
-
Curved Ears: Insert light wire into edges for poseable ears.
-
Neat Color Changes: Drop old yarn and pull new one through final stitch loop.
-
Finishing Touches: Block finished plush lightly with steam to smooth uneven areas.
Care Instructions
Help your plush puppy stay fresh and cuddly:
-
Hand wash gently using mild soap
-
Air dry flat on soft cloth
-
Avoid direct sunlight (color fading risk)
-
Store in zip bag or display shelf to prevent dust build-up
Display & Gift Ideas
Your finished puppy plush makes a wonderful:
-
Bedside or nursery decor
-
Kids’ cuddle toy
-
Pet-lover gift
-
Backpack clip, ornament or mascot
-
Handmade keepsake for baby showers
-
Heartfelt gift for birthdays, anniversaries, or holidays
Gift Idea: Wrap in rustic kraft paper and tie with twine and dried flowers for ultimate handmade charm!
Benefits of Crocheting a Cute Puppy Plush
-
Improves focus and hand-eye coordination
-
Relieves stress through calming repetition
-
Boosts pride from seeing a lovable toy come alive
-
Creates eco-friendly, waste-free handmade gifts
-
Inspires creative expression through yarn, shaping, and accessories
Photography & Social Media Tips
Want to show off your crochet puppy? Here’s how to take great photos:
-
Shoot in natural daylight for even color
-
Style with props like baskets, yarn balls, or flowers
-
Use clean or pastel backgrounds
-
Try overhead and side views
-
Zoom in to capture stitch detail
Conclusion
Crocheting your own Cute Puppy Amigurumi Plush is a fulfilling journey from start to finish. Each stitch brings you closer to creating a lovable friend one that carries your time care and joy. Whether you’re gifting it showing it off or keeping it close this handmade plush speaks volumes. Slow down savor the craft and let your creativity run free. Because there’s nothing quite like creating something sweet, soft and full of personality from a simple ball of yarn.