Easy Crochet Mini Dino Amigurumi Pattern
Crocheting is much more than just pulling yarn through loops. It’s a magical process an art form that transforms a simple strand of fiber into something warm, meaningful, and deeply personal. The satisfaction of seeing your handmade creation come to life stitch by stitch is truly incomparable. Whether you’re creating a gift for someone special or adding a piece of handmade love to your collection, crochet offers a beautiful way to express your creativity.
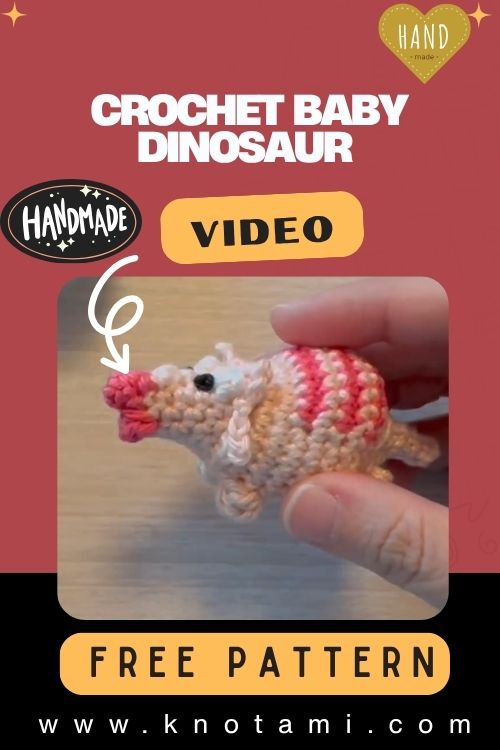
Today’s project is extra special meet the Crochet Mini Dino Amigurumi Pattern. This tiny dinosaur plushie is not only irresistibly cute but also easy to make, perfect for crochet lovers of all skill levels. With its lovable design, compact size, and endless customization options, it’s guaranteed to become one of your favorite amigurumi projects. Whether you’re new to the craft or a seasoned crocheter, this little dino will bring so much joy to your hook and heart.
What makes this pattern so appealing is its simplicity paired with creative freedom. You’ll learn fun techniques while enjoying a soothing, rhythmic craft that helps you unwind. This mini dino is a great introduction to amigurumi allowing beginners to practice shaping, stitching in the round, and simple assembly while advanced crocheters will appreciate how quickly it works up and how customizable it is.
So get comfy, grab your yarn and hook, and let’s take a peaceful crafting journey together. This crochet project is perfect for slow weekends, thoughtful gifts, or even turning into a cute keychain accessory all while giving you the joy of creating something with your own hands.

Materials & Tools You’ll Need
Before diving into our Crochet Mini Dino Amigurumi Pattern, let’s prepare everything needed to bring your mini plush to life.
Supplies List
-
Yarn: Worsted weight cotton or acrylic yarn (size 4). One main color for the dino body (e.g., green, blue, pink) and a contrasting color for spikes.
-
Hook: 3.0 mm (or recommended size for your yarn to achieve tight stitches).
-
Stuffing: Poly-fil or any soft fiber filler.
-
Safety Eyes: 6 mm or 8 mm round plastic eyes.
-
Scissors: For trimming yarn and shaping details.
-
Tapestry Needle: To sew pieces and weave in ends.
-
Stitch Marker: Useful when working in continuous rounds.
Yarn Choice Tip: Use cotton yarn for a clean, defined stitch look, or acrylic for a softer, more plush feel. Avoid fuzzy yarns if you’re still learning they can make it harder to see your stitches.
4. Step-by-Step Crochet Instructions
Let’s begin. This tutorial follows classic amigurumi techniques like working in the round, stuffing, shaping, and sewing pieces together. Refer to the video source as visual guidance only.
1. Making the Dino Head
-
Start with a magic ring and work single crochets (sc) in continuous rounds.
-
Increase gradually to form a rounded, dome-like shape.
-
Insert safety eyes between rounds (usually between rounds 4–6).
-
Continue shaping the head until you’re satisfied with the size.
-
Begin decreasing as you approach the neck area.
Pro tip: Use a stitch marker to always know where your round starts. Keep stuffing as you go to ensure a smooth shape.
2. Forming the Neck & Upper Body
-
Without fastening off from the head, continue crocheting the neck.
-
You’ll work fewer stitches in each round to create a slightly tapered shape.
-
Transition smoothly into building the upper body, increasing the stitch count to create width.
3. Building the Main Body
-
The main body is usually egg-shaped or cylindrical for this mini dino.
-
Continue rounds to achieve desired length, keeping the size proportional to the head.
-
Stuff evenly but avoid over-packing to prevent lumps.
4. Creating the Base or Legs
-
After shaping the body, close the opening tightly and secure with a yarn needle.
-
Legs can be small ovals or cylinder shapes, stitched onto the body symmetrically.
-
Sew on the bottom and front legs to make the dino stand or sit.
5. Adding Tail & Spikes
-
Crochet a small cone-shaped tail and sew it to the back.
-
Make small, triangle-like spikes or bobbles and attach them evenly along the dinosaur’s back.
-
Use contrasting yarn color for visual charm.
6. Assembly & Positioning
-
Lay out all body parts before sewing to confirm balance.
-
Use pins or clips to position limbs, tail, and head before stitching permanently.
-
Sew using tight, small stitches so seams are invisible.
7. Final Touches
-
Embroider a tiny mouth or blush spots if desired.
-
Add accessories like a flower crown, bow tie, or scarf to personalize.
Expert Tip: Always double-knot and hide ends inside the plush to avoid unraveling.
5. Customization Ideas
Looking to make your crochet dino one-of-a-kind? Here are some cute ideas:
-
Color Variations: Use pastel shades for a soft baby dino look, neon colors for fun, or go monochromatic for an elegant touch.
-
Yarn Textures: Swap standard yarn for velvet or chenille to make a fuzzy dino.
-
Themes: Try holiday dinos (red/green for Christmas, pinks for Valentine’s), or rainbow dinosaurs for pride-themed gifts.
-
Props & Accessories: Add hats, wings, backpacks, tiny glasses, or even a crocheted cupcake!
6. Advanced Tips & Troubleshooting
Even if you’re new to amigurumi, here are some expert tips to help you achieve a polished finish:
-
Invisible Decreases: Insert hook through front loops only to make decreases less visible.
-
Keep Even Tension: Don’t pull too tightly on yarn, or your stitches will shrink and distort shape.
-
Stitch Count Matters: Always count stitches to avoid accidental increases or decreases.
-
Avoid Twisting Rounds: Double-check your starting point and use stitch markers consistently.
-
Fixing Gaps: Add extra stitches using small backstitch or invisible stitching if you find holes after stuffing.
-
Stuff Lightly but Firmly: Too much stuffing stretches stitches; too little makes the dino floppy.
-
Join Parts Seamlessly: Use the whip stitch or ladder stitch for a clean edge.
-
Pattern Abbreviations: Familiarize yourself with common terms like sc (single crochet), inc (increase), dec (decrease).
7. Care Instructions
To make sure your Crochet Mini Dino stays adorable for years:
-
Wash: Hand wash with lukewarm water and mild detergent.
-
Dry: Squeeze gently and air dry flat.
-
Avoid: Direct heat, harsh scrubbing, and bleach.
-
Storage: Keep in a cool, dust-free space when not on display (great for long-term gifting).
8. Display & Gift Ideas
Your Crochet Mini Dino Amigurumi makes a wonderful:
-
Decor Piece: add to shelves, desk corners, or nursery rooms.
-
Handmade Gift: perfect for birthdays, holidays, or baby showers.
-
Backpack Charm or Keychain: attach a ring to make it portable.
-
Holiday Ornament: hang on Christmas trees or use in crochet garlands.
9. Benefits of Making Crochet Mini Dinos
Creating this Crochet Mini Dino Amigurumi Pattern is more than just crafting:
-
Mindfulness: Repetitive stitches calm the mind and improve focus.
-
Emotional Connection: Handcrafted gifts express care and love.
-
Eco-friendly: Uses natural or recyclable materials.
-
Creative Outlet: Experiment with colors and styles freely.
-
Sense of Achievement: Each finished plushie is a symbol of creativity and patience.
10. Photography & Social Media Tips
Want to proudly share your little dino with the world? Here’s how to make it shine:
-
Natural Light: Shoot near a window or outside.
-
Props: Add yarn balls, plants, or soft fabrics for aesthetic appeal.
-
Close-ups: Highlight stitches or cute eyes.
-
Backgrounds: Neutral tones or pastels make the subject pop.
11. Conclusion
Crocheting a mini dino isn’t just about the finished toy it’s a journey of creativity, joy, and connection. With every stitch, you’re putting love into a piece that will bring smiles to whoever receives it (including yourself!). Whether you’re a beginner exploring the world of amigurumi or a seasoned crocheter looking for a quick and cute project, this Crochet Mini Dino Amigurumi Pattern is your perfect match.
Grab your yarn, take a deep breath, and enjoy the relaxing rhythm of crochet. Before you know it, your tiny dinosaur friend will be ready to roar with cuteness!