

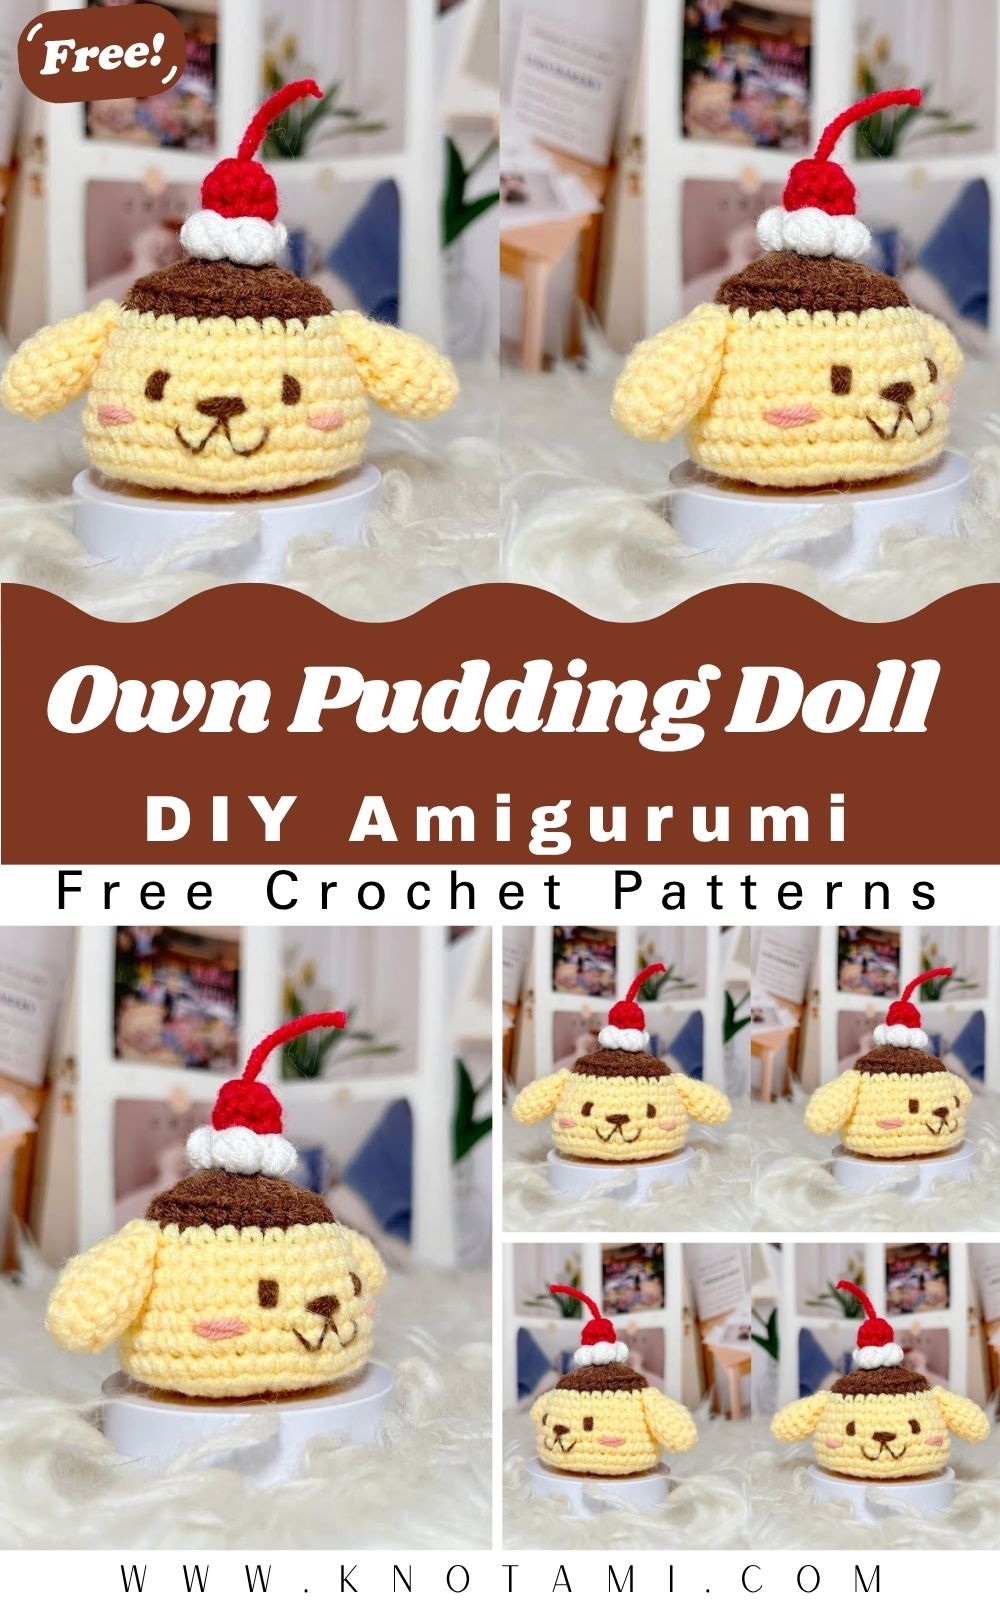
The Crochet Own Pudding Doll Amigurumi is the kind of make that brightens your day from the very first stitch. Inspired by a cozy, pudding-like silhouette, this little cutie features a softly rounded shape, a gentle smile, and charming details that bring it to life. It’s the perfect blend of adorable and simple, just right for a quick creative pick‑me‑up.
I love how petite and tidy it turns out. The smooth, even stitches give a clean, polished finish, and the palm-sized design feels so comforting in your hands. Display it on a shelf, tuck it into a gift box, or keep it close as a tiny companion. Its size makes it easy to love and easy to take along.
Materials Needed
Before you start, gather a few basic supplies. This project does not require anything fancy, which makes it great for using yarn you may already have.
-
Yarn: Smooth acrylic or cotton yarn, light worsted or DK weight, approximately small amounts per color
-
Crochet hook: Size 2.5 mm to 3.5 mm (adjust based on your tension)
-
Stuffing: Polyester fiberfill
-
Safety eyes or black embroidery thread for facial features
-
Tapestry or yarn needle
-
Scissors
-
Stitch markers
-
Optional items: Blush for cheeks, small bow, keyring, or decorative embroidery
When choosing yarn, go for something smooth rather than fuzzy. Clean stitch definition helps the pudding shape look neat and professional. Cotton yarn gives a slightly firmer finish, while acrylic creates a softer, squishier doll. Both work well, so it really depends on the final feel you prefer.
For colors, soft pastels and creamy tones work beautifully for pudding-themed dolls. Light yellow, beige, or caramel shades give a classic pudding look, while brighter colors can make it more playful and cartoon-like. Feel free to experiment with this pattern is forgiving and fun to customize.
Level of Difficulty
This Crochet Own Pudding Doll Amigurumi is beginner-friendly to easy-intermediate. If you already know basic amigurumi techniques, you will feel comfortable from the start. Even beginners who have made one or two small projects can follow along and learn as they go.
The skills used include single crochet, increases, decreases, working in continuous rounds, basic sewing, and simple embroidery. There are no complicated stitch patterns or advanced shaping techniques. Take your time, count your stitches carefully, and you’ll see the doll come together smoothly.
If something doesn’t look perfect right away, that’s completely normal. Amigurumi often looks a little uneven until it’s fully stuffed and assembled. With patience and small adjustments, you’ll be surprised how polished your finished piece looks.
Step-by-Step Overview
1. Starting the Base or Body
The project usually begins with a magic ring worked in continuous rounds. This creates the rounded base of the pudding doll. Increases are placed evenly to form a smooth circle that gradually grows into the main body shape.
At this stage, focus on keeping your tension consistent. If your stitches feel tight, consider going up one hook size. A relaxed but firm fabric helps the doll hold its shape without showing stuffing later.
2. Shaping the Main Body
Once the base is established, the body is built upward with even rounds. This is where the pudding shape really forms. The sides stay mostly straight for a bit, giving that classic cylindrical look.
Later, gradual decreases help close the top neatly. Before closing completely, pause and check that the shape looks even from all sides. If the body curves slightly, that is normal; gentle stretching and stuffing will help correct it.
3. Stuffing the Doll
Stuffing usually happens gradually as the body nears completion. Add small amounts at a time and press the fiberfill gently into place. This prevents lumps and keeps the shape smooth.
It helps to stuff a little, crochet a few stitches, then adjust again. At this stage, take a moment to check that the doll feels firm but not stiff.
4. Creating Facial Features
The face is what gives the pudding doll its personality. Safety eyes are typically placed before closing the body completely. If you prefer embroidery, simply stitched eyes work just as well.
Keep the face placement centered and symmetrical. At this stage, it helps to pause and check that both sides look even before securing anything permanently.
5. Adding Small Details
Depending on the design, you may add tiny arms, decorative toppings, or embroidered accents. These pieces are usually small and quick to make.
Sew each piece slowly and check positioning before tightening the yarn. A little adjustment here makes a big difference in the final look.
6. Final Assembly and Finishing Touches
Once all parts are attached, weave in loose ends carefully. Lightly shape the doll with your hands and smooth out any uneven areas.
Optional touches like blush on the cheeks, a tiny bow, or a keychain loop can be added at this stage to personalize your doll.
Special Features of This Pattern
This pattern stands out for its simplicity and charm. It’s designed to be enjoyable without feeling overwhelming.
-
Clear, easy-to-follow construction
-
Simple shapes with minimal sewing
-
Cute facial style that works with safety eyes or embroidery
-
Compact size that’s perfect for gifts or collectibles
-
Flexible design that allows lots of customization
The tutorial’s clear pacing and close-up views make it easy to understand each step, even if you’re still building confidence with amigurumi.
Tips for Best Results
A few small tips can make a big difference in how your finished doll looks and feels.
-
Keep your tension even throughout the project
-
Use stitch markers to track rounds accurately
-
Stuff gradually to avoid lumps
-
Place facial features before closing the body
-
Check symmetry before sewing pieces permanently
-
Adjust the hook size if the stitches look loose
-
Take short breaks to avoid hand fatigue
-
Shape the doll gently after finishing
Taking your time and enjoying the process often leads to the best results.
How to Use or Gift Your Crochet Own Pudding Doll Amigurumi
This little pudding doll is incredibly versatile. It works as a decorative piece on shelves, desks, or bedside tables. Many people also attach a small loop or keyring to turn it into a bag charm or keychain.
As a gift, it’s perfect for birthdays, holidays, baby showers, or as a thoughtful surprise for someone who loves handmade items. Pair it with a small box, a handwritten tag, or tissue paper for a polished presentation.
Because it’s soft and lightweight, it’s also suitable as a gentle toy for older children or a comforting keepsake for teens and adults.
Customization Ideas
One of the best things about this pattern is how easy it is to customize. Changing the yarn color instantly creates a new look. Soft neutrals feel classic, while bright colors make the doll playful and fun.
You can also experiment with different yarn types. Cotton gives a clean, structured finish, while velvet or chenille yarn creates a plush, cozy effect. Just remember to adjust your hook size accordingly.
For size changes, use a thicker yarn and a larger hook to make a bigger doll, or finer yarn for a mini version. Small add-ons like bows, embroidered details, or themed decorations let you make each doll truly unique.
Conclusion
Making a Crochet Own Pudding Doll Amigurumi is a relaxing and rewarding experience. It’s the kind of project that feels comforting from start to finish, with steady stitches and a cheerful result at the end.