Crochet Red Superhero Bug Amigurumi Pattern Toy
Have you ever felt the excitement of transforming a simple ball of yarn into something extraordinary? With crochet, that magic isn’t just possible it’s the goal! The satisfying rhythm of weaving each loop, stitch by stitch, brings peace to the mind and joy to the heart. There’s something incredibly powerful about taking a creative idea and turning it into a soft, tangible toy you can hug, admire, or gift.
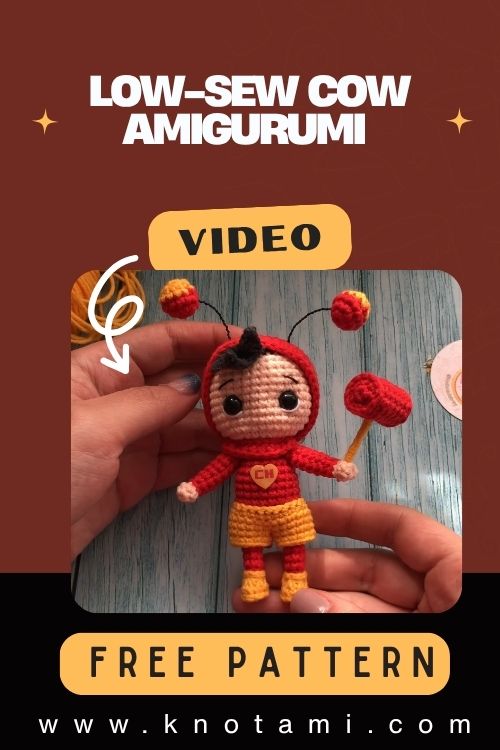
Today’s craft project is extra special we’re diving into the world of Crochet Red Superhero Bug amigurumi. Whether you’re a comic book fan, obsessed with bugs, or simply love adding cute heroes to your handmade collection, this toy is sure to steal your heart. With its bright red body, bold superhero mask, and charming antennae, this bug is the perfect mix of fun and fantasy and it’s absolutely beginner-friendly!
New to amigurumi? No worries. This red superhero bug project is suitable for crocheters of all levels. Even if it’s your first time making a round 3D plushie, you’ll enjoy the simple construction, step-by-step shaping, and adorable finishing touches. More experienced crafters can enjoy customizing the colors, adding personality, and perfecting their stitch consistency.
Crochet is more than just a craft it’s a form of healing and connection. The gentle motion, the flow of the yarn, the quiet time spent creating… it’s meditation with purpose. This Crochet Red Superhero Bug is a perfect project for slow crafting. Whether you make it for yourself or as a heartwarming handmade gift for someone special, this tiny hero brings joy to both maker and receiver. So grab your hook, set the yarn free, and let’s turn creativity into magic!

Materials & Tools
Here’s everything you’ll need to make your Crochet Red Superhero Bug:
Yarn
-
Yarn Weight: Worsted or DK (weight 3 or 4)
-
Main Color: Red (for body and limbs)
-
Secondary Colors: Black (mask), White (eye accents), Yellow or Gold (belt / cape / trim), Skin tone (face)
Tip: Choose soft, tightly spun acrylic yarn for durability and a smooth, plush finish. Cotton yarn is great for detailed texture, while chenille yarn adds fluffiness.
Tools
-
Crochet Hook: 3.0mm – 3.5mm (ideal for tight amigurumi stitches)
-
Safety Eyes: 8mm–10mm diameter (adjust to size of head)
-
Stuffing (Polyfill): High-quality, bouncy, hypoallergenic filling
-
Tapestry Needle: For sewing pieces and weaving ends
-
Stitch Marker: To mark the beginning of each round
-
Scissors: Sharp, precise pair
-
Pins: Optional, for positioning limbs before sewing
Choosing your yarn: A smooth yarn in vibrant shades brings the superhero bug to life. Look for thickness consistency and colors that match your favorite comic or superhero theme. Avoid fuzzy yarns if you’re a beginner.
4. Step-by-Step Crochet Instructions
Ready to begin your Crochet Red Superhero Bug amigurumi? Let’s break it down into easy steps. Each piece is crocheted separately in the round and joined at the end.
Step 1: Crochet the Head
Skill Level: Easy
-
Begin with skin tone yarn.
-
Round 1: Magic ring with 6 single crochets (sc).
-
Round 2: 2 sc in each stitch = 12 sc.
-
Continue increasing evenly (18 → 24 → 30 → 36 → 42), until the head is nicely round.
-
Place safety eyes between Rounds 9-10, about 6 stitches apart.
Pause here to attach eyes and maybe embroider a cute smile before closing. Start stuffing firmly.
Step 2: Form the Neck & Upper Body
Switch to red yarn:
-
Crochet a few rounds without increasing to create a narrower neck.
-
Begin increasing again as you move down to form a rounded upper torso.
Tip: Use markers to note front and back to keep shaping symmetrical.
Step 3: Build the Main Body
-
Continue crocheting in red yarn.
-
Crochet several more rounds evenly until the body reaches the desired length.
-
Decrease gradually towards the bottom to close up the shape.
This section should be slightly wider than the head to match plush proportions.
Step 4: Create the Arms & Legs
-
Crochet 4 cylindrical limbs in red (or striped if you’d like).
-
Start with 6 sc in a circle, increase to 12, then maintain the circle for about 8–10 rounds.
Stuff lightly (or leave unstuffed for floppy limbs!).
Step 5: Craft the Mask, Belt, and Accessories
-
Mask: Use black yarn to crochet a small oval shape that wraps the head horizontally.
-
Chain enough stitches to reach around the head → single crochet back and forth to create a band.
-
Sew it across the face, positioning it right above the eyes.
-
Cape (Optional): Chain 18–20 stitches, double crochet rows until desired length, then attach at the back.
Step 6: Assembly
-
Sew the head to the body.
-
Attach arms slightly under neck level.
-
Position legs evenly at the base.
-
Add antennae or optional details like a mini lightning bolt, tiny goggles, or a hero badge.
Assembly Trick: Pin limbs in place before sewing to ensure symmetry.
Final Touches
-
Embroider smile and eyebrow details.
-
Attach white felt circles under safety eyes for extra kawaii charm.
-
Brushed yarn ends or embroidered initials give added personality.
And just like that you’ve created your very own Crochet Red Superhero Bug!
5. Customization Ideas
Let your creativity fly! Here are a few fun ways to personalize your bug:
-
Color Variations: Try blue and silver for a futuristic bug, pink and sparkles for a princess version, or green and gold for an earthy woodland guardian.
-
Themed Versions: Candy cane stripes for Christmas, black and orange for Halloween, pastels for babies.
-
Add Accessories: Crochet a tiny sword, a pencil, or even a heart make each bug uniquely themed.
-
Play with Textures: Try velvet yarn for a plush finish or add felt wings for extra superhero flair.
6. Advanced Tips & Troubleshooting
Here are expert tips to help your superhero bug turn out adorable every time:
-
Use Invisible Decreases for a seamless closing.
-
Keep Tension Consistent to avoid bumpy rounds.
-
Prevent Twisting by using stitch markers for every round.
-
Stuff Firmly and Evenly to avoid saggy shapes.
-
Sew Limbs Symmetrically, pinning in place first.
-
Use Long Tail Ends for secure sewing and shaping.
-
Check Face Placement early before stuffing fully.
-
Use Felt or Embroidery if you don’t want safety eyes.
-
Avoid Loose Stitches they’ll show stuffing.
-
Practice Your Magic Ring for a clean center.
7. Care Instructions
-
Hand wash only in cool water with mild detergent.
-
Gently press excess water with a towel don’t wring!
-
Air dry flat, reshaping limbs and head as it dries.
-
Avoid direct sunlight to prevent fading.
-
Store in breathable packaging if gifting or displaying.
8. Display & Gift Ideas
This Crochet Red Superhero Bug is ready to save the world (or your bookshelf!). Here’s how you can use it:
-
As a kids’ bedroom decor item.
-
Perched on a desk for daily inspiration.
-
Dangling as a playful car or bag charm.
-
As a handmade Valentine’s or birthday toy.
-
Packaged in a DIY amigurumi gift box with matching tag.
9. Benefits of Making the Crochet Red Superhero Bug
-
Mindfulness & Relaxation: Repetitive motions calm the mind.
-
Stress Relief: A perfect way to unwind and recharge.
-
Artistic Expression: Choose colors, styles, and personality.
-
Sustainable Gift-Giving: Handmade beats mass-produced every time.
-
Lasting Emotional Value: A crochet creation is both art and keepsake.
10. Photography & Social Media Tips
Want to share your finished superhero bug online? Try this:
-
Shoot in natural daylight for true colors.
-
Use props: Yarn bundles, capes, tiny books, etc.
-
Soft, neutral backgrounds work best to make Red pop.
-
Try close-up shots emphasizing the eyes or mask.
-
Share process photos people love behind-the-scenes creativity!
11. Project Summary Table
| Category | Details |
|---|---|
| Skill Level | Easy – Intermediate |
| Estimated Time | 6–8 hours |
| Finished Size | 10–14 inches |
| Estimated Cost | $10–15 |
12. Conclusion
Crocheting the Crochet Red Superhero Bug isn’t just about making a toy it’s about slowing down, getting cozy with creativity, and giving life to something cute and courageous. Whether you’re crafting it for yourself or surprising a little one with a hero that’s 100% handmade with love, the process is pure joy from start to finish.
So grab your yarn and hook, follow the steps, and let this tiny superhero remind you of your own power to create something special one stitch at a time.