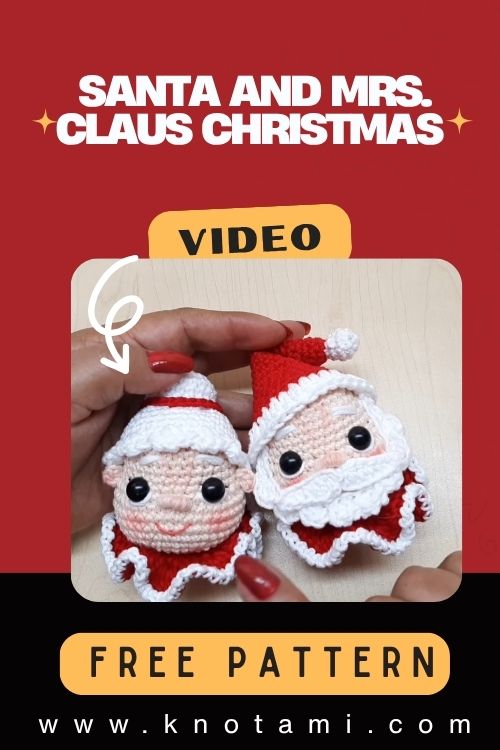
Crochet Santa and Mrs. Claus Christmas Amigurumi Pattern
There’s something truly magical about transforming a simple ball of yarn into a delightful piece of art. Crochet is not just a craft it’s a way of channeling creativity into something that warms the heart. Every loop and stitch tells a story of patience, imagination, and joy. The satisfaction of crafting something from scratch, feeling the softness of yarn in your hands, and watching your creation come to life is an experience every crafter cherishes deeply.
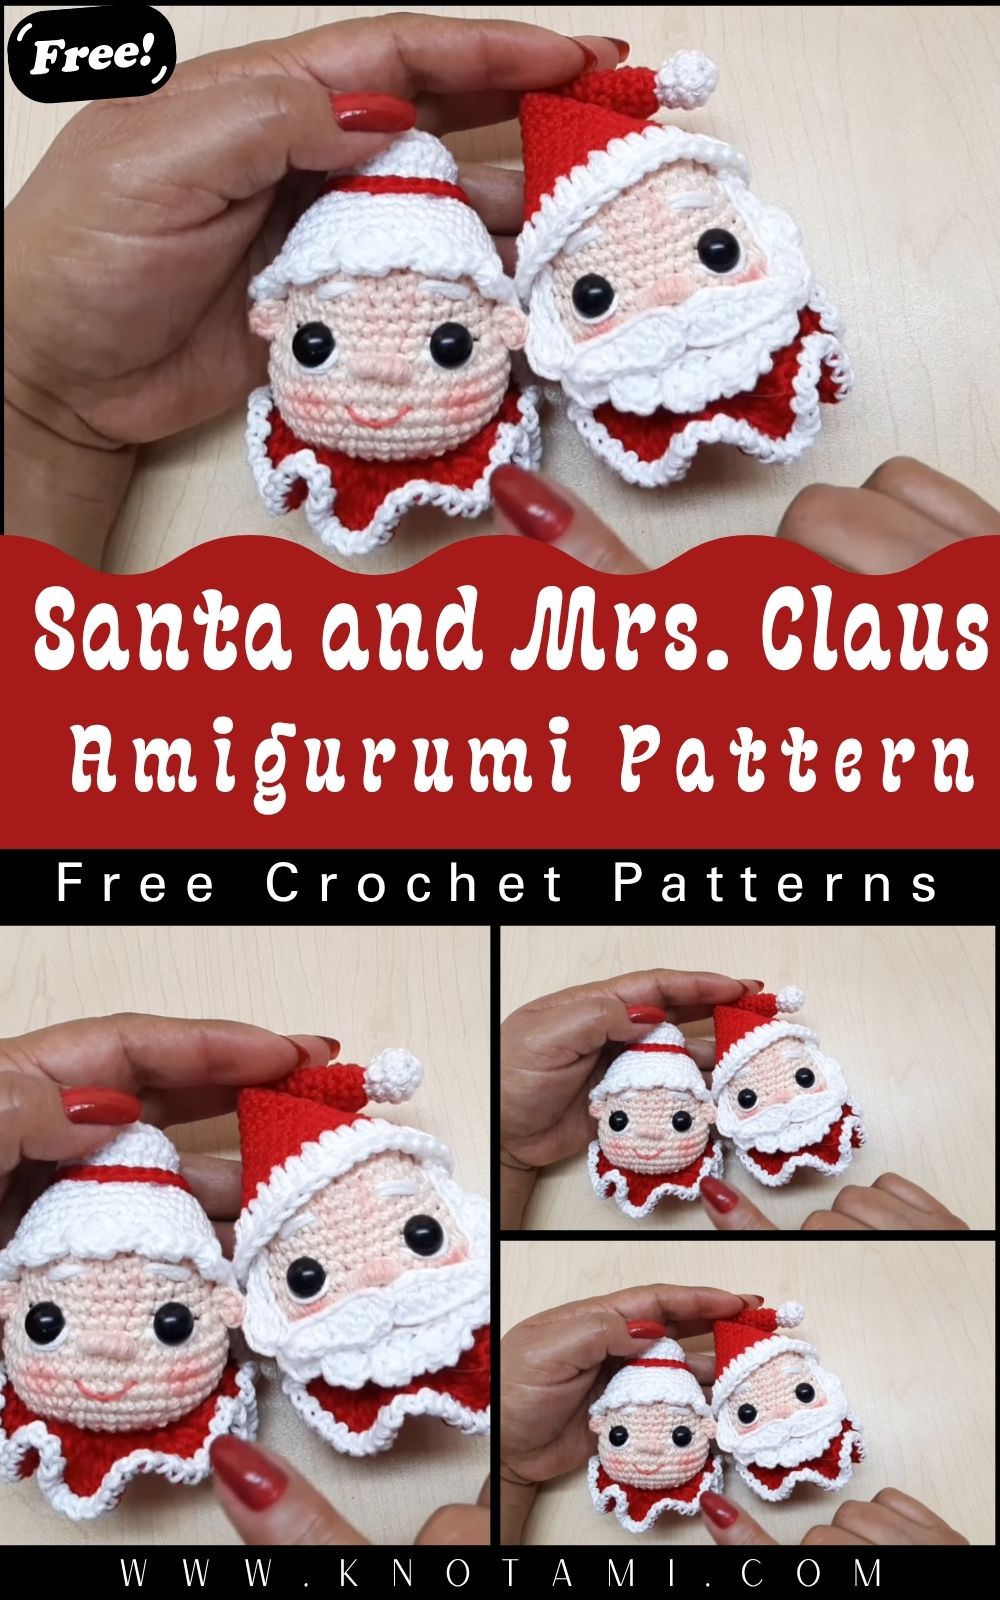
Among all seasonal crochet projects, nothing embodies the warmth and joy of the holidays quite like creating your own Crochet Santa and Mrs. Claus Amigurumi Pattern. These iconic Christmas figures bring festive cheer wherever they go from a cozy living room display to the perfect handmade gift for someone special. The gentle smile of Santa and the charming detail of Mrs. Claus make this set irresistible for both beginners and seasoned crocheters.
This project is wonderfully versatile. Whether you’re an experienced amigurumi maker or just starting your crochet journey, this pattern offers the perfect balance of creativity and fun. With simple stitches, easy-to-follow rounds, and customizable details, you can bring this adorable Christmas couple to life while experimenting with your favorite colors and textures.
Crocheting Santa and Mrs. Claus isn’t just about the finished toys it’s about the calming rhythm of crafting, the cozy joy of holiday preparation, and the pride of handmade art. As you stitch their rosy cheeks and fluffy trims, you’ll find yourself slowing down, smiling, and embracing the comforting spirit of slow crafting perfect for holiday relaxation or thoughtful, heartfelt gifting.
3. Materials & Tools
Before diving into the magic of creation, gather all your materials. The right supplies make the process smoother and the results even more charming.
Materials You’ll Need:
-
Yarn: Worsted weight cotton or acrylic yarn in red, white, beige, black, green, and gray.
-
Hook Size: 2.5 mm to 3.0 mm crochet hook (depending on your yarn thickness).
-
Stuffing: High-quality polyester fiberfill for soft and even shaping.
-
Safety Eyes: 6mm or 8mm, depending on desired eye size.
-
Scissors: Sharp for clean yarn cutting.
-
Tapestry Needle: For sewing parts together and weaving in ends.
-
Stitch Markers: To track rounds easily.
Yarn Choice Tips
Choose soft, smooth yarn that holds shape but isn’t too stiff. Cotton blends give a crisp look, while acrylic provides fluffiness. You can even add a touch of metallic yarn for Santa’s belt buckle or Mrs. Claus’s glasses for extra sparkle.
When picking colors, stay traditional with red, white, and cream — or get playful with pastel pinks, forest greens, or vintage gold tones for a unique Christmas twist.
4. Step-by-Step Crochet Instructions
Creating Santa and Mrs. Claus involves similar foundational techniques with minor variations for their individual outfits and accessories. Follow these steps carefully, and your holiday couple will come together beautifully!
Step 1: Making the Head
Start with a magic ring in beige or skin-tone yarn.
-
Work 6 single crochets (sc) into the ring.
-
Increase gradually every round until you reach around 36 stitches.
-
Continue working even rounds to shape the head’s height.
-
Insert safety eyes between Rounds 8 and 9, spaced evenly apart.
-
Begin gentle decreases toward the neck area.
Stuff the head as you go to maintain even pressure and roundness.
Pro Tip: Add a tiny blush with pink yarn or fabric paint after completion for extra character!
Step 2: Forming the Neck and Upper Body
Once the head is complete, switch to red yarn for Santa and Mrs. Claus’s iconic outfits.
-
For Santa: Continue with red yarn to form his upper suit, adding white trim later.
-
For Mrs. Claus: Use red yarn as well, but plan to crochet a white collar edge for a softer, festive look.
Work 2–3 rounds of even stitches before gradually increasing to form the shoulders.
Step 3: Building the Main Body
The body is a simple cylindrical or slightly tapered shape.
-
Increase the stitch count for a rounded torso.
-
Work evenly for about 10–12 rounds.
-
Switch yarn color for Santa’s belt (black) and buckle (yellow or gold).
-
For Mrs. Claus, add a white apron effect by crocheting a white panel and stitching it onto the front.
Stuff firmly but evenly to keep a stable shape.
Step 4: Shaping or Attaching the Base & Legs
The base can be a flat circle worked separately and stitched on later.
-
Crochet a small circular base in red or white.
-
Attach the legs directly or crochet them separately.
For Santa, short stubby legs in black work well to resemble boots.
For Mrs. Claus, use red legs with a white shoe rim.
Attach securely to ensure they can stand upright when displayed.
Step 5: Creating Arms and Accessories
Both Santa and Mrs. Claus have small arms worked as tubes:
-
Chain 2, work in the round for about 8–10 rounds.
-
Slightly stuff and attach at shoulder height.
-
Add white cuffs to Santa’s sleeves and lace trim to Mrs. Claus’s.
Accessories:
-
Santa’s Hat: A red cone with white trim and a fluffy pom-pom.
-
Mrs. Claus’s Hair: Crochet white yarn loops or curls and sew neatly around the head. Add small bun details or a lace cap.
Step 6: Assembly and Positioning
Once all parts are ready, use a tapestry needle to carefully sew each piece in place. Start with the head, followed by arms and legs.
Align symmetrically slightly tilt Santa’s hat for character or position Mrs. Claus’s hands holding a tiny crocheted cookie!
Step 7: Final Touches and Details
Add white beard loops to Santa using surface slip stitches or attach pre-made yarn strands.
For Mrs. Claus, embroider gentle eyes and a warm smile using black and pink thread.
You can even crochet mini glasses, candy canes, or a small Christmas bag for Santa’s hand.
Expert Tip: Balance stuffing between firmness and softness. Too much makes shaping stiff, too little leads to sagging. Aim for a smooth, rounded surface.
5. Customization Ideas
One of the joys of crochet is personalizing every project. Try these fun customization ideas:
-
Color Variations: Go classic with red and white or make pastel Santa and Mrs. Claus in pink, mint, and cream for a softer aesthetic.
-
Themed Versions: Create a “Winter Wonderland” edition with blue and silver outfits or a “Rustic” version using beige and brown yarns.
-
Accessories: Add tiny props like presents, gingerbread cookies, or crochet mugs of hot cocoa.
-
Textures: Use fluffy yarn for Santa’s beard or faux-fur trim for realism.
Each detail you add makes your creation uniquely yours — perfect for personalized gifting.
6. Advanced Tips & Troubleshooting
Even beginner-friendly amigurumi can look professional with a few expert techniques.
-
Invisible Decreases: Instead of regular decreases, use invisible ones to avoid bumps in shaping.
-
Keep Tension Consistent: Hold your yarn at the same angle and tension to maintain smooth stitches.
-
Avoid Twists: Mark the beginning of each round with a stitch marker to keep your work aligned.
-
Fix Uneven Shapes: If your head or body leans, gently massage the stuffing to even it out.
-
Proper Stuffing Balance: Stuff gradually, layer by layer never all at once.
-
Seamless Joins: Use the invisible join method to make part connections look neat.
-
Read Patterns Carefully: Familiarize yourself with abbreviations like sc (single crochet), inc (increase), dec (decrease).
-
Weaving in Ends: Always secure yarn tails inside the stuffed body to avoid unraveling.
-
Blocking Small Pieces: For Mrs. Claus’s apron or Santa’s hat brim, light steam-block for a crisp edge.
-
Pattern Adaptation: Adjust hook size if you want a smaller or larger toy without changing the pattern.
7. Care Instructions
Keep your amigurumi looking as festive as the day you made it!
-
Hand Wash Only: Use cool water and a gentle detergent.
-
Avoid Soaking: Quick rinse is better than long soaking to protect stuffing.
-
Air Dry Flat: Shape them while drying to maintain their cute forms.
-
Avoid Sunlight: Prolonged exposure can fade vibrant Christmas colors.
-
Storage: Keep them in a dust-free box or display shelf when not in use.
8. Display & Gift Ideas
Your Santa and Mrs. Claus Amigurumi set deserves the spotlight! Here are a few display ideas:
-
Home Décor: Place them by the Christmas tree or fireplace.
-
Children’s Room: Perfect as soft seasonal toys for kids.
-
Office Desk: Add a cheerful holiday touch to your workspace.
-
Holiday Ornaments: Turn them into hanging decorations by adding small loops.
-
Gift Pair: Wrap them in clear cellophane with ribbons for a heartwarming handmade present.
9. Benefits of Crocheting Santa & Mrs. Claus
Crocheting isn’t just a hobby it’s therapy in disguise. Here’s what this project brings:
-
Relaxation & Mindfulness: The rhythmic repetition of stitches brings calm and focus.
-
Stress Relief: Crocheting allows you to unwind and disconnect from daily pressures.
-
Sense of Accomplishment: Finishing detailed amigurumi provides immense satisfaction.
-
Sustainable Gifting: Handmade toys are eco-friendly and full of love.
-
Emotional Connection: A crocheted Santa made by hand becomes a keepsake filled with warmth and memories.
10. Photography & Social Media Tips
Make your crochet creations shine online!
-
Use Natural Light: Morning or late-afternoon light gives soft shadows and true colors.
-
Add Props: Include pinecones, yarn skeins, snowflakes, or fairy lights for a festive feel.
-
Soft Backgrounds: White, beige, or wood backgrounds keep the focus on your amigurumi.
-
Close-Up Shots: Highlight details like Santa’s beard or Mrs. Claus’s apron lace.
-
Creative Captions: Share your story people love seeing the journey behind handmade art!
11. Conclusion
Crocheting your own Santa and Mrs. Claus Christmas Amigurumi is more than just a holiday project it’s a celebration of creativity, joy, and love. Each stitch brings you closer to a festive treasure that carries the warmth of your hands and the spirit of the season. Whether displayed under the tree, gifted to someone dear, or cherished as part of your holiday tradition, these little figures are bound to bring smiles and nostalgia every year.
So, grab your yarn, put on your favorite Christmas tunes, and let your crochet hook dance through every loop. With patience, passion, and a bit of holiday magic, your Santa and Mrs. Claus will come to life spreading handmade happiness wherever they go.