
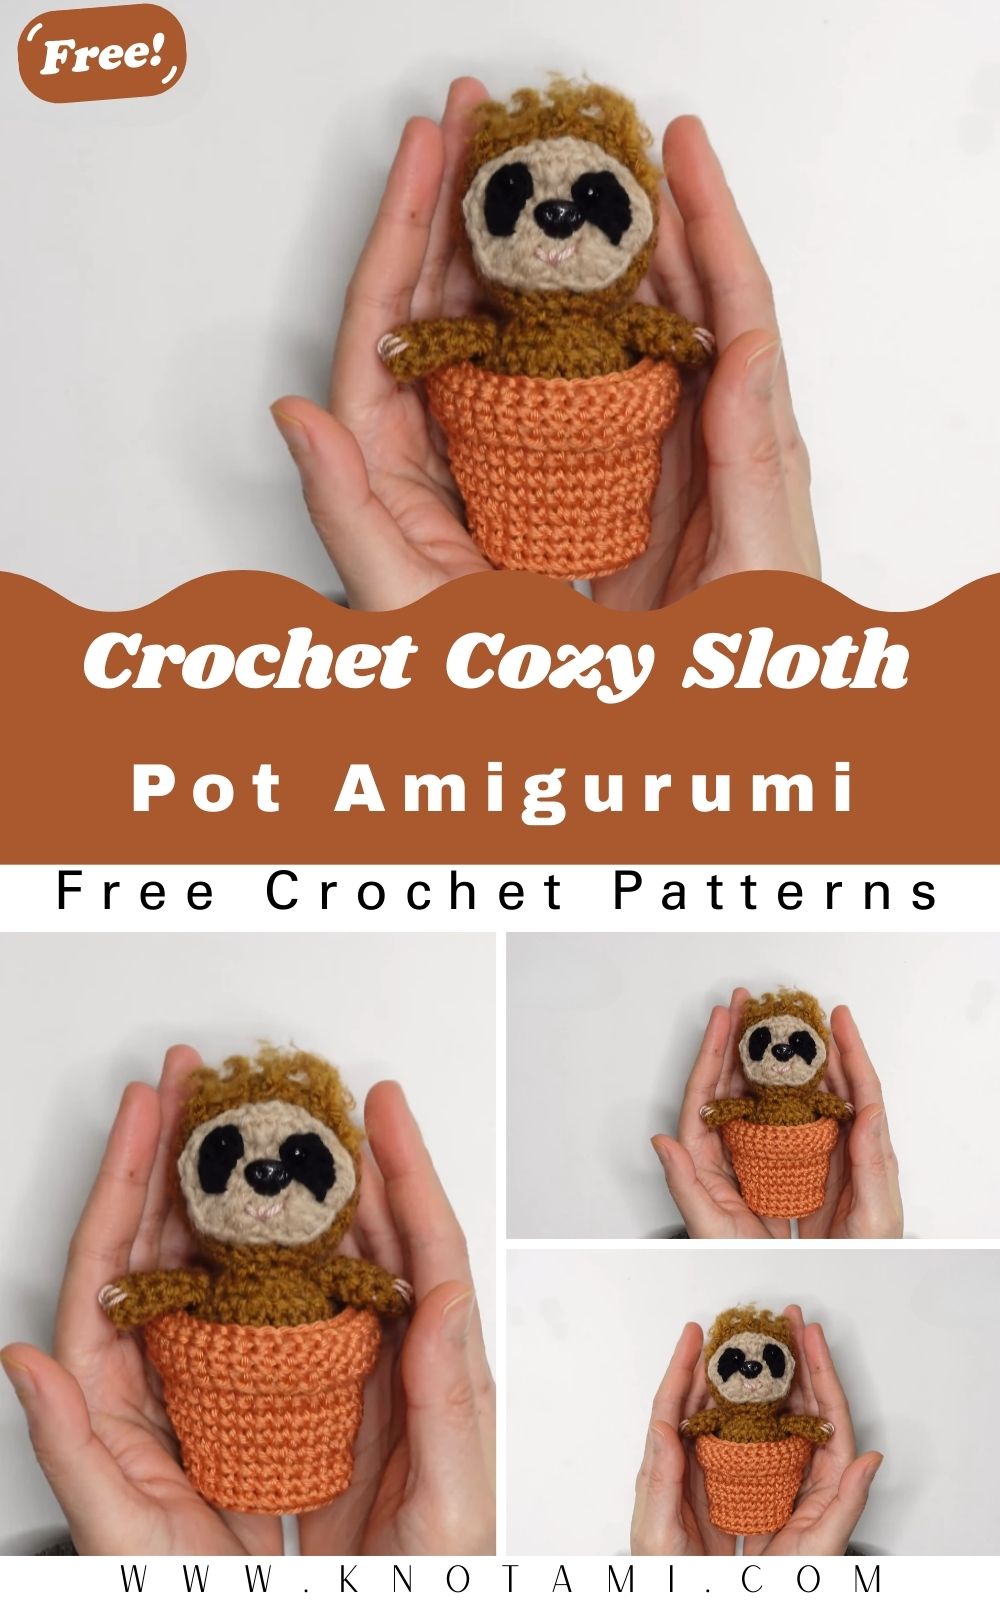
Creating a cozy home for your greenery has never been more adorable than with this Cozy Sloth Planter Crochet Pattern. If you are looking for a project that combines the slow, relaxing nature of a sloth with the vibrant life of your indoor plants, you have found the perfect match. This pattern is designed to be approachable for beginners while remaining engaging for seasoned crafters. By using simple stitches and a few clever shaping techniques, you can transform a basic skein of yarn into a functional piece of art that brings a smile to your face every time you water your plants.
The beauty of this Cozy Sloth Planter Crochet Pattern lies in its versatility and charm. Whether you want to brighten up your desk or find a unique gift for a fellow plant lover, this sloth cozy is a fantastic choice. In the following sections, you will find everything you need to know, from the exact materials required to the step by step assembly instructions. Let us pick up our hooks and start crafting this delightful companion for your succulents today.
Skill Level and Level of Difficulty
This project is rated as Easy to Intermediate. While the primary stitches are basic single and double crochets, the assembly and the use of the magic ring require a bit of patience. If you have mastered the basics of amigurumi, you will find the Cozy Sloth Planter Crochet Pattern very straightforward. The most challenging part is ensuring the tension is consistent so the planter fits snugly around your pot.
Tutor’s Suggestions
To get the best results with your Cozy Sloth Planter Crochet Pattern, I suggest using a stitch marker for the spiral rounds. Because we are working in a continuous spiral for the arms, it is incredibly easy to lose your place. Additionally, when you are sewing the face onto the head, use thin sewing pins to hold the pieces in place before you start stitching. This prevents the face from shifting and ensures your sloth looks symmetrical. Lastly, do not overstuff the arms, as they need to remain flexible enough to “hang” off the side of the planter pot naturally.
Materials Needed for Your Sloth Planter
Before you begin your Cozy Sloth Planter Crochet Pattern, gather these essential supplies:
-
Yarn: 100% Acrylic yarn (Medium weight works best for durability).
-
Hook: 4.0 mm crochet hook.
-
Eyes: Safety eyes or small black buttons.
-
Nose: Small piece of black felt or dark yarn for embroidery.
-
Filling: High quality fiberfill stuffing for the arms and head.
-
Tools: Sharp scissors, a yarn needle for sewing, and a stitch marker.
Step by Step Guide to Creating the Sloth Planter
1. The Sleepy Eyes
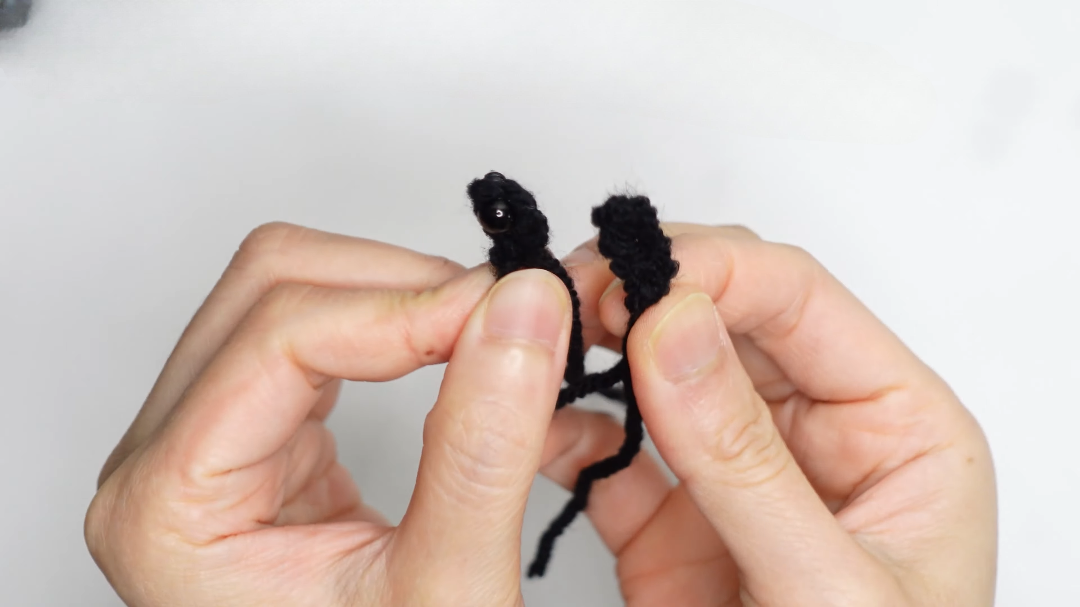
To start the eye detail of your Cozy Sloth Planter Crochet Pattern, you will first form a slip knot on your 4.0 mm hook. Chain four. In the second chain from the hook, place one single crochet. Follow this by placing a slip stitch in each of the next two chains. Make one final chain to secure the work and cut the yarn, leaving a short tail for later attachment.
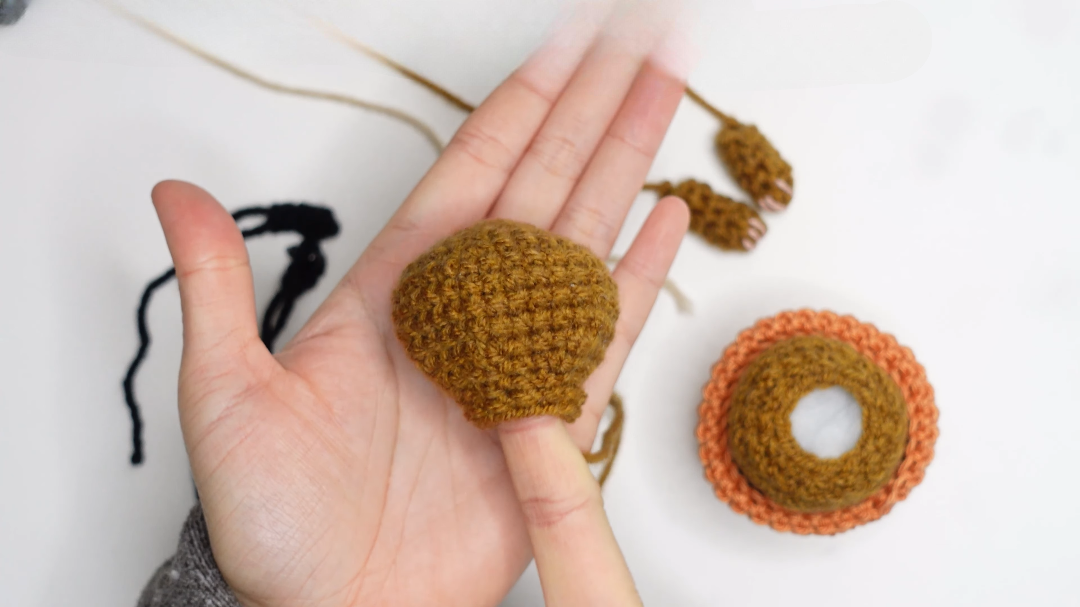
2. Crafting the Arms
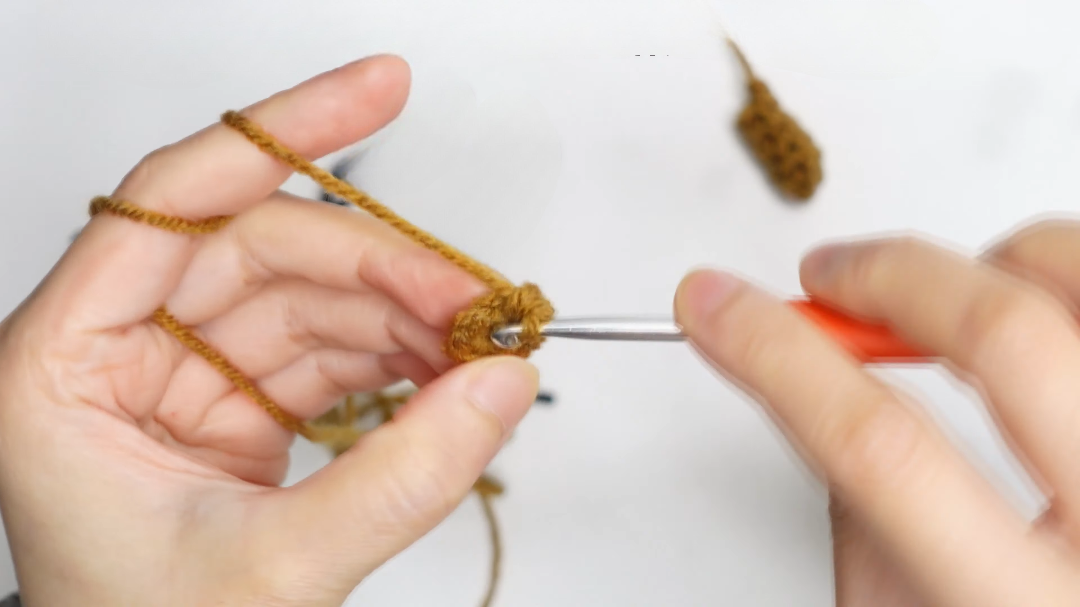
The arms give this sloth its “clinging” look. Start by forming a magic ring. Chain one and place six single crochets inside the ring. Pull the tail tight to close the circle. For the next five rounds, you will work a single crochet into every stitch in a spiral. This creates a tube. Continue for five rounds in total. Once finished, stuff lightly with fiberfill and fasten off.
3. Designing the Face
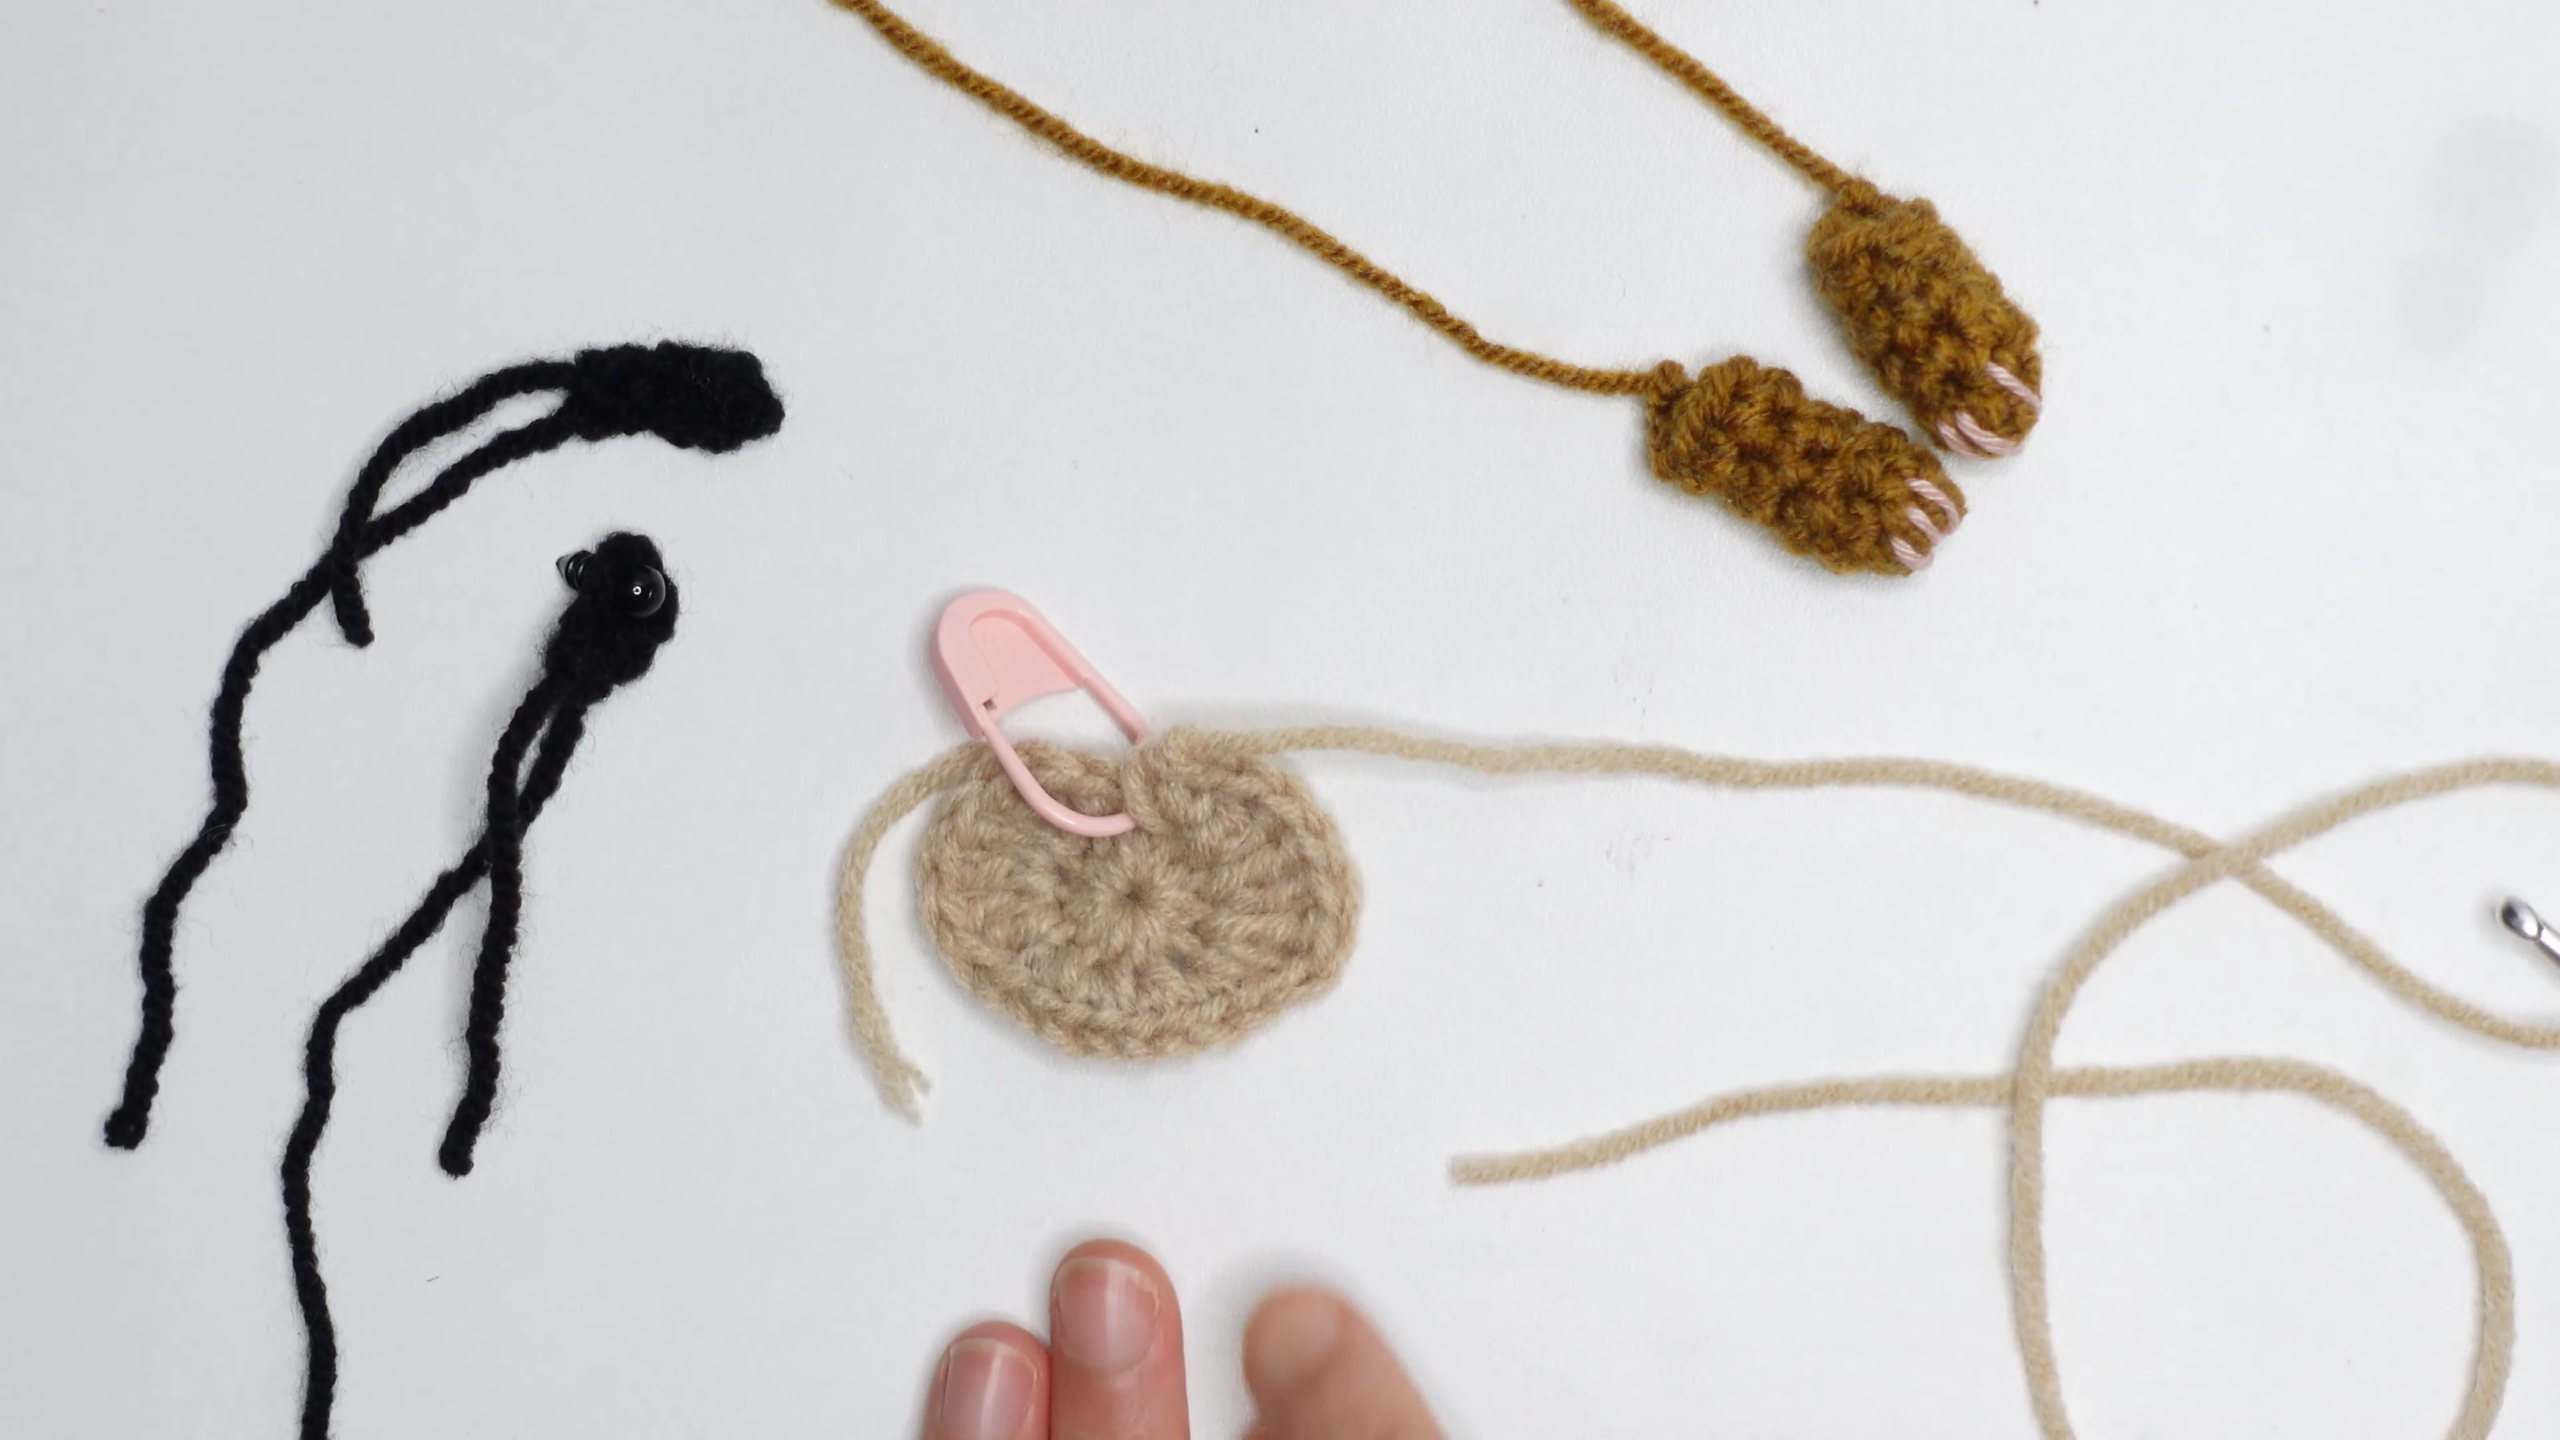
The face is a vital part of the Cozy Sloth Planter Crochet Pattern. Start with a magic ring and chain one. Place 12 single crochets into the ring and pull tight. In round two, you will perform a single crochet increase in the first stitch. In the following three stitches, perform double crochet increases. This creates the oval shape of the face. For the next four stitches, simply single crochet. Repeat the increase pattern on the opposite side. You should end the round with 24 stitches. Leave a long tail for sewing this onto the main head.
4. Head and Body Assembly
Following the main structure of the Cozy Sloth Planter Crochet Pattern, you will create the larger cylindrical body that fits your pot. Once the body and head are crocheted, you will use the long tails from your previous steps to attach the face and arms. Ensure the eyes are positioned within the eye patches you created in step one.
<
Where Can You Use Your Sloth Planter?
The Cozy Sloth Planter Crochet Pattern is perfect for various settings around your home. It looks particularly charming on a sunny windowsill, where the sloth can “watch” over your sun loving succulents. Furthermore, it makes an excellent addition to an office desk. The presence of a cute animal and a green plant can significantly reduce stress during a busy workday. You can also use this cozy in a nursery or a child’s room as a decorative piece for small toys if you prefer not to use a real plant. It is a versatile piece of decor that fits anywhere that needs a touch of handmade warmth.
Tips and Tricks for Success
When working on your Cozy Sloth Planter Crochet Pattern, remember that tension is key. If your stitches are too loose, the fiberfill might show through the arms or the face. If they are too tight, you might find it difficult to fit the hook through the loops. Another great tip is to use a slightly darker shade of yarn for the eye patches to give the sloth a more realistic look. If you are using this for a real plant, consider placing a plastic liner inside the crochet cozy. This prevents water from soaking into the acrylic yarn and keeps your Cozy Sloth Planter Crochet Pattern looking fresh and clean for a long time.
Common Mistakes to Avoid
One frequent error when making the Cozy Sloth Planter Crochet Pattern is forgetting to count the stitches in the facial increase round. If you miss an increase, the face will look lopsided rather than oval. Another mistake is pulling the magic ring tail too hard, which can sometimes snap certain types of yarn. Be gentle but firm. Finally, ensure that you leave long enough yarn tails for sewing. Many beginners cut the yarn too short, making it very difficult to weave the pieces together securely. Always err on the side of caution and leave at least ten inches of yarn for assembly.
Frequently Asked Questions (FAQs)
1. What type of yarn is best for this sloth planter?
For the Cozy Sloth Planter Crochet Pattern, 100% acrylic yarn is recommended. It is durable, holds its shape well, and is easy to wash if it gets dirty from the plant soil.
2. Can I use a different hook size?
While a 4.0 mm hook is ideal for this weight of yarn, you can use a smaller hook for tighter stitches. However, using a larger hook might make the planter too big and floppy for standard succulent pots.
3. How do I clean my crochet planter?
Since it is made from acrylic, you can gently hand wash it with mild soap and let it air dry. Do not put it in a dryer, as high heat can damage the fibers and cause the planter to lose its shape.
4. Is this pattern suitable for complete beginners?
Yes, as long as you know how to do a single crochet, double crochet, and a magic ring. The Cozy Sloth Planter Crochet Pattern is a great project to practice these fundamental skills.
5. How long does it take to finish this project?
On average, most people can finish the entire Cozy Sloth Planter Crochet Pattern in about two to three hours, making it a perfect afternoon craft project.
Final Thoughts on Your Crochet Journey
Completing a Cozy Sloth Planter Crochet Pattern provides a wonderful sense of accomplishment. You have taken simple materials and turned them into something that is both functional and adorable. As you look at your new sloth friend hanging onto your favorite plant, remember that every stitch was a step toward mastering your craft. Crocheting is a journey of patience and creativity, much like the slow and steady life of the sloth itself.
Moreover, this project serves as a reminder that handmade items carry a special value that store bought items simply cannot match. You have infused your time and care into this Cozy Sloth Planter Crochet Pattern, and it shows in the final result. Whether you keep it for yourself or give it away as a heartfelt gift, this sloth planter will surely be a conversation starter. We hope you enjoyed this tutorial and feel inspired to continue exploring the world of amigurumi and functional crochet. Keep your hooks moving and your plants growing. Happy crocheting and may your home always be filled with cozy, handmade treasures.