
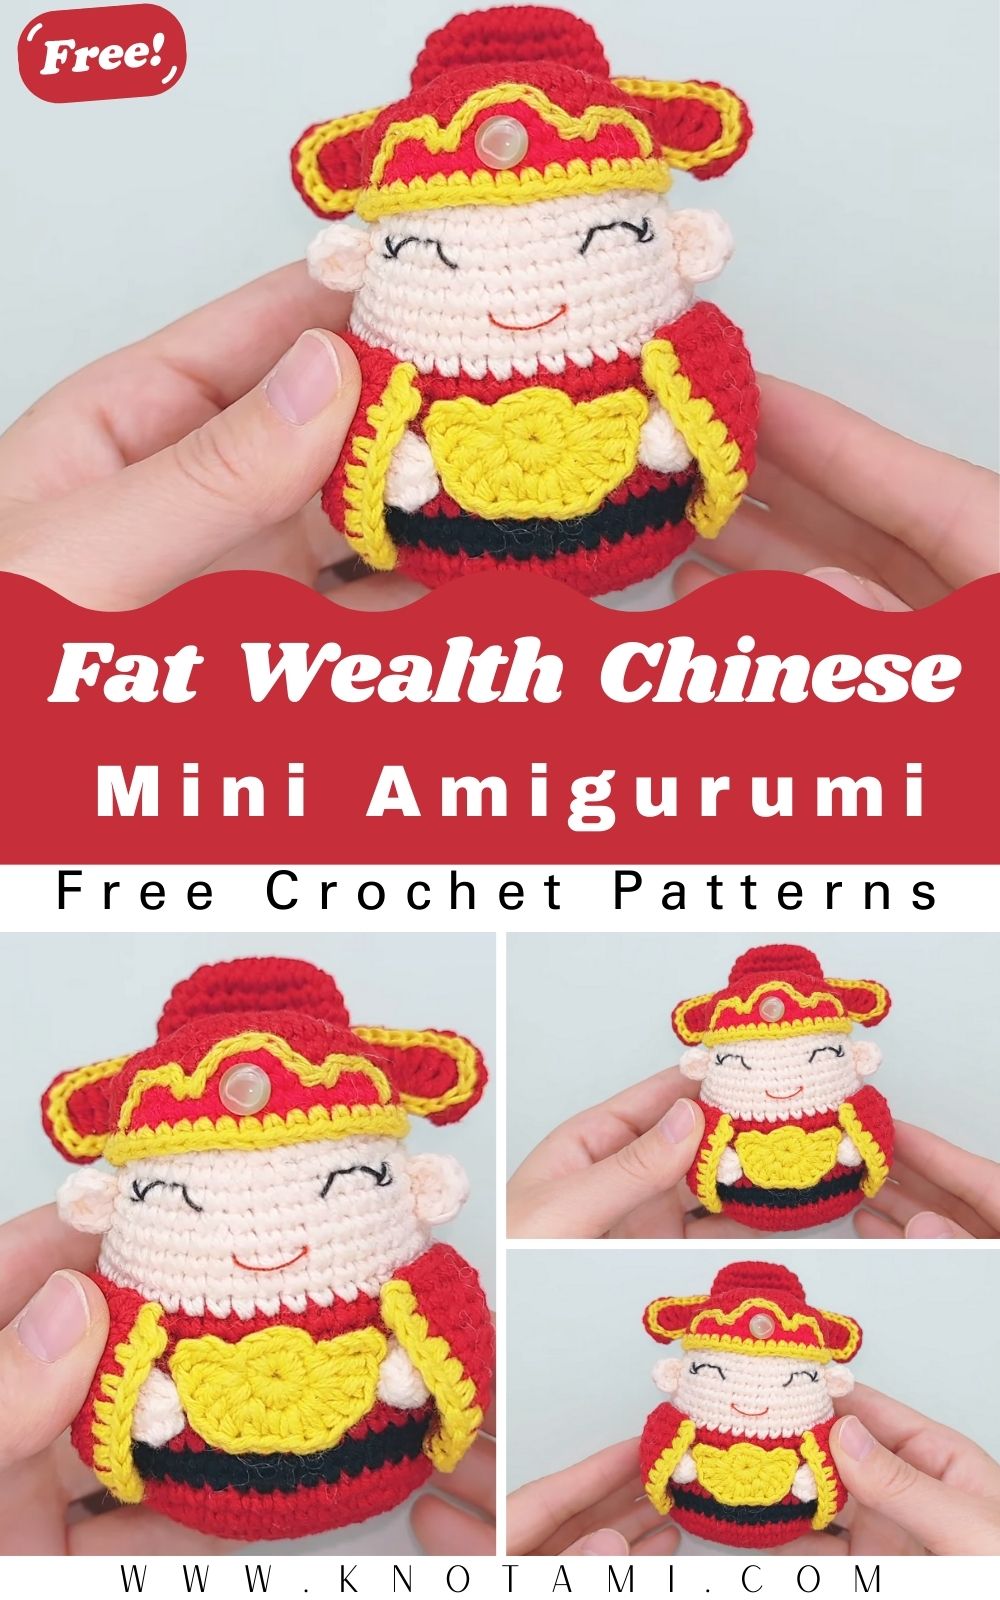
Welcome to the wonderful world of festive crafting where you can bring tradition to life with your own hands. Creating a Crochet Chinese Wealth God Amigurumi is not just about making a toy; it is about crafting a symbol of abundance and joy. This “Fat God of Wealth,” also known as Cai Shen, is a beloved figure in Chinese culture, believed to bring good fortune and financial success to those who welcome him. Whether you are an experienced crafter or just starting your journey with a hook and yarn, this project offers a delightful way to explore cultural artistry while practicing your tension and stitch work.
In this comprehensive guide, you will learn every step needed to finish this adorable Crochet Chinese Wealth God Amigurumi. We use vibrant colors like red, gold, and green to signify luck and growth, ensuring your finished piece stands out as a beautiful centerpiece. By following this pattern, you are not only learning a new skill but also creating a meaningful gift for friends and family. Let us dive into the details of the materials and the specific stitches that make this “Fat God of Wealth” so unique and festive. Furthermore, this project is designed to be accessible, ensuring that your path to prosperity through crafting is smooth and rewarding.
Now that you have watched the detailed video tutorial above, you might feel ready to start your journey with the Crochet Chinese Wealth God Amigurumi. Seeing the movements of the crochet hook in real-time helps clarify how to handle the yarn transitions and the shaping of the body. However, having a written guide alongside the visual instruction is crucial for tracking your row counts and stitch types. This combination of video and text ensures that you do not miss any small details, especially when you are working on the intricate parts like the “Yuan Bao” or the golden ingot. Keep your materials ready as we break down the process into easy-to-follow written steps that complement the video perfectly.
Skill Level / Level of Difficulty
The difficulty for this Crochet Chinese Wealth God Amigurumi is Intermediate. While the basic stitches are simple, the project requires frequent color changes and the assembly of multiple small parts. If you are a beginner who has mastered the magic ring and increasing/decreasing, you will find this a fun and achievable challenge.
Tutor’s Suggestions
I highly recommend that you use a stitch marker for every single round. Since we are working in a continuous spiral for the main body of the Crochet Chinese Wealth God Amigurumi, it is very easy to lose your place. Also, pay close attention to the “floats” or the yarn you carry behind your work during color changes. Keep them loose enough so the fabric does not pucker, but tight enough so they do not snag. Lastly, when you are stuffing the “Fat God of Wealth,” add the stuffing gradually to ensure he stays smooth and round without any lumps.
Materials Needed and Step-by-Step Guide
Materials You Need
To create the perfect Crochet Chinese Wealth God Amigurumi, please gather these items:
-
Yarn: Four strands of milk cotton (Red, Yellow, Green, and Skin tone).
-
Hook: 2.0 mm crochet hook.
-
Eyes: 8 mm flat-bottomed cat eye beads.
-
Other: Fiberfill stuffing, a tapestry needle, and scissors.
Step-by-Step Guide
The Main Body
You will begin the Crochet Chinese Wealth God Amigurumi by creating the head and torso in one piece. Start with a magic loop using your skin-tone yarn.
-
Round 1: Make 6 single stitches into the loop and pull tight.
-
Round 2: Increase in every stitch to reach 12 stitches.
-
Round 3: Follow the “1 single stitch, 1 increase” pattern for 18 stitches.
-
Round 4: Work “2 single stitches, 1 increase” to get 24 stitches.
-
Round 5: Knit “3 single stitches, 1 increase” for 30 stitches.
-
Round 6: Move to “4 single stitches, 1 increase” for 36 stitches.
-
Round 7 to 9: Continue increasing until you reach 54 stitches. This provides the “fat” shape for our lucky figure.
-
Round 10 to 13: Work even with 54 stitches. At the end of round 10, prepare to change your thread to the red garment color.
-
Round 14 to 30: Follow the decreasing pattern as described in the video. You will gradually reduce the stitches from 51 down to 12. Remember to stuff the body firmly before you close the final gap.
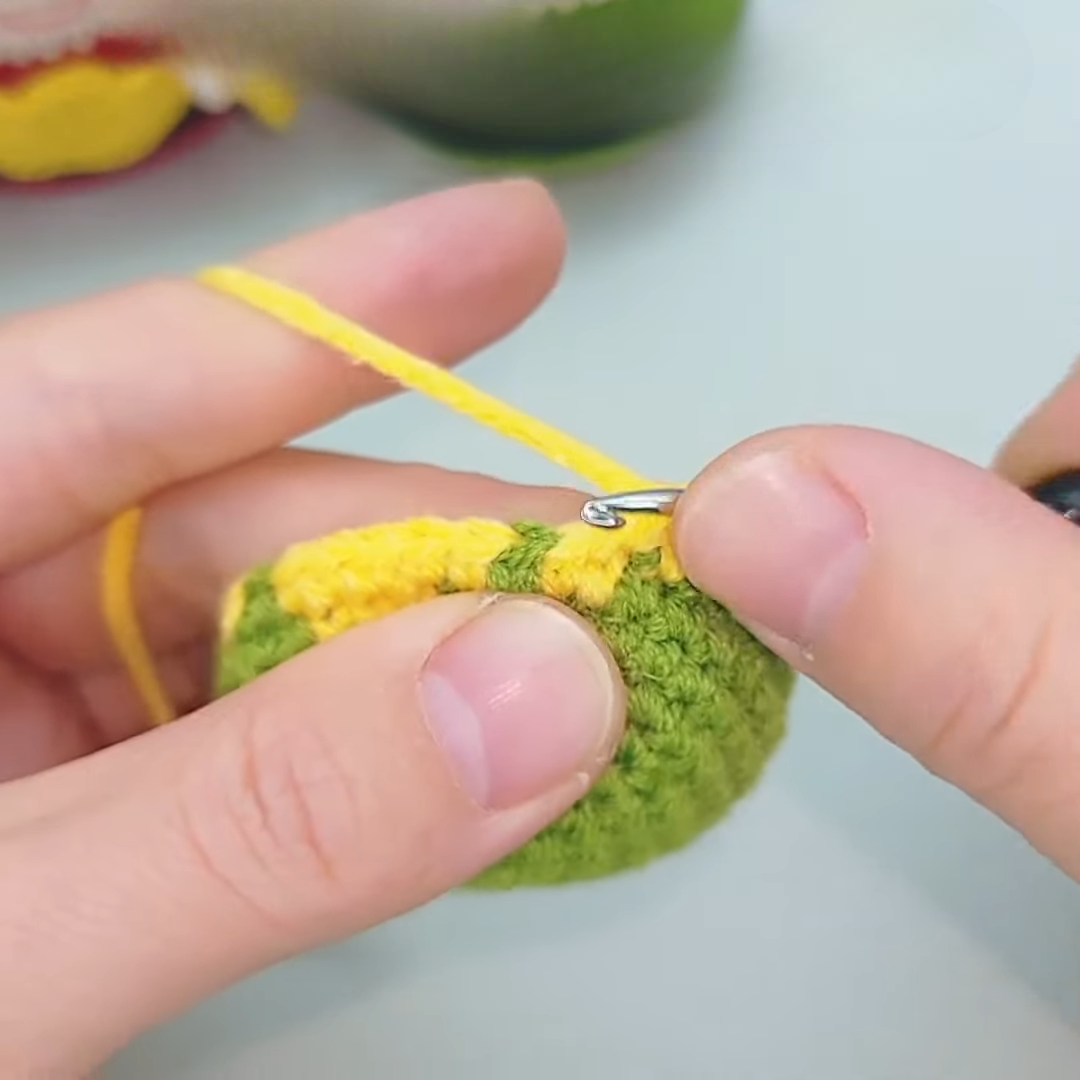
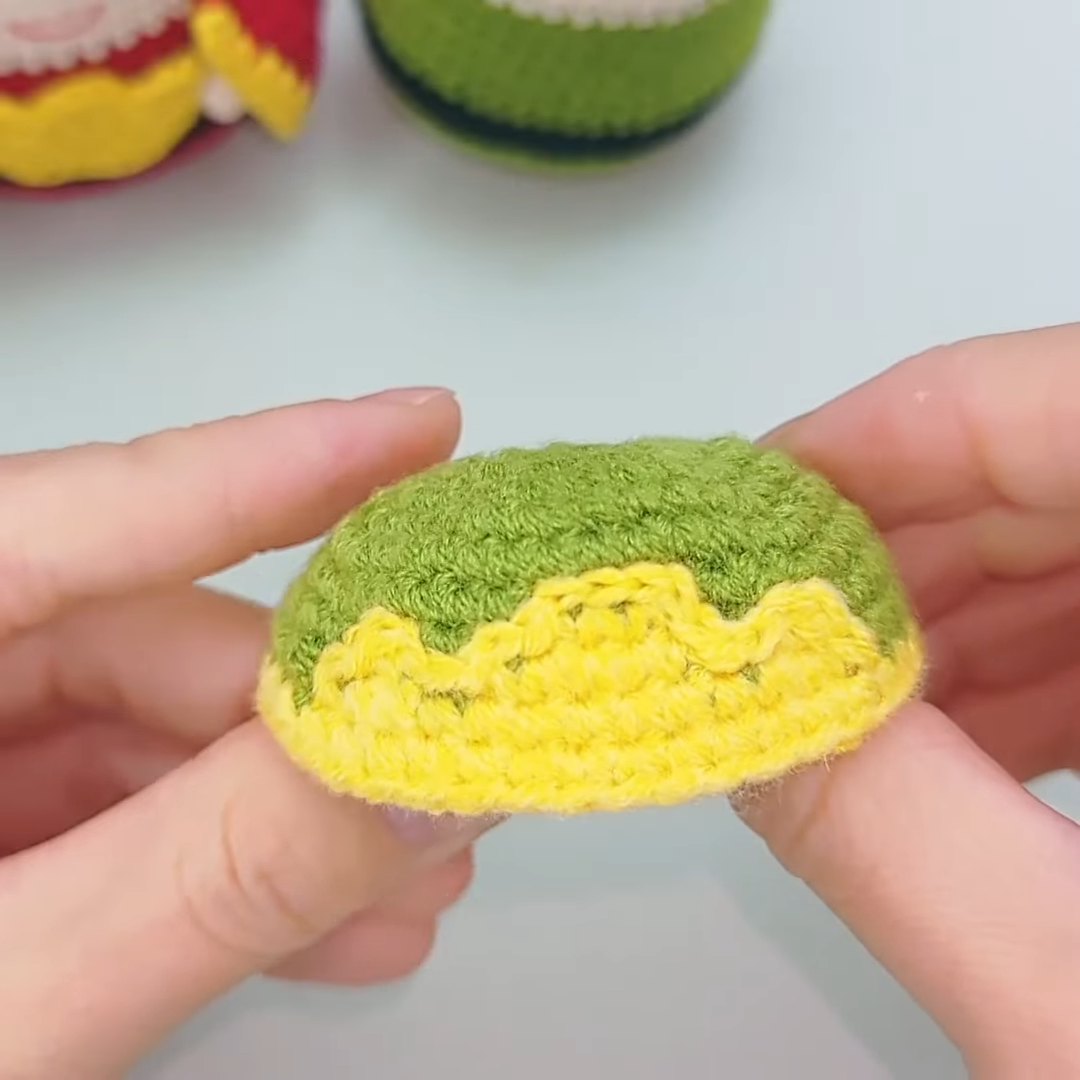
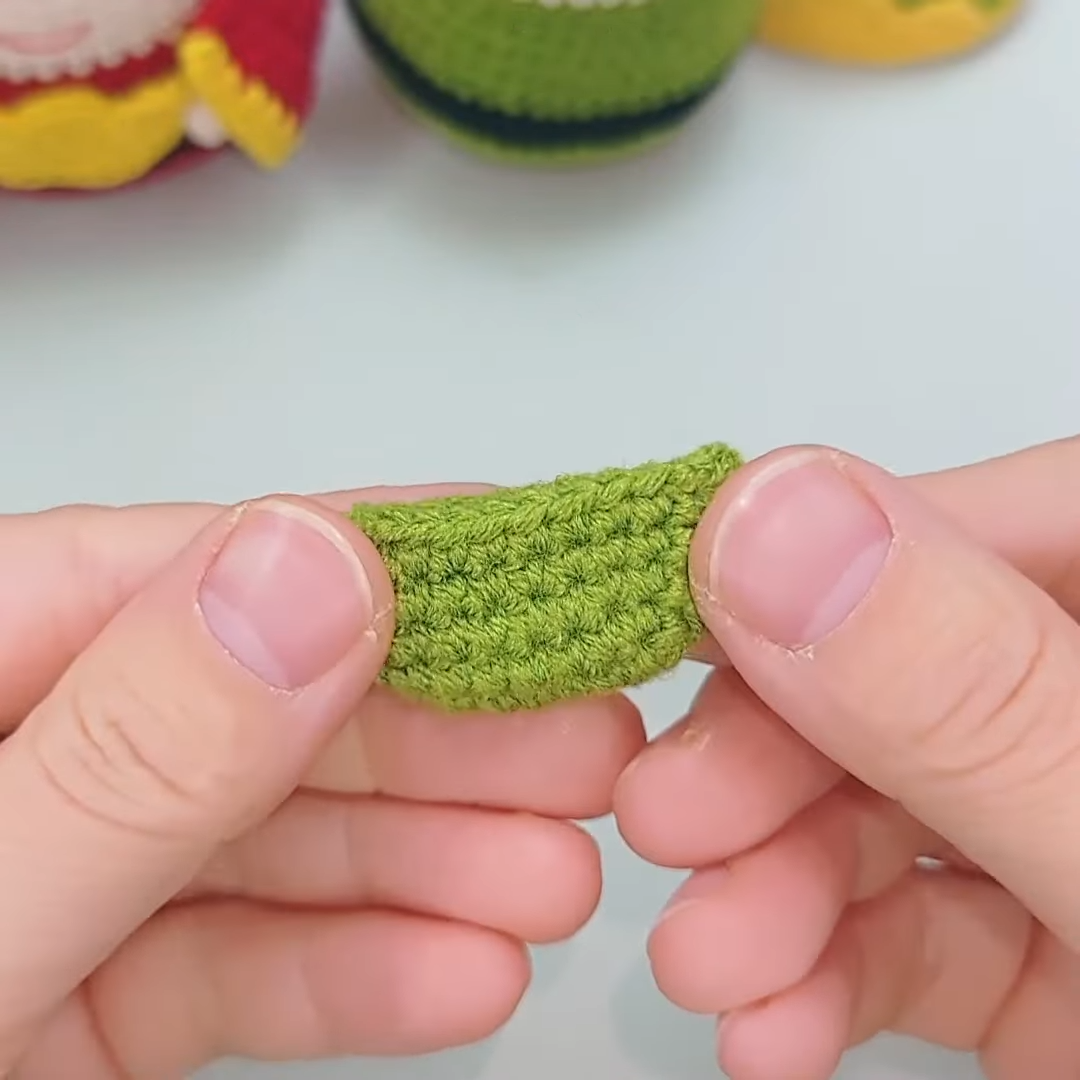
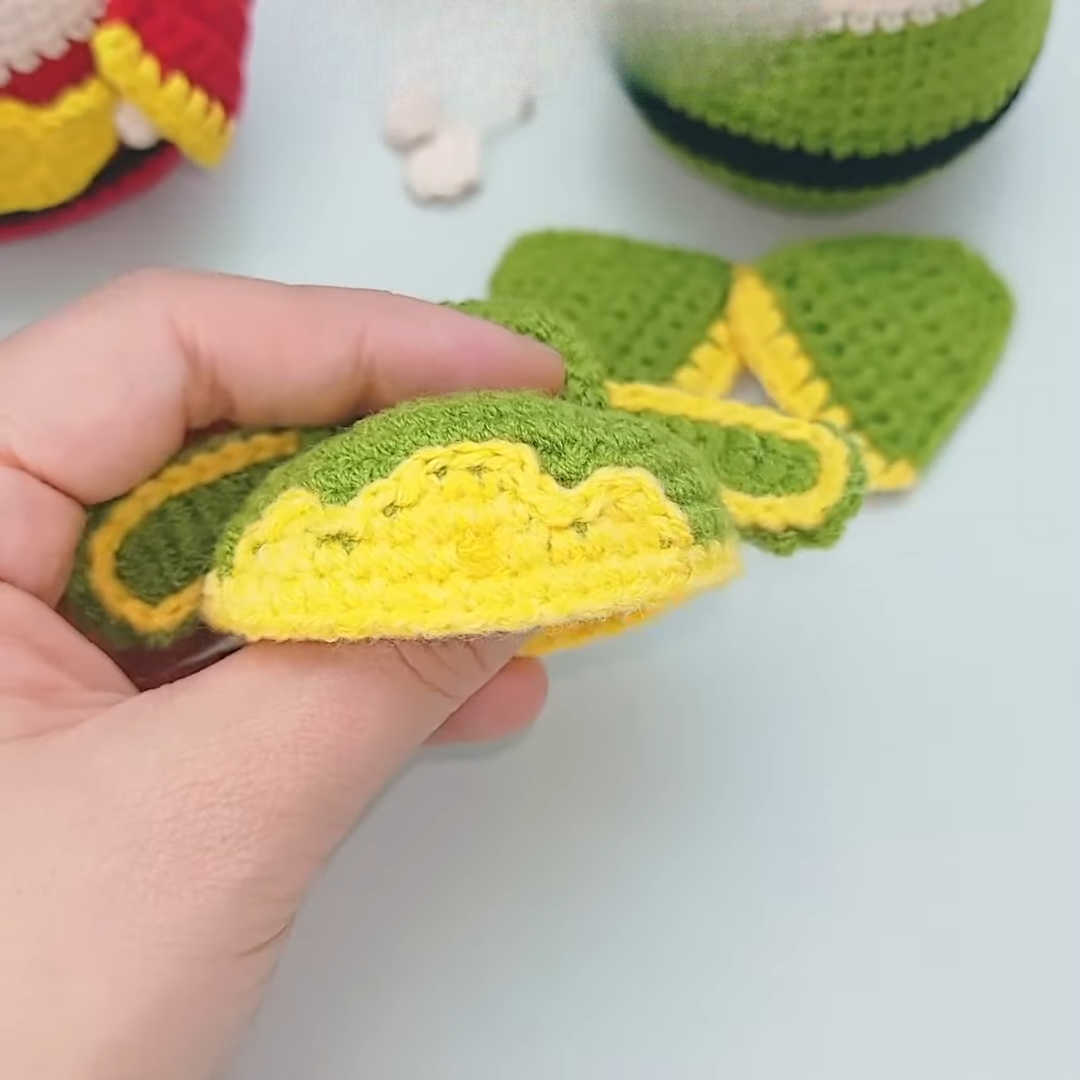
The Festive Hat
The hat is a signature piece of the Crochet Chinese Wealth God Amigurumi. It consists of the main hat base, a top piece, and two long ears.
-
Hat Base: Use green and yellow yarn. Start with a magic ring of 6 stitches and increase to 39 stitches by round 7.
-
Color Transitions: From round 7 to 9, you will switch between green and yellow to create the traditional pattern.
-
Ears: These are worked using foundation chains. You will use long stitches and medium-long stitches to give the ears their structured, rectangular look. Make two of these and attach them to the sides of the hat.
Sleeves and Hands
-
Sleeves: Work in rows rather than rounds for the initial part to create the opening. Start with a slip knot and 3 lock stitches. Increase to 8 stitches by row 6.
-
Hands: Use skin-colored yarn to make “jujube-shaped” stitches, which look like small fingers. Attach these to the ends of the sleeves.
The Golden Ingot (Yuan Bao)
No Crochet Chinese Wealth God Amigurumi is complete without his gold!
-
Round 1: 10 short stitches in a magic loop using bright yellow yarn.
-
Round 2: Use a combination of long stitches and medium-long stitches to create the flared boat shape of the traditional currency. This will be placed in the God’s hands during assembly.
Where You Can Use It
You can use this Crochet Chinese Wealth God Amigurumi in many creative ways. It is a perfect decoration for your home during the Lunar New Year to invite positive energy and wealth. Because it is so cute, it works wonderfully as a desk companion in your office to keep your spirits high during work. Many people also use it as a car dashboard ornament or a hanging charm for their bags. If you have a festive display shelf, this “Fat God of Wealth” will surely be the star attraction. Furthermore, it serves as a thoughtful handmade gift for business openings or housewarming parties.
Tips and Tricks
To make your Crochet Chinese Wealth God Amigurumi look professional, use the “invisible decrease” technique. This prevents large gaps in the fabric where stuffing might peek through. Additionally, when you are changing colors, always pull the new color through the last two loops of the previous stitch for a seamless transition. If you want the God of Wealth to stand up more easily, you can place a small, flat plastic circle or a heavy coin at the bottom of the body before you finish stuffing it. This adds weight and stability to your amigurumi.
Common Mistakes
One common mistake is stuffing the body too lightly. If you do not add enough fiberfill, your Crochet Chinese Wealth God Amigurumi might look wrinkled or lose its “fat” charm over time. Another error is making the stitches too loose. If your crochet hook is too large for your yarn, the stuffing will show through the holes. Also, be careful when sewing the ears onto the hat. If they are not symmetrical, the God of Wealth might look a bit lopsided. Always pin the parts in place first to check the alignment before you start sewing.
FAQs
1. What yarn is best for this project?
Four-strand milk cotton is ideal because it is soft yet holds its shape well. This ensures your Crochet Chinese Wealth God Amigurumi stays sturdy and looks high-quality.
2. Can I use a larger hook?
If you use a hook larger than 2.0 mm, your amigurumi will be bigger, but the stitches will be looser. You might need to adjust your yarn thickness to compensate.
3. How do I clean my amigurumi?
It is best to spot clean your Crochet Chinese Wealth God Amigurumi with a damp cloth. If you must wash it, use cold water and a gentle soap, then air dry it completely.
4. How long does it take to finish?
Depending on your speed, it usually takes about 4 to 6 hours to complete all the parts and the assembly. It is a great weekend project!
5. Can I sell the finished product?
Yes! Hand-crafted items like this Crochet Chinese Wealth God Amigurumi are very popular at craft fairs and online shops, especially during the holiday season.
Conclusion
As you finish the final assembly, take a moment to appreciate the details. The way the sleeves drape and the way the hat ears stand out are all results of your hard work. This Crochet Chinese Wealth God Amigurumi will likely become a conversation starter in your home. Friends will ask where you bought it, and you can proudly say you made it yourself. Remember that every master was once a beginner, and even if your first attempt isn’t perfect, it carries the spirit of your effort. Keep practicing, and soon you will be able to whip up a whole army of these lucky charms to share with everyone you know.
Finally, consider the environment where you work. A well-lit, comfortable space will make your experience with the Crochet Chinese Wealth God Amigurumi much more enjoyable. Put on some festive music and enjoy the rhythmic motion of the hook. This project is as much about the journey as it is about the finished product. We hope this guide helps you create a masterpiece that brings you endless luck and happiness throughout the year. Happy crocheting, and may the God of Wealth bring you all the prosperity you deserve!