
Ready to crochet your very first cuddly little creature? This easy dinosaur amigurumi pattern is perfect for beginners who want something cute, quick, and actually simple to finish. The shaping is easy, the look is playful, and you’ll end up with a tiny dino you’ll be excited to show off.
If you’re new to amigurumi, the hardest part is usually figuring out where to start. A good beginner pattern should help you practice the basics—working in the round, counting stitches, and using increases and decreases—without complicated color switches or lots of tiny pieces to sew on. That’s why this dinosaur is such a great first project. It’s straightforward, relaxing to make, and builds your confidence as you go.
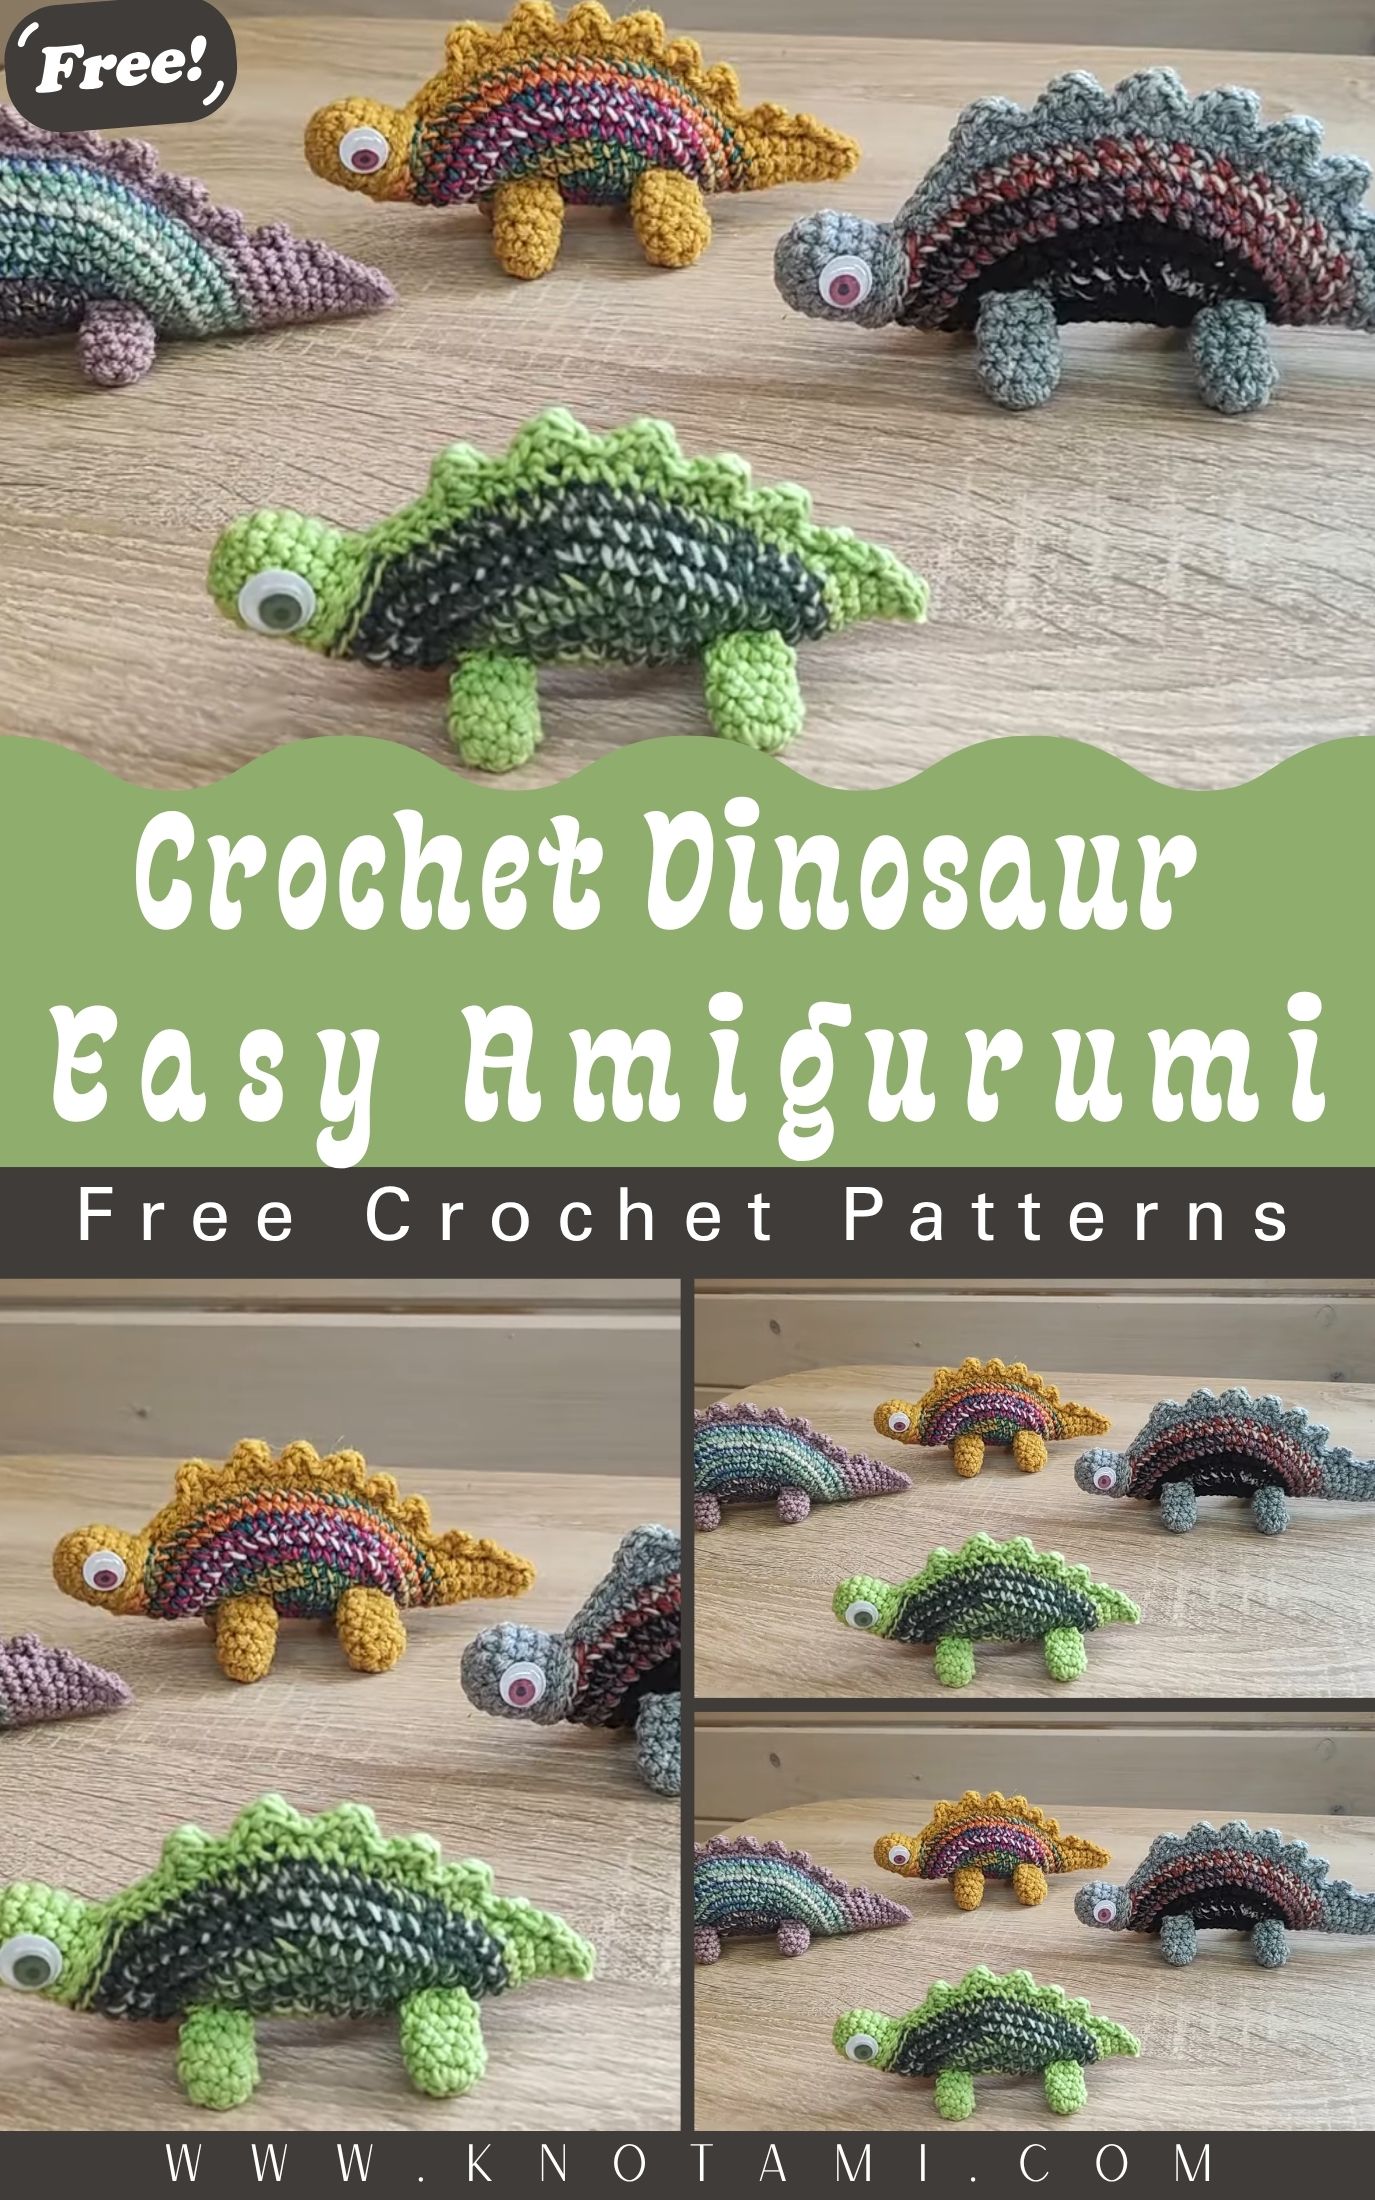
Plus, who doesn’t love dinosaurs? You can make this little guy a cute desk buddy, a small pocket pal to carry around, or a handmade toy for kids just use safe eyes if it’s for little ones. It also makes an amazing DIY crochet gift—because a cheerful, handmade dinosaur is the kind of present that instantly makes people smile.
Materials
Here’s what you’ll need. Don’t worry if your supplies aren’t “perfect”—amigurumi is flexible.
- Yarn in your main dino color (DK or worsted weight is easiest for beginners)
- Small amount of contrasting yarn for spikes/back detail (optional but cute)
- Crochet hook (usually 2.75–3.5 mm for tight stitches; match your yarn and tension)
- Fiberfill stuffing
- Stitch marker (or a safety pin/scrap yarn)
- Yarn needle (for sewing and weaving in ends)
- Scissors
- Eyes:
- Safety eyes (6–10 mm) or
- Black embroidery thread/yarn for stitched eyes (best for baby/toddler toys)
- Optional:
- Pink yarn/chalk for blush cheeks
- White yarn for tiny eye highlights
- Rattle insert (if making a supervised baby toy)
Gauge (Beginner-Friendly)
Gauge in amigurumi isn’t about hitting an exact measurement like it is with sweaters. What matters most is stitch tightness.
You want a fabric that:
- Looks smooth and dense (no big holes)
- Holds stuffing without showing through
Quick test: Crochet the first 3–4 rounds of the body. If you can see daylight through the stitches, switch to a smaller hook. If your hands are struggling and stitches are painfully tight, go up a hook size.
Stitch Guide (Plain English)
You’ll only use a few basic stitches for this beginner crochet dinosaur tutorial:
- MR (Magic Ring): A neat way to start crocheting in the round. You can pull the center closed.
- sc (Single Crochet): Your main stitch for the whole dinosaur.
- inc (Increase): 2 single crochets in the same stitch to make the round bigger.
- dec (Decrease): Combine 2 stitches into 1 to reduce the size of the piece.
- inv dec (Invisible Decrease): A smoother decrease that looks nicer on toys.
- sl st (Slip Stitch): Used to finish off neatly.
- FO (Fasten Off): Cut the yarn and pull through to secure.
Tip: Most amigurumi is worked in a spiral (continuous rounds). Use a stitch marker to mark the first stitch of each round so you don’t lose your place.
Pattern Instructions
This pattern is written to be forgiving and beginner-friendly. If your stitch counts are off by one occasionally, don’t panic—just correct it in the next round and keep going.
Notes
- Work in continuous rounds unless stated.
- Stuff as you go for the best shape.
- Stitch counts are shown in parentheses.
Body (Head + Body in One Piece)
This one-piece body makes life easier: fewer seams, less sewing, and it still looks adorable.
Round 1: MR, 6 sc (6)
Round 2: inc in each stitch (12)
Round 3: (sc, inc) x6 (18)
Round 4: (2 sc, inc) x6 (24)
Round 5: (3 sc, inc) x6 (30)
Rounds 6–9: sc around (30)
At this point, you’ve got a nice round “head” shape.
Round 10: (3 sc, dec) x6 (24)
Round 11: sc around (24)
Now we gently widen for the belly:
Round 12: (2 sc, inc) x6 (30)
Rounds 13–16: sc around (30)
Start shaping toward the bottom:
Round 17: (3 sc, dec) x6 (24)
Round 18: sc around (24)
Round 19: (2 sc, dec) x6 (18)
Start stuffing firmly, shaping the head and belly with your fingers as you fill.
Round 20: (sc, dec) x6 (12)
Round 21: dec x6 (6)
FO, close the hole with a yarn needle.
Beginner tip: Stuff in small pieces, not one giant wad. It prevents lumps and helps the dinosaur keep a smooth shape.
Legs (Make 2 or 4)
You can make two chunky legs for a cute sitting dino, or four smaller legs if you want it to look more “standing.” Beginners usually find two legs quicker and less fiddly—either option works.
Option A: Two Legs (Simplest)
Round 1: MR, 6 sc (6)
Round 2: inc in each stitch (12)
Rounds 3–5: sc around (12)
FO, lightly stuff, leave a long tail for sewing.
Option B: Four Legs (Still Beginner-Friendly)
Round 1: MR, 6 sc (6)
Round 2: (sc, inc) x3 (9)
Rounds 3–4: sc around (9)
FO, lightly stuff, leave a long tail.
Tip: Don’t overstuff legs. Slightly squishy legs are easier to sew on neatly and help the toy sit well.
Tail
A small tail adds instant “dino” charm, and it’s easier than it looks.
Round 1: MR, 4 sc (4)
Round 2: (sc, inc) x2 (6)
Round 3: sc around (6)
Round 4: (2 sc, inc) x2 (8)
Rounds 5–6: sc around (8)
FO, leave a long tail for sewing.
Lightly stuff the base only (the tip can stay unstuffed so it curves nicely).
Spikes / Back Detail
This is the detail that takes your dinosaur from “cute blob” to “definitely a dinosaur.” Keep it simple.
Option A: Tiny Spike Bumps (Quick + Clean)
Make 5–7 little spikes.
For each spike:
- Round 1: MR, 3 sc (3)
- FO, leave a tail
No stuffing needed. These tiny triangles sew on quickly and look adorable.
Option B: Simple Back Ridge (One Piece)
If you prefer sewing fewer pieces:
- Chain 8–12 (depending on how long you want the ridge)
- In the second chain from hook: sl st, sc, hdc, dc, hdc, sc, sl st (adjust to your chain length)
- FO and sew along the back
This makes a wavy ridge that looks great on a mini crochet dinosaur.
Eyes
You’ve got two beginner-friendly options here depending on who the toy is for.
Option A: Safety Eyes (Fastest)
- Place eyes between Rounds 7–8 of the head area
- Space them about 6–7 stitches apart
- Attach backs securely before stuffing gets too firm
Option B: Stitched Eyes (Best for Kids)
For a handmade crochet toy for kids, stitched eyes are safer (no hard parts).
- Use black embroidery thread or thin black yarn
- Stitch a small “U” shape or a simple straight stitch for each eye
- Add a tiny white stitch highlight if you want the eyes to look extra lively
Tip: Stitched eyes also let you adjust expression—sleepy, happy, or curious.
Assembly
This is where it gets fun. Pin pieces first if you can—your dinosaur will look more balanced.
- Attach the legs
- If using 2 legs, sew them onto the lower front half of the body so the dino sits.
- If using 4 legs: position two toward the front and two toward the back, evenly spaced.
- Stitch securely around the top edge of each leg.
- Attach the tail
- Sew the tail centered on the back of the body, slightly above the base (so it doesn’t drag).
- After sewing, gently curve it upward with your fingers.
- Add spikes/back detail
- If using individual spikes, sew them from the top of the head down the back toward the tail.
- Keep spacing consistent. Uneven spikes can still look cute—just aim for “intentionally quirky.”
- Finishing touches
- Weave in all ends.
- Add optional blush cheeks.
- Give the dinosaur a little “shape massage” (seriously—squeeze and smooth it to distribute stuffing).
Pattern Questions (FAQs)
1) Is this project truly beginner-friendly?
Yes. This is an easy crochet dinosaur amigurumi pattern built around single crochet and simple shaping. The pieces are small, the rounds repeat, and the details are optional. If you can single crochet and count stitches, you can make this dinosaur.
2) What yarn is best for a first amigurumi?
Choose a smooth DK or worsted yarn in a light or medium color so you can see stitches clearly. Avoid fuzzy or velvet yarn at first—it hides your stitch placement and makes counting harder. Once you’ve made one dinosaur, velvet becomes a fun “level up.”
3) How do I adjust the size?
The simplest way is to change yarn weight and hook size:
- Smaller dinosaur: thinner yarn + smaller hook
- Bigger dinosaur: thicker yarn + larger hook
You can also add extra rounds in the body “straight sections” (the rounds where you sc around without increasing or decreasing) to make it taller.
4) What beginner mistakes should I watch for?
A few common ones:
- Skipping stitch markers and losing your round start
- Accidentally increasing (2 sc in one stitch) when you didn’t mean to
- Loose tension, which causes holes and visible stuffing
- Overstuffing the head so stitches stretch
Go slowly, count each round, and remember: small imperfections disappear once the toy is stuffed and shaped.
5) Is it safe for little kids?
It can be—just choose the right features.
- For babies/toddlers: embroider eyes, avoid safety eyes and small detachable parts.
- Sew pieces on very securely with tight stitching.
- If gifting, include a note about supervision for very young children.
This makes a sweet, soft, kid-friendly result when finished carefully.
Final Words
If you’ve been nervous to try amigurumi, let this dinosaur be your first win. It’s cute, forgiving, and you’ll learn the exact skills that unlock dozens of other patterns. Follow the steps, take your time with stuffing, and don’t stress about being perfect. When you finish, snap a photo and share it—your first dino deserves a little spotlight.