

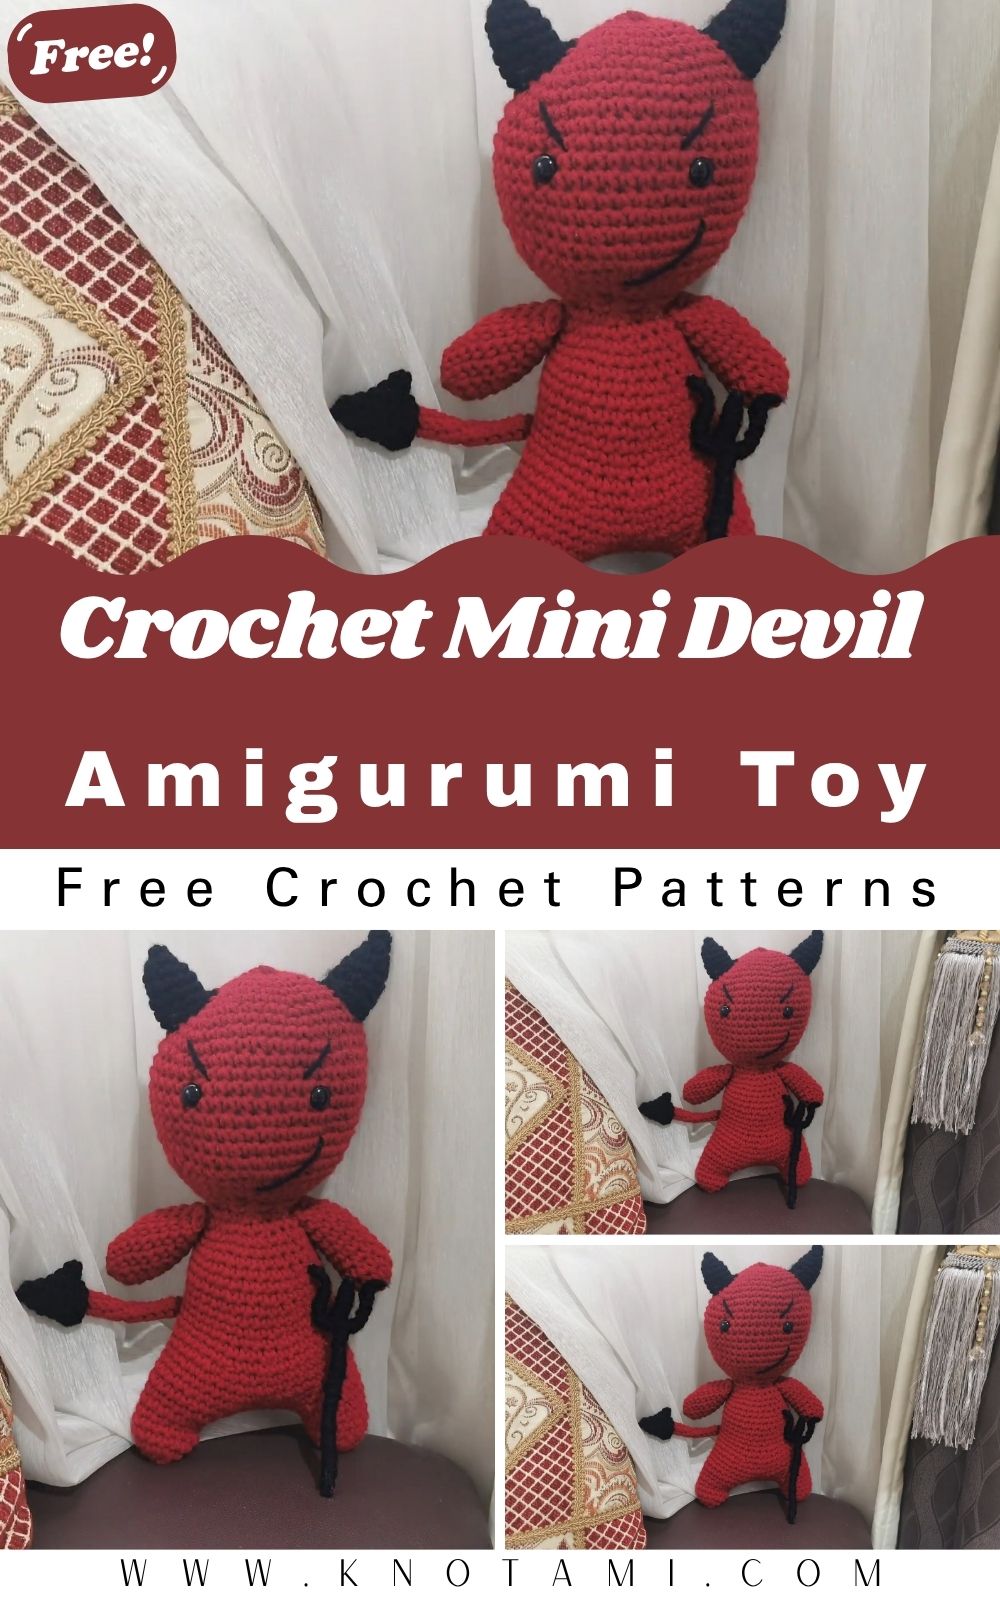
Looking for a quick, cheeky Halloween project you can whip up in an evening? This tiny devil amigurumi is irresistibly plush and round, with little horns, a pointy tail, and a grin that’s more sweet than scary. It’s the kind of bite-sized make that brings instant October charm to your shelf, party table, or trick-or-treat display.
Beginner-friendly yet satisfying for more seasoned crocheters, this pattern keeps things simple and fun. Work it up as a festive decoration, a gift for a plush-loving friend, or a playful addition to your handmade collection. Because it’s so small, it doubles beautifully as a keychain, backpack charm, desk buddy, or even a Halloween party favor.
Materials Needed
To get started on your mini devil amigurumi, gather these supplies:
-
Yarn: DK or worsted-weight yarn in red (for the body), black (for horns and tail), and a little white or pink (for details).
-
Crochet Hook: 2.5 mm or 3 mm, depending on your yarn weight.
-
Stuffing: Polyester fiberfill or soft cotton stuffing.
-
Safety Eyes: 6 mm or 8 mm, or use black embroidery thread if you prefer to stitch the eyes.
-
Tapestry Needle: For sewing pieces together and weaving in ends.
-
Scissors: Sharp enough for clean yarn cuts.
-
Stitch Marker: Helpful for keeping track of rounds.
-
Optional: Keychain ring or ribbon if you plan to make it into a keychain or hanging ornament.
Yarn Tips:
For best results, use smooth-textured yarn so your stitches stay neat and visible. Acrylic yarn works beautifully since it’s soft yet durable. If you want a more luxurious feel, try cotton for crisp stitches or velvet yarn for a soft, plush look.
Color Suggestions:
Classic red with black details works great for a Halloween theme. You could also experiment with purple, dark grey, or even pink for a “cute devil” version perfect for year-round decor or gifts.
Level of Difficulty
This pattern is easy to intermediate, making it great for anyone comfortable with basic amigurumi techniques. You’ll use:
-
Single crochet (sc)
-
Increase (inc) and decrease (dec)
-
Magic ring
-
Working in rounds
-
Sewing pieces together
Even if this is your first Halloween-themed amigurumi, don’t worry, the project is forgiving. The shapes are simple and small, so you can finish them quickly. Once you make one, you might find yourself creating a whole set of colorful mini devils to gift or decorate with.
Step-by-Step Overview
1. Starting the Body
Begin with a magic ring and work in continuous rounds to form a small, oval, or ball-shaped body. This will serve as the main part of your devil. The body should be firm but slightly squishy once stuffed,d not too tight or overfilled.
Add your safety eyes while you’re still partway through the body section, as it’s easier before closing the top. Space them evenly for a friendly, symmetrical look.
Tip: Use your stitch marker to mark the start of each row. It’llll help you avoid losing count, especially as you increase and decrease.
2. Shaping the Head and Face
As you finish the top of the body, you’ll naturally form a round head shape. You can slightly emphasize it by tightening your tension near the top.
Once the body is stuffed, stitch the top closed neatly. Add the facial detail, it’s a small embroidered smile or a mischievous grin that works perfectly for the devilish theme. You can also blush the cheeks lightly with fabric paint or pink yarn for a cute touch.
3. Making the Horns
The horns are what give your amigurumi its devilish personality! Crochet two small cones using black or dark grey yarn. They’re usually made by starting with a few stitches and increasing gradually over a few rounds.
After finishing both horns, stuff them very lightly (or not at all if you prefer pointier horns) and sew them securely on top of the head.
Tip: Place the horns slightly off to the sides rather than directly on top; it gives your devil a more natural and expressive look.
4. Adding Arms and Legs
For the limbs, crochet four small tubes or ovals,s two arms and two legs. These are quick to make and easy to attach.
Sew the arms slightly forward-facing so the devil looks like it’s reaching out or waving. The legs should be placed symmetrically at the bottom, helping it sit flat.
If you want a chibi or baby-style devil, make shorter limbs. Longer limbs will make it look a bit more comical or dramatic.
5. Crafting the Tail
Every good devil needs a tail! Crochet a small chain and add a tiny triangular point at the end. You can slightly curl it or make it stick out straight; ht both look adorable.
Attach the tail to the lower back of your amigurumi, making sure it’s securely sewn so it doesn’t loosen with play or use.
6. Adding Details and Finishing Touches
Now comes the fun part, art the personality!
You can add:
-
A tiny pitchfork made from craft wire or yarn.
-
Small felt wings for a fantasy twist.
-
Glitter yarn highlights for sparkle.
-
A little Halloween hat or cape for an extra festive touch.
If turning it into a keychain, attach a loop of yarn to the top of the head and slip a metal ring through.
Final step: Trim any stray threads and shape your devil with your hands to give it a smooth finish.
Special Features of This Pattern
This Crochet Devil Halloween Amigurumi stands out for being small, quick, and incredibly fun to make.
Why you’ll love it:
-
Simple design perfect for all skill levels.
-
Uses minimal yarn, great for stash busting.A quick project can be completed in an evening.
-
Adorable and spooky, perfect for Halloween displays.
-
Highly customizable with horns, tails, or props.
The tutorial that inspired this project includes clear camera angles and steady pacing, which helps beginners follow along without confusion. It’s a great introduction to seasonal crochet.
Tips for Best Results
To make your little devil look neat and professional, keep these tips in mind:
-
Use a smaller hook than your yarn recommends for tight, gap-free stitches.
-
Count your stitches carefully when increasing or decreasing it keeps the shape even.
-
Stuff gradually, pressing lightly as you go to prevent lumps.
-
Place eyes symmetrically for a balanced, cute look.
-
Sew pieces carefully, pin them in place first before attaching.
-
Don’t overstuff the horns; they should stand upright but not stiff.
-
Work in good lighting, especially when using dark yarn like black or red.
-
Customize expression, tiny changes in the mouth or eyes, give each devil its own attitude.
-
If using a keychain ring, reinforce the attachment point with extra stitches.
-
Store your finished piece flat while shaping to avoid squashing the horns.
How to Use or Gift Your Crochet Devil Halloween Amigurumi
Your completed devil plush can be used in so many fun and creative ways!
-
Halloween Decor: Place it on your mantel, window, or candy table.
-
Keychain or Bag Charm: Turn it into a mini charm for backpacks or purses.
-
Party Favor: Give it out during Halloween gatherings, and guests will love it.
-
Cute Desk Buddy: A little devil watching over your workspace adds humor and charm.
-
Gift Idea: Perfect for friends who love handmade toys or cute, spooky collectibles.
If gifting, wrap your little devil in a small black or orange box with tissue paper. Add a handwritten tag like “Made with Mischief” or “Handmade with a Hint of Trouble” for extra Halloween spirit.
Customization Ideas
The best part about this project is how easy it is to make it your own!
Color Variations:
While red and black are classic, you can experiment with:
-
Purple and silver for a fantasy-inspired devil.
-
Pink and white for a “cute” or Valentine-themed version.
-
Glow-in-the-dark yarn for a spooky nighttime effect.
Yarn Types:
-
Cotton yarn gives structure and crisp definition.
-
Acrylic yarn is soft and easy to shape.
-
Velvet or chenille yarn turns your devil into a cuddly plush toy.
Size Adjustments:
Use thicker yarn and a larger hook for a huggable plush, or finer yarn for tiny keychain-sized devils.
Add-ons:
-
Mini cape, scarf, or pitchfork for detail.
-
Safety eyes with glitter or embroidered stars for a whimsical touch.
-
Sew on tiny hearts or initials to personalize gifts.
The possibilities areendlesss. Once you’ve made one, you’ll likely want to create a small army of colorful little devils for every occasion.
Conclusion
The Easy Mini Crochet Devil Halloween Amigurumi Pattern Toy is one of those projects that perfectly captures the spirit of handmade fun, simple, fast, and full of personality. It’s a relaxing make that fits right into your Halloween crafting lineup or any time you feel like adding a bit of playful mischief to your collection.