
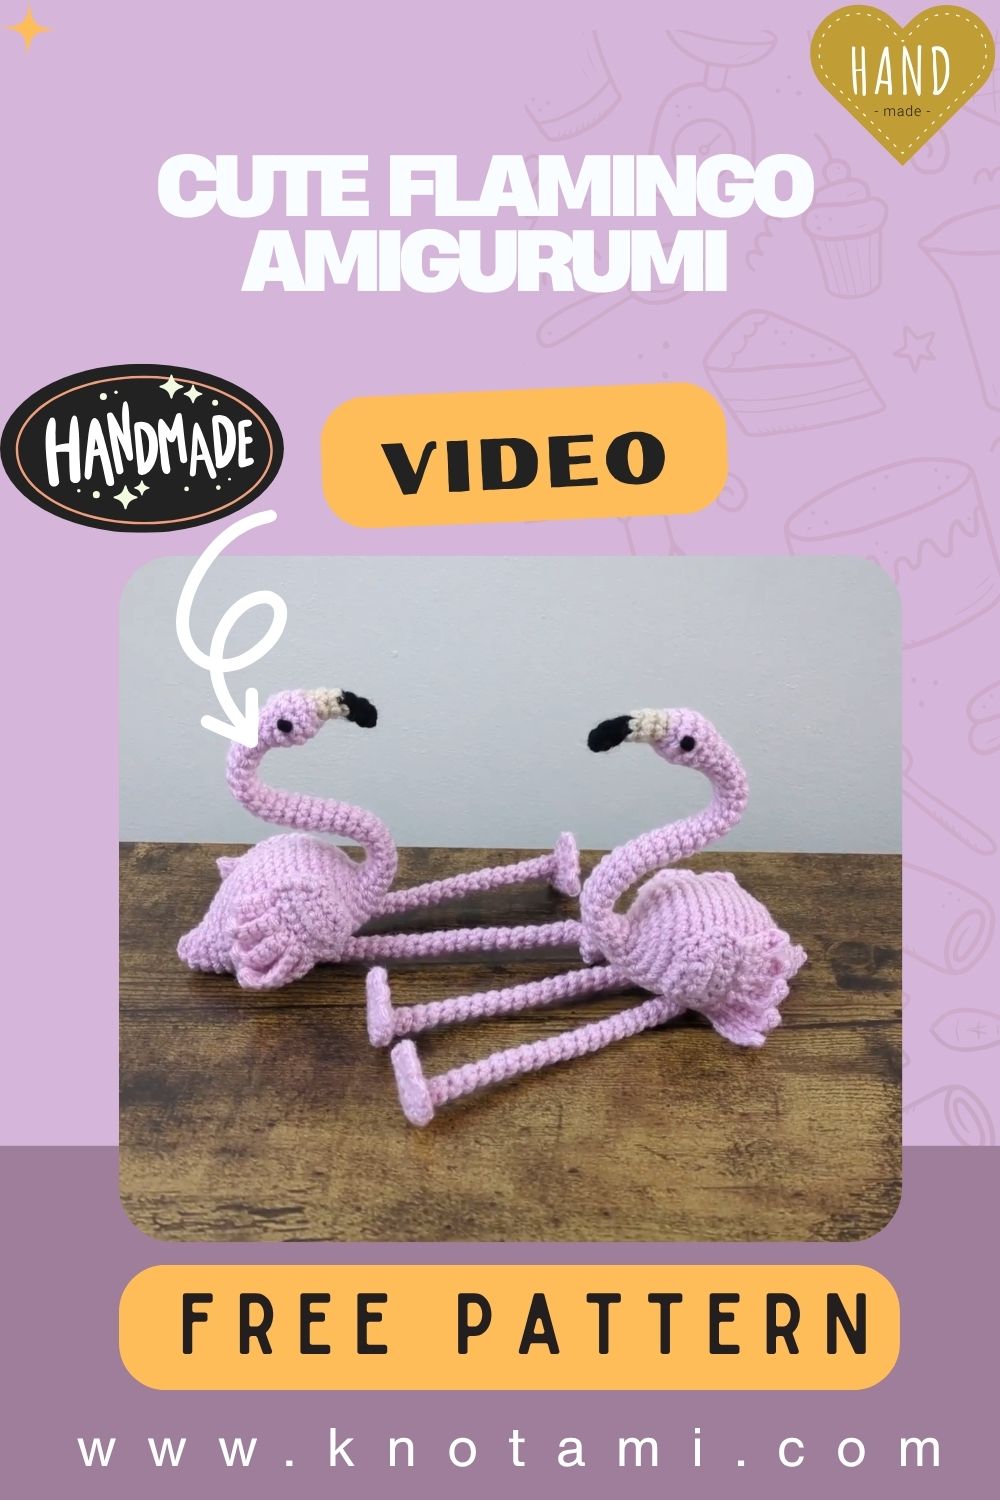
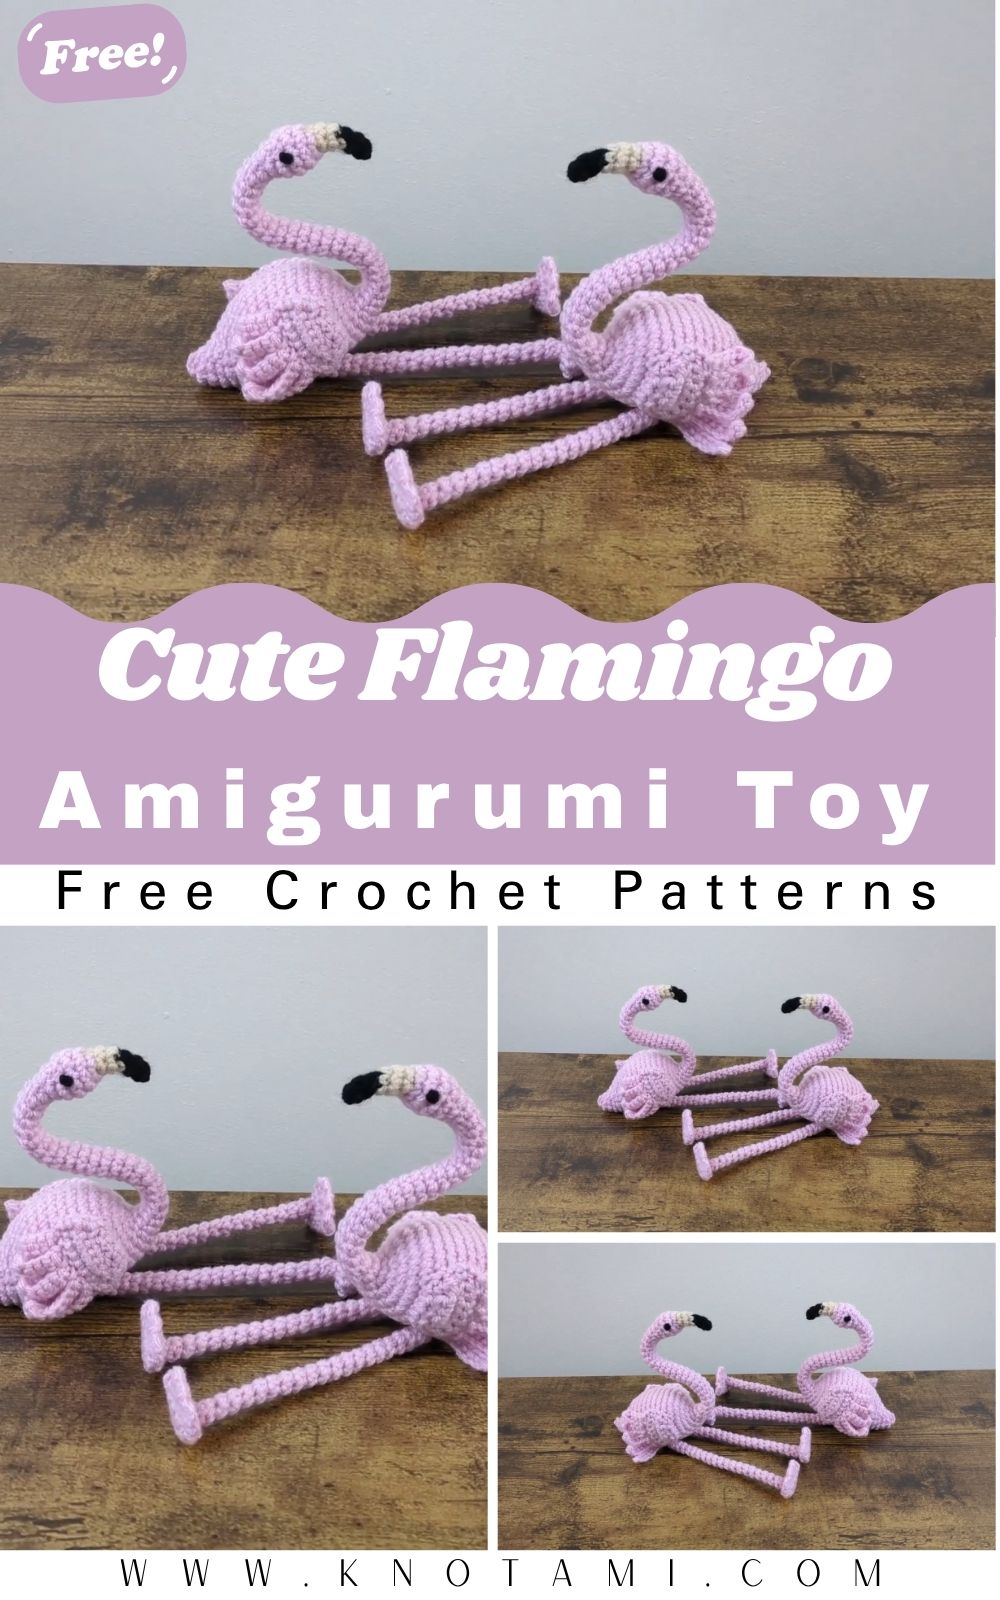
This Crochet Flamingo Amigurumi Pattern creates a charming little flamingo with a soft, rounded body, a gently curved neck, and sweet stitched details that instantly give it personality. The finished piece feels playful and cheerful, with that classic flamingo pose that looks great whether it’s standing on a shelf or sitting on a desk. It’s the kind of project that looks impressive but still feels approachable while you’re working on it.
This project is great for beginners who want to move beyond basic balls, as well as experienced crocheters looking for a relaxing, colorful make. Kids, teens, and gift makers will all enjoy this pattern, and it works beautifully as a toy, nursery decor, shelf ornament, or thoughtful handmade gift for animal lovers.
Materials Needed
Before you start, gather your supplies so the project flows smoothly from beginning to end.
-
Yarn: Medium-weight (worsted) yarn in pink for the body, with small amounts of black and white for details
-
Crochet hook: 3.0–4.0 mm (choose based on your tension)
-
Stuffing: Polyester fiberfill
-
Safety eyes or embroidery thread: For facial features
-
Tapestry needle: For sewing pieces together
-
Scissors
-
Stitch markers: Helpful for keeping track of rounds
-
Optional items: Blush yarn for cheeks, wire or pipe cleaner for extra neck support, ribbon for decoration
For this project, smooth yarn with good stitch definition works best. Acrylic or cotton blends are easy to manage and help the stitches look neat and even. Avoid very fuzzy yarns if you want the flamingo’s shape and details to stand out clearly.
Traditional pink shades are always a favorite, but you can easily customize this pattern. Soft pastels give a nursery-friendly look, while bright pinks create a bold, playful flamingo. A slightly darker shade for the wings or feet can also add subtle contrast without making the design complicated.
Level of Difficulty
This Crochet Flamingo Amigurumi Pattern is best described as beginner-friendly to easy-intermediate. If you’re comfortable working in the round and have made simple amigurumi before, you’ll feel right at home with this project.
The pattern uses basic stitches like single crochet, increases, decreases, and simple shaping techniques. You’ll also practice sewing parts together, which is a great skill to build confidence. Even if some steps feel new, the process is gradual and forgiving, making it easy to learn as you go without stress.
Step-by-Step Overview
Starting the Body
The project usually begins with the main body, worked on in continuous rounds. This creates a smooth, rounded base that gives the flamingo its soft, plush look. As you increase evenly, the shape naturally forms without sharp angles.
At this stage, it helps to keep your stitch count consistent. Using a stitch marker makes a big difference, especially if you like to crochet while watching TV or listening to music.
Shaping the Body
Once the body reaches its widest point, you’ll start decreasing to close the shape. Stuff the body gradually as you go. Adding small amounts of fiberfill helps avoid lumps and keeps the flamingo nicely balanced.
If your piece curves slightly, that is normal. Gentle stretching and adjusting the stuffing can help refine the shape before closing.
Creating the Neck and Head
The neck is one of the most charming features of this flamingo. It’s worked as a narrow tube that curves naturally, giving the flamingo its elegant posture. Some crocheters like to add a thin piece of wire or pipe cleaner inside for extra stability, but this is optional.
The head is typically small and rounded, attached directly to the neck or worked separately and sewn on. Take your time here, as proper placement makes a big difference in the flamingo’s expression.
Making the Wings and Beak
The wings are small and simple, adding just enough detail to bring the flamingo to life. These are usually flat or lightly stuffed pieces sewn onto the sides of the body.
The beak is worked in contrasting colors to capture that classic flamingo look. Even simple stitching can create a clear, expressive face when placed carefully.
Legs and Feet
The legs are often thin and slightly elongated, giving the flamingo its signature stance. Whether you choose short legs for a sitting flamingo or longer legs for a standing one, keeping both sides even is key.
Pause here and check symmetry before attaching. Adjusting placement now saves time later.
Assembly and Finishing Touches
Once all parts are complete, everything comes together in the final assembly. Sewing slowly and checking alignment before tightening stitches helps ensure a polished finish.
This is also the stage where you can add personality with embroidered eyes, blush cheeks, or small decorative touches.
Special Features of This Pattern
This pattern stands out because it combines simplicity with personality. The tutorial is easy to follow, with clear demonstrations and steady pacing that make it accessible even if you’re newer to amigurumi.
-
Simple construction with minimal sewing
-
Smooth shaping that creates a realistic flamingo silhouette
-
Clear visual guidance for each stage
-
Flexible design that works well with different yarn types and sizes
Compared to very basic animal patterns, this flamingo feels more expressive while still being relaxing to make.
Tips for Best Results
Taking a few extra moments during the process can really elevate the finished piece.
-
Keep your tension even to maintain a smooth fabric.
-
Use stitch markers to track rounds accurately.
-
Stuff gradually in small amounts for a balanced shape.
-
Check symmetry before attaching wings and legs.
-
Adjust the hook size if the stitches look too loose.
-
Sew pieces slowly and securely.
-
Take breaks to avoid hand fatigue.
-
Lightly stretch the fabric to smooth out minor uneven areas.
How to Use or Gift Your Crochet Flamingo Amigurumi Pattern
A finished flamingo amigurumi is incredibly versatile. It works beautifully as a toy, nursery decoration, shelf accent, or desk companion. Its cheerful look makes it especially popular for spring and summer decor.
This flamingo also makes a thoughtful handmade gift for birthdays, baby showers, holidays, or anyone who loves animals. Pair it with a simple gift bag, a handwritten tag, or a small themed box to make the presentation extra special.
Customization Ideas
One of the best parts of this pattern is how easy it is to customize. Changing the yarn color instantly creates a different mood, from soft pastel flamingos to bold, modern designs.
You can also experiment with yarn types. Cotton gives crisp definition, while plush yarn creates a softer, cuddlier flamingo. Adjusting the hook size allows you to scale the project up or down depending on your preference.
Small additions like bows, flowers, embroidered eyelashes, or even a keychain loop can turn this flamingo into a unique creation. Don’t be afraid to make it your own.
Conclusion
This Crochet Flamingo Amigurumi Pattern is a wonderful way to enjoy a relaxing crochet session while creating something full of charm and character. The process is calming, the steps are approachable, and the result feels rewarding every time.