
There’s a certain kind of quiet magic that lives in the rhythm of crochet the way yarn loops and hooks turn imagination into touchable joy. Each stitch feels like a breath of calm, each round like a heartbeat of creativity. With every piece, you’re not just making a toy you’re crafting a tiny world of warmth, patience, and love. That’s the real beauty of crochet: it transforms simple yarn into something that carries emotion.
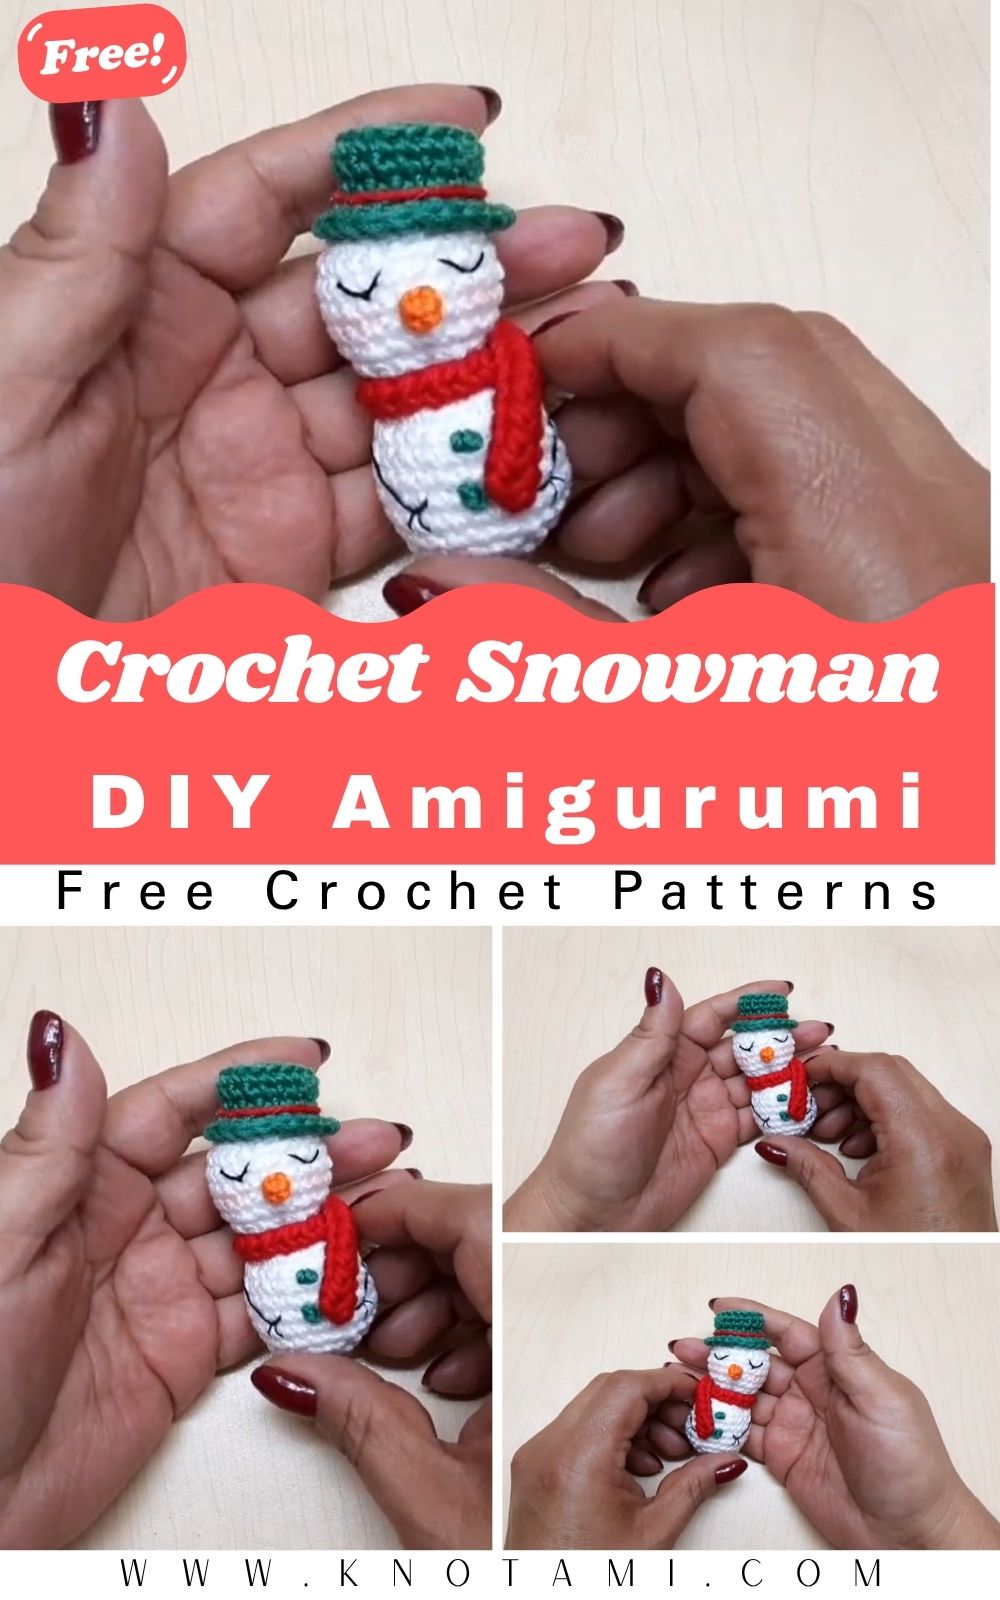
One of the most delightful projects for the winter season is the Crochet Mini Snowman Amigurumi. Tiny, cheerful, and endlessly customizable, this handmade snowman captures the very essence of winter coziness. Its plump little body, button eyes, and snug scarf instantly spark holiday happiness whether it’s hanging from your Christmas tree or sitting by your desk spreading soft smiles.
This project welcomes everyone from absolute beginners looking for an easy start to experienced crocheters seeking a quick, relaxing make. It uses basic stitches, simple shaping, and fun accessories, yet the result looks professionally crafted. You’ll explore creative techniques like building spheres, attaching small parts, and adding expressive details all within a compact, enjoyable session.
Crocheting a snowman is more than a craft it’s a cozy ritual. As the yarn slides through your fingers and takes form, time slows down. You find comfort in repetition and joy in the moment you finish your last stitch. Whether made for décor, gifting, or self-care, this snowman is proof that handmade art can melt hearts even in the coldest season.
Materials & Tools
Here’s everything you’ll need to bring your tiny snowman to life:
Materials:
-
Yarn: Soft acrylic or cotton yarn in white (main body), orange (nose), black (buttons / eyes / hat), and any color you love for the scarf. DK or light-worsted (Category 3) yarn works best.
-
Hook: 2.0 mm – 2.5 mm crochet hook (choose size that matches your yarn and tension).
-
Stuffing: Polyester fiberfill for a plush, even shape.
-
Safety Eyes: 6 mm – 8 mm black eyes (or use black embroidery thread).
-
Tapestry Needle: For sewing pieces together and weaving ends.
-
Scissors: Sharp, precise craft scissors.
-
Stitch Markers: To mark your rounds.
-
Optional: Tiny buttons, beads, or miniature felt pieces for décor.
Yarn Tips & Color Advice:
For crisp, classic snowman vibes, choose bright white yarn. But if you want a whimsical touch, try off-white, cream, or sparkle yarn with metallic threads. Cotton yarn provides a neat, defined texture; acrylic yields a softer, fluffier finish. If you love modern tones, pastel blue or mint green scarves look adorable, while deep red and forest green bring classic holiday charm.
Step-by-Step Crochet Instructions
Below you’ll find detailed steps to create your very own crochet snowman from head to base.
Making the Head
-
Start with a magic ring using white yarn.
-
Crochet 6 single crochets (sc) into the ring, then tighten the loop.
-
Increase each round until you reach about 24 stitches.
-
Continue several rounds without increasing to give the head height.
Before closing, add stuffing gradually enough to hold shape but not bulge. Keep the stitches tight to prevent the filling from showing through.
Pro Tip: Rotate your work occasionally to ensure the head stays round. If it leans, add a little extra stuffing to the lighter side.
Forming the Neck and Upper Body
After finishing the head, crochet one or two rounds without increases to narrow slightly for the neck. Then begin increasing again to form the upper half of the body.
Stuff as you go so the snowman remains firm but squeezable. Keep the neck slightly smaller than the head this proportion gives your snowman its adorable, cartoon-like cuteness.
Building the Main Body
Continue working in rounds, increasing until you reach the widest part (about 30 stitches). Crochet several rounds even, then start decreasing gradually to close the base.
Before the final round, fill the body fully you want it plush and stable. Shape with your fingers to create a smooth transition between upper and lower sections.
Expert Note: If you prefer a “stacked snowball” look, you can crochet two separate spheres (head + body) and sew them together instead of making one continuous piece.
Shaping and Attaching the Base
For a neat bottom, crochet a flat circle slightly smaller than the body’s opening. Sew it closed using invisible whip stitch. This helps your snowman stand upright on shelves or mantels.
Alternatively, you can leave the base slightly rounded for a classic snowball finish perfect for hanging ornaments.
Pro Tip: To make it freestanding, insert a small washer or cardboard circle inside before closing.
Creating the Arms, Hat, and Nose
Arms:
Crochet two short tubes using brown or beige yarn (tiny twigs!). Stuff lightly and sew to the sides between the head and body.
Nose:
Using orange yarn, chain 2 and work small increases to form a cone. Stuff lightly and attach in the center of the face.
Hat:
With black yarn, crochet a flat circle for the brim, then work upward rounds to form the cylinder. You can add a color band with red or green yarn for festive flair.
Pro Tip: Lightly stuff the hat to keep its shape, then sew or glue it slightly tilted for personality.
Assembly and Positioning
Attach the head to the body (if made separately) using whip stitch, ensuring alignment. Place safety eyes about six rounds down from the top, spaced evenly apart.
Embroider a sweet smile beneath the eyes with black thread. For blush, lightly dab pink fabric paint or embroidery floss.
Once all parts are attached, check that your snowman stands straight and symmetrical before weaving in all loose ends.
Adding Final Touches and Accessories
Now the fun truly begins! Wrap a mini crocheted scarf around its neck, sew on buttons, or add a pom-pom to the hat.
You can also crochet a tiny broom, snowflake, or even a cup of hot cocoa for added cuteness. Use leftover yarn scraps to get creative!
Finishing Tip: If gifting, tie a tiny ribbon around its neck with a handwritten tag it turns a simple plush into a keepsake.
Customization Ideas
Personalizing your snowman is half the joy. Here are ideas to inspire your creativity:
-
Classic Holiday Look: White body, red scarf, black hat, and coal-style buttons.
-
Pastel Winter: Mint body, pink hat, and cream scarf for a cozy aesthetic.
-
Frosty Fantasy: Use glitter or shimmer yarn for an icy, magical look.
-
Character Versions: Turn your snowman into a snow-cat or snow-bear by adjusting ears!
-
Mini Ornament Set: Make several in different colors and string them as garland.
-
Holiday Themes: Add reindeer antlers, elf ears, or mini Santa beards.
No matter how you decorate, your snowman will be one-of-a-kind a true expression of your style.
Advanced Tips & Troubleshooting
Take your amigurumi skills to the next level with these expert suggestions:
-
Invisible Decreases: Insert the hook under front loops of two stitches, yarn over, pull through both, then complete no gaps!
-
Even Tension: Keep your yarn hand relaxed. Consistent loops create smooth shapes.
-
Avoid Twisted Rounds: Always mark your first stitch; it prevents spiraling.
-
Fix Uneven Shaping: Use your needle to redistribute stuffing gently.
-
Color Changes: Drop the old yarn on the last yo of the previous stitch, pick up the new color cleanly.
-
Seamless Joins: Use invisible whip stitch for attaching parts; hides stitch lines beautifully.
-
Stuffing Balance: Fill gradually; too much can distort shape, too little causes sagging.
-
Pattern Reading: Learn abbreviations sc = single crochet, inc = increase, dec = decrease, sl st = slip stitch.
-
Finishing Polish: Steam lightly (without touching yarn directly) to relax fibers.
-
Storage Protection: Keep finished projects in breathable bags away from dust.
Care Instructions
Your crochet snowman deserves gentle love and care.
-
Hand Wash Only: Use lukewarm water and mild soap.
-
Rinse Softly: Press (don’t wring) to remove excess moisture.
-
Air Dry Flat: Lay on a towel; reshape while damp.
-
Avoid Sunlight: Bright light may fade colors.
-
Long-Term Storage: Place in a sealed box with silica gel or lavender pouch to prevent humidity.
Proper care keeps your snowman bright and fluffy for many winters to come.
Display & Gift Ideas
Your Mini Snowman Amigurumi is wonderfully versatile! Here are fun, creative ways to show it off or share it:
-
Home Décor: Display on mantels, windowsills, or holiday tables.
-
Kid’s Room Buddy: A soft winter companion for little ones.
-
Desk Charm: Brighten your work area with festive cheer.
-
Christmas Ornament: Add a hanging loop and dangle it on your tree.
-
Gift Topper: Tie to wrapped presents for a personal touch.
-
Stocking Stuffer: Small enough to slip inside with candies and love notes.
Because it’s tiny, light, and handmade, it fits perfectly anywhere joy belongs.
Benefits of Crocheting a Mini Snowman Amigurumi
Beyond the finished plush, this project brings emotional and creative rewards:
-
Relaxation & Mindfulness: Repetitive motion soothes the mind and reduces stress.
-
Stress Relief: Focused crafting releases tension it’s like yarn meditation!
-
Accomplishment & Joy: Watching your creation take shape is deeply satisfying.
-
Eco-Friendly Gifting: Handmade beats mass-produced, reducing waste and adding meaning.
-
Emotional Connection: Gifting something handmade conveys care words can’t.
-
Skill Growth: Learn shaping, color changes, and part assembly core amigurumi skills.
-
Community Spirit: Join online crochet groups; share progress, gain encouragement, and inspire others.
Each snowman you make becomes a small story of patience, creativity, and warmth.
Photography & Social Media Tips
Want to share your adorable snowman online? Here’s how to make your photos shine:
-
Natural Daylight: Shoot near a window for soft, diffused light no harsh shadows.
-
Clean Background: Neutral surfaces like white, gray, or wood textures highlight your work.
-
Festive Props: Add pinecones, yarn skeins, fairy lights, or a steaming mug for cozy vibes.
-
Close-Ups: Focus on eyes, scarf texture, and hat details to capture craftsmanship.
-
Angles: Try top-down and 45-degree shots; they reveal shape and depth.
-
Editing: Gently brighten and sharpen, avoiding over-saturation.
A little styling makes your project as photogenic as it is adorable!
Conclusion
The DIY Crochet Mini Snowman Amigurumi Pattern is more than a holiday project it’s a piece of happiness you can hold. From the first loop to the last stitch, you’ll feel the calm rhythm of creation and the excitement of bringing a character to life.
In the end, your tiny snowman will do more than decorate a space it’ll remind you of quiet evenings spent crafting, the warmth of handmade art, and the joy of giving. Whether perched on your shelf or wrapped as a heartfelt gift, it will always carry that special glow only handmade things have.
So grab your hook, your favorite yarn, and a cup of cocoa. Let your imagination snow and crochet yourself a little snowman who’ll melt hearts all winter long.