
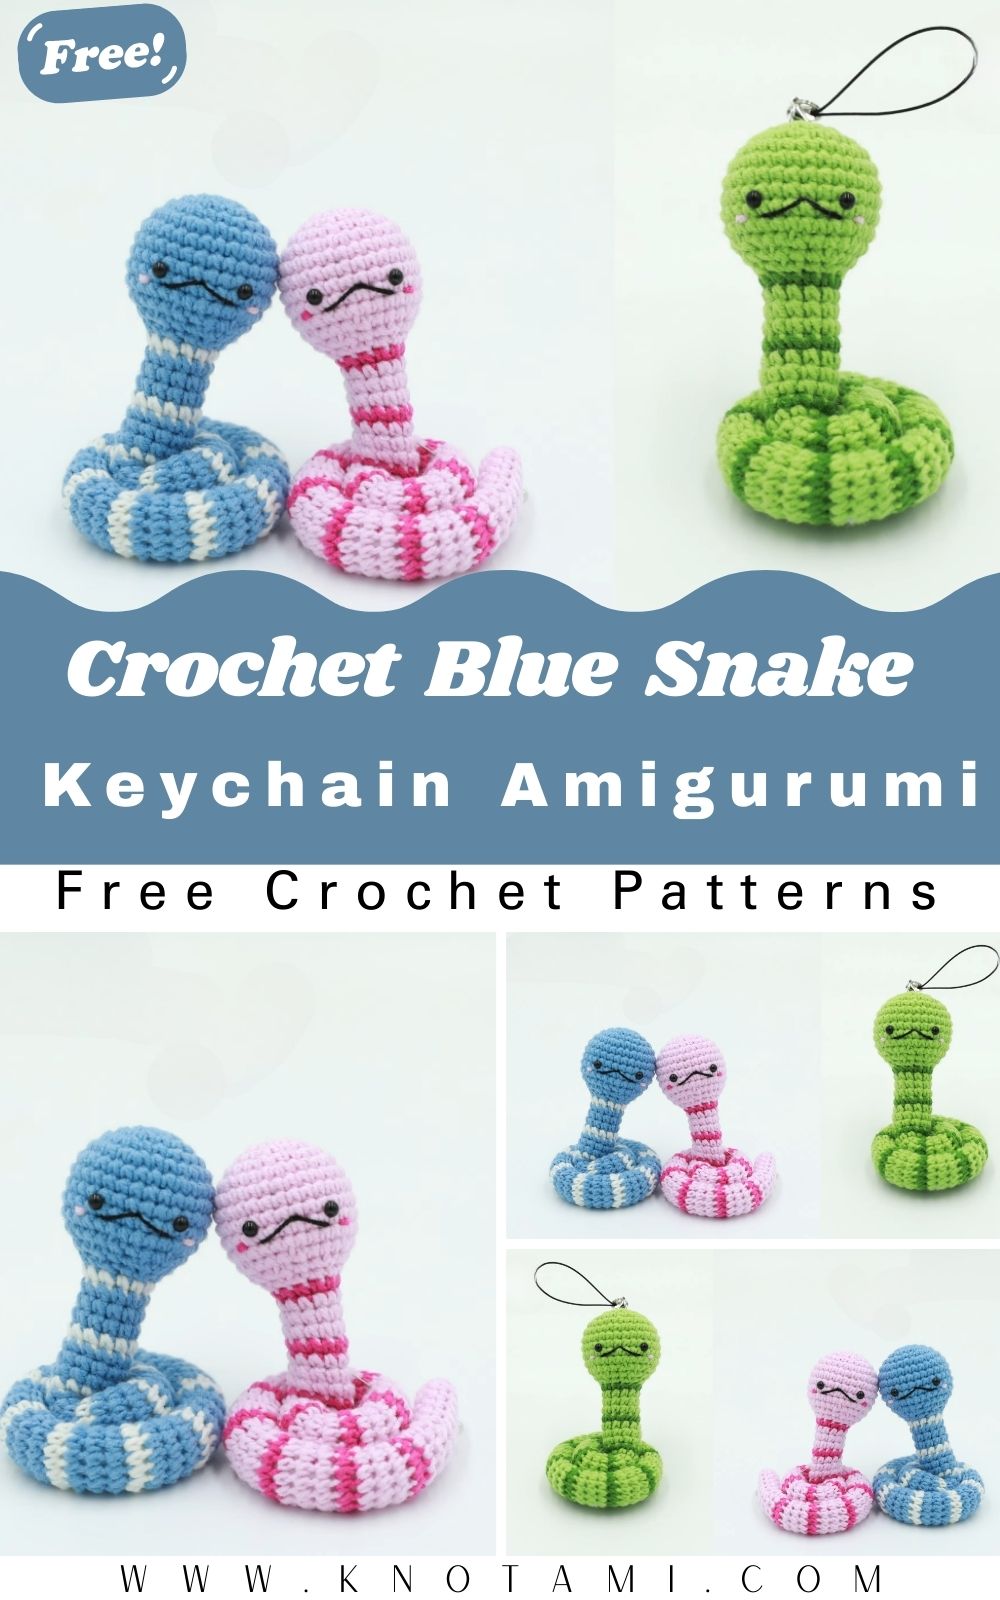
Are you looking for a fun and festive way to celebrate the Year of the Snake? This Crochet Snake Keychain Pattern is the perfect project for you! Whether you are a seasoned pro or just starting your journey with a hook and yarn, this guide will help you create a charming, coiled companion. Not only is this little blue snake incredibly cute, but it is also a versatile accessory that you can use to brighten up your daily life. Because the design allows the snake to uncoil, you can wrap it around bag straps or use it as a traditional keyring.
Furthermore, this project is a fantastic way to practice your amigurumi skills. We will be working in rounds to create a seamless, fluid body that looks professional yet handmade. Using vibrant blue and white yarn creates a striking contrast that stands out on any backpack or set of keys. Consequently, you will find that this snake becomes a great conversation starter. Let’s grab our materials and dive into this creative process together to make something truly special.
The video embedded above provides a visual walkthrough of every single stitch mentioned in this guide. Watching the video while reading these instructions will help you visualize the transitions between the head, body, and tail. It is especially helpful for seeing exactly where to place your safety eyes and how to embroider the tiny, cheerful face. Therefore, I highly recommend having the video play in the background as you work through the rows.
Skill Level: Advanced Beginner
This Crochet Snake Keychain Pattern is categorized as an advanced beginner project. While it uses basic stitches like the magic ring, single crochet (short knit), and decreases, it requires some attention to detail during the color changes. However, do not let that intimidate you! The repetitive nature of the body sections makes it a very relaxing and meditative project once you get past the shaping of the head.
Tutor’s Suggestions for Success
Before you begin, I have a few personal tips to ensure your snake turns out perfectly. First, always use a stitch marker to keep track of your rounds, as the spiral can become confusing. Second, make sure to stuff the body firmly but gradually. If you wait until the very end to add cotton, it will be much harder to push the stuffing through the long, narrow body. Lastly, keep your tension consistent so the white stripes look even and professional.
Materials Needed for Your Crochet Snake
To create this adorable accessory, please prepare the following supplies:
-
Yarn: Donghwa thread (or similar cotton yarn) in Blue (Color 361) and White (Color 301).
-
Crochet Hook: A 2.5mm or No. 4 crochet hook.
-
Stuffing: High-quality polyester fiberfill or cotton.
-
Eyes: Small plastic safety eyes or black beads.
-
Face Details: Small amounts of pink and black embroidery thread.
-
Tools: Sharp scissors, a tapestry needle, and a glue gun for the eyes.
-
Optional: A cellphone ring or standard metal keyring.
Step-by-Step Guide to the Crochet Snake Keychain Pattern
Phase 1: Creating the Head (Rounds 1 to 13)
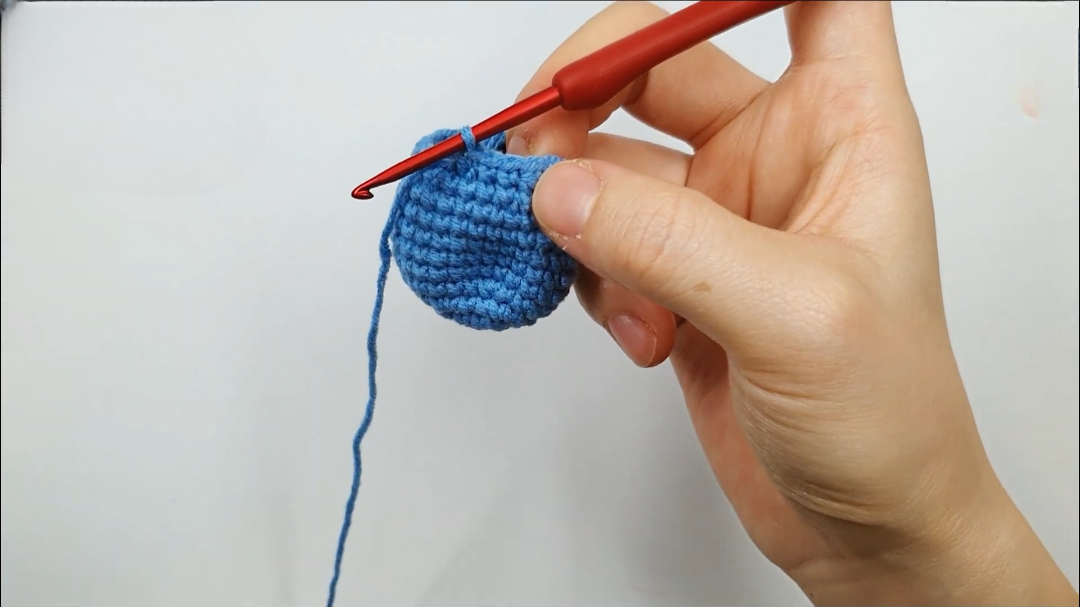
Start by making a magic ring with your blue yarn. In Round 1, work 6 single crochet (sc) stitches into the ring. For Round 2, increase in every stitch to reach 12 stitches. In Round 3, follow the pattern of 1 sc and then 1 increase (18 stitches). For Round 4, do 2 sc followed by an increase (24 stitches). Round 5 consists of 3 sc and an increase (30 stitches).
From Rounds 6 through 10, simply work 30 sc in each round to build the height of the head. In Round 11, we begin decreasing: work 3 sc and then a decrease (24 stitches). Round 12 requires 2 sc and a decrease (18 stitches). Finally, in Round 13, work 1 sc and a decrease (12 stitches). This forms the base of the head where it meets the neck.
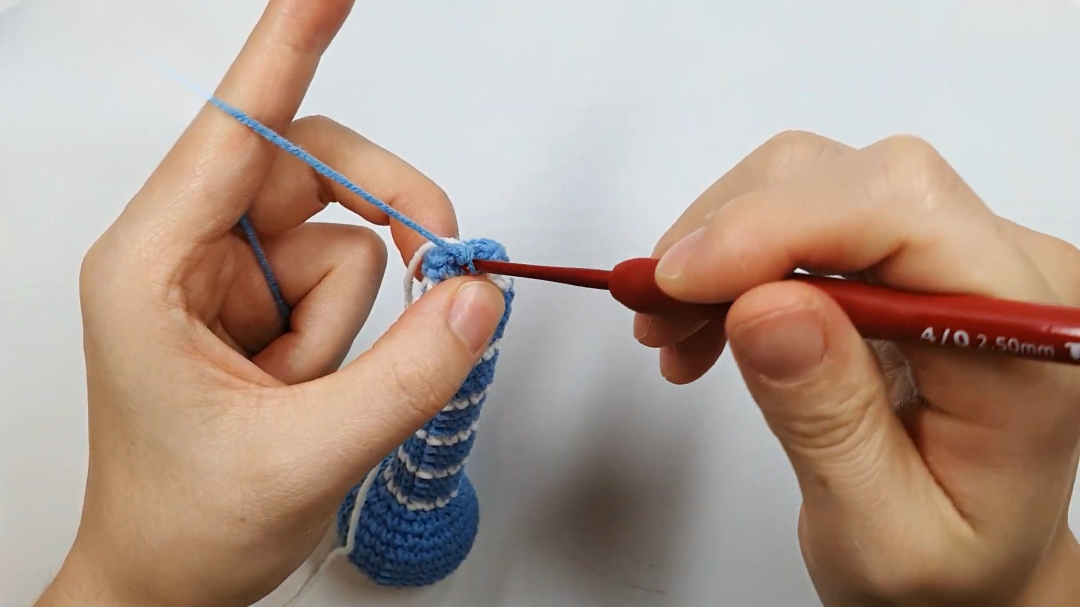
Phase 2: The Striped Body (Rounds 14 to 50)
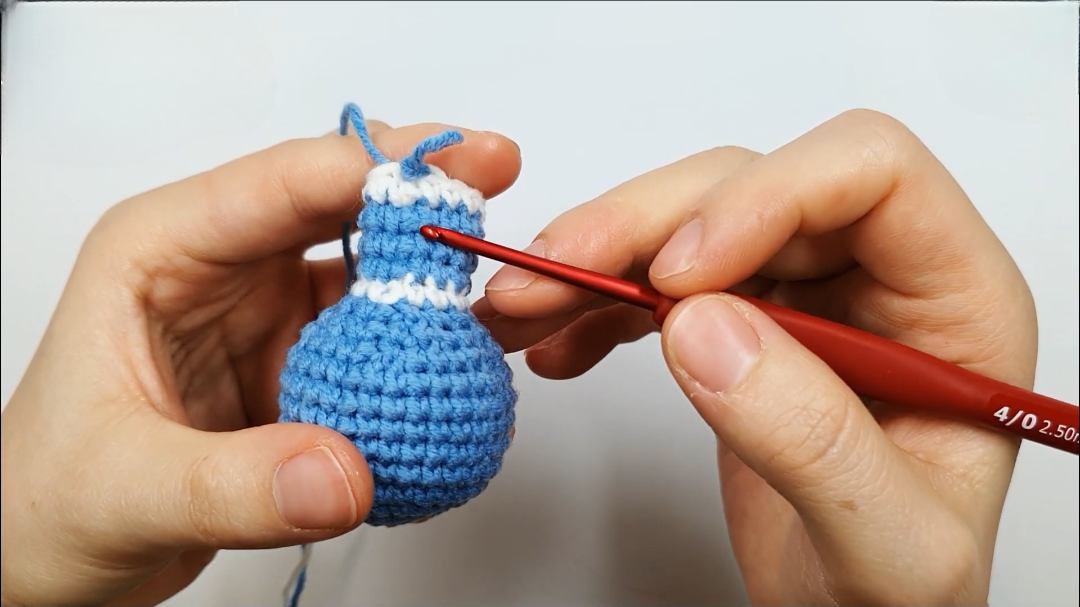
Now, change to your white yarn for Round 14. Work 12 sc around. For the next three rounds (15, 16, and 17), switch back to blue yarn and work 12 sc. This established pattern of one white row and three blue rows is the secret to a beautiful Crochet Snake Keychain Pattern. Continue this pattern until you reach Round 34. Remember to add stuffing as you go!
At Round 35, we will slightly taper the body. Work 10 sc and then one decrease to bring your count to 11 stitches. Continue the 3-blue, 1-white color pattern with 11 stitches per row until you reach Round 50. By doing this, the snake looks more realistic as it gets thinner toward the tail.
Phase 3: The Tail and Finishing (Rounds 51 to 71)
In Round 51, decrease again to reach 10 stitches. Continue your pattern until Round 62, which should be your 13th white stripe. After this, cut the white yarn and finish the tail using only blue. From Round 63 to 65, perform decreases until you have 7 stitches left. For Rounds 66 to 70, work 7 sc in each row. In the final Round 71, decrease to 6 stitches, cut the thread, and use your tapestry needle to sew the tip closed.
Where Can You Use Your New Snake?
This versatile Crochet Snake Keychain Pattern results in an item that has many uses. Obviously, it serves as a fantastic keyring for your house or car keys. However, because it is long and flexible, you can also wrap it around the handle of a purse or a laptop bag. Furthermore, it makes a wonderful “fidget” toy for your desk or a cute ornament to hang from a rearview mirror. If you make several in different colors, they can even be used as festive decorations for a nursery or a bookshelf.
Tips and Tricks for a Professional Finish
To make your snake look like it came from a high-end boutique, focus on your color transitions. When changing from blue to white, pull the new color through the last two loops of the previous stitch. This creates a clean line. Additionally, if you want your snake to be “poseable,” you can insert a blunt floral wire inside the body along with the stuffing. This allows you to bend the snake into different shapes that it will hold permanently.
Common Mistakes to Avoid
One common mistake is overstuffing the neck area, which can make the head look disconnected from the body. Ensure the transition is smooth. Another error is neglecting to tie off the yarn ends securely during color changes; if these come loose, your snake might unravel. Finally, be careful not to place the eyes too high on the head. Placing them lower, around Round 8, gives the snake a much “cuter” and more “chibi” appearance.
Frequently Asked Questions
1. Can I use a different yarn weight for this pattern?
Yes, you certainly can! However, keep in mind that using a thicker yarn like worsted weight will result in a much larger snake. If you change the yarn, make sure to adjust your hook size accordingly to keep the stitches tight so the stuffing doesn’t show through.
2. How do I make the snake longer?
If you want a longer snake, simply add more sets of the “3 blue, 1 white” rows before you start the tapering process. This pattern is very easy to customize to your preferred length.
3. Is the glue gun necessary for the eyes?
While safety eyes are very secure, many crafters use a glue gun for added stability or if they are using flat-backed beads. If you are making this for a small child, I recommend embroidering the eyes with black thread instead for safety.
4. How do I clean my crochet keychain?
Since this is made of cotton thread, you can gently hand wash it with mild soap and let it air dry. Avoid using a washing machine, as it might distort the shape of the head or displace the stuffing.
5. Why does my snake look twisted?
Crocheting in a spiral naturally creates a slight slant. If your stripes look very slanted, it might be due to your tension. Try to keep your stitches relaxed but firm to minimize the spiral effect on the stripes.
Safety Precautions and Final Thoughts
When working on this Crochet Snake Keychain Pattern, please be mindful of small parts. Safety eyes and beads can be a choking hazard for children under three years old. Additionally, when using a lighter or a glue gun for finishing touches, always work in a well-ventilated area and keep them away from flammable materials.
In conclusion, creating this blue snake is a rewarding experience that combines holiday tradition with the joy of handmade craft. Because you followed this guide, you now have a unique, durable, and adorable accessory. I hope you enjoyed every stitch and feel proud of the little snake you have brought to life. Happy crocheting, and may your Year of the Snake be filled with creativity and joy!