

it’s a Peaceful amigurumi creature or a cozy accessory, crochet holds the magic of turning imagination into something real and huggable. Creating with your hands looping, pulling, and shaping yarn is both grounding and inspiring. It doesn’t just produce a beautiful final result but also brings joy through the journey of slow crafting.
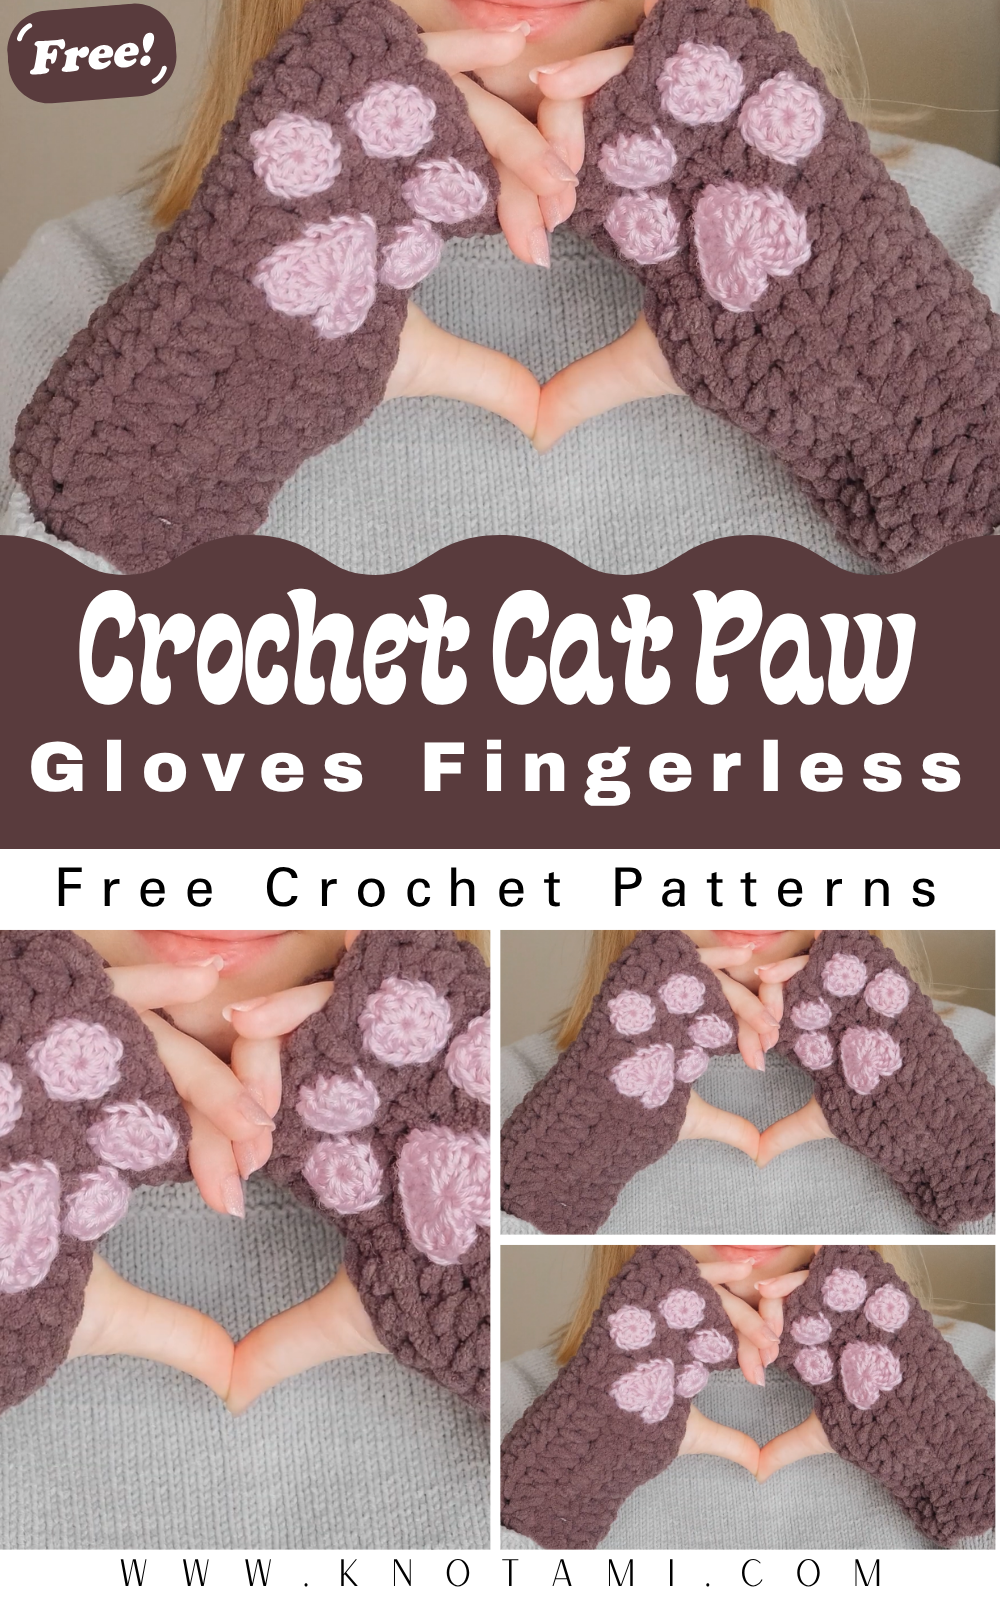
Today’s project is especially purr-fect for those who love cute and functional crafts: Crochet Cat Paw Gloves Fingerless Mittens Pattern. With their adorable paw pad details and cozy fingerless style, these crochet mittens are more than just accessories they’re wearable art. These gloves capture the heart of anyone who sees them and instantly elevate your craft collection, wardrobe, or gift box.
Materials & Tools
To make your Cat Paw Gloves Fingerless Mittens, you’ll need:
-
Yarn: Medium-weight (4) acrylic or cotton blend yarn in 2–3 colors (e.g., white, black, pink).
-
Hook: 3.5mm to 4.0mm crochet hook (use the size recommended for your yarn).
-
Stuffing: Very light amount of fiberfill for paw pads (optional but recommended).
-
Safety Eyes (optional): Small round beads for decoration if making cat faces.
-
Scissors: For trimming yarn ends.
-
Tapestry Needle: To sew in ends and attach parts.
-
Stitch Markers: Essential for tracking rounds in amigurumi-style crochet.
Yarn Choice Tips:
-
Choose soft, durable yarn to make the gloves comfortable for wearing.
-
Cotton yarn offers great stitch definition, while acrylic keeps the gloves warm.
-
Use high-contrast colors (like black paws on white gloves) to make the design pop!
4. Step-by-Step Crochet Instructions
Below is a structured guide to help you create your own Cat Paw Fingerless Mittens. It follows the general layout from the reference video but written entirely from scratch so you can follow along at your own pace.
Step 1: Creating the Wrist Cuff
-
Begin with a slip knot and chain enough stitches to fit around your wrist (usually 26–30).
-
Slip stitch to the first chain to form a loop.
-
Crochet in rounds using single crochet (SC) or half-double crochet (HDC) to build height.
-
Work 8–10 rows for a snug but stretchy cuff.
Tip: For added stretch, use back-loop-only stitches when working the cuff.
Working the Hand Section
-
Continue crocheting in the round from the cuff, adding stitches evenly to allow room for the hand.
-
Crochet until your work reaches the base of the fingers (usually 10–12 rows).
-
Create a thumb hole by chaining 5–7 stitches and skipping the same number of stitches on the next round.
-
Continue working in rounds above the thumb opening for the fingerless design.
Step 3: Shaping the Cat Paw Pads
-
Using pink yarn, crochet 1 large oval pad and 4 smaller circles (for toes).
-
Lightly stuff them with fiberfill to give a 3D, plush effect.
-
Sew the paw pieces onto the palm side of the glove using matching yarn and small backstitches.
Pro Tip: Attach paw pads before finishing the glove shape it’s much easier to sew on flat work than curved.
Adding the Thumb (Optional)
-
Once the thumb hole is open, rejoin yarn and work small rounds to crochet the thumb opening.
-
3–4 rows of single crochet should be enough to make the thumb area neat and wearable.
Step 5: Final Edging
-
Use a contrasting color to add a row of crab stitch or slip stitch around the top of the glove.
-
Add decorative accents like whiskers, ears, or embroidered faces, depending on your theme.
5. Customization Ideas
Crochet is a playground for creativity! Here are some ways to put your unique spin on your cat paw gloves:
-
Pastel Rainbow Paws: Use pastel shades for each finger and bright white for the base.
-
Gothic Cat: Use black yarn with deep red paw pads.
-
Holiday Charm: Use red and green stripes and attach a tiny jingle bell.
-
Accessories: Add bows, mini scarves, or tassels.
-
Textured Yarn: Use fuzzy or velvet yarn for an extra plush feel.
6. Advanced Tips & Troubleshooting
-
Invisible Decreases: Use front loop only decreases to avoid bumps.
-
Even Tension: Keep wrist and hand sections snug but not tight.
-
Prevent Twisting: Check your first round isn’t twisted before joining.
-
Seamless Joins: Use mattress stitch for nearly invisible sewing.
-
Fixing Uneven Shapes: Light blocking can reshape minor distortions.
-
Stuffing Carefully: Don’t overstuff especially finger sections!
-
Sizing Hacks: Adjust cuff size with additional rows/rounds to expand or shrink.
7. Care Instructions
To keep your handmade gloves in great shape:
-
Hand wash gently in cold water with mild detergent.
-
Do not wring roll gently in a towel to remove excess water.
-
Lay flat to air dry in a shaded area.
-
Avoid bleach, ironing, and high-heat drying.
-
Store in a cool, dry place when not in use.
8. Display & Gift Ideas
These mittens are more than accessories they’re treasures! Here’s how to show them off:
-
Decorate a craft room wall or shelf with them.
-
Use as a cozy winter accessory or costume piece.
-
Gift them for birthdays, holidays, or as tokens of love.
-
Add them to handmade gift baskets or crochet sets.
9. Benefits of Crafting Crochet Cat Paw Gloves
-
Promotes relaxation and stress relief.
-
Encourages eco-friendly gifting.
-
Boosts fine motor skills and concentration.
-
Creates emotional connections when gifted.
-
Builds confidence through handmade accomplishment.
10. Photography & Social Media Tips
Want to show off your gloves online? Try these tips:
-
Use natural light near a window.
-
Add yarn, hooks, or coffee mugs as props.
-
Use soft, neutral backgrounds to highlight the texture.
-
Try overhead or close-up shots to capture details.
11. Project Summary Table
| Category | Details |
|---|---|
| Skill Level | Easy / Intermediate |
| Estimated Time | 6–8 hours (approx.) |
| Finished Size | Adult women size (adjustable) |
| Estimated Cost | $10–15 |
12. Conclusion
Crafting your own Crochet Cat Paw Gloves Fingerless Mittens is more than making something cute it’s an experience full of creativity, comfort, and personal expression. From choosing your yarn to sewing on the final paw pad, each step is an invitation to slow down and enjoy the process. Whether you make them for yourself or as a lovingly handmade gift, these mittens are sure to bring joy with every stitch. And that’s the magic of crochet turning yarn into warmth, smiles, and memories.
So grab your hook, pick your colors, and start stitching. Your paws are waiting!