
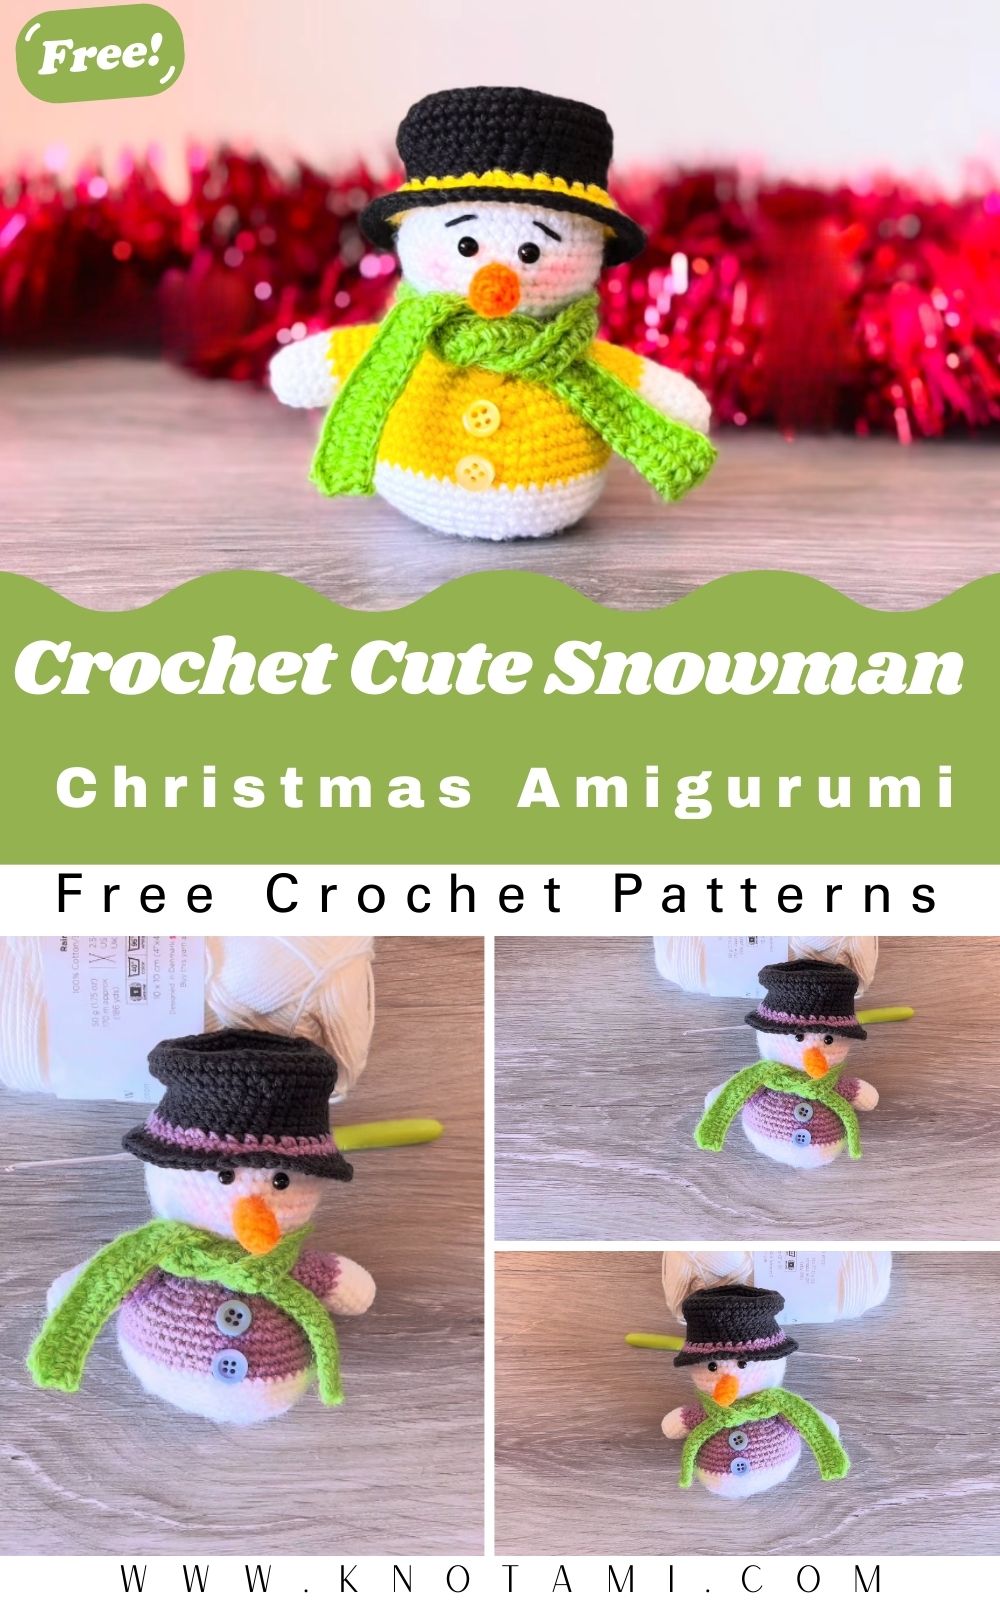
Christmas is just around the corner, and there is absolutely nothing better than creating something warm and handmade to celebrate the season. If you are looking for the perfect holiday project, you have come to the right place today. In this detailed guide, I will show you exactly how to crochet a cute snowman for Christmas that features an adorable Santa hat and a cozy scarf. This project is designed to bring a touch of handmade magic to your holiday celebrations, whether you want to hang it on your tree or give it as a heartfelt gift.
Creating your own holiday decorations allows you to customize every single detail to match your home style. Furthermore, this specific snowman design is incredibly beginner friendly, so you do not need to be a professional to achieve great results. Consequently, you will find that the process is quite relaxing and rewarding as you watch your little frosty friend come to life. Let us dive into the world of festive yarn crafts and start making something truly special for your family and friends this year.
If you prefer visual learning, please take a moment to watch the embedded video tutorial located above. This video provides a real time look at every stitch and technique mentioned in this article. Specifically, it covers the tricky parts like the magic ring and the specialized scarf braiding method. Therefore, I highly recommend keeping the video open as you read through the step by step instructions to ensure your snowman turns out perfectly.
Skill Level: Beginner to Intermediate
This project is classified as an easy to intermediate level because it uses basic amigurumi techniques. However, if you are a complete beginner, do not worry at all. While the magic ring and invisible decreases might seem a bit intimidating at first, the repetitive nature of the rounds will help you build confidence quickly. As long as you know how to make a single crochet and a slip stitch, you are already halfway there.
Tutor’s Suggestions for Success
Before you pick up your hook, I have a few professional suggestions to ensure your snowman looks professional and polished. First, I strongly recommend using a stitch marker because amigurumi is worked in continuous or joined rounds where it is very easy to lose your place. Additionally, make sure you maintain a tight tension so that the fiberfill stuffing does not peek through the holes of your stitches. Finally, when you are attaching the eyes and nose, take your time to center them perfectly since the face is the most important part of the character.
Essential Materials for Your Snowman
To crochet a cute snowman for Christmas, you will need to gather the following supplies:
-
Yarn: Five ply milk cotton yarn or thin chenille yarn in white, red, and two colors for the scarf.
-
Hook: A 2.5 mm crochet hook to keep stitches tight.
-
Eyes: 6 mm plastic safety eyes or glue on eyes.
-
Nose: An orange 1 cm pom pom.
-
Stuffing: High quality fiberfill to give the snowman its shape.
-
Tools: A darning needle, sharp scissors, and a reliable stitch marker.
-
Adhesive: Hot glue for attaching the face details and the hat.
Step by Step Guide: The Snowman Head and Body
Phase 1: Crafting the Head
To begin your crochet cute snowman Christmas project, you must start with a magic ring using white yarn. In round one, you will make six single crochets into the ring. After you pull the tail tight, remember to mark your first stitch. In round two, you are going to perform an increase in every stitch, which brings your total to 12 stitches.
Moving into round three, the pattern shifts to one single crochet followed by one increase, resulting in 18 stitches. For round four, you will work two single crochets then an increase to reach 24 stitches. In round five, do three single crochets and one increase to hit 30 stitches. From rounds six through nine, simply work one single crochet in each stitch around to build the height of the head.
Phase 2: Shaping and Stuffing
Now it is time to start narrowing the head. In round ten, you will crochet three single crochets and then perform a decrease. This decrease is done by using the front loops of the next two stitches to keep the work neat. For round eleven, work two single crochets and a decrease. Round twelve requires one single crochet and one decrease. At this point, you should pause and stuff the head firmly with fiberfill. Ensure it is round and solid before moving to the body.
Phase 3: The Snowman Body
Instead of fastening off, you will continue directly into the body. In round thirteen, work in the front loops only to create a base for the body to expand. You will follow a pattern of one single crochet and one increase. For the subsequent rounds, you will gradually increase the stitch count until you reach 36 stitches by round sixteen.
Work rounds seventeen through twenty one evenly with 36 stitches each. This creates the plump belly of your snowman. Afterward, you will begin the decreasing rounds. In round twenty two, work seven single crochets and a decrease. Continue decreasing until you have only eight stitches left in round twenty five. Finally, fasten off and use your darning needle to weave through the front loops to close the bottom of the body securely.
Crafting the Festive Santa Hat
Every crochet cute snowman for Christmas needs a stylish hat. Using red yarn, start with a magic ring of six stitches. For the hat, you will increase much more slowly to create a pointed cone shape. You will alternate between rounds of even stitching and rounds with three increases.
For example, in round three, you will have nine stitches. In round five, you will reach twelve stitches. Continue this gradual growth until round eleven where you have 30 stitches. Finish the red section with two even rounds. To give it that classic Christmas look, switch to white yarn for the brim. Work one round of half double crochets and one final round of slip stitches for a textured edge. Attach a small white pom pom to the tip and glue the hat onto the snowman’s head at a jaunty angle.
Designing the Two Tone Scarf
The scarf is the simplest part but adds so much personality. Take two different colors of yarn and hold them together. Instead of a traditional crochet chain, you will alternate chaining with each strand. This creates a braided, colorful look that resembles a real winter scarf. Once it is long enough to wrap around the snowman’s neck, tie a knot at the end and trim the fringe. Wrap it snugly between the head and body to hide the transition line.
Where to Use Your Handmade Snowman
Once you have finished your crochet cute snowman for Christmas, the possibilities for decoration are endless. Firstly, these make incredible ornaments for your Christmas tree if you add a small loop of silver thread to the hat. Secondly, you can place them on your fireplace mantle or bookshelf to create a winter wonderland scene.
Furthermore, these snowmen are the perfect size for office desk decorations or as car dashboard companions. If you are attending a holiday party, you can use them as unique gift toppers for your presents. Because they are handmade, they carry a sentimental value that store bought decorations simply cannot match. Your friends and family will surely appreciate the effort you put into such a detailed and cute holiday character.
Essential Tips and Tricks
To get the best results for your crochet cute snowman for Christmas, keep these tips in mind. If you find that your snowman is leaning to one side, it is likely due to uneven stuffing. Always add stuffing in small pinches and push it toward the outer walls of the crochet piece.
Another great trick is to use a slightly smaller hook than the yarn label recommends. This ensures your stitches are very tight, which is the secret to high quality amigurumi. If you want a “blushing” look, you can use a tiny bit of real pink makeup blush on the cheeks with a cotton swab. This small detail makes the snowman look even more “kawaii” and adorable.
Common Mistakes to Avoid
Many people make the mistake of not counting their stitches in every round. In amigurumi, being off by just one stitch can cause the entire shape to warp. Therefore, always use your stitch marker and double check your count before moving to the next round.
Another common error is stuffing the project too lightly. Over time, fiberfill can settle, so if you do not stuff it firmly now, your snowman might become floppy in a few months. Also, avoid using too much hot glue. A small drop is usually enough to hold the eyes and nose. If you use too much, it might seep through the yarn and leave a visible, hard residue that ruins the soft look of the cotton.
Frequently Asked Questions
Q1: Can I use a different size of yarn for this snowman?
Yes, you certainly can. However, keep in mind that using thicker yarn like bulky velvet yarn will result in a much larger snowman. If you change the yarn, make sure you also change your hook size accordingly so the stitches remain tight enough to hold the stuffing.
Q2: How do I make the snowman stand up on its own?
To help your snowman stand, ensure the bottom is flattened during the stuffing process. You can also place a small, clean flat stone or a plastic disc at the very bottom inside the body before you close the final round to add weight and stability.
Q3: Is this project safe for small children?
If you are giving this to a small child, I recommend embroidering the eyes and nose with yarn instead of using plastic eyes or pom poms. Small plastic parts can be a choking hazard if they are pulled off. Safety first is always a good rule for handmade toys.
Q4: How long does it take to finish one snowman?
For an average crocheter, this project takes about two to three hours. It is the perfect activity for a cozy evening while watching your favorite holiday movies. Since the parts are small, it is a very fast and satisfying project.
Q5: What if I don’t have an orange pom pom for the nose?
No problem at all. You can easily crochet a tiny cone with orange yarn or simply embroider a triangle shape using a darning needle and some orange thread. Both methods look fantastic and give the snowman a classic carrot nose appearance.
Conclusion
By following this guide, you now have all the knowledge needed to crochet a cute snowman for Christmas. This project is a wonderful way to express your creativity and share the joy of the holidays with others. Remember to take your time, enjoy the process, and do not be afraid to experiment with different scarf colors or hat styles. Your handmade snowman will surely be a highlight of your festive decorations this year. Happy crocheting and have a wonderful holiday season!