Crochet Cutest Penguin Amigurumi Pattern Toy
There is something truly magical about turning a simple ball of yarn into a tangible, heartwarming creation. Crocheting allows you to transform imagination into a playful, huggable piece of art. Each stitch brings satisfaction and builds anticipation as the design gradually takes shape. Holding a handmade amigurumi is a uniquely rewarding experience; it is not just a toy, but a creation imbued with care and creativity. The joy of crafting lies in the ability to create something meaningful from scratch, stitch by stitch.
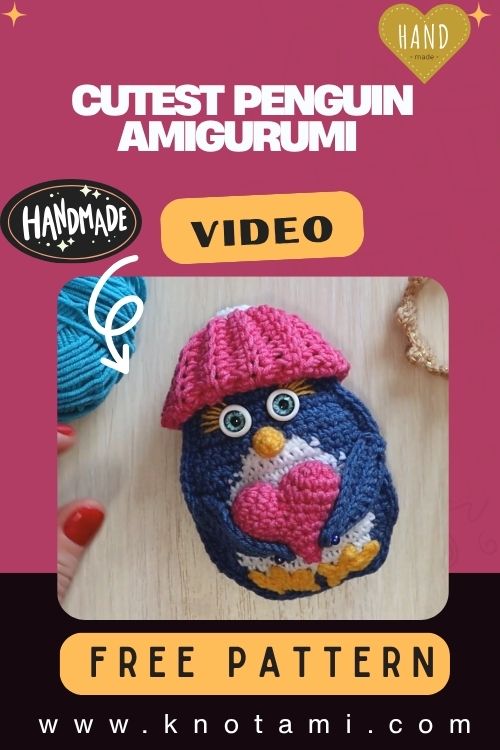
The Crochet Cutest Penguin is a project that embodies both charm and whimsy. Its round, plump body, tiny wings, and expressive little face make it an irresistibly cute character. Perfectly balanced between realistic and cartoonish, this penguin is a delightful addition to any collection, whether displayed on a shelf, used as a desk companion, or gifted to a loved one. Its small size and soft texture make it especially appealing for children and penguin enthusiasts alike.
This project is ideal for both beginners and experienced crocheters. Beginners can practice essential techniques such as magic rings, single crochet stitches, and basic shaping, while more advanced crocheters can explore color changes, textured yarn, and subtle shaping adjustments. The versatility allows crafters of all skill levels to enjoy creating this charming plush.
Beyond the cute appearance, crocheting the Cutest Penguin is a meditative and calming experience. The rhythmic motion of crocheting fosters relaxation, reduces stress, and enhances mindfulness. The satisfaction of completing each section, coupled with the excitement of seeing the penguin come to life, makes this project perfect for slow crafting, mindful play, and thoughtful gifting.

Materials & Tools
To make your Crochet Cutest Penguin gather the following supplies:
-
Yarn: Medium-weight (worsted) acrylic or cotton yarn in black, white, and optional orange for the beak and feet.
-
Crochet Hook: Size G/4.0 mm or H/5.0 mm, depending on your tension preference.
-
Stuffing: Polyester fiberfill or polyfill to achieve a soft, huggable body.
-
Safety Eyes or Embroidery Thread: Black or brown for facial features.
-
Scissors: For clean yarn cuts.
-
Tapestry Needle: For sewing parts together and weaving in ends.
-
Stitch Markers: Helpful for keeping track of rounds, especially on small wings or feet.
Pro Tips:
-
Smooth yarn provides clean, defined stitches.
-
Consistent yarn weight ensures balanced, symmetrical shaping.
-
Use contrasting colors for facial features to make them stand out.
Step-by-Step Crochet Instructions
1. Making the Head
-
Begin with a magic ring and single crochet 6 stitches into the center.
-
Increase each round evenly to form a small, round head.
-
Continue crocheting in rounds until the head reaches approximately 2 inches in diameter.
-
Insert safety eyes or embroider the penguin’s eyes and mouth.
-
Lightly stuff the head to maintain a smooth, firm shape.
Expert Tip: Stuff gradually to prevent lumps and ensure a rounded, polished head.
2. Forming the Neck and Upper Body
-
Crochet a few rounds without increases to form a gentle neck.
-
Optionally, decrease slightly to create a smooth transition from head to body.
Expert Tip: Stitch markers help prevent twisting during continuous rounds.
3. Building the Main Body
-
Switch to black yarn for the body, crocheting single crochet rounds.
-
Increase and decrease strategically to create a rounded, chubby penguin shape.
-
Make the body slightly larger than the head for an adorable, balanced look.
Expert Tip: Keep tension even to avoid bulges or uneven shaping.
4. Shaping or Attaching the Base
-
Crochet a small circular base for stability if desired.
-
Attach securely to ensure the penguin sits upright.
5. Creating the Wings and Feet
-
Crochet two small wings using black yarn and slightly curve them.
-
Create feet using orange yarn and attach to the base of the body.
-
Adjust wings and feet for symmetry and balance.
Expert Tip: Slight wing curvature adds character and makes the penguin look lively.
6. Assembly and Positioning
-
Sew all parts securely using a tapestry needle.
-
Adjust positions to maintain symmetry and balance.
-
Weave in all ends to prevent unraveling.
7. Adding Final Touches
-
Embroider blush, eyebrows, or mouth for additional cuteness.
-
Optional: Attach a keychain loop, ribbon, or tiny accessory for gifting.
Customization Ideas
-
Alternative Colors: Light gray, pastel blue, or white for winter-themed penguins.
-
Different Yarn Types: Plush yarn for extra soft, chubby appearance.
-
Themed Versions: Holiday penguins with scarves or Halloween costumes.
-
Add-Ons: Tiny bows, hats, or props like icebergs or fish.
Advanced Tips & Troubleshooting
-
Use invisible decreases for seamless shaping.
-
Keep even tension to avoid uneven body or head.
-
Prevent twists in rounds using stitch markers.
-
Correct uneven shapes with strategic increases or decreases.
-
Stuff lightly but evenly for soft, plump results.
-
Join parts seamlessly with whip stitch or ladder stitch.
-
Read pattern abbreviations carefully to avoid mistakes.
-
Position wings, feet, and facial features symmetrically.
-
Embroider small details with thin thread for precision.
-
Ensure safety eyes or accessories are secure, especially if giving as a gift.
Care Instructions
-
Hand wash gently in cool water with mild detergent.
-
Air dry flat to preserve shape.
-
Avoid direct sunlight to prevent fading.
-
Store in a cool, dry place, away from pets.
-
Reshape after washing to maintain plush integrity.
Display & Gift Ideas
-
Home Décor: Cute accent for shelves, mantels, or living room displays.
-
Kid’s Room Accessory: Soft, huggable penguin companion.
-
Desk Companion: Adds charm and personality to office spaces.
-
Holiday Ornament: Mini penguins make delightful Christmas decorations.
-
Personalized Handmade Gift: Perfect for friends, family, or penguin enthusiasts.
Benefits of Making a Crochet Cutest Penguin
-
Relaxation & Mindfulness: Focused crocheting promotes calm and mental clarity.
-
Stress Relief: The repetitive motion of stitching is soothing.
-
Sense of Accomplishment: Completing a plush boosts confidence.
-
Eco-Friendly & Sustainable: Handmade gifts reduce waste.
-
Emotional Connection: Handmade amigurumi carry care and personality.
Photography & Social Media Tips
-
Use natural daylight for crisp, vibrant photos.
-
Include props like yarn, baskets, or winter-themed items.
-
Soft backgrounds emphasize the penguin without distractions.
-
Close-up shots highlight stitch detail and facial features.
-
Experiment with angles to showcase its round, chubby charm.
Conclusion
Creating a Crochet Cutest Penguin is more than just a craft it’s a journey of creativity, patience, and joy. Each stitch brings this adorable plush to life, resulting in a handmade toy full of personality and charm. Whether displayed at home, gifted to a loved one, or used as a cheerful desk companion, this amigurumi embodies the magic of crochet. Dive into your yarn, follow this tutorial, and experience the satisfaction of transforming simple materials into a charming penguin that delights both maker and recipient.