
Crochet Mini Pizza Toy Pattern that looks good enough to eat, without sewing a single piece. This beginner-friendly project pairs perfectly with easy crochet patterns and serves as a fun amigurumi food tutorial you can finish quickly.
If you love playful projects, this is a great crochet food pattern to add to your collection. You will make a small, squishy, handmade step-by-step amigurumi food slice using simple rounds and easy color changes. It is an ideal amigurumi for beginners because the shapes stay basic, and the no-sew method keeps finishing stress low. Add felt-like toppings in yarn, keep it minimal, or go wild with cute crochet ideas for a whole pizza set.
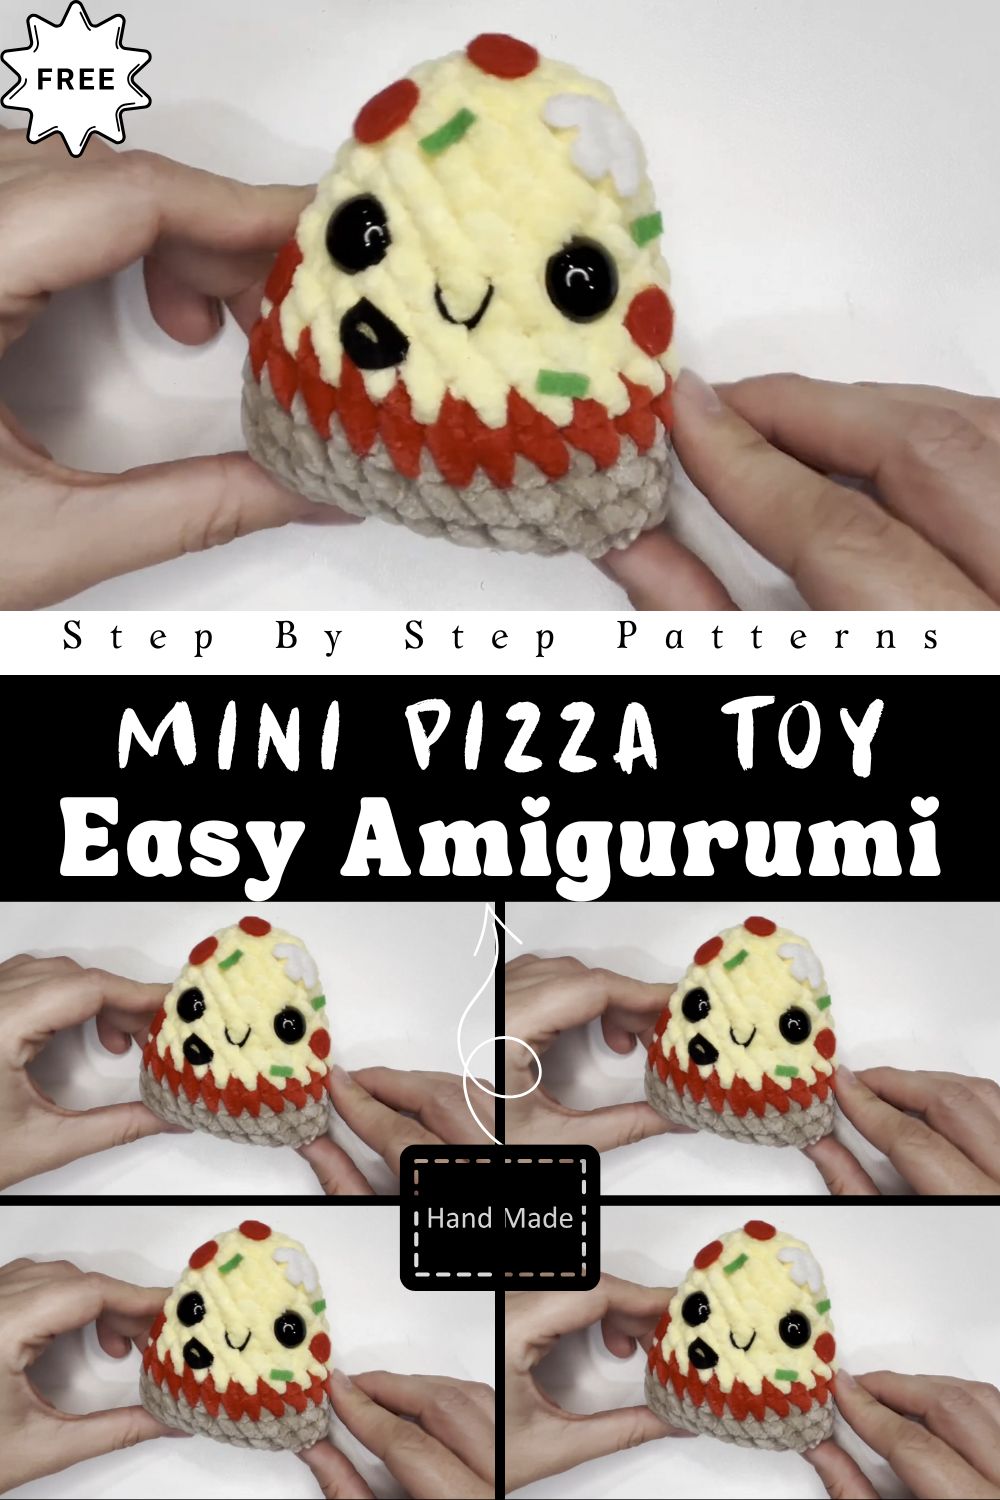
Easy No-Sew Mini Pizza Amigurumi Pattern for Beginners (Cute Crochet Food Tutorial)
Skill Level
Beginner (confident beginner if you’re brand new).
You should be comfortable with:
- Single crochet in the round
- Basic increases and decreases
- Simple color changes (optional, for crust/cheese/toppings)
No sewing is required, which makes this project feel extra friendly.
Materials
Choose soft yarn so your pizza looks plush and “puffy.”
- Yarn (worsted or DK recommended):
- Tan/light brown (crust)
- Yellow (cheese)
- Red (sauce and/or pepperoni)
- Optional topping colors: white, black, green, beige
- Small amounts of each color are enough—this is a great scrap-buster.
Hook Sizes
Pick a hook slightly smaller than the yarn label suggests to keep stitches tight.
- 2.75 mm to 4.0 mm (use what gives you a firm fabric)
- If your stuffing shows through, go down a hook size.
Other Supplies
- Fiberfill stuffing (small amount)
- Stitch marker (highly recommended)
- Scissors
- Yarn needle (only for weaving in ends, not sewing parts together)
- Optional: tweezers or a chopstick for pushing stuffing into corners
Key Abbreviations (US Crochet Terminology)
- MR = Magic ring
- ch = Chain
- sc = Single crochet
- inc = Increase (2 sc in same stitch)
- dec = Decrease (single crochet 2 stitches together)
- sl st = Slip stitch
- BLO = Back loop only
- FLO = Front loop only
- st(s) = Stitch(es)
Special Notes
- No-sew construction: toppings are crocheted on (joined as you go) or worked as surface details—no separate pieces to attach.
- Work in continuous rounds unless you choose a turned edging.
- Stuff lightly: mini food amigurumi looks best when it’s plush but not stretched.
- For extra help with shaping and where to place toppings, keep the YouTube tutorial open as a visual reference while you crochet.
Step-by-Step Instructions
This is an original, beginner-friendly method inspired by the look and concept (not copied from the video). It produces a small, stuffed pizza slice with built-in toppings.
H3: Step 1 — Make the Cheese Base (Top of the Pizza)
Use yellow.
- Start with MR, 6 sc.
- Increase evenly over the next rounds until you get a small circle (about 2–2.5 inches wide for a mini slice, depending on yarn).
- Crochet 1–2 even rounds (no increases) to give the top a tiny bit of height.
Tip: If you want a “cheese drip” look, add a few random sc + ch-1 + sc little bumps around the edge later.
H3: Step 2 — Add Sauce Accent (Optional but Cute)
With red, you can surface crochet a swirl or add sprinkle-like stitches:
- Make small sl st lines in a curved pattern, or
- Add a few tiny embroidered dashes with yarn.
Keep it subtle—the cheese should still dominate visually.
H3: Step 3 — Crochet Pepperoni (No-Sew Toppings)
With red, crochet small circles and attach them as you go.
A simple mini-circle topping:
- MR, 6 sc, sl st to close, fasten off (or keep yarn attached if you prefer).
No-sew attachment option:
Instead of fastening off, place the circle on the cheese base and use slip stitches through both layers to “tack” it down in a few spots. Weave the end inside.
Repeat for 2–4 pepperoni pieces, depending on slice size.
H3: Step 4 — Build the Crust Edge
Switch to tan/light brown.
- Crochet one round around the cheese edge in BLO to create a slight ridge (this makes the crust look raised).
- If you want a thicker crust, do another round in the oven.
This little ridge is what makes it read as pizza immediately.
H3: Step 5 — Form the Slice Shape (Triangle Body, Still No Sew)
Now you’ll turn the round into a wedge-shaped slice by shaping it.
Begin reducing stitches on one side to taper:
- Mark the “tip” area (where you want the point of the slice).
- Work a few rounds where you:
- Crochet normally across the wide back edge (crust side),
- Then add decreases closer together near the front to narrow it.
Your goal is a soft triangle/wedge, not a sharp geometric point.
H3: Step 6 — Crochet the Bottom (Closing the Pizza)
Switch back to yellow (or a pale tan if you want a bready underside).
- Continue decreasing until the opening is small.
- Stuff the slice firmly but gently.
- Finish with a final decrease round, then close the remaining hole by weaving the yarn through the final stitches and pulling tight.
Because it’s a no-sew build, this finishing step is the only “construction” moment; everything else is crocheted together.
Tips for Beginners for ( Crochet Mini Pizza Toy Pattern)
- Use a stitch marker so your rounds don’t drift.
- Count stitches after increase rounds mini projects show mistakes fast.
- Tight stitches = better amigurumi. If you see gaps, switch to a smaller hook.
- Stuff in tiny pinches to avoid lumps.
- If shaping the wedge feels confusing, watch that section in the YouTube video and match the timing of your decreases to what you see.
Creative Variations
Make one slice… then you’ll want a whole menu.
Topping ideas
- Green pepper strips (tiny chains tacked down with slip stitches)
- White mushrooms (small half circles)
- Black olives (tiny rings)
- Pineapple chunks (little yellow squares)
Pizza styles
- Margherita: fewer toppings, add little green basil stitches
- Extra cheese: add a second yellow round with drippy edges
- Stuffed crust: make the crust thicker and add extra stuffing along the back edge
- Keychain (add a small loop)
- Desk buddy
- Pretend play food
- Crochet garland for a game room or kitchen theme
Conclusion for ( Crochet Mini Pizza Toy Pattern)
This no-sew mini pizza amigurumi pattern is a perfect first crochet food project: fast, adorable, and beginner-friendly with minimal finishing stress. With simple rounds, gentle wedge shaping, and crocheted-on toppings, you get a plush slice that looks detailed without being complicated. Use the YouTube tutorial as a visual guide for shaping and topping placement, then customize your pizza until it matches your favorite order.