
If you want a soft Halloween plush that is cute, not scary, this bunny is a perfect start. It uses easy crochet patterns and an amigurumi tutorial for beginners, featuring simple shapes you can finish with confidence.
This project is all about simple stitches and a big payoff. You will crochet a basic crochet bunny pattern, then style it with Halloween crochet ideas like tiny details and dark colors. Because it is amigurumi for beginners, the body parts are small and easy to redo if needed. Once finished, you will have a cuddly little crochet plush that looks great on a shelf, desk, or in a seasonal gift basket.
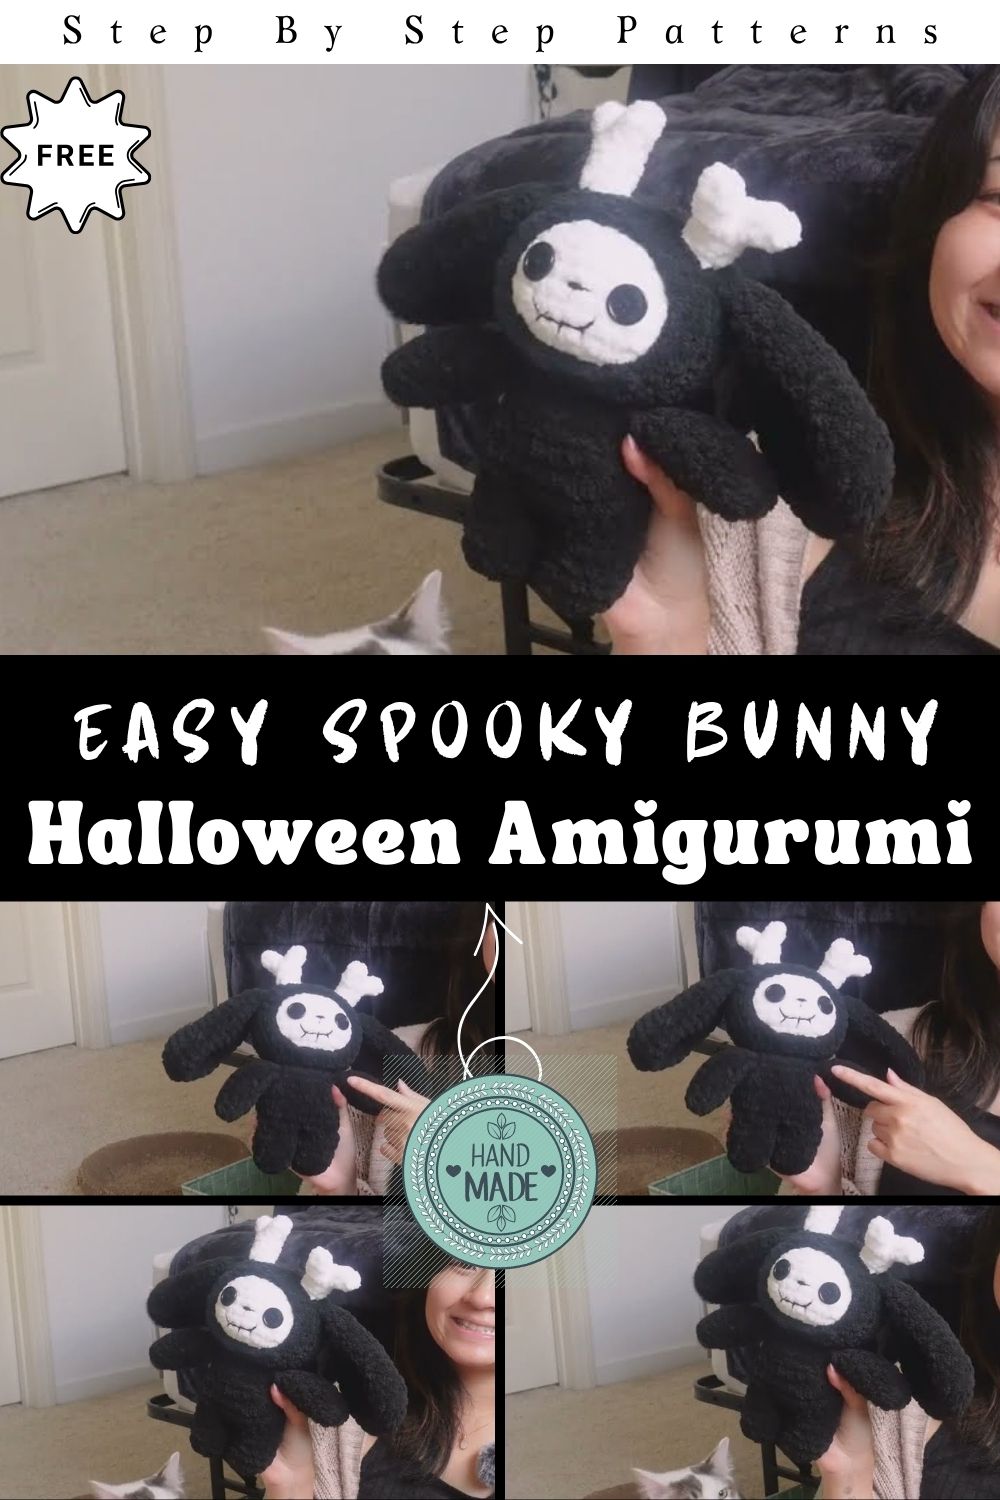
Easy Spooky Bunny Halloween Amigurumi Pattern for Beginners (Step-by-Step Crochet Guide)
What is Amigurumi?
Amigurumi is the art of crocheting small stuffed toys using tight stitches, usually worked in a spiral. You create simple shapes like balls, tubes, and ovals, then stitch them together.
Amigurumi is beginner-friendly because you repeat the same basic moves: single crochet, increase, decrease, and simple sewing. And since most pieces are small, you can see progress quickly.
Why This Spooky Bunny is Perfect for Beginners
A black spooky bunny plush sounds fancy, but the build is actually very approachable.
Here’s why this spooky bunny Halloween amigurumi pattern works well for first-timers:
- Simple construction: One main body and a few small add-ons.
- Beginner stitches: Mostly single crochet in continuous rounds.
- Easy to customize: Small changes make it look more Halloween- themed without extra effort.
- Quick to finish: Great weekend project, even if you crochet slowly.
- Cute results: Long ears instantly read as bunny, even with a simple face.
If you like learning by watching, the YouTube video linked in the prompt is a helpful guide for seeing shaping and assembly in real time. Use it as a visual companion while you follow the steps below.
Materials Needed
Keep your supplies simple so the project stays relaxing.
- Black yarn (plush/chenille for extra softness, or smooth cotton/acrylic for clearer stitches)
- Small amount of white yarn (optional, for tiny details like fangs or eye highlights)
- Crochet hook that suits your yarn (often smaller than the label suggests for tighter stitches)
- Stuffing (fiberfill)
- Stitch marker (very helpful when working in a spiral)
- Yarn needle (for sewing parts and weaving ends)
- Scissors
- Safety eyes or black/white embroidery thread for stitched eyes
- Optional Halloween extras: mini ribbon, tiny bell, felt pieces, or embroidery floss for scars
Tip: If you are brand new, choose a smooth yarn first. Plush yarn looks amazing, but it can be harder to see each stitch.
Step-by-Step Crochet Guide (simple & beginner-friendly)
This is an original, simplified walkthrough inspired by the project style shown in the video. It is not an exact stitch-for-stitch pattern, but it will guide you through the full process clearly.
Step 1: Crochet the Head (a soft round shape)
The head is usually a basic amigurumi ball.
- Start with a magic ring (or chain method).
- Increase evenly for a few rounds to form a flat circle.
- Crochet a few even rounds to build height.
- Begin decreasing to close the shape.
- Stuff firmly while there is still space to shape it nicely.
- Close the opening and weave in the end.
Beginner tip: Tight stitches make the head look smooth and help prevent stuffing from showing through.
Step 2: Crochet the Body (slightly oval or rounded)
For a plush look, the body is often slightly larger than the head or gently oval.
- Start in the round the same way you did for the head.
- Increase the width to what you want.
- Work a few even rounds for body height.
- Stuff as you go, so you can control the shape.
- Decrease to close.
If you want a “sitting bunny,” keep the base slightly flatter by adjusting stuffing and shaping at the bottom.
Step 3: Make the Long Ears (the signature spooky-bunny look)
Long ears give the bunny its character, especially in black yarn.
- Crochet two matching ear pieces, usually narrow and longer than the head height.
- Keep them lightly stuffed or unstuffed, depending on whether you want floppy or upright ears.
- Slightly pinch the ear base when sewing to help the ears sit neatly.
A simple trick: Make one ear a bit bent or folded for extra personality.
Step 4: Add Tiny Arms and Tail (optional but cute)
These pieces are small and forgiving.
- Arms can be simple tubes with a rounded end.
- A tail can be a tiny ball or a small puff shape.
- Light stuffing is enough, especially for arms.
If you want to keep it super beginner-simple, you can skip arms and just add a tail.
Step 5: Create the Face (cute, not scary)
The face is where the Halloween theme comes through.
- Insert safety eyes before closing the head, or embroider sleepy eyes with black thread.
- Stitch a small nose and a simple mouth line.
- Optional: add tiny fangs with white yarn for a playful spooky vibe.
Keep the expression simple. Minimal faces look clean and adorable on amigurumi.
Step 6: Assemble the Bunny (easy sewing)
Now you bring all the parts together.
- Sew the head to the body with a strong stitch and tight knots.
- Attach ears at the top of the head, checking symmetry before tightening.
- Sew on arms and tail if you made them.
- Weave in all ends securely.
If sewing feels tricky, watch the YouTube video during this part. Seeing ear placement and head alignment makes a big difference.
Tips for Beginners
A few small habits will make your bunny look neater right away.
- Use a stitch marker so you don’t lose your round count.
- Count stitches at the end of each round to avoid slow shape drift.
- Stuff in small pieces to prevent lumps.
- Pin ears in place first (or use scrap yarn to tack them) before sewing.
- Choose the right hook size: going smaller makes the fabric look tighter and more professional.
- Take breaks: fresh eyes help you spot uneven placement before you finish sewing.
If you make a mistake, it’s normal to undo a few rounds in amigurumi. It is part of learning, not failure.
Halloween Theme Variations
Once you finish one spooky bunny, you may want a whole Halloween set.
Colors and yarn effects
- Black bunny with purple inner ears
- Black with neon green stitches for a “monster” look
- Grey bunny with white patch details for a “ghost bunny” vibe
- Glow-in-the-dark yarn accents on the ears or nose
Costume-style add-ons
- Little witch hat (tiny cone with a brim)
- Mini cape or bow tie in orange
- Stitched “patchwork” squares on the body
- Spiderweb embroidery on one ear
Extra-spooky (but still cute) face ideas
- Button eyes instead of safety eyes
- One sleepy eye and one open eye
- Small stitched scar lines on the cheek
- Tiny fangs with a soft smile
These variations work well because the base spooky bunny halloween amigurumi pattern stays the same, and only the styling changes.
Conclusion
A soft black bunny is one of the cutest ways to celebrate Halloween with crochet. This spooky bunny halloween amigurumi pattern keeps things beginner-friendly with simple shapes, basic stitches, and quick assembly. Take your time with stuffing and sewing, and use the YouTube video as a visual guide when needed. Once you finish your first bunny, try new colors and tiny Halloween details to make it your own.