
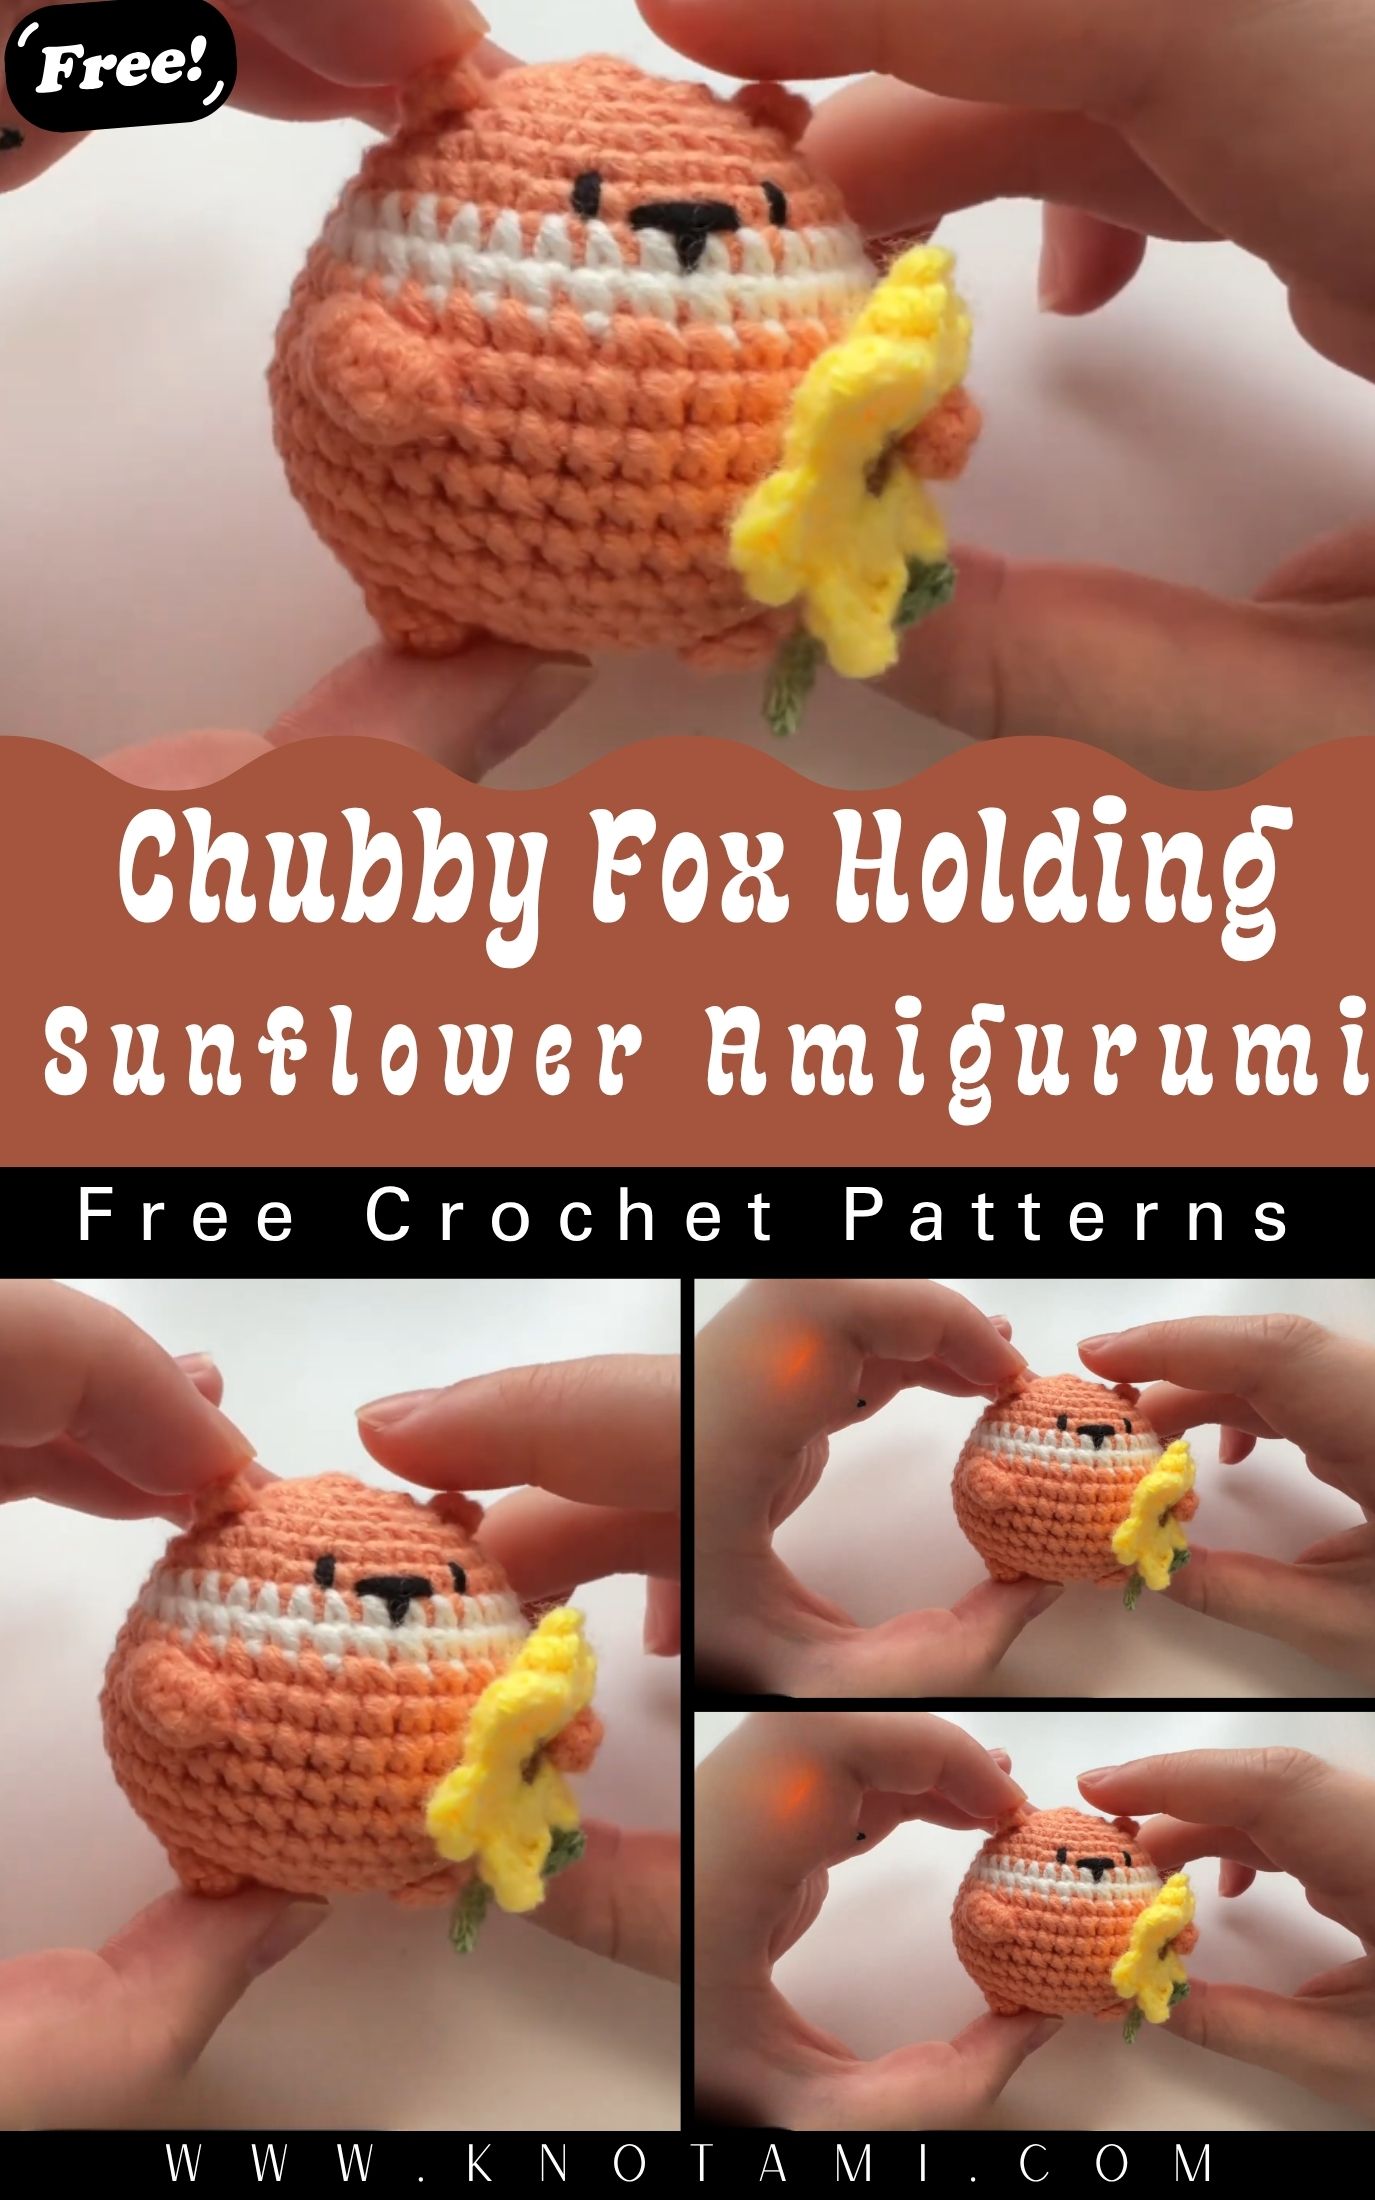
Create a Crochet Chubby Fox amigurumi pattern that you can easily complete and get a beautiful result that will highlight your crafting style. This handmade gift is a great choice for animal amigurumi, dolls and character plushies. Moreover, the fluffy fox with sunflowers gives a cheerful and charming touch that makes it a unique and special piece of boutique style.
If you love modern crochet trends, this chubby fox amigurumi hits the sweet spot between “adorable” and “display-worthy.” Additionally, you can use this crochet fox plush as nursery decor, a desk buddy, or a thoughtful present for a friend who loves woodland themes. Because the fox holds a sunflower, you also get a bright seasonal accent that lifts home aesthetics instantly. Moreover, this sunflower amigurumi accessory makes the project feel special without adding difficulty. As a result, you build patience, strengthen stitch consistency, and spark creativity while enjoying a relaxing hobby.
Necessary Supplies
Gather everything first, because smooth prep makes the whole amigurumi process more enjoyable.
- Yarn (worsted/DK recommended)
- Fox body: orange or rust
- Belly/muzzle: cream or white
- Accents: black (nose/eyes), optional brown (details)
- Sunflower: yellow petals, brown center, green for stem/leaf
- Crochet hook: typically 2.5–3.5 mm for tight stitches (adjust to your yarn)
- Safety eyes (6–10 mm) or black embroidery thread for stitched eyes
- Fiberfill stuffing
- Tapestry needle for sewing parts and weaving ends
- Stitch markers (or a scrap of yarn)
- Scissors
- Pins (optional, for positioning ears/arms/sunflower)
- Row counter (optional, although helpful)
- Optional shaping tools: small dowel/chopstick for stuffing, blush/paint for cheeks
Research Method for ( Crochet Chubby Fox)
I’ll keep this beginner-friendly and flexible, because you may follow the video for stitch counts while using this guide for clear structure and sequencing. Therefore, you can crochet confidently without getting lost.
Step 1: Start with the round base
Begin with a magic ring and crochet in continuous rounds. Additionally, place a stitch marker in the first stitch so you never lose your round start. Increase gradually to form a flat circle, and then keep building height to create a rounded, chubby body shape.
Step 2: Shape the fox body into a plump oval
After your base grows to the desired width, switch from increases to even rounds. Meanwhile, check your tension: tight stitches prevent stuffing from showing through. When you reach the belly area, you can add a cream panel using a color change or sew on a felt/stitched patch later. However, crocheting the belly directly usually looks cleaner.
Step 3: Add decreases to close the body
Stuff as you go, because it feels easier than trying to fill a tiny opening at the end. Moreover, use small tufts of fiberfill to avoid lumps. Decrease gradually to create a smooth, rounded finish, and then close the opening firmly.
Step 4: Crochet the head (or build a combined head-and-body)
Some patterns use one continuous piece, while others create a separate head. In addition, both methods work well for a chubby fox. If you crochet the head separately, repeat the same idea: widen with increases, work even rounds, then decrease. Therefore, you’ll get a neat sphere that you can position for maximum cuteness.
Step 5: Create the muzzle and cheeks
Crochet a small oval for the muzzle in cream yarn. Additionally, you can lightly stuff it for a 3D look. Sew it onto the face, and then embroider a small triangular or oval nose in black. As a result, you get that sweet fox expression that makes the whole toy feel alive.
Step 6: Make the ears with crisp shaping
Crochet two small triangles or tapered ear shapes in orange. Moreover, add a cream inner-ear piece if you want extra contrast. Sew the ears slightly angled outward, because that instantly makes the fox look curious and friendly. However, avoid placing them too low, or the head can look wide instead of cute.
Step 7: Add arms, legs, and a balanced sitting pose
Crochet two short arms and two stubby legs. Additionally, keep the limbs lightly stuffed so they stay soft and squeezable. If you want the fox to sit securely, flatten the base slightly and position the legs forward. Therefore, the toy can rest on a shelf without toppling.
Step 8: Build the tail for extra personality
Crochet a fluffy tail with a cream tip. Meanwhile, consider slightly overstuffing the tail base, because it helps the tail hold a pretty curve. Sew it low on the back so it supports the “chubby” silhouette rather than sticking straight out.
Step 9: Make the sunflower (center + petals + leaf)
This is the signature detail, so take your time.
- Sunflower center (brown): crochet a small circle, then add texture using bobble stitches or surface embroidery if you like.
- Petals (yellow): crochet multiple petals and attach around the center. Additionally, you can vary petal length for a natural look.
- Stem/leaf (green): crochet a small stem or strap-like piece plus a leaf.
As a result, the sunflower looks bold and cheerful even at a small scale.
Step 10: Attach the sunflower so the fox “holds” it
Sew the sunflower to one paw, and then tack that paw to the body. Moreover, you can stitch the stem lightly across the chest for stability. If you want a removable accessory, however, sew a tiny loop and use a small button or hidden snap instead.
Step 11: Face details and final polish
Install safety eyes before closing the head, if you use them. Additionally, embroider eyebrows or eye shine dots for extra charm. Weave in ends securely, and then massage the stuffing gently to smooth any bumps. Therefore, your fox will look clean, balanced, and photo-ready.
Artistic Design & Visual Appeal
This project shines because it combines a rounded woodland animal with a bright floral accent. Moreover, the chubby fox shape makes the toy instantly huggable and modern, especially if you keep the body compact with a slightly oversized head. The sunflower adds a focal point, therefore the plush looks styled rather than simple.
Additionally, the color harmony matters: warm orange and creamy white feel cozy, while yellow petals add energetic contrast. Meanwhile, the brown sunflower center ties back to earthy tones, which keeps the palette grounded. If you want a softer vibe, however, swap rust orange for peach and use muted mustard petals.
Practical Uses & Decorative Value
This amigurumi isn’t just cute; it’s genuinely useful in your space and gifting plans.
Home styling ideas
Place your fox on a bookshelf, coffee table tray, or craft-room shelf. Additionally, it works beautifully as nursery decor because the sunflower brings a gentle “sunny day” mood. If you crochet it with embroidered eyes, moreover, you can make it more baby-friendly.
Gift moments that feel personal
This plush makes a thoughtful birthday present, a fall-themed surprise, or a “thinking of you” gift. Therefore, it suits both adults and kids. For example, pair it with a real sunflower bouquet or a sunflower card for a coordinated present.
Aesthetic value for photos and craft fairs
If you sell makes, this design photographs well from every angle. Moreover, the sunflower creates a built-in prop, which helps your listing images stand out. As a result, the plush often looks more “premium” than a plain animal.
Why This Amigurumi is Trending
Chubby, rounded amigurumi styles dominate social feeds right now, and this fox fits that trend perfectly. Additionally, makers love projects that look impressive but stay beginner-accessible. The sunflower accessory also taps into seasonal crafting, therefore you can market it for spring, summer, or even early autumn.
Moreover, people gravitate toward comforting handmade decor. Meanwhile, shorter attention spans push crafters toward projects they can finish in a weekend. As a result, a small plush with one standout detail like a sunflower hits the ideal balance between quick and special.
Benefits for Creativity & Skill Building
You don’t just end with a cute plush; you also sharpen core crochet skills.
- Better tension control: Tight, even stitches improve the overall finish. Additionally, your future amigurumi will look cleaner.
- Shaping confidence: Increases and decreases teach you how to “sculpt” yarn. Therefore, you can design your own animals later.
- Patience and focus: Amigurumi rewards slow, steady progress. Moreover, assembling parts builds persistence.
- Creative decision-making: Color choices, facial expression, and sunflower styling let you personalize the result. As a result, you build a real maker voice instead of copying a single look every time.
Beginner Tips for Better Results
A few tweaks make a huge difference, especially if this is your first plush.
- Use the right hook size: Go smaller than you would for a scarf. Additionally, tighter stitches keep stuffing invisible.
- Mark the first stitch of every round: This habit saves hours of confusion. Moreover, it prevents accidental spiraling mistakes.
- Stuff gradually: Add small pieces and shape as you go. Therefore, the body stays smooth instead of lumpy.
- Pin before you sew: Pin ears, muzzle, and arms first. However, don’t rush the sewing placement affects personality.
- Secure your ends like you mean it: Weave ends through multiple stitches and change direction. As a result, your toy holds up to hugs and handling.
FAQs for ( Crochet Chubby Fox)
1) Is this chubby fox amigurumi suitable for beginners?
Yes, beginners can make it with basic amigurumi skills like single crochet, increases, and decreases. Additionally, the sunflower detail stays manageable because you work it in small pieces.
2) What yarn works best for a crochet fox plush?
Worsted or DK yarn works well because it holds shape without feeling stiff. Moreover, cotton gives crisp stitches, while acrylic feels extra soft for a cuddly toy.
3) How do I keep stuffing from showing in my crochet amigurumi pattern?
Use a smaller hook, keep consistent tension, and avoid over-stretching stitches while you stuff. Therefore, the fabric stays dense and polished.
4) Can I sell the finished sunflower fox amigurumi?
In many cases, you can sell finished items, but you should always check the specific designer’s policy in the video or pattern notes. Additionally, you should credit the source when required.
5) How can I make the sunflower accessory removable?
Sew a small loop to the sunflower and attach it with a hidden snap, tiny button, or stitchable Velcro dot. However, avoid small parts for baby gifts.
Wrap-up for ( Crochet Chubby Fox)
This flawless crochet chubby fox holding a sunflower amigurumi project blends cozy woodland charm with a bright floral twist. Additionally, you can use it as decor, a heartfelt gift, or a cheerful desk companion. Moreover, the shaping teaches you control and patience while keeping the process fun and creative. Therefore, if you want a modern plush that looks boutique-worthy, this sunflower fox belongs on your hook list.