
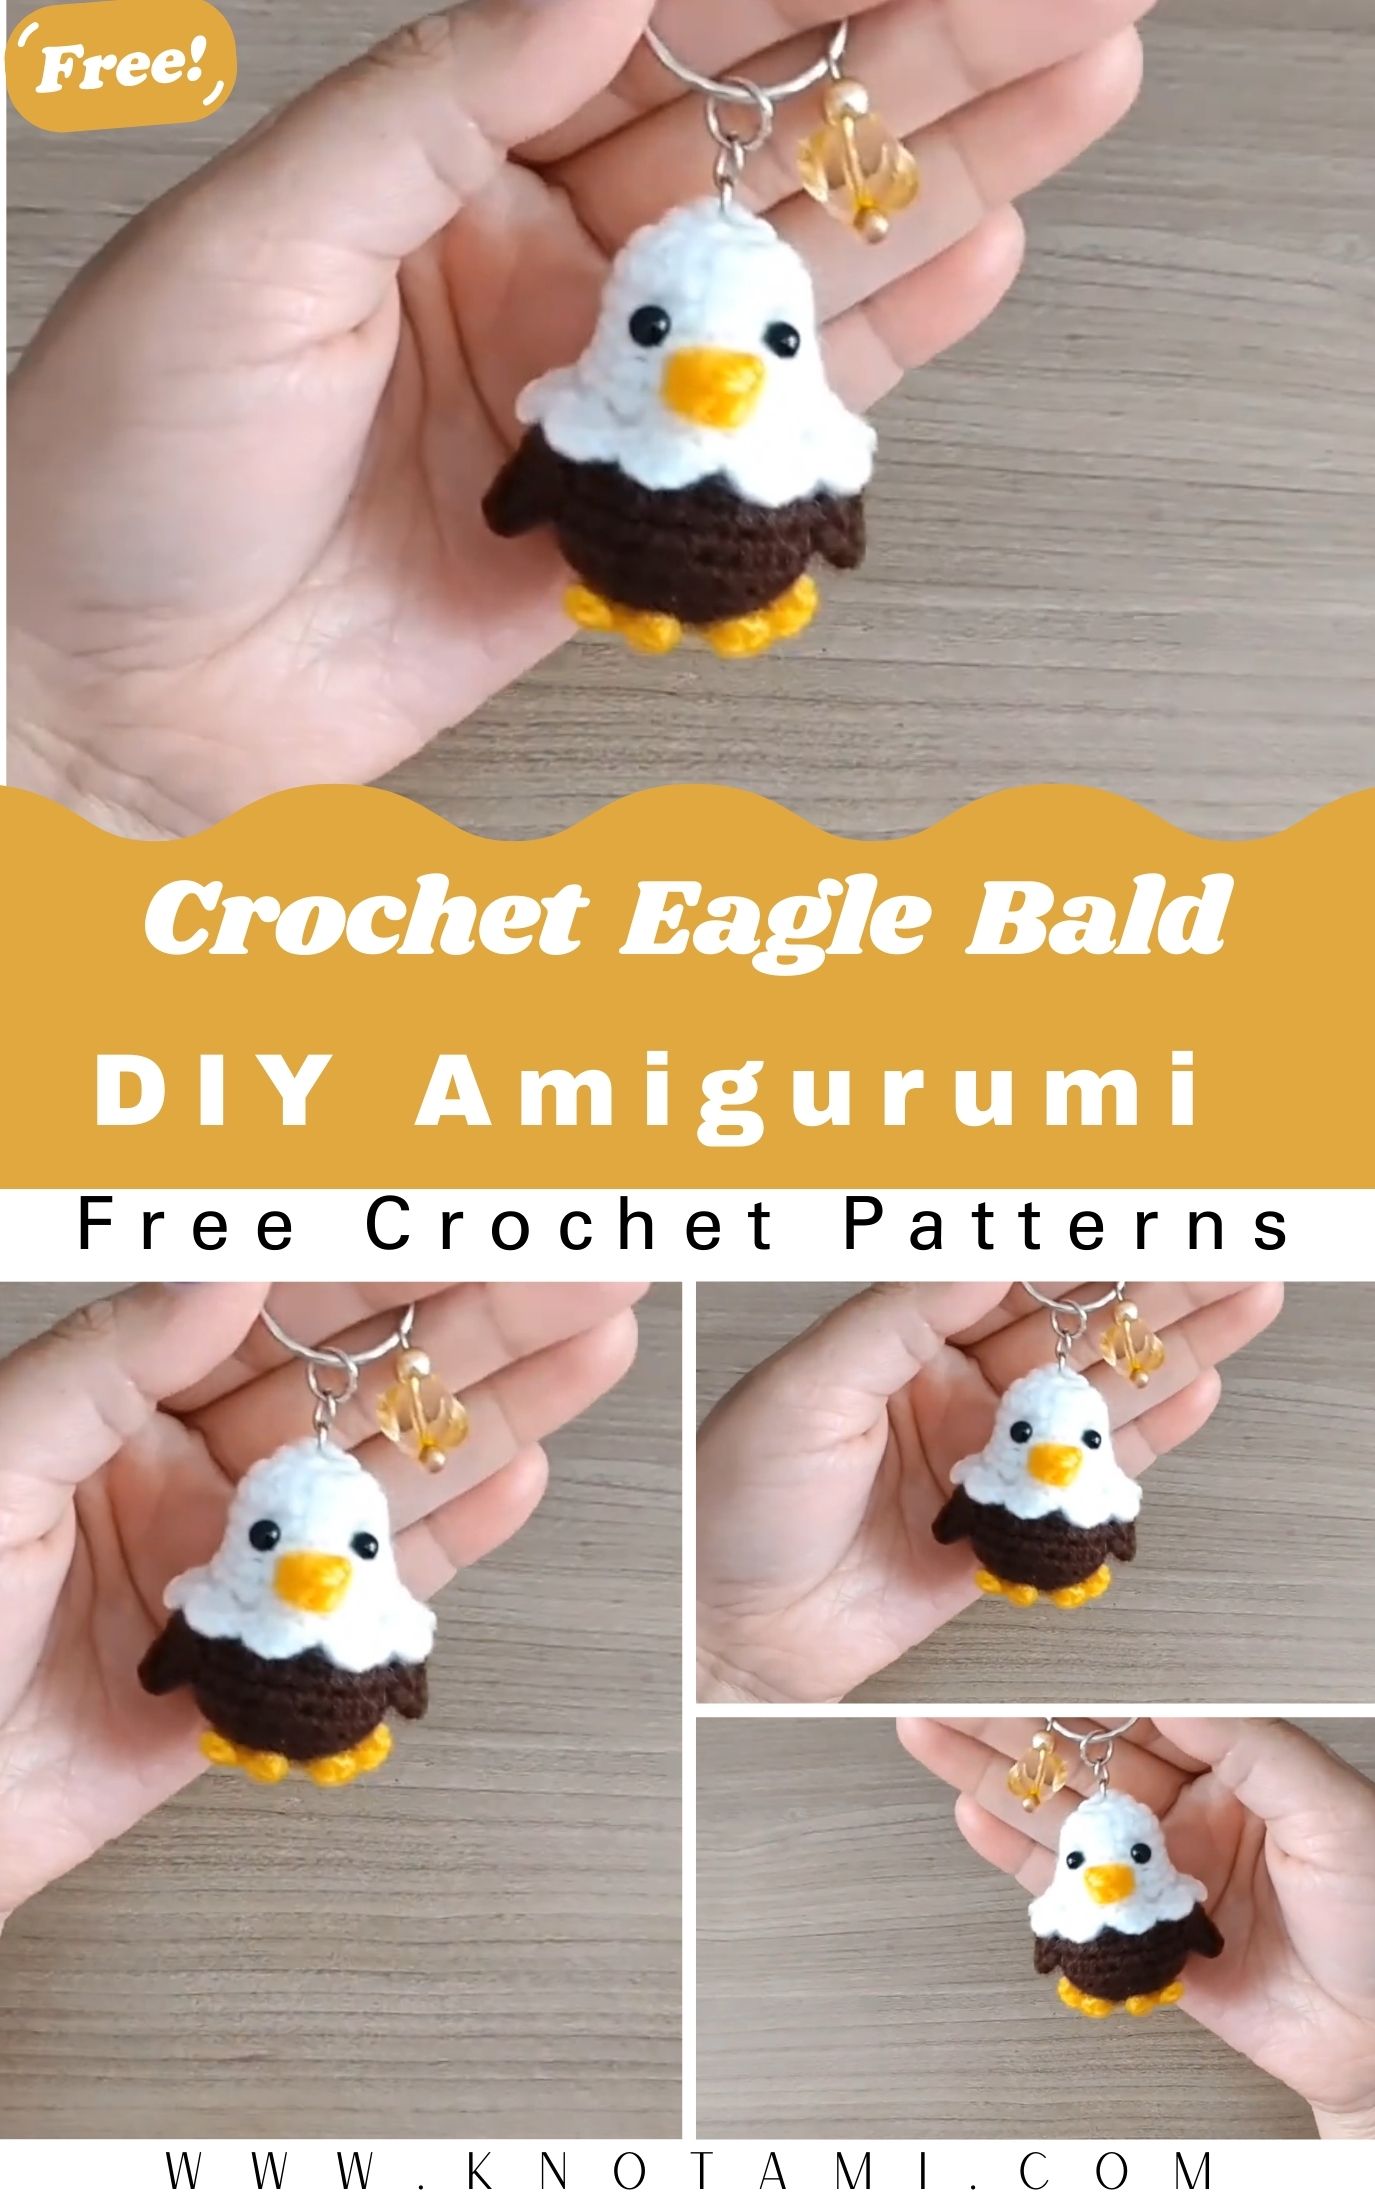
Welcome to this exciting tutorial where you will learn the secrets of a high quality Crochet Bald Eagle Amigurumi Pattern. Designing a bird with yarn is a special art because it combines geometry with creativity. In this guide, we focus on the bald eagle, a symbol of strength and freedom. By using the right tension and hook size, you can ensure your eagle stays firm and holds its shape perfectly. In addition to being a fun project, this amigurumi is a great way to use up your scrap yarn. Since the eagle only requires three main colors, it is very cost-effective for any crafter.
Moreover, the beauty of this Crochet Bald Eagle Amigurumi Pattern lies in its versatility. If you want a tiny keychain, use a thinner thread. However, if you want a cuddly plushie, go for a chunky velvet yarn. No matter which path you choose, the basic steps remain the same. We have structured this blog post to ensure you never feel lost. Consequently, you will move from the magic ring to the final assembly with total confidence. Let’s get your materials ready and start stitching this beautiful bird together!
The video embedded above provides a visual walkthrough of every single stitch mentioned in this Crochet Bald Eagle Amigurumi Pattern. While reading the instructions is helpful, seeing the hand movements can clarify any tricky parts. For example, the way the wings are shaped or how the beak is attached becomes much clearer when you see it in motion. Therefore, I highly recommend keeping the video open as a reference while you work through the written steps below. This dual approach ensures that your finished eagle looks exactly like the professional version in the tutorial.
Skill Level: Beginner to Intermediate
This Crochet Bald Eagle Amigurumi Pattern is rated as easy. It is perfect for anyone who knows the basic stitches like single crochet, increases, and decreases. While the assembly requires a bit of patience, the actual crocheting is very straightforward. Because the shapes are small, you can finish the entire project in just one afternoon. Thus, it is a great “quick win” for those who want to see fast results from their hard work.
Tutor’s Expert Suggestions
To get the best results with your Crochet Bald Eagle Amigurumi Pattern, I suggest using a stitch marker at the beginning of every round. Since amigurumi is worked in a continuous spiral, it is very easy to lose track of where you are. Additionally, make sure you stuff the body firmly but not so much that the stitches stretch open. If you see the white stuffing peeking through, your hook might be too large for your yarn. Furthermore, always leave a long tail when you finish a piece. These long tails are essential for sewing the wings and beak onto the body securely.
Materials Needed for Your Eagle
Before you start your Crochet Bald Eagle Amigurumi Pattern, gather these essential tools:
-
Brown, White, and Yellow yarn (Cotton or Acrylic works best)
-
2.0 mm Crochet Hook
-
Safety eyes (between 4th and 5th row)
-
Fiberfill stuffing
-
Yarn needle for sewing
-
Scissors
Step-by-Step Guide to Creating Your Eagle
1. The Body and Head
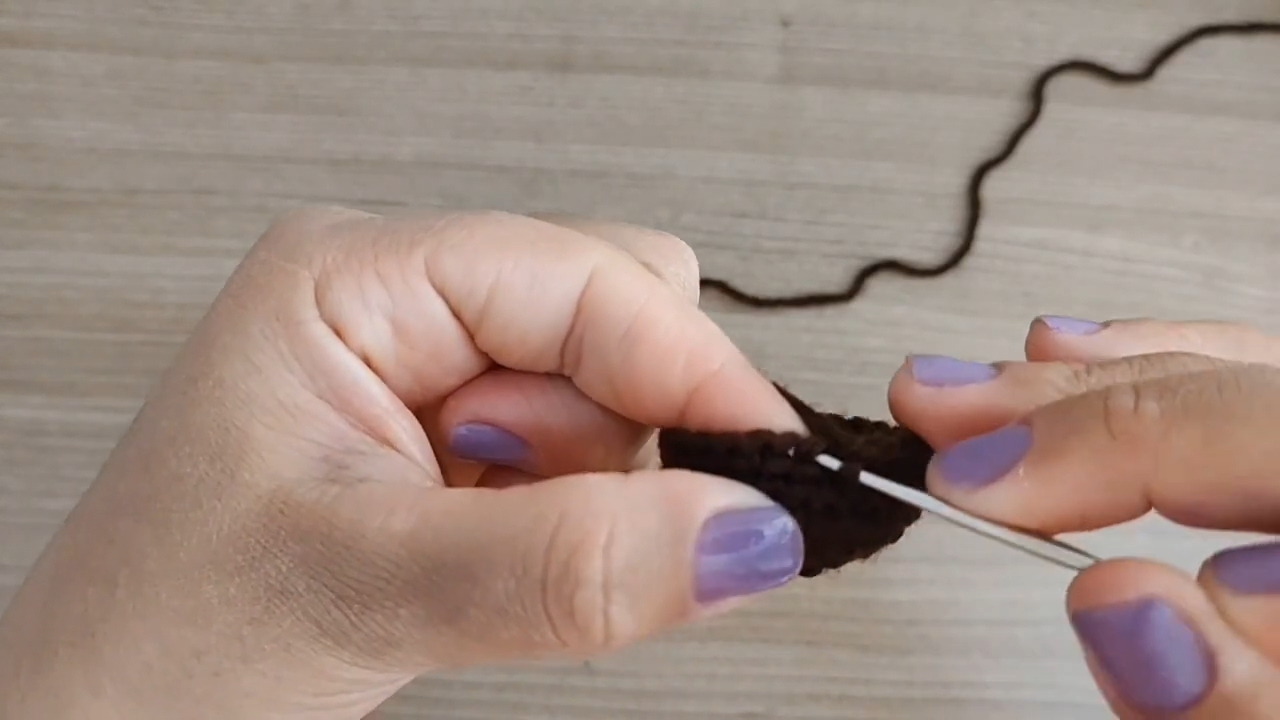
Start with the brown yarn to create the lower body. Create a magic ring and work 6 single crochets into it. For the second round, do an increase in every stitch to reach 12 points. In the third round, follow a pattern of one single crochet and one increase. By the fourth round, you should have 24 stitches. Continue with three rounds of “point over point” to give the body height. Finally, do a round of four single crochets followed by a decrease.
Now, switch to the white yarn for the head. This transition is what gives the Crochet Bald Eagle Amigurumi Pattern its realistic look. Work two rounds of point over point with the white yarn. Next, perform a round of three single crochets and a decrease. After three more rounds of simple stitches, place your safety eyes between the 4th and 5th white rows. Stuff the head firmly before you close the top using your yarn needle.
2. The Majestic Wings
To make the wings, use the brown yarn. Chain 6 and skip the first two chains. In the third chain, work a single crochet. In the next, work a half double crochet. Finally, work double crochets in the last two chains. This creates a natural taper that looks like a real wing. You need to make two of these. Because the wings are small, they don’t need stuffing. Just sew them onto the sides of the brown body once you are ready for assembly.
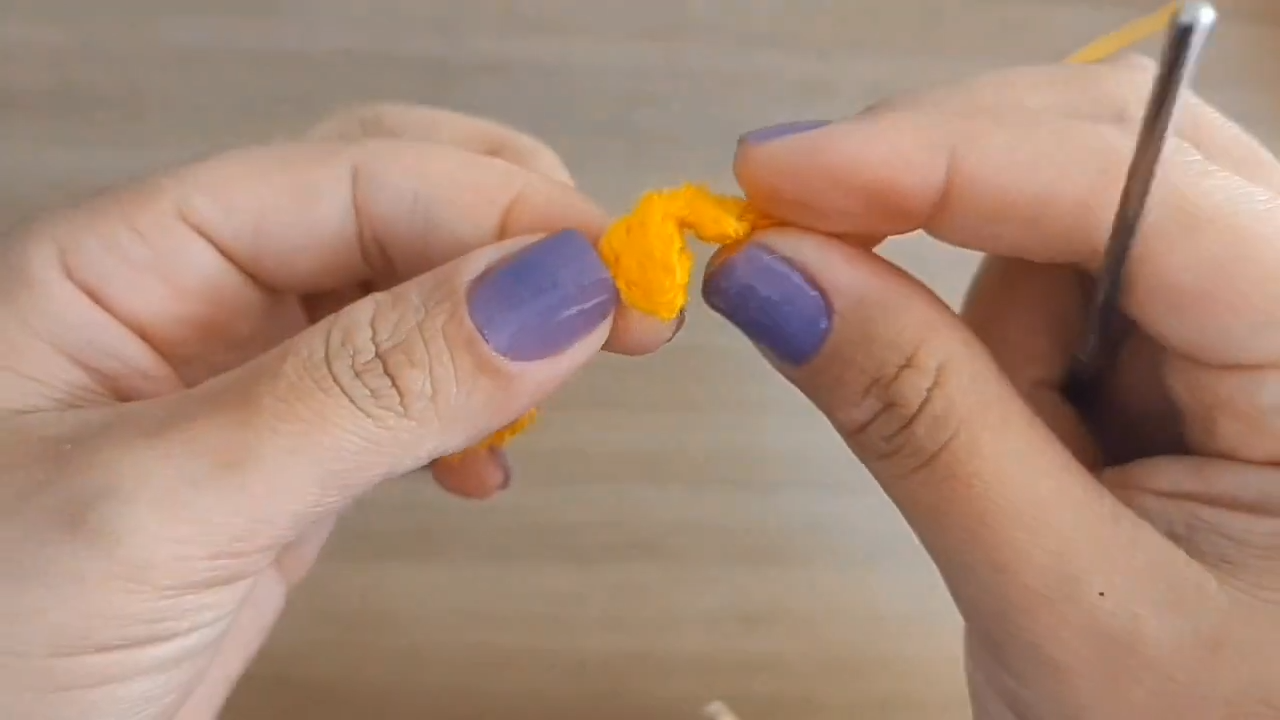
3. The Beak and Talons
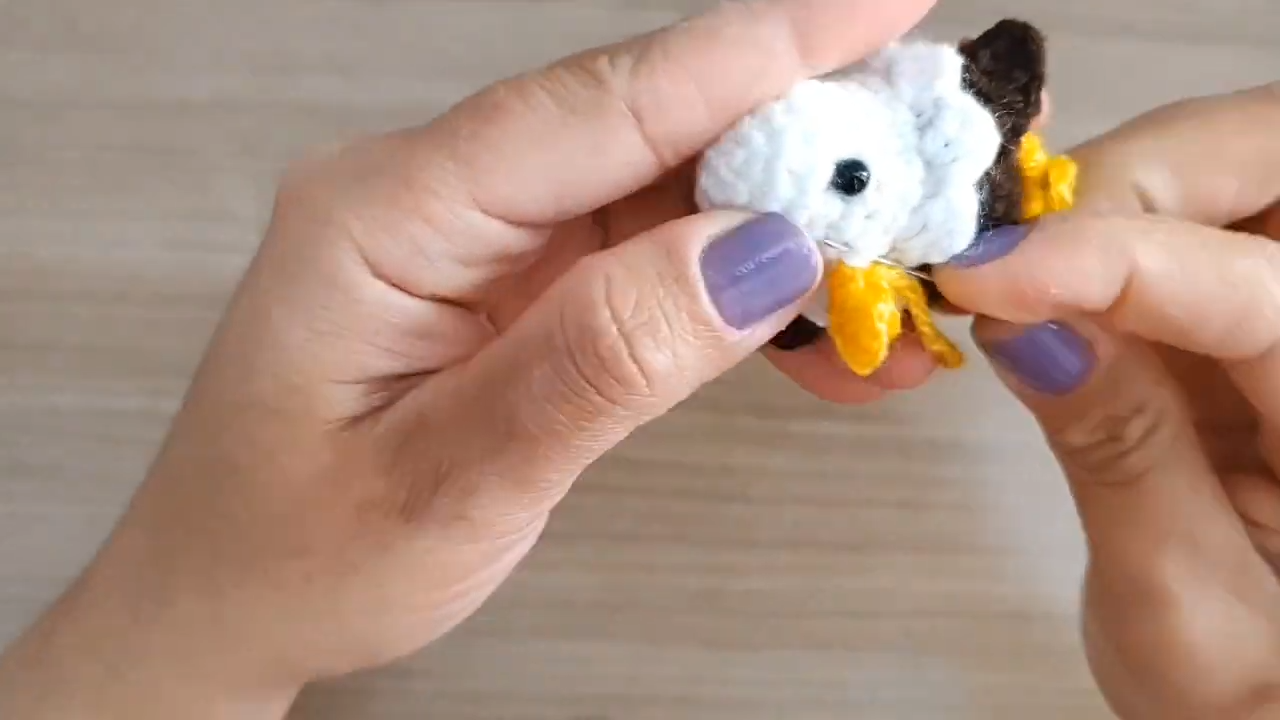
The beak is the most important feature of the Crochet Bald Eagle Amigurumi Pattern. Use yellow yarn and chain 4. Work a single crochet, a half double crochet, and a double crochet down the chain. Then, chain 3 and work a small “lower beak” section to give it a 3D effect. For the feet, use the yellow yarn to create a small magic ring with 3 stitches, then work tiny chains to represent the claws. This detail makes your eagle look professional and high quality.
Where Can You Use This Amigurumi?
Once you finish your Crochet Bald Eagle Amigurumi Pattern, the possibilities are endless. Most people love to turn these into keychains because they are small and durable. You can attach one to your backpack or your car keys to show off your crafting skills. Furthermore, they make excellent decorations for a nursery or a themed office desk. Because the bald eagle is a symbol of bravery, it also serves as a thoughtful gift for veterans or graduates. Additionally, if you are a seller, these are very popular items at craft fairs because they are unique and catch the eye of passersby quickly.
Tips and Tricks for Success
To make your Crochet Bald Eagle Amigurumi Pattern stand out, pay close attention to the tension of your yarn. Consistent tension ensures that the eagle’s body looks smooth and professional. If you want a fuzzy look, you can gently brush the brown yarn with a clean toothbrush after finishing. Moreover, when you are sewing the white “ruffle” between the head and body, take your time to space the stitches evenly. This ruffle is a signature part of the eagle’s look. Therefore, doing it carefully will significantly improve the final aesthetic of your project.
Common Mistakes to Avoid
One common mistake when following the Crochet Bald Eagle Amigurumi Pattern is placing the eyes too high or too low. Always double check the row count before inserting the safety backs. Another error is not stuffing the neck area enough, which can cause the head to wobble. Furthermore, beginners often forget to weave in their ends securely. If you don’t hide your yarn tails properly, the amigurumi might unravel over time. Avoid these pitfalls by taking your time and following each step of this guide precisely.
Frequently Asked Questions
What type of yarn is best for this project?
For the Crochet Bald Eagle Amigurumi Pattern, mercerized cotton is excellent because it provides great stitch definition. However, acrylic yarn is also a good, budget friendly choice that stays soft over time.
Can I make this eagle larger?
Yes, you certainly can. To make a larger version, simply use a thicker yarn like bulky weight and a larger hook size like 5.0 mm. The pattern remains the same, but the finished bird will be much bigger.
How do I clean my crochet eagle?
If you used cotton or acrylic, you can gently hand wash the eagle with mild soap. Always air dry it to ensure the stuffing doesn’t clump together or lose its shape.
Do I have to use safety eyes?
While safety eyes look great, you can also embroider the eyes using black yarn. This is actually safer if you are giving the eagle to a very small child or an infant.
How long does it take to finish?
Most crafters can finish this Crochet Bald Eagle Amigurumi Pattern in about 2 to 3 hours. It is a perfect project for a rainy afternoon or a quiet weekend morning.
Conclusion
I hope you enjoyed this comprehensive guide to the Crochet Bald Eagle Amigurumi Pattern. By following these steps and watching the video, you now have the tools to create a beautiful piece of art. Remember that practice makes perfect, so do not be afraid to try again if your first eagle isn’t perfect. Happy crocheting!