
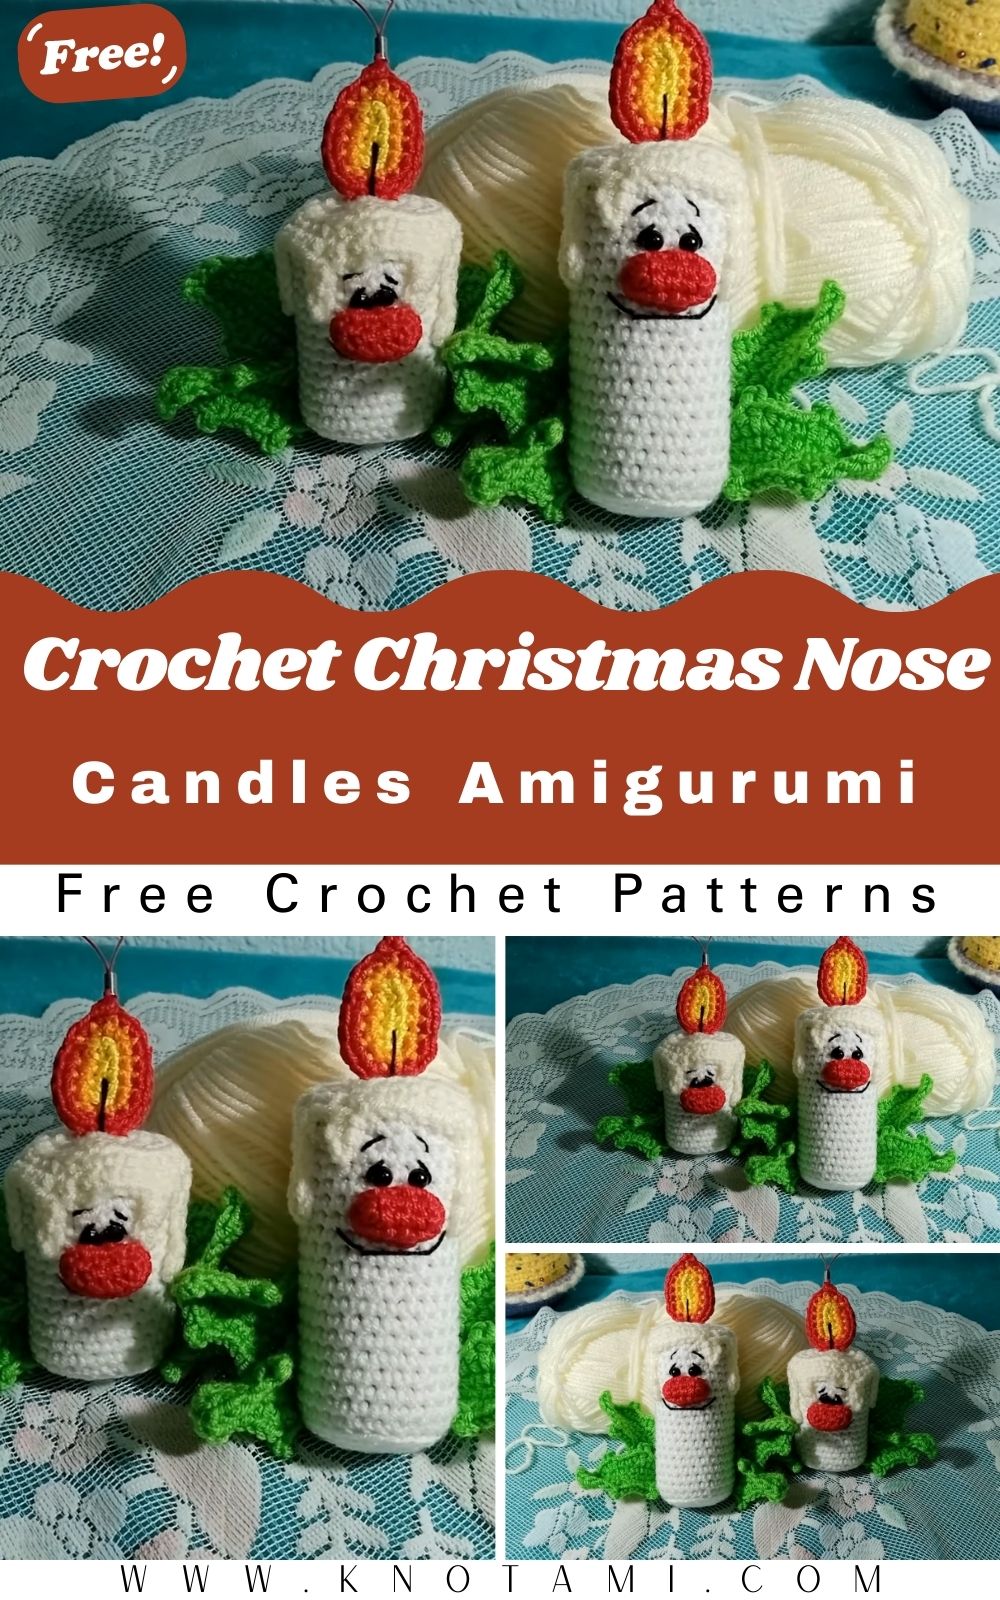
Are you looking for a unique way to brighten up your home this holiday season? Look no further because this Crochet Candle Amigurumi is the perfect blend of creativity and sustainability. This project is specifically designed to be fun, quirky, and incredibly easy to follow. Whether you want to decorate your fireplace or give a handmade gift to a loved one, these little “big-nosed” candles bring a smile to everyone’s face. We are going to use basic stitches and even some recycled materials to bring these characters to life.
Because we are focusing on a Crochet Candle Amigurumi, you do not need to be a master of the craft to get started. Even if you have only been working with a crochet hook for a short time, you will find this tutorial very accessible. The design features a recycled cardboard tube as the base, which means your candle will stand tall and sturdy without needing expensive inserts. Consequently, this is an excellent way to practice your tension and shaping while creating something truly magical for your Christmas display.
After watching the video above, you will have a clear visual understanding of how the different parts of the Crochet Candle Amigurumi come together. The video demonstrates the tactile nature of the stitches and how to assemble the flame and the “melting wax” topper. Seeing the process in motion helps clarify any tricky transitions, especially when you are working on the nose or the tiny flame details. Now, let us dive deeper into the specific steps and materials you need to complete this adorable holiday friend.
Skill Level / Level of Difficulty
The skill level for this Crochet Candle Amigurumi is Beginner to Intermediate. If you know how to make a magic ring, a single crochet, and basic increases or decreases, you are ready to go. The most “complex” part is simply changing yarn colors for the flame, but even that is explained simply. Therefore, do not feel intimidated if this is your first amigurumi. It is a fantastic learning piece that yields professional-looking results quickly.
Tutor’s Suggestions
To make your Crochet Candle Amigurumi look its absolute best, I suggest paying close attention to your stitch tension. If your stitches are too loose, the stuffing or the cardboard tube might show through the yarn. Additionally, I recommend using a slightly smaller hook than the yarn label suggests to ensure a tight, clean fabric. Another great tip is to use high-quality cotton or acrylic yarn in vibrant Christmas colors to make the candle pop. Finally, do not be afraid to customize the face! The “big nose” is what makes these candles special, so position it where you think it looks the most charming.
Materials Needed and Step-by-Step Guide
Materials You Will Need
-
Yarn: White for the candle body, yellow, orange, and red for the flame, and green for the decorative leaves.
-
Crochet Hook: A 1.75 mm or 2.0 mm hook (depending on your yarn weight).
-
Recycled Material: One toilet paper roll or cardboard tube.
-
Stuffing: Small amount of fiberfill.
-
Needle: A tapestry needle for sewing the parts together.
-
Scraps: A small amount of black yarn for the facial expressions.
Step 1: The Base of the Candle
To begin your Crochet Candle Amigurumi, start with a magic ring using white yarn. Work 7 single crochet stitches into the ring. In the second round, increase in every stitch until you have 13 points. For the third round, follow a pattern of one single crochet then one increase to reach 20 points. Finally, for the fourth round, work two single crochets and one increase until you hit 26 points. This size usually fits a standard toilet paper roll perfectly.
Step 2: Going Up the Body
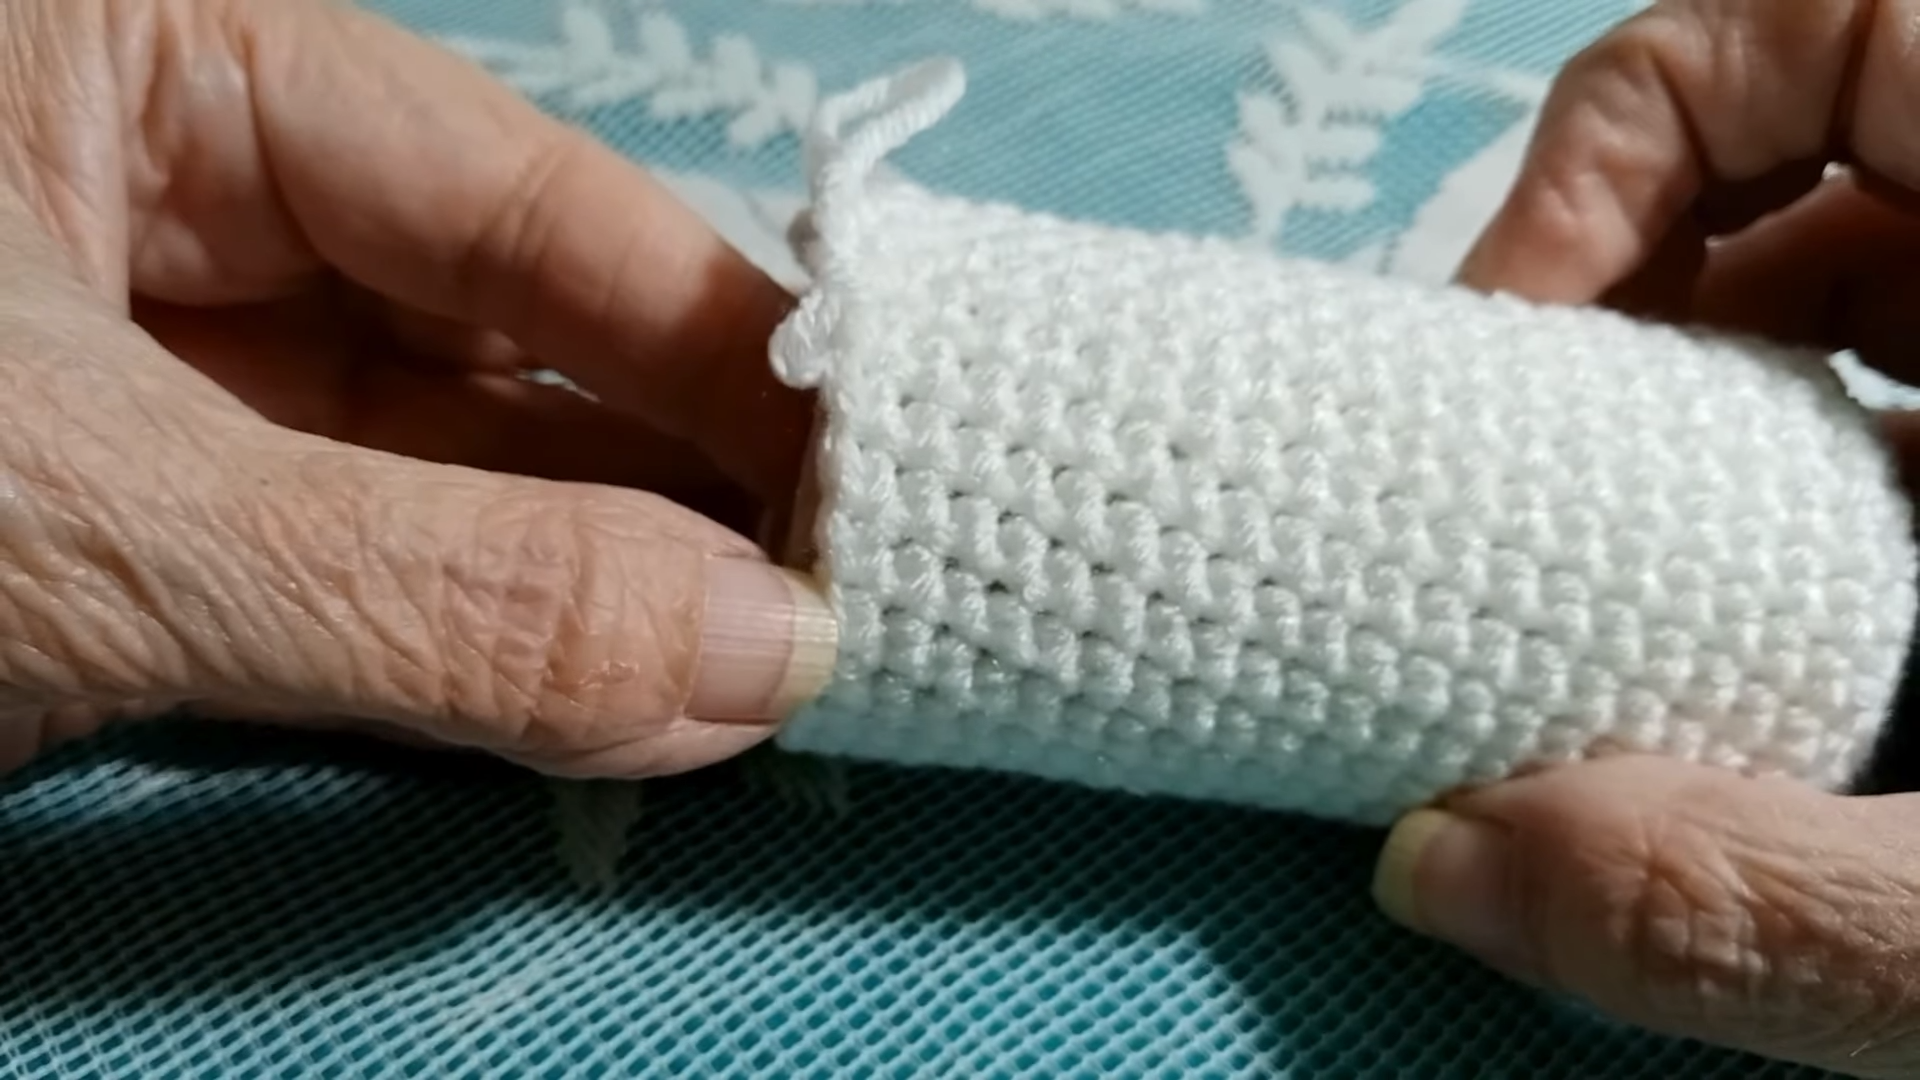
Once your base is the right size, you need to “turn the corner” to go up the sides of the tube. Work one round of 26 single crochets into the back loops only. This creates a sharp edge for the candle to stand on. Afterward, continue working in continuous rounds of standard single crochet. You should repeat this until the crochet sleeve covers the entire length of your cardboard tube. For a standard roll, this is usually around 19 to 20 rounds.
Step 3: Closing the Top
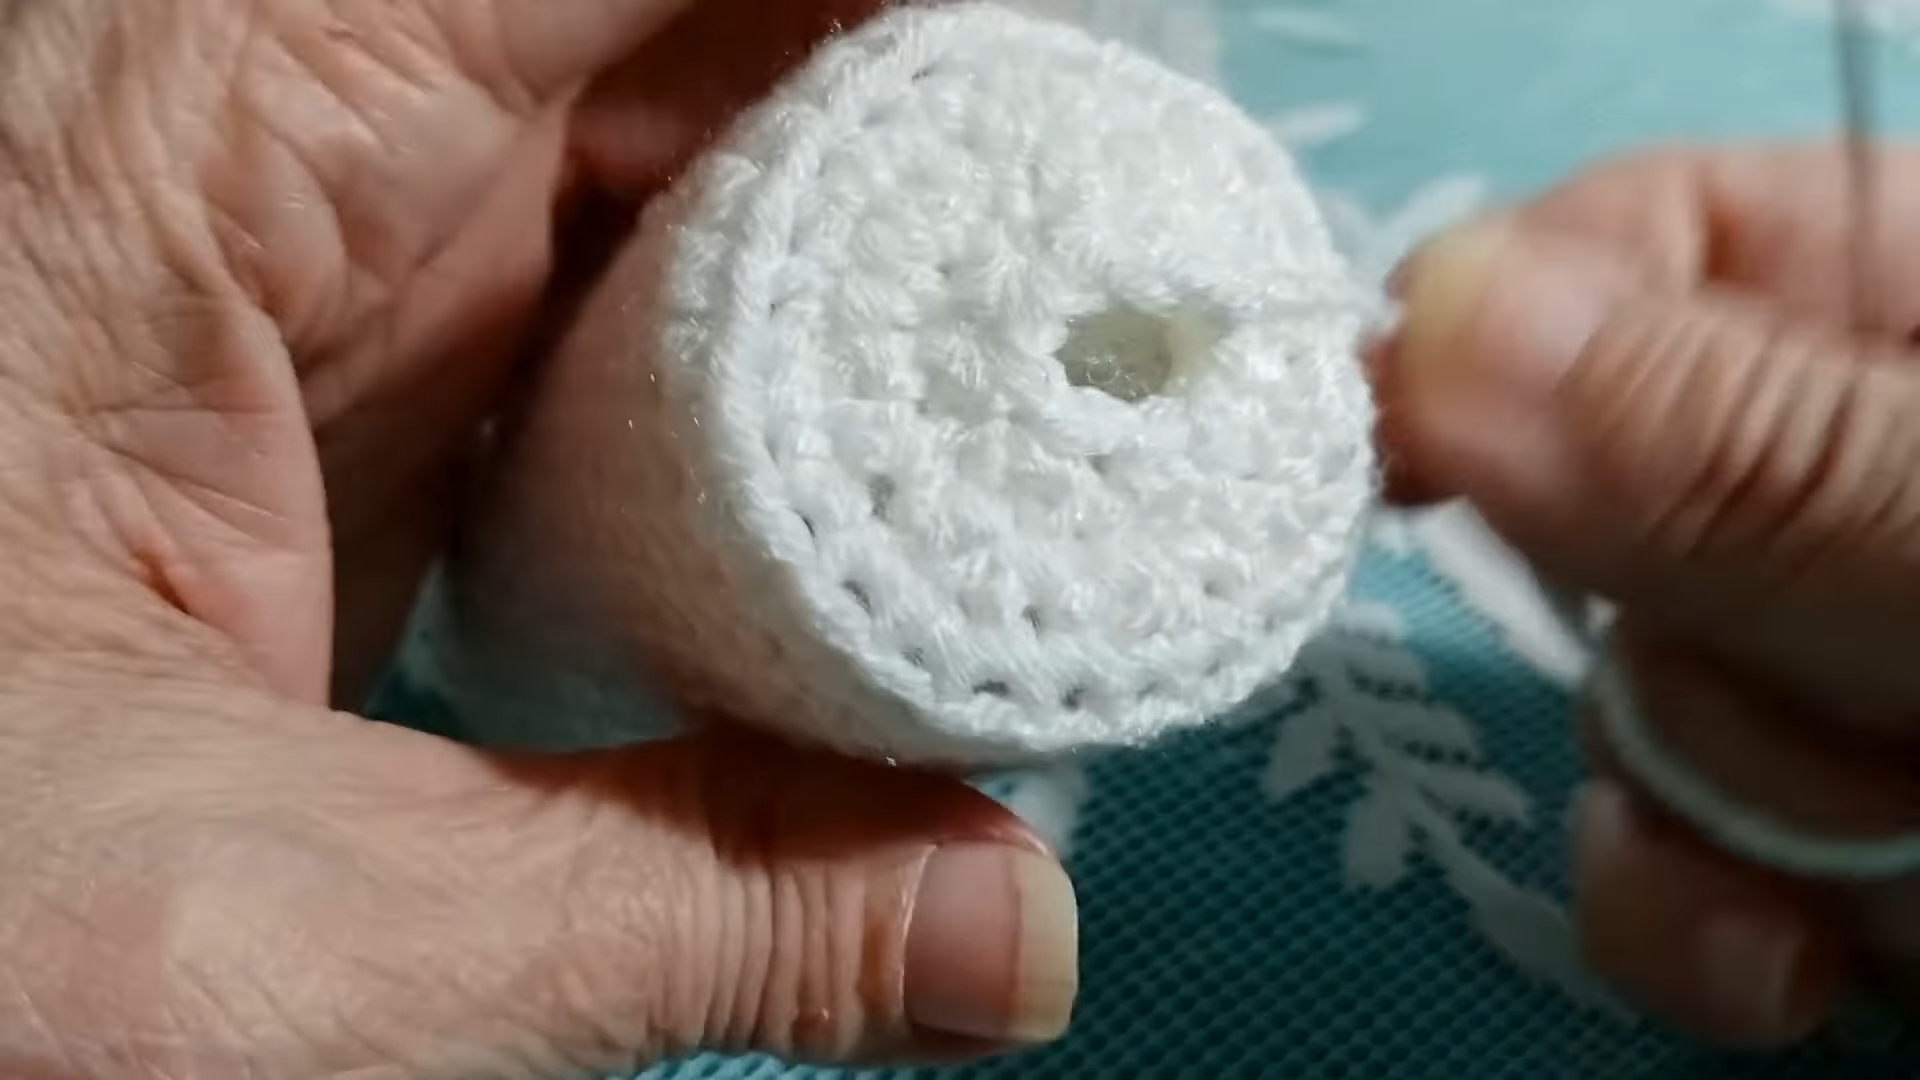
Insert your cardboard tube into the crochet sleeve. Before you close the top, add a little bit of stuffing inside the tube to give it some weight and stability. Now, start decreasing. Work a round of “one single crochet, one decrease” and then finish with a round of pure decreases. Cut the yarn and use your tapestry needle to weave the end through the remaining stitches, pulling it tight like a drawstring to close the hole.
Step 4: Crafting the Melting Wax
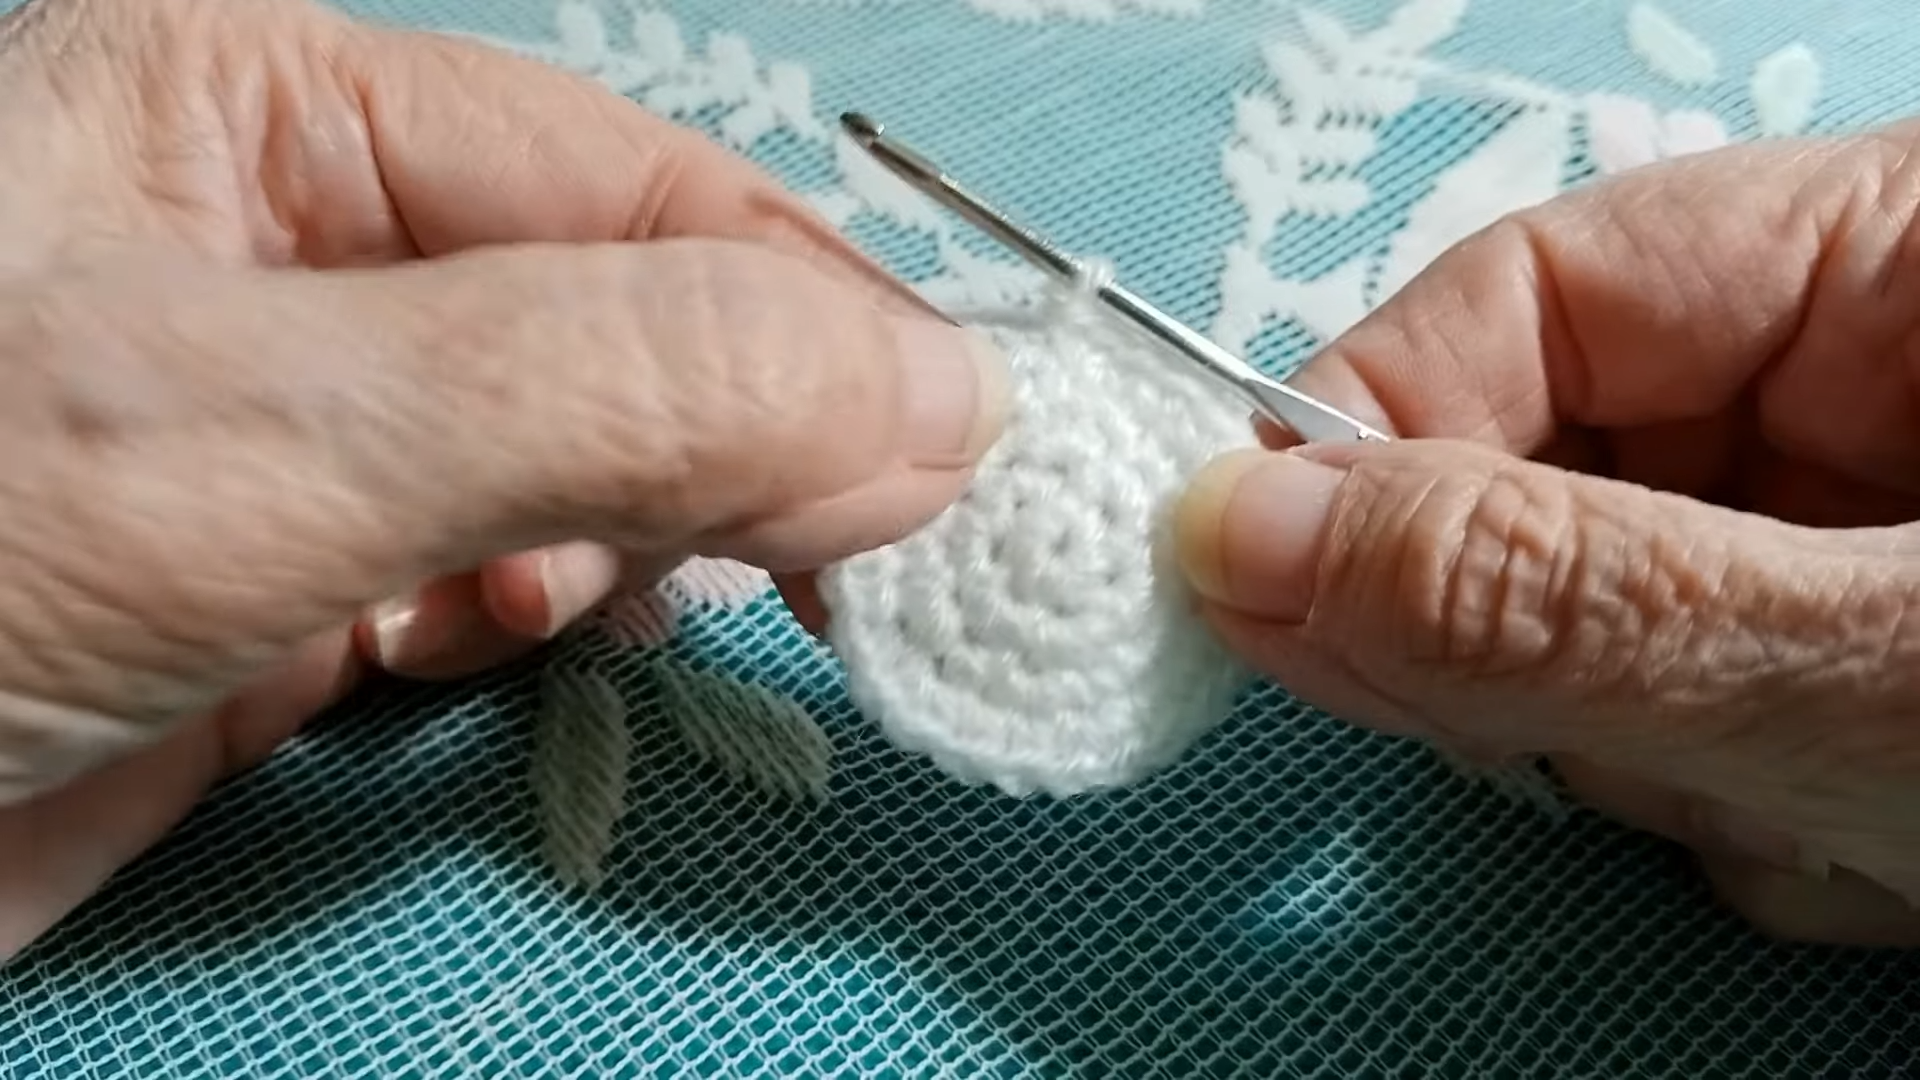
This is what gives the Crochet Candle Amigurumi its character. Repeat the base pattern (up to 26 stitches) using white yarn. To create the “drips,” crochet a series of chains of different lengths (like 4, 6, or 8 chains) and then crochet back down them with single crochets. Attach these drips around the edge of the circle. This piece will be sewn onto the top of your candle body later.
Step 5: The Three-Color Flame
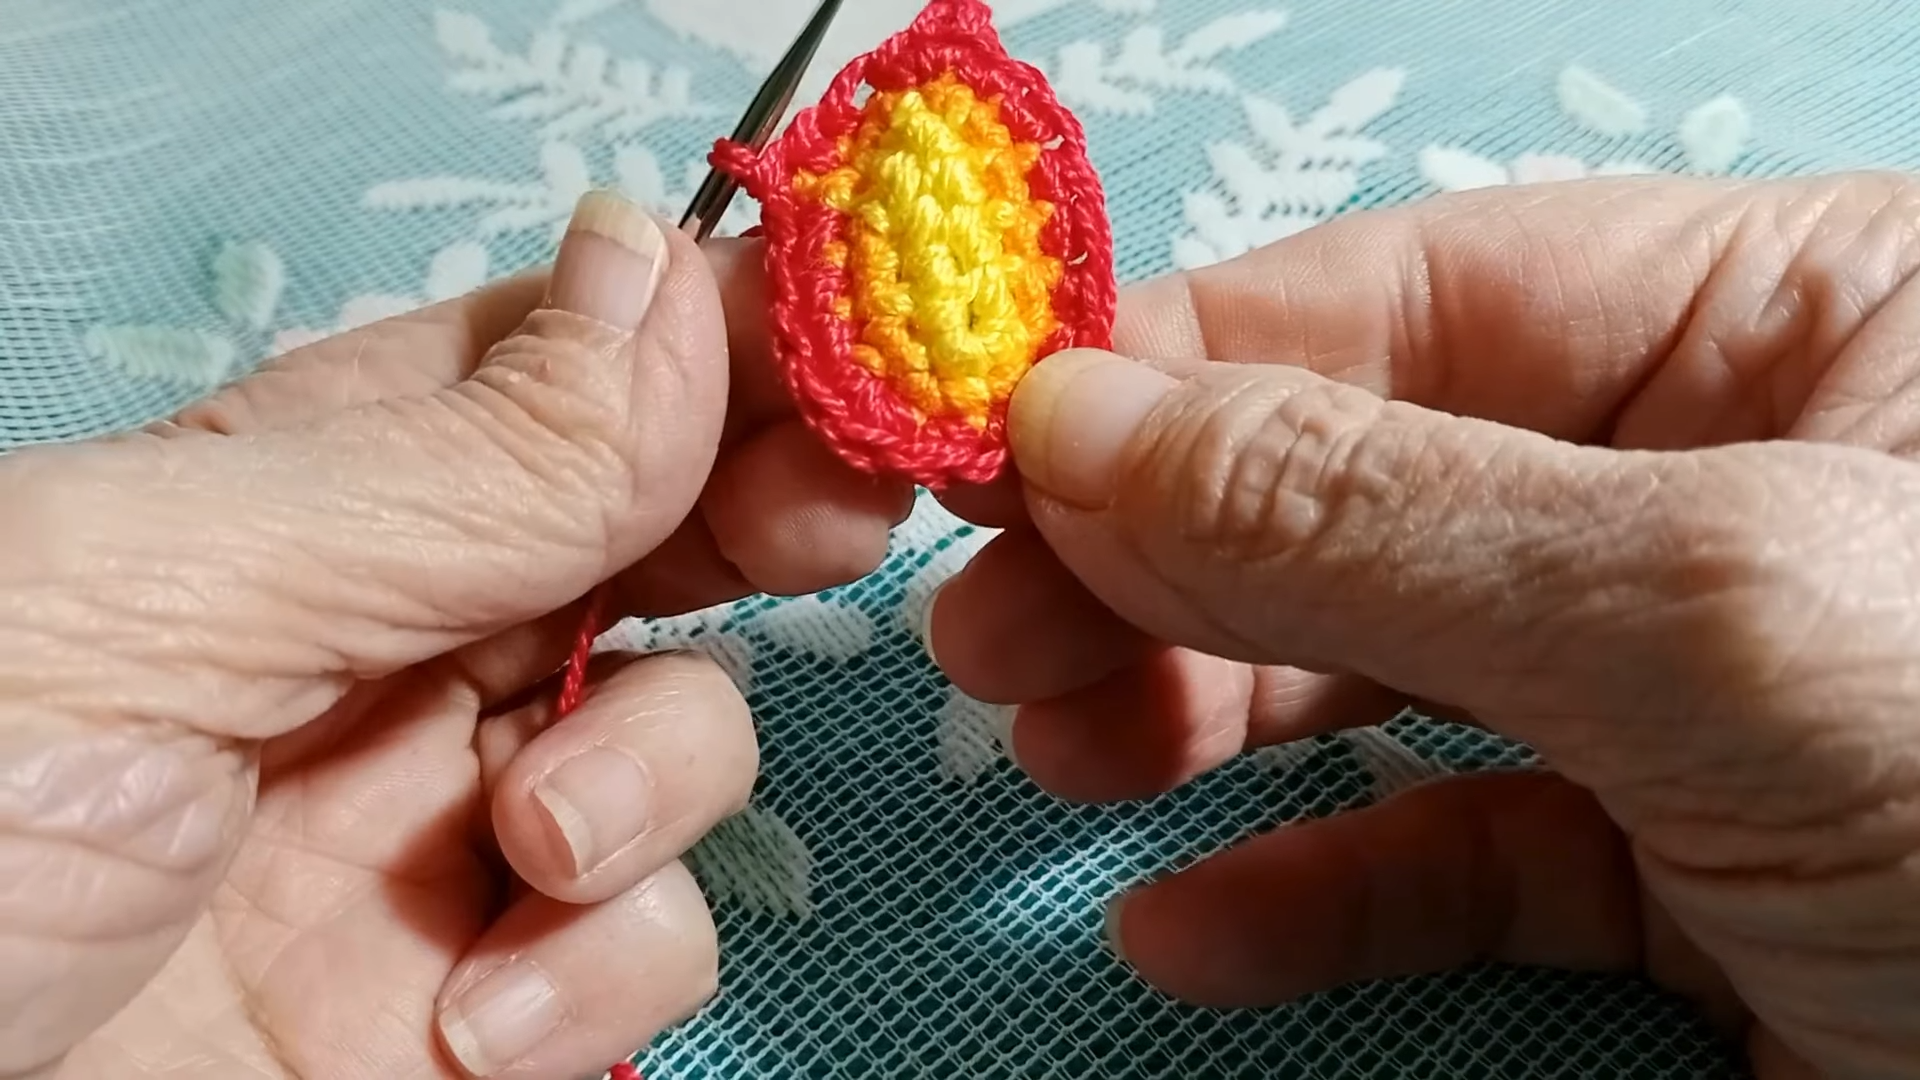
The flame is the crown of your Crochet Candle Amigurumi. Start with yellow yarn and make a small oval. Switch to orange for the middle section and finish the outer edge with red yarn. Use a “picot stitch” at the very top of the red section to give the flame a realistic point. You will need to make two of these flame pieces and sew them together so the flame is thick and looks good from both sides.
Step 6: The Famous “Big Nose”

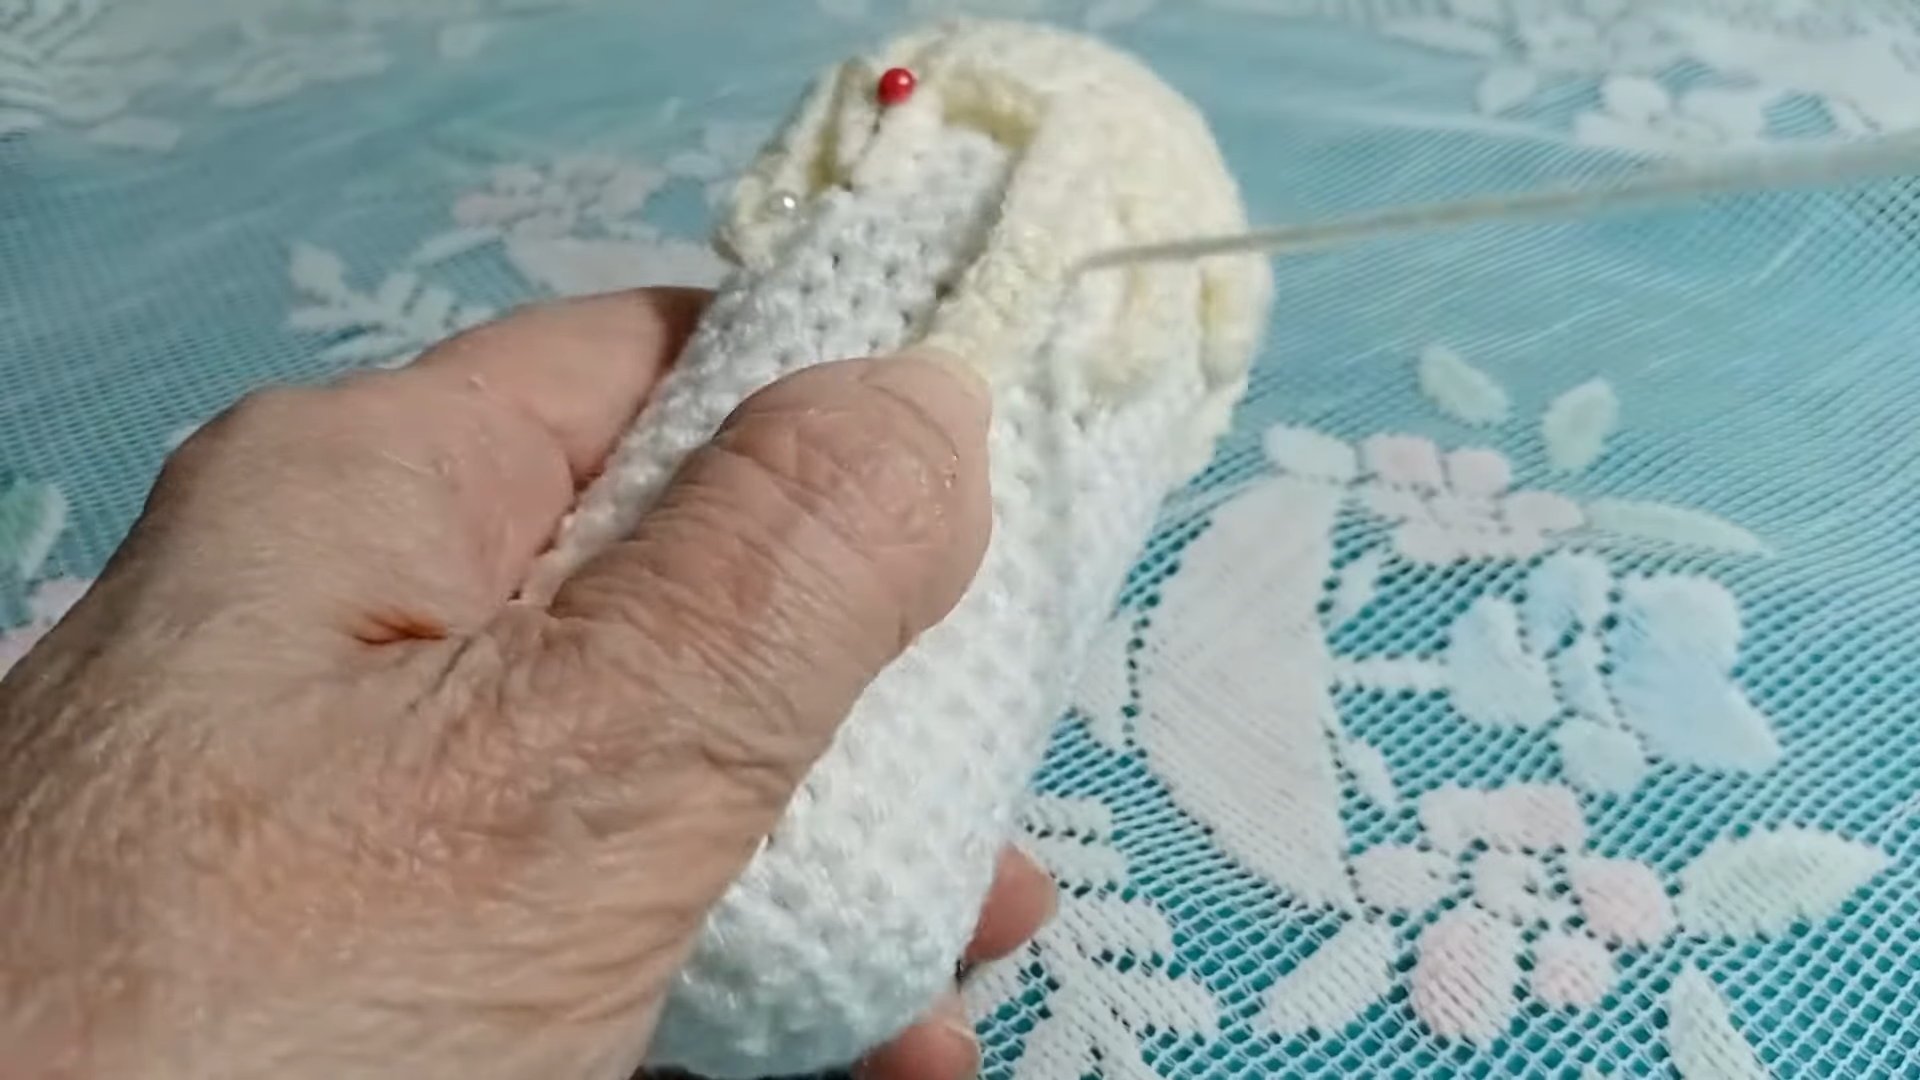
For the nose, chain 5 and crochet around the chain in an oval shape. Increase at the ends to create a rounded, puffy look. You only need a couple of rounds to get that perfect “narizota” shape. Once finished, sew it onto the center of the candle body. Afterward, use your black yarn to embroider simple eyes, eyelashes, and a smiling mouth around the nose.
Where Can We Use It?
You can use this Crochet Candle Amigurumi in so many festive ways! They look incredible as part of a Christmas table centerpiece surrounded by pinecones and holly. Because they are lightweight and durable, they are also safe for households with pets or small children who might knock over real candles. Additionally, you can add a small loop to the top and turn them into oversized ornaments for your Christmas tree. They also make wonderful teacher gifts or “Secret Santa” presents because they are handmade with love.
Tips and Tricks
-
Recycled Support: If your cardboard tube is too flimsy, you can wrap a bit of tape around it to reinforce it before sliding it into the crochet sleeve.
-
Invisible Decreases: Always use the invisible decrease technique when working on amigurumi to prevent gaps in your fabric.
-
Color Play: While white is traditional, try making these in red, gold, or even a soft blue for a “winter wonderland” theme.
-
Stitch Markers: Since we are working in continuous rounds, always use a stitch marker to keep track of the start of your rows. This prevents your candle from becoming lopsided.
-
Perfect Placement: Use pins to hold the nose and flame in place before you start sewing. This ensures everything is symmetrical and centered.
Common Mistakes to Avoid
One common mistake is choosing a hook that is too large for your yarn. If you see the cardboard tube through the stitches, your hook is too big. Another error is forgetting to stuff the tube. While the tube provides the shape, the stuffing provides the “soul” and prevents the candle from feeling hollow or cheap. Additionally, many beginners struggle with sewing the pieces together. Make sure you use a sharp tapestry needle and take small, hidden stitches so the assembly looks seamless. Finally, do not rush the facial features. The expression is what makes the Crochet Candle Amigurumi come alive, so take your time with the embroidery.
FAQs
1. Can I wash my crochet candle?
Yes, but you must be careful. Since there is a cardboard tube inside, you cannot submerge it in water. Instead, use a damp cloth to spot-clean the yarn if it gets dusty.
2. What yarn is best for this project?
Mercerized cotton is excellent because it has a slight sheen that looks like real wax. However, any scrap acrylic yarn will work perfectly fine for beginners.
3. How long does it take to make one?
Because this is an Easy Crochet Project, most people can finish a single candle in about two to three hours. It is the perfect “weekend afternoon” craft.
4. Can I make the candle taller?
Absolutely! You can stack two cardboard tubes together and simply continue your rounds of single crochet until the entire length is covered.
5. Do I need to use a cardboard tube?
While you could stuff the entire candle with fiberfill, the tube ensures it stays perfectly cylindrical and stands up straight on flat surfaces.
Creating Lasting Memories with Crochet
In conclusion, making a Crochet Candle Amigurumi is a delightful way to spend your time. It combines the joy of crafting with the satisfaction of recycling. By following this guide, you have created a piece of decor that is not only beautiful but also has a personality of its own. These candles do not just sit on a shelf; they tell a story of creativity and holiday spirit.
As you continue your crochet journey, projects like this help build your confidence. You have learned how to shape objects, work with multiple colors, and assemble various pieces into a finished character. Moreover, the smiles these candles generate are worth every stitch. So, grab your hook, find some scrap yarn, and start building your own little family of glowing, big-nosed candles today. Happy crocheting and may your holidays be filled with handmade warmth!