
There’s a special kind of wonder in watching a simple strand of yarn take on life between your fingers. With every loop and pull, you sculpt something warm, soft, and delightfully personal. Crochet is more than a technique, it’s a slow, satisfying ritual. From choosing the colors to shaping the smile on a tiny plush face, you’re building a tiny world of comfort and creativity, one stitch at a time.
Meet the Crochet Cute Joy Amigurumi
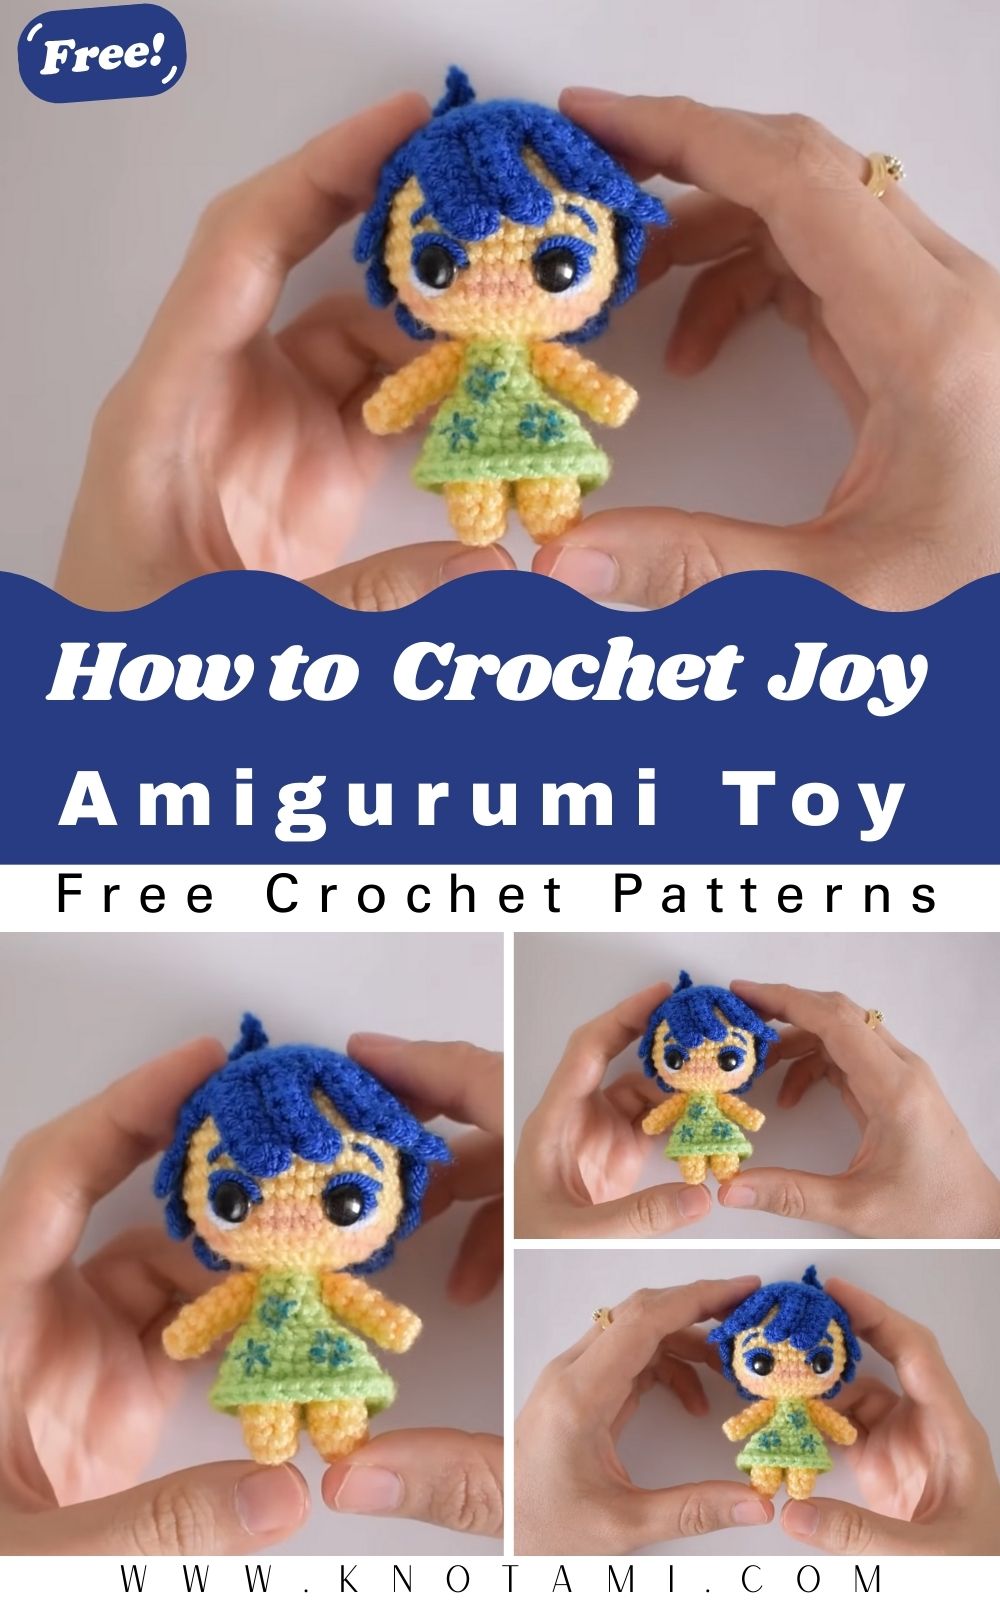
Today’s project, the Crochet Cute Joy Amigurumi, is a pocket-sized bundle of happiness. Think bright colors, expressive features, and a cheerful presence that lights up any space, your keyring, backpack, office desk, or craft shelf. This small, stylized figure has a rounded head, a compact body, and little poseable limbs you can accessorize to match any theme or season. It’s the perfect quick-make that still looks polished and “store-worthy.”
Beginner-Friendly, Expert-Approved
This pattern is approachable for beginners (hello, magic ring, single crochet, increases, and decreases!) yet still engaging for experienced crocheters who love clean shaping, hidden joins, and clever assembly. You’ll practice foundational amigurumi skills and learn professional finishing techniques that elevate your work like achieving symmetrical features, balanced stuffing, and tidy seams.
Slow Crafting & Gifting Bliss
Crocheting a small amigurumi is the essence of slow crafting. The rhythm calms the mind, the texture soothes the senses, and the finished piece delivers that unmistakable I made this glow. A Joy plush makes a thoughtful handmade gift easy to personalize, quick to mail, and guaranteed to spark a smile.
Materials & Tools
Complete Supply List
-
Yarn (DK or light worsted, Category 3)
-
Main color for body (e.g., sunny yellow, sky blue, mint, or any joyful shade)
-
Contrast color for hair or accents (e.g., teal/navy/pastel); optional small scraps for cheeks and mouth
-
Neutral/skin-tone or cream for face patch (optional style)
-
-
Hook: 2.5 mm–3.0 mm (match hook to your yarn for tight amigurumi fabric)
-
Stuffing: Polyester fiberfill (small handful)
-
Safety Eyes: 6 mm (or embroider eyes for kid-safe version)
-
Scissors: Small, sharp pair for precise trimming
-
Tapestry Needle: For seaming and weaving in ends
-
Stitch Marker: Essential for tracking continuous rounds
-
Keychain Hardware (optional): Split ring with short chain and jump ring
-
Pins or Clips: To position parts before sewing
-
Fabric Glue (optional): For tiny felt embellishments
Choosing Yarn Texture, Weight & Color Combos
-
Fiber: Cotton gives crisp stitch definition; acrylic offers stretch and a softer halo. Blends work well, too.
-
Gauge: Pick a hook small enough to create a dense fabric no stuffing peeking through.
-
Colors: Aim for high contrast between face/hair/accessories and the main body so features “pop.” Monochrome looks elegant; brights feel playful.
-
Finish: Matte cotton reads illustrated and tidy, while soft acrylic feels plush and cuddly. Use what suits your brand or gift vibe.
Step-by-Step Crochet Instructions
Notes: US terms; work in continuous rounds unless noted. Use a stitch marker at the start of each round. Inc = 2 sc in one stitch; Dec = invisible decrease.
1) Head (worked bottom-up, round)
Main/face color
-
R1: Magic ring, 6 sc (6)
-
R2: Inc around (12)
-
R3: (1 sc, inc) × 6 (18)
-
R4: (2 sc, inc) × 6 (24)
-
R5: (3 sc, inc) × 6 (30)
6–9. R6–R9: Sc around (30) → keep fabric dense and even -
R10: (3 sc, dec) × 6 (24)
-
R11: (2 sc, dec) × 6 (18) Insert safety eyes between R7–R8, ~5–6 sts apart
-
R12: (1 sc, dec) × 6 (12) Stuff firmly, shaping a clean sphere
-
R13: Dec around, close and weave in tail
Expert shaping tips
-
Pack stuffing in small tufts. Rotate the piece as you fill to avoid lumpy sides.
-
For symmetrical eyes, count stitches from the marker, not just eyeballing.
-
If using a face patch, stitch it before closing the head fully.
2) Neck & Upper Torso (continuous piece)
Body main color
-
Attach yarn at the center bottom of the head; pick up 12 sts evenly around the base.
-
R1–R2: Sc around (12) to form a sturdy neck column lightly stuff.
-
R3: (1 sc, inc) × 6 (18)
-
R4: (2 sc, inc) × 6 (24)
Pro tip: Keep neck stuffing firm; a strong “post” prevents bobble-head wobble.
3) Main Body (oval doll torso)
-
R5–R7: Sc around (24) build height
-
R8: (2 sc, dec) × 6 (18)
-
R9: (1 sc, dec) × 6 (12) Stuff evenly, shaping a gentle pear
-
R10: Dec around (6), close, weave in tail
Refinement
-
Gently massage the body to distribute fiberfill.
-
Keep the top slightly narrower than the belly for a friendly chibi silhouette.
4) Base / Standing Option (optional flat sole)
Body color or neutral
-
R1: MR, 6 sc (6)
-
R2: Inc around (12)
-
R3: (1 sc, inc) × 6 (18)
-
R4: (2 sc, inc) × 6 (24)
Stitch or whip-stitch the circle to the body bottom for a flat, display-friendly shape. For a keychain, you can skip the base and keep the body rounded so it hangs nicely.
5) Limbs & Extras
Arms (make 2)
Body color
-
R1: MR, 5 sc (5)
2–5. R2–R5: Sc around (5)
Fasten with long tail, do not stuff or add a hint of stuffing near the shoulder only. Sew at torso sides, slightly forward so hands meet or can hold props.
Legs (make 2)
Body color
-
R1: MR, 6 sc (6)
2–4. R2–R4: Sc around (6)
Lightly stuff and sew to bottom front corners if you want a seated look. For keychain, tiny legs look cute dangling; keep them short.
Hair / Fringe (optional)
-
For a simple tuft: cut short strands of contrast yarn, latch through a stitch at head top, trim evenly, and steam-tame gently.
-
For a neat cap: crochet a tiny circle (6 → 12 → 18), work 1–2 even rounds, then sew as a “wig.”
Face Patch (optional)
-
Crochet an oval (6 → 12 → 18; then 18 even) or cut from felt. Sew/attach before placing cheeks and mouth.
Accessories (choose your Joy!)
-
Mini dress/tunic: Work a small foundation chain to fit torso circumference; join, then 2–3 rounds of sc; add a picot hem.
-
Scarf: Chain to desired length, sc one row, fasten off; fringe optional.
-
Heart, star, or balloon: Tiny appliqués add delight sew to one hand.
6) Assembly & Positioning
-
Pin first. Use pins/clips to mock-up placement; check symmetry from multiple angles.
-
Sew with invisible whip stitch: catch front loops only for seamless joins.
-
Keychain loop: Thread a yarn loop or metal screw eye at the crown, then attach split ring/chain.
Balance checklist
-
Does the head sit centered over the torso?
-
Are arms aligned (same round, equal tilt)?
-
If a keychain, does it hang straight from the loop?
7) Final Touches & Expressions
-
Eyes: Add tiny white stitch “sparkles” for life.
-
Cheeks: Lightly blush with fabric paint or embroider 2–3 satin stitches in pink.
-
Mouth: Backstitch a soft smile in brown/black.
-
Surface grooming: Use a lint roller or soft brush to remove fuzz; trim stray fibers with tiny scissors.
Customization Ideas
-
Color Stories:
-
Sunrise Joy: Peach body, coral cheeks, lemon accessories.
-
Ocean Joy: Teal body, white accents, navy scarf.
-
Pastel Joy: Mint body, lavender hair, blush scarf.
-
Monochrome Chic: All cream or all charcoal for a minimalist desk buddy.
-
-
Yarn Experiments:
-
Velvet/Chenille: Plush, luxe finish (increase hook down a half size to tighten fabric).
-
Cotton: Crisp, graphic edges excellent for photos.
-
Self-striping: Subtle gradients without color changes.
-
-
Theme Packs:
-
Holiday Joy: Santa hat, candy-cane scarf, or mini pumpkin.
-
Rainbow Joy: Multicolor outfit or stacked rainbow appliqué.
-
Fantasy Joy: Star wand, crown, or tiny cape.
-
-
Add-Ons:
-
Micro backpack, messenger bag, tiny book, coffee cup, or heart plush.
-
Embroidered initials for personalized gifts.
-
Advanced Tips & Troubleshooting
-
Invisible Decreases
Work through the front loops of the next two stitches; yarn over, pull through both, yarn over, pull through no bumps, no gaps. -
Consistent Tension
Keep yarn flowing over the index finger with the same angle. If fabric loosens after breaks, do a quick tension reset: two practice rounds on a scrap. -
Round Tracking
Use a removable marker and move it every round. If you forget, count from distinct landmarks (eye placement, color changes). -
Shape Rescue
Uneven sphere? Reopen one stitch, adjust stuffing (add or remove tiny tufts), then close. Massage to redistribute fiberfill. -
Stuffing Balance
Understuffing leads to dents; overstuffing stretches stitches. Aim for “springy-firm.” Test by pressing piece should rebound without warping. -
Seamless Joins
Match yarn color for seaming. Take short, closely spaced stitches, catching just the edge loops to hide the seam ridge. -
Reading Abbreviations
US terms: sc (single crochet), inc, dec, sl st (slip stitch), ch (chain), MR (magic ring). Keep a cheat card nearby. -
Black or Dark Yarn Visibility
Place light paper on your lap or use a ring light from the side. Touch helps: feel each top V to insert the hook. -
Tiny Part Control
Use tweezers to insert miniature stuffing amounts in arms/legs; keep tails long for secure sewing. -
Finishing Polish
Steam block lightly (no direct iron contact). A brief waft of steam relaxes fibers and smooths edges.
Care Instructions
-
Hand Wash Only: Cool water + a drop of mild detergent.
-
Rinse & Press: Rinse gently; press in a towel (don’t wring).
-
Dry Flat: Reshape and lay on a clean towel until fully dry.
-
Sunlight Caution: Avoid direct sun to prevent fading.
-
Storage: Keep in a dust-free pouch or lidded display box.
-
Travel Tip: If using as a keychain, remove during rainy days to preserve color and shape.
Display & Gift Ideas
-
Home Décor: Line up several Joy figures in different colors on a bookshelf or windowsill.
-
Kid’s Room: Hang a trio from a wooden dowel for a cheerful mini mobile.
-
Desk Buddy: Place beside a plant or pen cup instant mood lift during work.
-
Holiday Ornament: Add a hanging loop and seasonal accessories.
-
Gift Magic: Pair your plush with a handwritten tag, or tuck it into a kraft box with tissue and a little confetti.
-
Party Favors: Make a color-coordinated batch for birthdays, baby showers, or craft meetups.
Benefits of Crocheting the Cute Joy Amigurumi
-
Relaxation & Mindfulness: Repetitive motion encourages flow state and quiet focus.
-
Stress Relief: Tactile work + color play = serotonin boost.
-
Accomplishment: Quick wins build confidence ideal for new or returning crafters.
-
Eco-Friendly Gifting: Handmade beats mass-produced trinkets; use stash yarn or sustainable fibers.
-
Emotional Connection: A made-with-love object carries meaning to the maker and the recipient.
-
Skill Growth: Practice counting, shaping, seaming, and finishing transferable to larger projects.
-
Community Joy: Share WIPs, trade tips, and inspire others with your color combos and accessories.
Photography & Social Media Tips
-
Light: Shoot in bright, indirect daylight near a window; avoid harsh noon shadows.
-
Backdrop: Clean neutrals (linen, white card, pale wood) make colors pop.
-
Props: A hook, a small yarn cake, a leaf sprig, or a tiny book give context without clutter.
-
Angles: Capture front, ¾ view, side profile, and a macro of stitches/face.
-
Styling: Odd-number groupings (3 or 5) look balanced; try a color gradient lineup.
-
Editing: Slightly increase exposure and clarity; keep colors true.
Conclusion
There’s a reason tiny amigurumi win hearts so quickly: they’re joyful to make, irresistible to hold, and endlessly personalizable. The Cute Joy Amigurumi brings together everything we love about crochet soothing rhythm, cheerful color, and the pride of a polished finish. From the first loop of the magic ring to the final stitched smile, you’re crafting more than a toy you’re crafting a feeling.
So pick your happiest hue, thread that favorite hook, and give yourself a pocket-sized reminder that creativity lives in your hands. When your Joy plush is finished and beaming back at you, you’ll know: a little yarn, a little time, and a lot of heart can make something truly special.