
There’s something incredibly satisfying about turning a simple skein of yarn into a three-dimensional, lovable creature. Every stitch, loop, and pull of the hook feels like a heartbeat, adding life to a bundle of soft fibers. Crochet is more than a hobby it’s an act of creation and calmness, where your hands move with rhythm and your mind finds peace. When that creation slithers into existence as a cute, coiled snake, it’s hard not to smile at what you’ve made.
Meet the Crochet Cute Snake Amigurumi
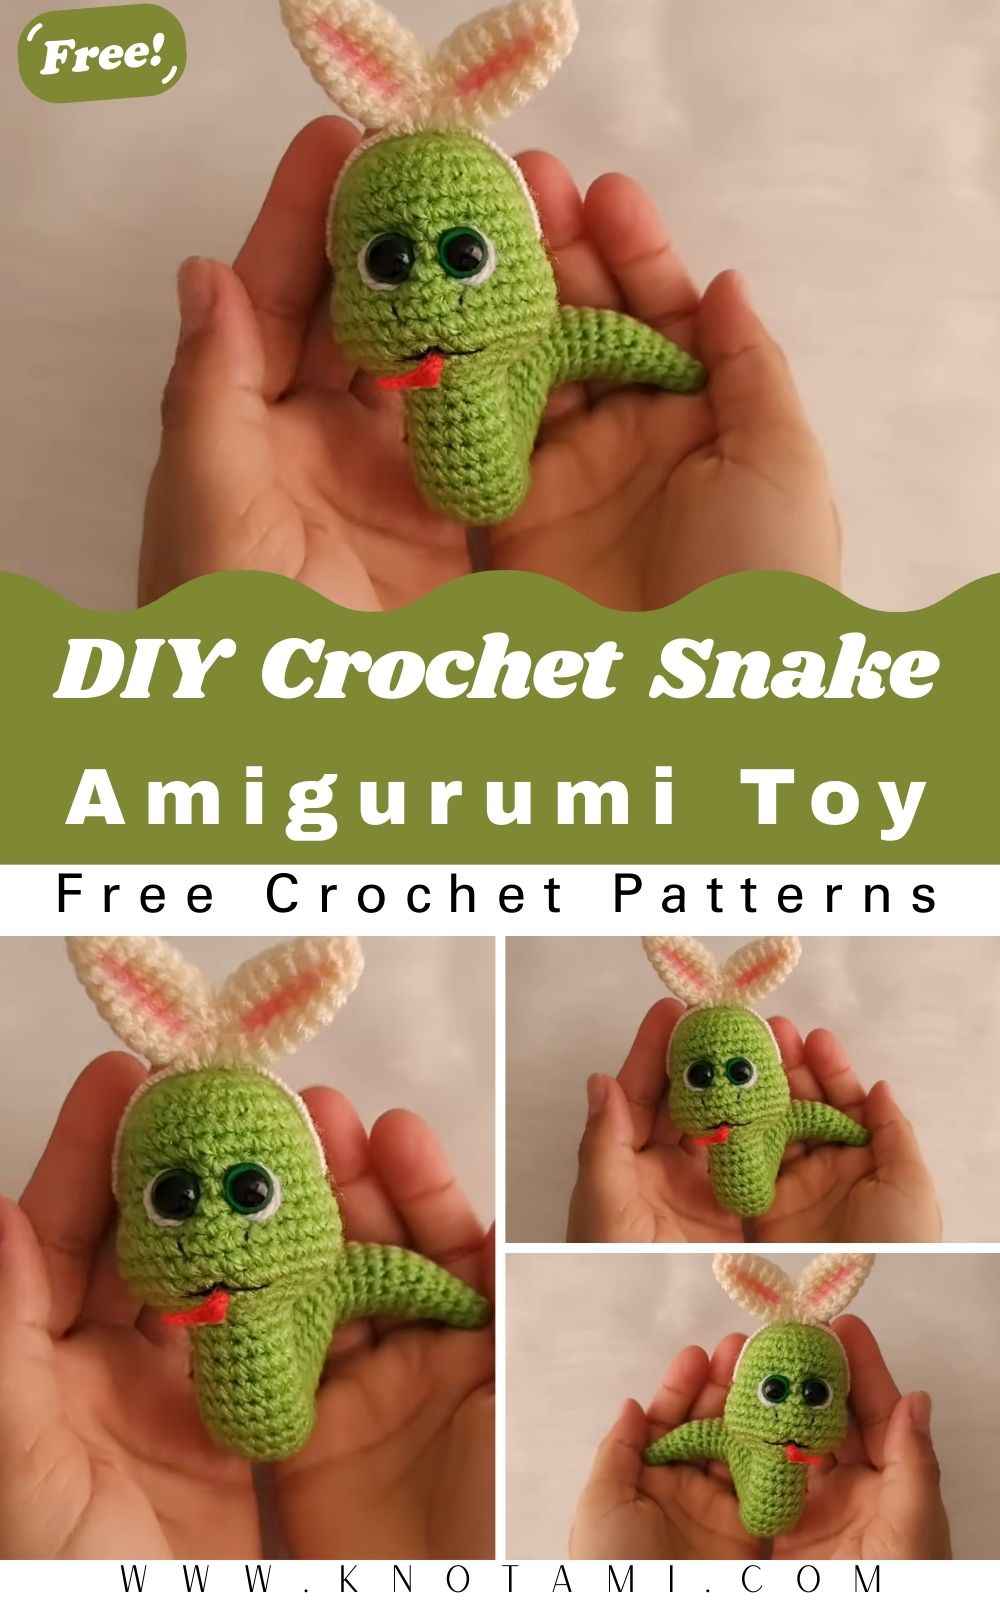
The DIY Crochet Cute Snake Amigurumi Pattern Toy is the perfect project for anyone who loves quirky and charming handmade creatures. This little snake, with its soft curves, bright stripes, and playful tongue, makes an adorable companion or display piece. Unlike its real-life counterpart, this one is all warmth and cuteness a symbol of creativity, patience, and the fun of crochet artistry.
Great for Beginners and Beyond
This project is designed for all skill levels. Beginners will find it easy to follow with simple stitches and repetitive rounds, while experienced crocheters can enjoy experimenting with color changes, shaping, and expressive details. The pattern is flexible make a short, chubby snake for a toy, or a long, twisty one as a desk accessory or car décor!
Crochet as Calm, Creativity, and Care
As your snake slowly takes shape, you’ll notice how relaxing the process becomes. The motion of coiling yarn, stuffing evenly, and creating smooth, continuous rounds is like a gentle meditation. When you finish, you’ll have more than just a handmade toy you’ll have a personal creation, brimming with charm and love, ready to bring smiles wherever it goes.
Materials & Tools
Here’s what you’ll need to make your adorable crochet snake:
-
Yarn: DK or Light Worsted Weight (Category 3–4)
Cotton, acrylic, or soft-blend yarns work perfectly. Use multiple colors if you’d like a striped or patterned snake. -
Crochet Hook: 3.0 mm to 3.5 mm (adjust based on your yarn thickness)
-
Stuffing: Polyester fiberfill or cotton stuffing for the body
-
Safety Eyes: 6mm–8mm (or you can embroider eyes if gifting to a baby)
-
Tapestry Needle: For sewing ends, attaching details, and embroidery
-
Scissors: Sharp ones for clean cutting
-
Stitch Markers: To track the start of your rounds
-
Optional Accessories: Felt for the tongue, tiny bow, or decorative beads
Choosing Yarn & Colors
To give your snake character, choose a smooth, non-fluffy yarn that holds shape well.
Color ideas:
-
Natural Style: Shades of green, brown, and beige
-
Cute Style: Pastels like mint, baby pink, or lavender
-
Vibrant Style: Bright rainbow stripes or alternating neon colors
-
Themed Designs: Try black and yellow for a “bumblebee snake” or red and white for a “candy cane snake.”
Experimenting with color placement is half the fun!
Step-by-Step Crochet Instructions
(Pattern inspired by the linked source written in clear, friendly steps for your own creation!)
Before you start, remember:
-
Work in continuous rounds unless otherwise stated.
-
Use stitch markers to mark the first stitch of each round.
-
Keep your tension firm but not tight to avoid gaps in stuffing.
1. Making the Head
-
Round 1: Start with a magic ring, 6 single crochets (sc) inside (6).
-
Round 2: Increase in each stitch (12).
-
Round 3: (1 sc, inc) repeat 6 times (18).
-
Round 4: (2 sc, inc) repeat 6 times (24).
-
Rounds 5–8: Work even (24 sc each round). This forms the rounded top of the head.
-
Round 9: (2 sc, dec) repeat 6 times (18).
-
Round 10: (1 sc, dec) repeat 6 times (12).
-
Round 11: sc around (12).
-
Add safety eyes between rounds 6–7, spaced about 5 stitches apart.
-
Begin stuffing lightly shape the head as you go.
-
Round 12: (sc, inc) repeat (18). This slight increase gives the snake a gentle neck taper.
Pro Tip: Use extra stuffing under the eyes to create slight cheek definition for a friendlier look.
2. Forming the Neck and Upper Body
-
Continue working rounds of single crochet without increases for 3–5 rounds (depending on how thick you want the neck).
-
For a gentle slope, increase one stitch every 2–3 rounds until the circumference feels natural compared to the head.
Tip: Keep testing the stuffing firmness too loose and your snake’s head will flop; too tight and it’ll bulge.
3. Building the Main Body
Now you’ll create the snake’s signature long, flexible body.
-
Continue crocheting in rounds, maintaining consistent stitch count to form a tube.
-
Add stripes by switching yarn colors every 3–5 rounds.
-
For a thicker body, increase every 10 rounds by 2 stitches evenly around the body.
-
For a slimmer snake, maintain the same stitch count until near the tail.
-
Keep stuffing lightly as you go too much at once makes the snake stiff.
-
Crochet until your desired length (usually 10–15 inches for a small snake, or longer for fun décor pieces).
Tip: To make a coiled snake, work fewer rounds and shape with flexible wire inside or a bendable pipe cleaner core.
4. Shaping or Attaching the Base (Tail)
Time to taper the tail gracefully.
-
When you’re about 3–4 inches from the desired length, begin decreasing:
-
(4 sc, dec) repeat around.
-
Next round: (3 sc, dec).
-
Continue: (2 sc, dec), then (1 sc, dec), then dec around.
-
-
As the tail narrows, add the final bit of stuffing very lightly.
-
Fasten off, leaving a long tail to close the end neatly. Weave in securely.
Optional: Before fully closing, insert a thin wire if you want a poseable snake that can wrap around objects.
5. Creating the Tongue
A snake isn’t complete without its flicking tongue!
Option 1: Felt Tongue
-
Cut a small forked tongue from red or pink felt.
-
Sew or glue it between two front stitches at the snake’s mouth.
Option 2: Yarn Tongue
-
With red yarn, chain 6, then slip stitch back.
-
At the tip, add a small knot or fork (split ends of the yarn slightly).
-
Sew inside the mouth opening.
6. Assembly and Positioning
-
Check that the snake’s shape is smooth massage the stuffing evenly.
-
Slightly curve the body as you stuff for a natural coil.
-
Embroider eyebrows or blush cheeks for personality (optional).
-
Add a bow or tiny hat on top of the head for extra cuteness.
Balancing Tip: If your snake keeps rolling, flatten a few stitches on the underside by adding a row of slip stitches along the belly. It helps stability and creates a fun scale line.
7. Adding Final Touches & Accessories
-
Eyes: Add eyelids with a small embroidery stitch over the top of each eye.
-
Blush: Dab pink pastel or use yarn embroidery on the cheeks.
-
Bowtie or Scarf:
-
Bowtie: Chain 20, hdc in 2nd ch, repeat for 2 rows, cinch middle.
-
Scarf: Chain long enough to wrap around; work 3 rows of sc; fringe ends.
-
-
Decorative Add-ons: Add small flowers, a heart patch, or a tiny crown for a themed snake.
Customization Ideas
Let your imagination slither wild!
Color Themes
-
Rainbow Snake: Change color every 2 rounds makes for a bright and happy friend.
-
Forest Snake: Shades of moss, olive, and beige for natural camouflage style.
-
Pastel Baby Snake: Soft lilac, mint, and butter yellow for a dreamy, nursery-friendly vibe.
-
Holiday Snake: Red, white, and green stripes for Christmas; orange and black for Halloween.
Yarn Types
-
Cotton for crisp stitch definition
-
Acrylic for soft, cuddly plushness
-
Velvet yarn for a luxurious, squishy feel
-
Gradient yarn cakes for beautiful color fades
Creative Variations
-
Mini Keychain Snake: Use thinner yarn and a 2mm hook.
-
Giant Snake Plush: Use chunky yarn and a 6mm hook for a floor toy.
-
Poseable Snake: Insert a wire core to shape coils or letters.
-
Fantasy Snake: Add metallic thread, horns, or scales using surface crochet.
Advanced Tips & Troubleshooting
-
Invisible Decrease Technique: Insert hook into the front loops of the next two stitches; yarn over, pull through both loops, then pull through again. Smooth and seamless!
-
Keep Even Tension: Practice consistent hand movement. Uneven tension can make your snake lumpy.
-
Prevent Round Twists: Always check your stitch marker and work spirally not in turned rounds.
-
Fix Uneven Shapes: Massage the stuffing and redistribute fiberfill evenly through the body.
-
Proper Stuffing Balance: Lightly stuff long sections; too dense = stiff, too loose = floppy.
-
Smooth Color Changes: Switch colors on the last yarn-over of the previous stitch.
-
Joining Seamlessly: Use the mattress stitch for invisible joins when sewing parts.
-
Reading Patterns: Keep a quick abbreviation chart handy (MR, sc, inc, dec, sl st).
-
Eye Safety: If making for children under 3, embroider eyes instead of safety eyes.
-
Avoid Curling Base: Keep tension firm and use blocking if needed to straighten the body.
Care Instructions
Keep your cute crochet snake looking fresh and snuggly:
-
Hand wash gently with cold water and mild detergent.
-
Do not wring or twist; press between towels to remove water.
-
Air dry flat, reshaping as needed.
-
Avoid direct sunlight to prevent color fading.
-
Storage: Keep in a cool, dry space; for display pieces, consider a dust cover or shelf enclosure.
-
Spot clean only if you used delicate embellishments like beads or felt.
Display & Gift Ideas
-
Home Décor: Wrap your snake around a plant pot, bookshelf, or jar for playful charm.
-
Kid’s Room Buddy: Use pastel shades for a soft, friendly nursery toy.
-
Desk Companion: Place on your workspace for a little motivation and whimsy.
-
Holiday Ornament: Mini snakes make perfect Christmas tree hangers or Easter basket fillers.
-
Personalized Gift: Attach a note that says You’re hiss-terically awesome! and watch smiles spread instantly.
-
Party Favors: Make multiple snakes in assorted colors for handmade birthday or classroom giveaways.
Benefits of Making a Crochet Cute Snake Amigurumi
1. Relaxation & Mindfulness
The repetitive motion of crocheting is a natural stress reliever. Watching your snake grow round by round is both grounding and meditative.
2. Stress Relief Through Creativity
Choosing colors, shaping the body, and personalizing accessories shift your focus to joy and creativity a welcome break from daily tension.
3. A Sense of Accomplishment
Completing your snake gives a deep sense of pride. Every inch of it is proof of patience and creativity.
4. Sustainable Gifting
Handmade gifts reduce waste and carry emotional value. A crochet snake beats plastic toys any day!
5. Emotional Connection
When you gift a handmade snake, you’re giving time, care, and thought that makes it more than a toy; it’s a token of love.
Photography & Social Media Tips
Ready to show off your handmade snake? Here’s how to make it shine online!
-
Use Natural Light: Photograph near a window during morning or late afternoon.
-
Soft Backgrounds: White, wooden, or pastel backgrounds highlight colors beautifully.
-
Add Props: Use leaves, yarn balls, or hooks to tell a story in your shot.
-
Show Details: Capture close-ups of the head, eyes, and tongue for texture clarity.
-
Play with Angles: Coil your snake and shoot from above for a spiral look; or let it “slither” across the frame for a fun effect.
-
Group Shots: Photograph a family of snakes in different colors it’s instantly eye-catching for Pinterest!
-
Captions: Tell the story behind your creation what inspired your color choice or who it’s for.
Conclusion
Creating your own DIY Crochet Cute Snake Amigurumi Toy is more than a craft it’s an experience of patience, creativity, and joy. From the first magic ring to the final tongue stitch, every moment adds personality to your little coiled friend. Whether you make it bright and silly or sleek and elegant, this snake will charm anyone who meets it.
So grab your favorite yarns, find a cozy corner, and let your crochet hook dance. In just a few sessions, you’ll have a one-of-a-kind handmade snake that’s soft, colorful, and full of personality a sweet reminder that creativity truly knows no limits.