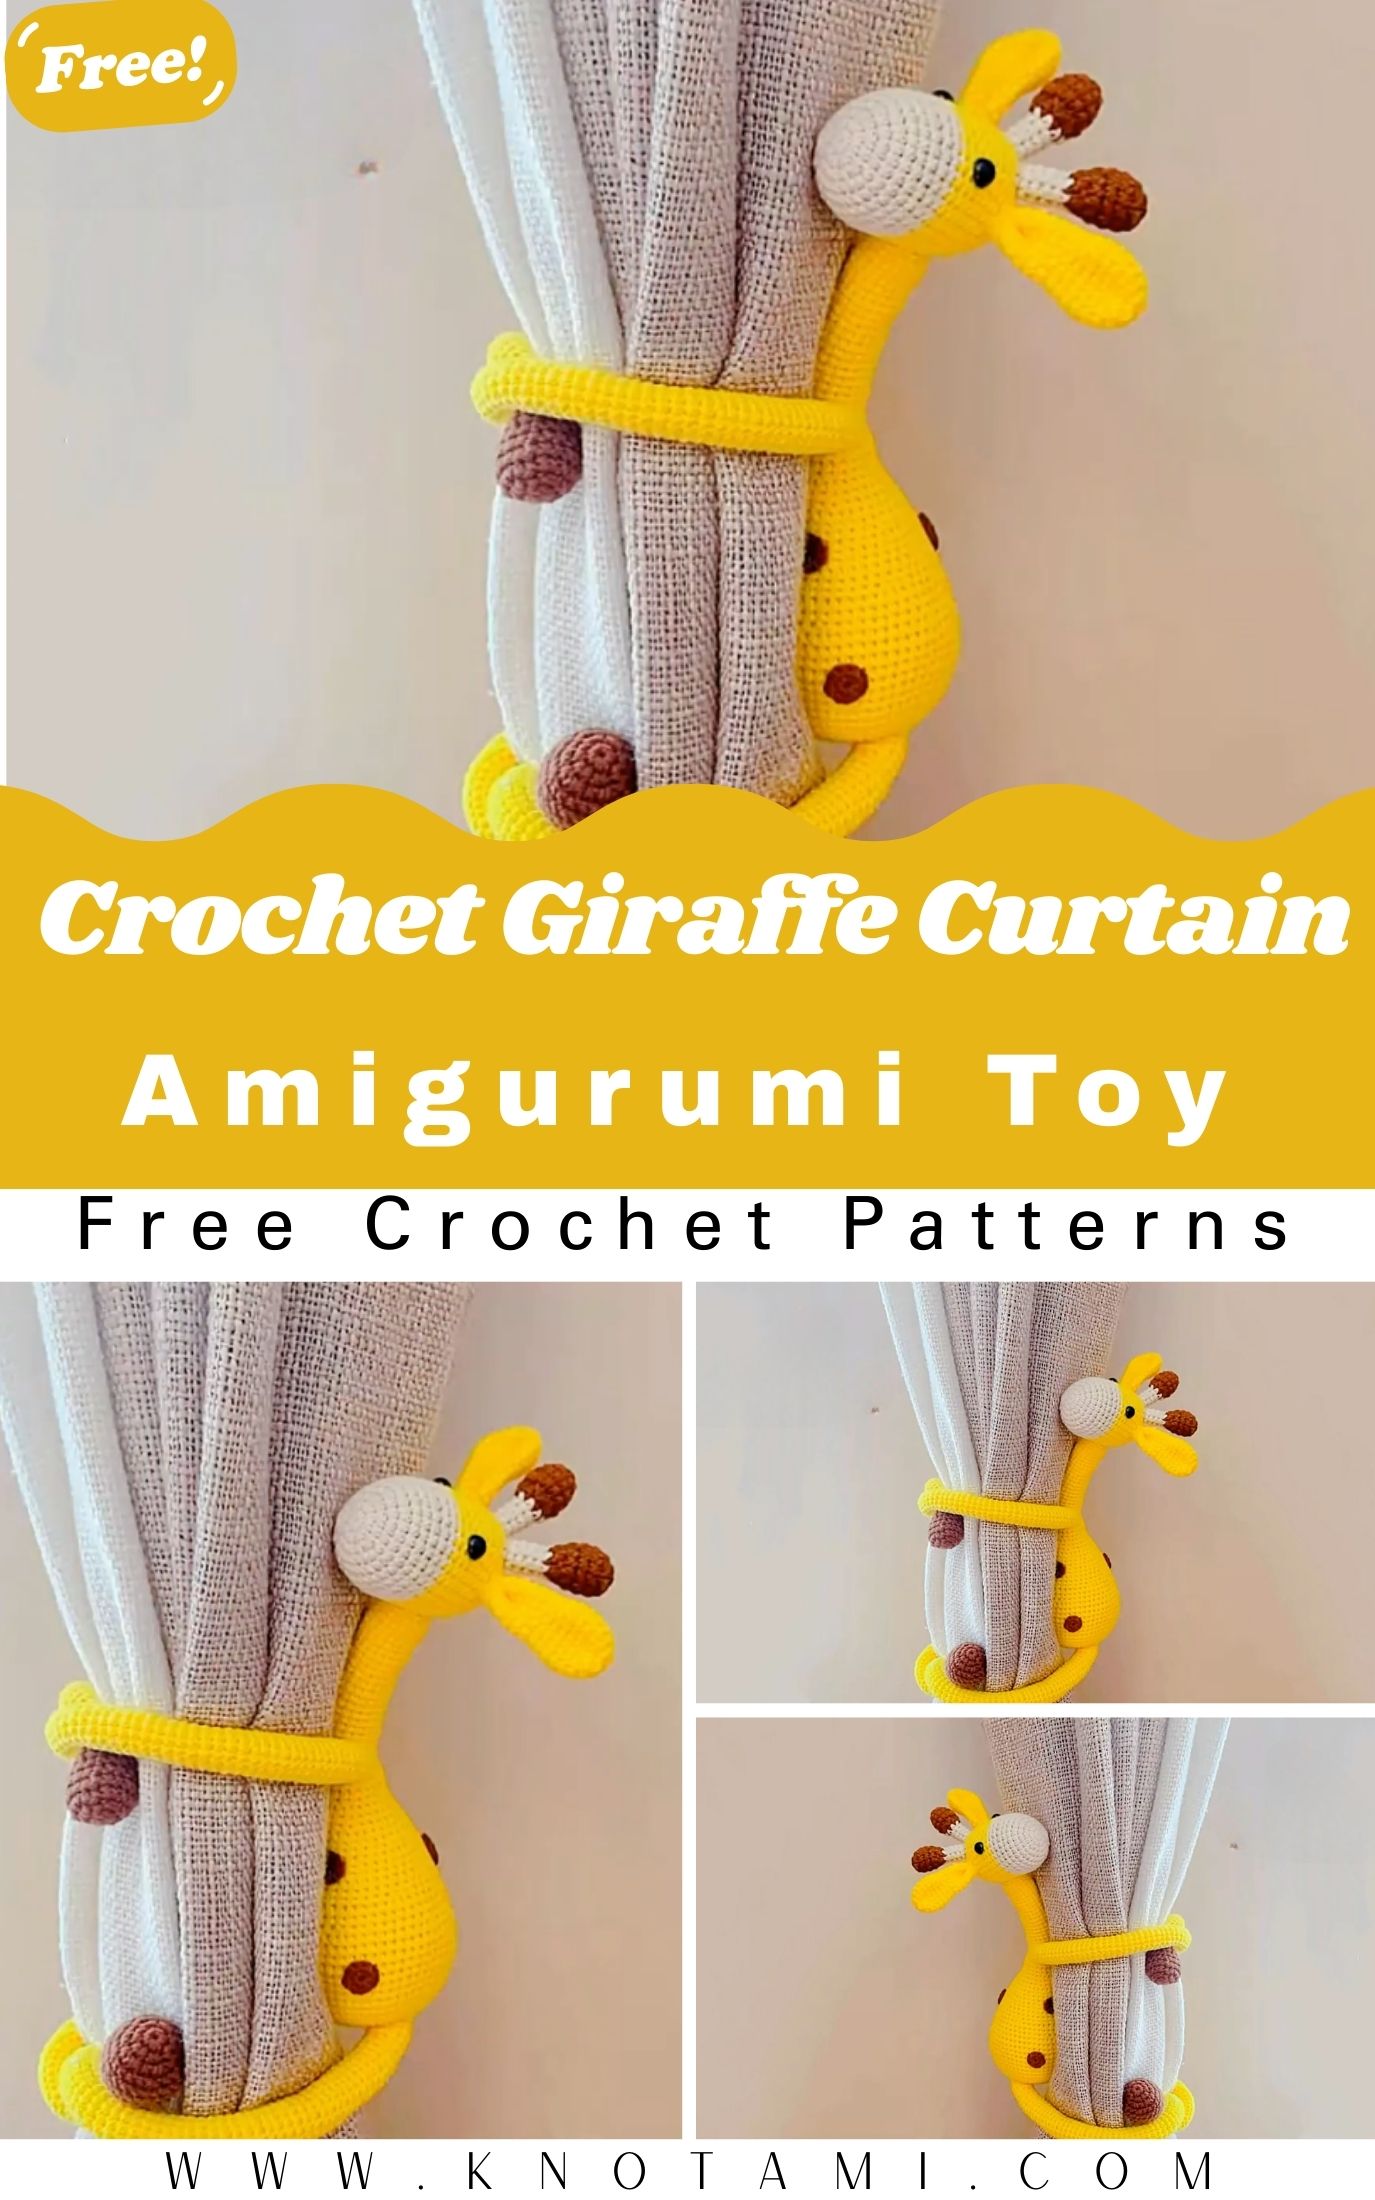
Are you looking to add a touch of handmade charm to your home or nursery? If so, you are in the perfect place to learn how to create a Crochet Giraffe Curtain Amigurumi. This project is not only incredibly functional but also serves as an adorable piece of decor that brings life to any room. Using a soft, chunky yarn, you will be able to whip up this little friend in no time. Whether you are an experienced crafter or a beginner looking for a fun challenge, this guide will walk you through every single stitch needed to finish your project.
Crocheting amigurumi can sometimes feel intimidating because of the small parts, but this DIY giraffe curtain tie is designed to be sturdy and manageable. The long arms and legs are specifically made to wrap around your curtains, keeping them neatly tucked away while showcasing your crafting skills. Additionally, the giraffe’s friendly face and soft texture make it a wonderful gift for baby showers or children’s birthdays. Consequently, you will find that this pattern is versatile enough to be adjusted in size simply by changing your yarn weight and hook size.
After watching the video tutorial above, you will have a much clearer visual understanding of how the stitches come together. The video acts as a perfect companion to this written guide, especially when you are working on the shaping of the head and the stomach area. Seeing the hand movements in real-time helps you ensure that your tension remains consistent throughout the body. Therefore, I highly recommend following the video along with the step-by-step instructions provided below to achieve the best results for your crochet animal curtain holder.
video pattern
Skill Level / Level of Difficulty
The skill level for this Crochet Giraffe Curtain Amigurumi is Intermediate-Beginner. While the stitches used are basic single crochets and increases, the shaping of the face requires a bit of focus. You will need to know how to work in a magic ring and how to perform invisible decreases. However, do not let that discourage you! If you can handle a crochet hook and count your stitches, you will successfully complete this project.
Tutor’s Suggestions
Before you start, I suggest that you choose a yarn that has a bit of “grip” so your stitches stay tight and the stuffing doesn’t show through. If you are making this for a nursery, safety is the most important factor. Therefore, you should ensure that all parts are sewn on very securely. I also recommend using a stitch marker religiously; since we work in continuous rounds, it is very easy to lose your place. Lastly, don’t overstuff the arms, as they need to be flexible enough to tie around the curtains easily.
Materials Needed
To create your handmade giraffe amigurumi, you will need the following supplies:
Chunky Yarn: Brown or yellow (depending on your giraffe preference).
Crochet Hook: 4.0 mm (or appropriate size for your yarn).
Safety Eyes or Black Yarn: For the face details.
Stuffing: High-quality polyester fiberfill.
Yarn Needle: A large one for sewing pieces together.
Scissors: To trim your ends.
Stitch Marker: To keep track of your rounds.
Step-by-Step Guide to Creating Your Giraffe
Phase 1: Crafting the Head
To begin your amigurumi giraffe pattern, you start with a magic ring. Work 6 single crochets (sc) into the ring. In the second round, you will increase (inc) in every stitch to reach 12 stitches. For the third round, follow a pattern of (1 sc, 1 inc) around to get 18 stitches. Continue increasing systematically until you reach Round 8 with 48 stitches. From Rounds 9 to 14, you simply work 1 sc in each stitch.
The shaping starts in Round 15. You will work 22 sc, then increase three times in a row to create the snout area, and finish with 23 sc. This protruding part is what gives your giraffe its unique look. Follow the specific decrease patterns in Rounds 19 through 24 to close the head. Ensure you stuff the head firmly before finishing off with a slip stitch, leaving a long tail for sewing.
Phase 2: The Body and Stomach
The body of your Crochet Giraffe Curtain Amigurumi also starts with a magic ring of 6 sc. You will increase until you have 36 stitches by Round 6. In Round 7, you will create a “belly” effect by increasing specifically in the middle of the round. This makes the giraffe look plump and cute.
From Rounds 8 to 12, work even. Starting in Round 13, you will begin decreasing. By the time you reach Round 21, you should have 18 stitches left. This matches the stitch count of the neck area on the head, making the assembly much easier for you later on. Again, leave a long tail for sewing and stuff the body well.
Phase 3: Arms and Legs
Since this is a curtain tie, the arms are the most functional part. You will create long, tube-like structures. Start with a magic ring of 6 sc and work until the arms reach your desired length to wrap around your specific curtains. You will repeat this process for the legs, though the legs can be slightly shorter if you prefer.
Where Can You Use It?
You can use this crochet nursery decor in various creative ways. Naturally, its primary purpose is as a curtain tie-back in a child’s bedroom or a nursery. It adds a playful, Safari-themed vibe to the window treatments. Furthermore, because it is an amigurumi, it can also function as a standalone plush toy for a toddler. You might even consider using it as a decorative wrap around a bedpost or a lamp base to carry the giraffe theme throughout the entire room.
Tips and Tricks for Success
First, you should always use the “invisible decrease” method when working on amigurumi. This prevents large gaps from forming in your work, which keeps the stuffing hidden. Second, if you find that your giraffe’s head is flopping over, you can insert a pipe cleaner or a thick piece of foam into the neck to provide extra support.
Additionally, when you are sewing the parts together, use plenty of pins to hold the arms and head in place before you start stitching. This ensures everything is symmetrical. If you want a more colorful giraffe, you can experiment with “spot” patterns by changing yarn colors every few stitches in the body section.
Common Mistakes to Avoid
One common mistake is stuffing the piece too lightly. Over time, crochet fabric stretches, and if there isn’t enough stuffing, your giraffe will lose its shape and look deflated. Conversely, don’t stuff the arms too tightly, or they won’t bend around the curtain properly. Another mistake is forgetting to move the stitch marker. In a project with over 20 rounds, losing your place can result in a lopsided head or body. Finally, make sure you don’t use a hook that is too large; if the stitches are loose, the fiberfill will peek through the holes, which ruins the professional look of your DIY giraffe curtain tie.
Frequently Asked Questions (FAQs)
1. What kind of yarn is best for a curtain tie?
While the transcript suggests chunky yarn for a fast project, you can use cotton yarn if you want a more defined, crisp look that won’t pill over time.
2. Can I wash my crochet giraffe?
Yes, if you use acrylic or cotton yarn and polyester stuffing, you can gently hand wash the amigurumi and air dry it.
3. How do I make the giraffe bigger?
To increase the size of your Crochet Giraffe Curtain Amigurumi, simply use a thicker yarn (like jumbo chenille) and a larger hook size, such as 6.0 mm or 8.0 mm.
4. Is this pattern suitable for absolute beginners?
If you have mastered the single crochet stitch and the magic ring, you can definitely try this! Just take your time with the shaping rounds.
5. How do I attach the giraffe to the curtain?
The long arms are designed to wrap around the fabric. You can either tie them in a simple knot or sew a small button onto one hand and a loop onto the other for a cleaner look.
Conclusion
In conclusion, creating a Crochet Giraffe Curtain Amigurumi is a rewarding project that combines utility with adorable design. By following the steps outlined above and utilizing the video tutorial, you will produce a high-quality piece of handmade giraffe amigurumi that will brighten up any space. Remember to keep your tension even and have fun with the process!
By Mira Knotts — the creative mind behind Knotami (knotami.com), lovingly crafting unique crochet designs and sharing inspiring patterns for makers everywhere.