Are you looking for a fun and colorful project to brighten up your day? Today you are in for a treat because we are diving into the world of the Crochet Baby Chick Amigurumi. Specifically, you are going to learn how to create the famous Pepe the Chicken. This character is currently taking the internet by storm because it is full of vibrant colors and extreme cuteness. Consequently, this project is perfect if you want to make something special for yourself or even to start a small business selling handmade keychains.
In this guide, you will find everything you need to know about crafting your own Crochet Baby Chick Amigurumi. We will cover the materials, the specific techniques, and the assembly process. Since this pattern uses basic stitches, it is accessible for those who are just starting their crochet journey. Furthermore, the small size of the chick makes it an ideal project for using up leftover yarn scraps. So, grab your crochet hook and let us get started on this adorable journey together.
After watching the video above, you will have a clear visual understanding of how the stitches should look. This Crochet Baby Chick Amigurumi tutorial is designed to be followed along in real time. Therefore, you can pause the video whenever you need to catch up or review a specific movement. Seeing the placement of the eyes and the wings in motion will help you achieve a professional finish that looks exactly like the famous Pepe the Chicken.
Skill Level / Level of Difficulty
Level: Intermediate Beginner While the stitches are simple, this Crochet Baby Chick Amigurumi involves several small parts and a bit of assembly with felt. Thus, it requires a steady hand and some patience during the sewing phase.
Tutor’s Suggestions
To ensure your Crochet Baby Chick Amigurumi looks its best, I suggest using 100% cotton yarn. Cotton provides excellent stitch definition which makes the amigurumi look crisp and professional. Additionally, you should maintain a tight tension so that the stuffing does not peek through the holes. If you find that your stitches are too loose, try switching to a smaller hook size. Lastly, always use a stitch marker because working in continuous rounds can be confusing without one.
Materials Needed and Step-by-Step Guide
Materials Needed
Yarn (100% Cotton): Yellow, Red, Tobacco/Light Brown, Dark Brown, and Green.
Felt Sheets: Red, White, and Black for the eye details.
Hook: 2.5 mm crochet hook.
Stuffing: High quality synthetic fiberfill.
Tools: Scissors, tapestry needle, stitch markers, and hot glue.
Step 1: The Body and Head
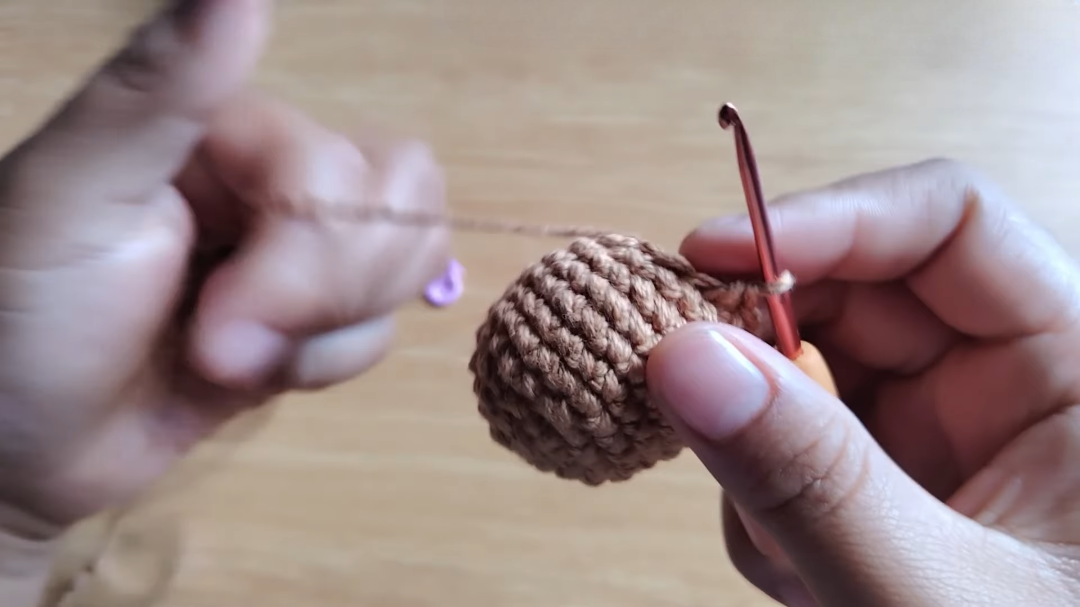
To begin your Crochet Baby Chick Amigurumi, start with the brown or tobacco yarn. You will create a magic ring and place 6 single crochets inside. In the second round, you must perform 6 increases to reach 12 stitches. For the third round, follow a pattern of 1 single crochet and 1 increase. By the fourth round, you should have 24 stitches. Continue working on even rounds from round 5 to 10 to build the height of the body. Afterward, you will start decreasing to close the shape. Make sure you stuff the body firmly before the opening becomes too small.
Step 2: The Mouth and Face Base
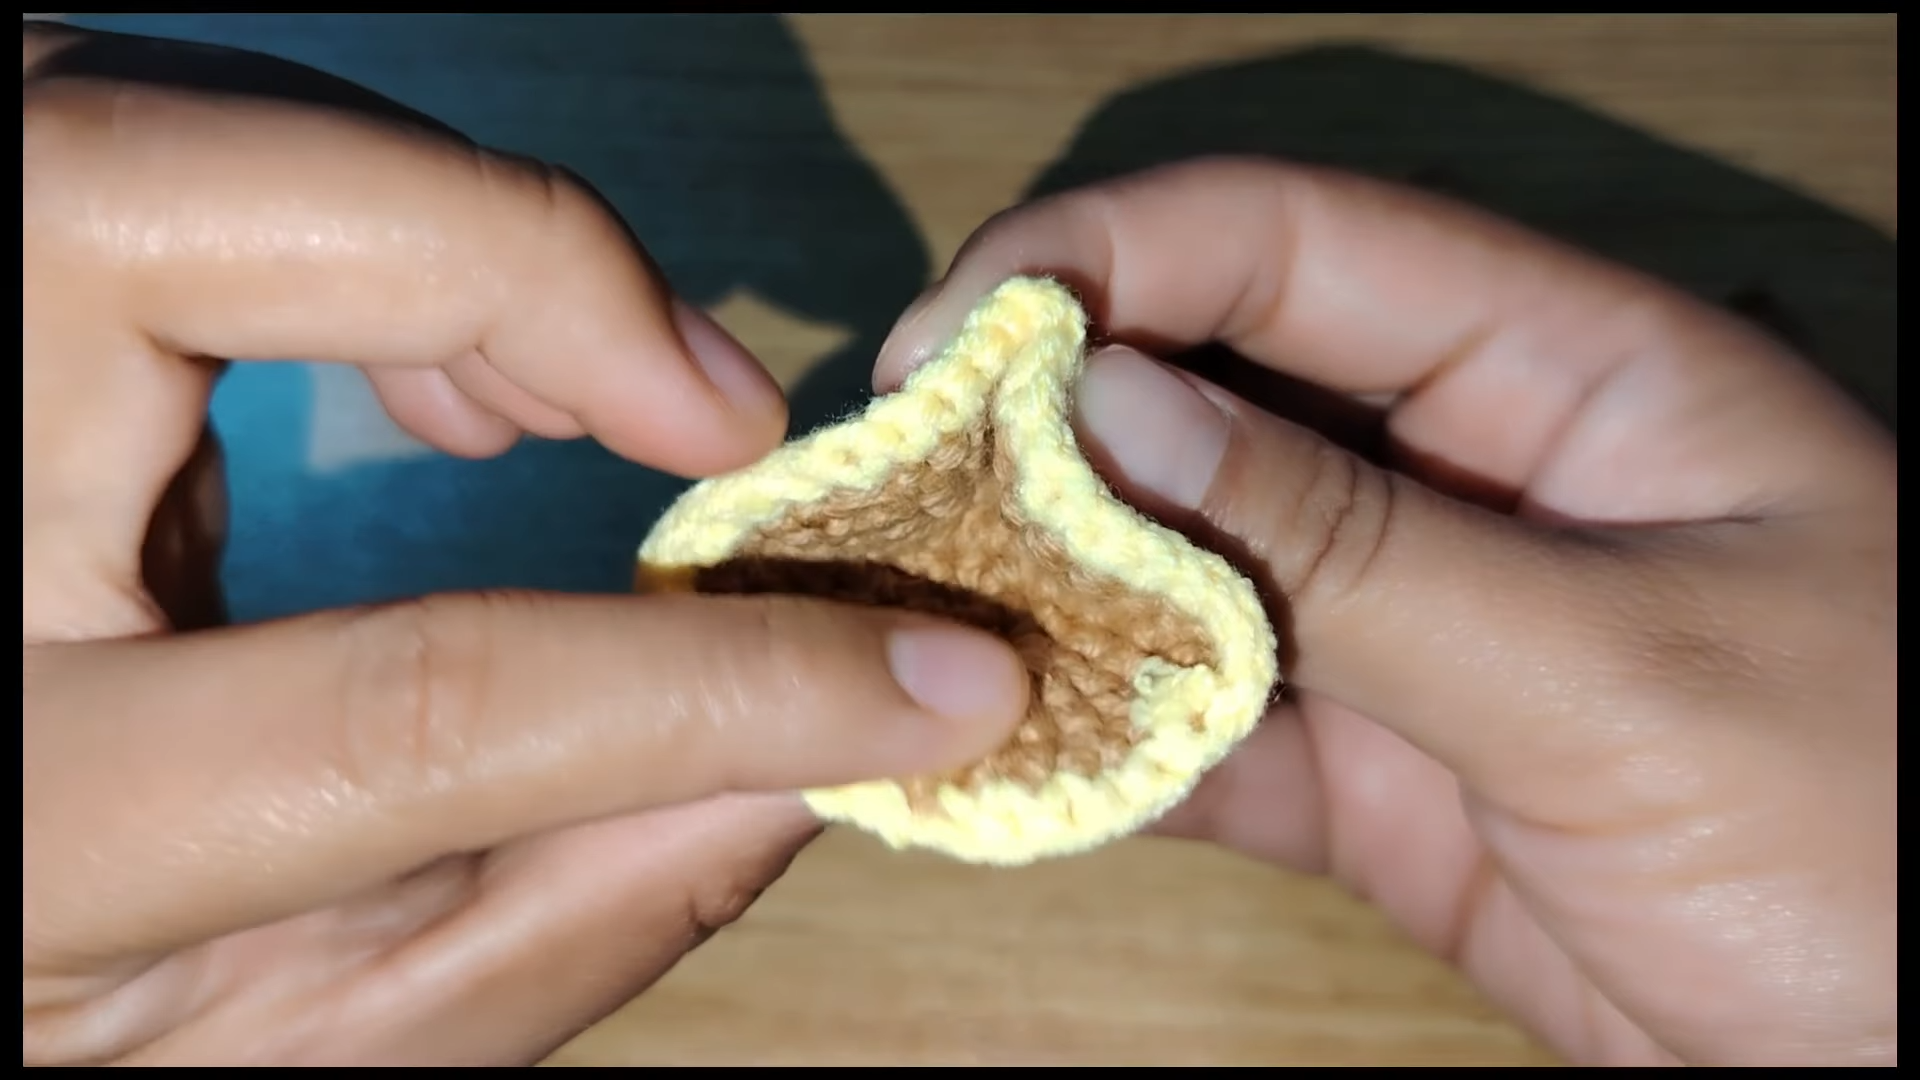
Using the same brown yarn, you will create a separate circular piece for the mouth area. Start with 6 stitches in a magic ring and increase until you have 36 stitches. At the very last stitch of round 6, you must change to yellow yarn. This transition is vital for the Crochet Baby Chick Amigurumi’s look. Once you finish the yellow round, fasten off and leave a long tail. You will eventually fold this piece and glue it to create the beak-like structure seen in the video.
Step 3: Crafting the Eyes and Wings
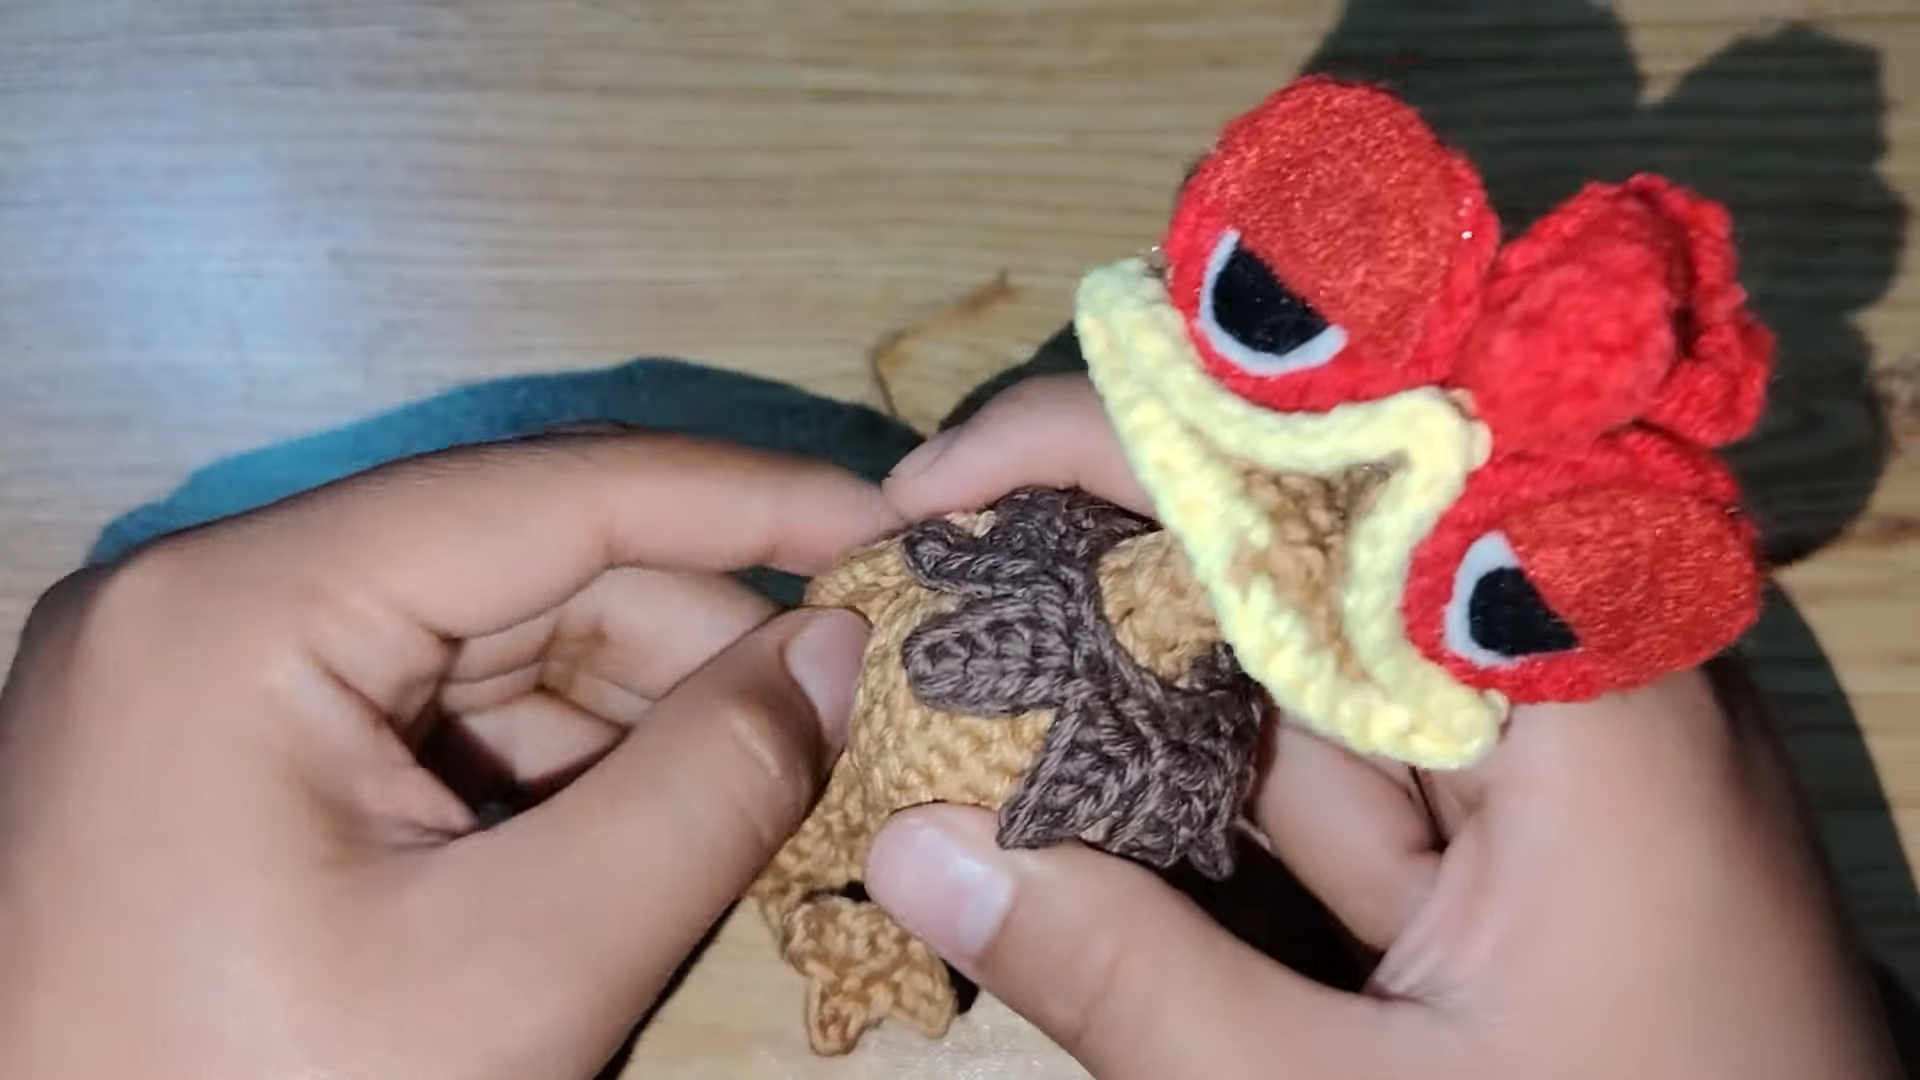
For the eyes, use red yarn to crochet small circles, starting with 5 stitches in a magic ring. You will increase these to 18 stitches. To make the wings, you will chain 11 and work back across the chain with a mix of high and low stitches to give them a feathered shape. Because the wings are small, you need to make two identical pieces. These wings are what give your Crochet Baby Chick Amigurumi its personality and charm.
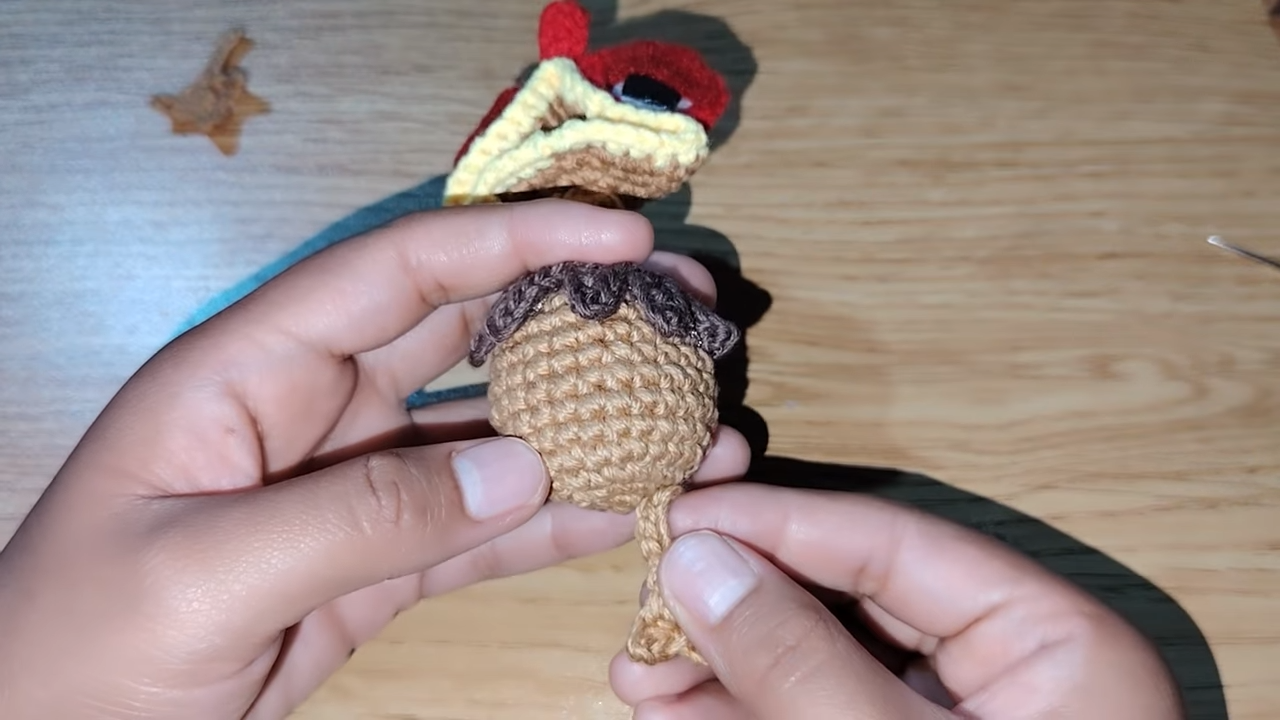
Step 4: The Finishing Details (Legs, Crest, and Tail)
The legs are made with yellow yarn using chains and slip stitches to create tiny toes. For the red crest and the green tail, you will use a series of chain loops to create a “fringed” look. These decorative parts are what set Pepe apart from a standard chick. Finally, use your felt to cut out the eye layers. Glue the white, black, and red felt pieces onto the red crocheted circles. This layered effect creates a very expressive face for your Crochet Baby Chick Amigurumi.
How You Can Use Your Amigurumi
You can use this Crochet Baby Chick Amigurumi in many creative ways. Because it is small and lightweight, it makes a perfect keychain for your backpack or keys. Alternatively, you can use it as a desk mascot to keep you company while you work. If you have friends who love cute characters, this handmade chick is a wonderful gift. Many crafters also sell these at local markets because they are quick to make and very popular with children and collectors alike.
<
Tips and Tricks
When you are stuffing your Crochet Baby Chick Amigurumi, use a small tool like the end of a crochet hook to push the fiberfill into the corners. This ensures the shape is even and smooth. Another great trick is to use a “staggered” increase method to avoid the hexagonal shape that sometimes happens with circular crochet. Also, when gluing the felt, apply the glue to the felt piece rather than the yarn to prevent messy overflows.
Common Mistakes
One common mistake is losing track of the start of the round. Since amigurumi is worked in a spiral, skipping a stitch can ruin the symmetry of your Crochet Baby Chick Amigurumi. Another error is overstuffing, which can stretch the stitches and show the white fluff inside. Lastly, be careful with the hot glue. If you use too much, it might seep through the yarn and create hard, uncomfortable spots on your soft toy.
FAQs
Q1: What is the best yarn for this Crochet Baby Chick Amigurumi?
You should use 100% cotton yarn because it is durable and shows off the stitch detail beautifully.
Q2: Can I make this larger?
Yes, you can use a thicker yarn and a larger hook to scale up the pattern without changing the stitch count.
Q3: Is this project suitable for kids?
The finished product is great for kids, but since it uses glue and felt, it is best as a decorative item or for older children.
Q4: How long does it take to finish?
Typically, an experienced crocheter can finish this in about two to three hours.
Q5: Do I have to use hot glue?
While hot glue is fast, you can also use fabric glue or sew the felt pieces on with a needle and thread for extra security.
By Mira Knotts — the creative mind behind Knotami (knotami.com), lovingly crafting unique crochet designs and sharing inspiring patterns for makers everywhere.