
If you love the world of Japanese-inspired characters, then learning how to make a Crochet Kitty Dress Amigurumi Kitty will be the highlight of your week. This project is not just about making a toy; it is about bringing a personality to life with your own hands. Amigurumi is the Japanese art of knitting or crocheting small, stuffed yarn creatures. Because this specific design includes a beautiful flared dress and a signature bow, it stands out as a high-quality piece for collectors and children alike. You will find that the rhythmic motion of the crochet hook is incredibly relaxing while you work on this adorable feline friend.
Starting your journey with a Crochet Kitty Dress Amigurumi Kitty is easier than you might think, especially if you have a passion for cute designs. In this blog post, you will discover the exact steps needed to create the head, body, and that iconic dress. By using the right materials and following our tips, you will transform a simple ball of yarn into a stunning handmade treasure. Let’s get your hooks ready and dive into the wonderful world of crochet!
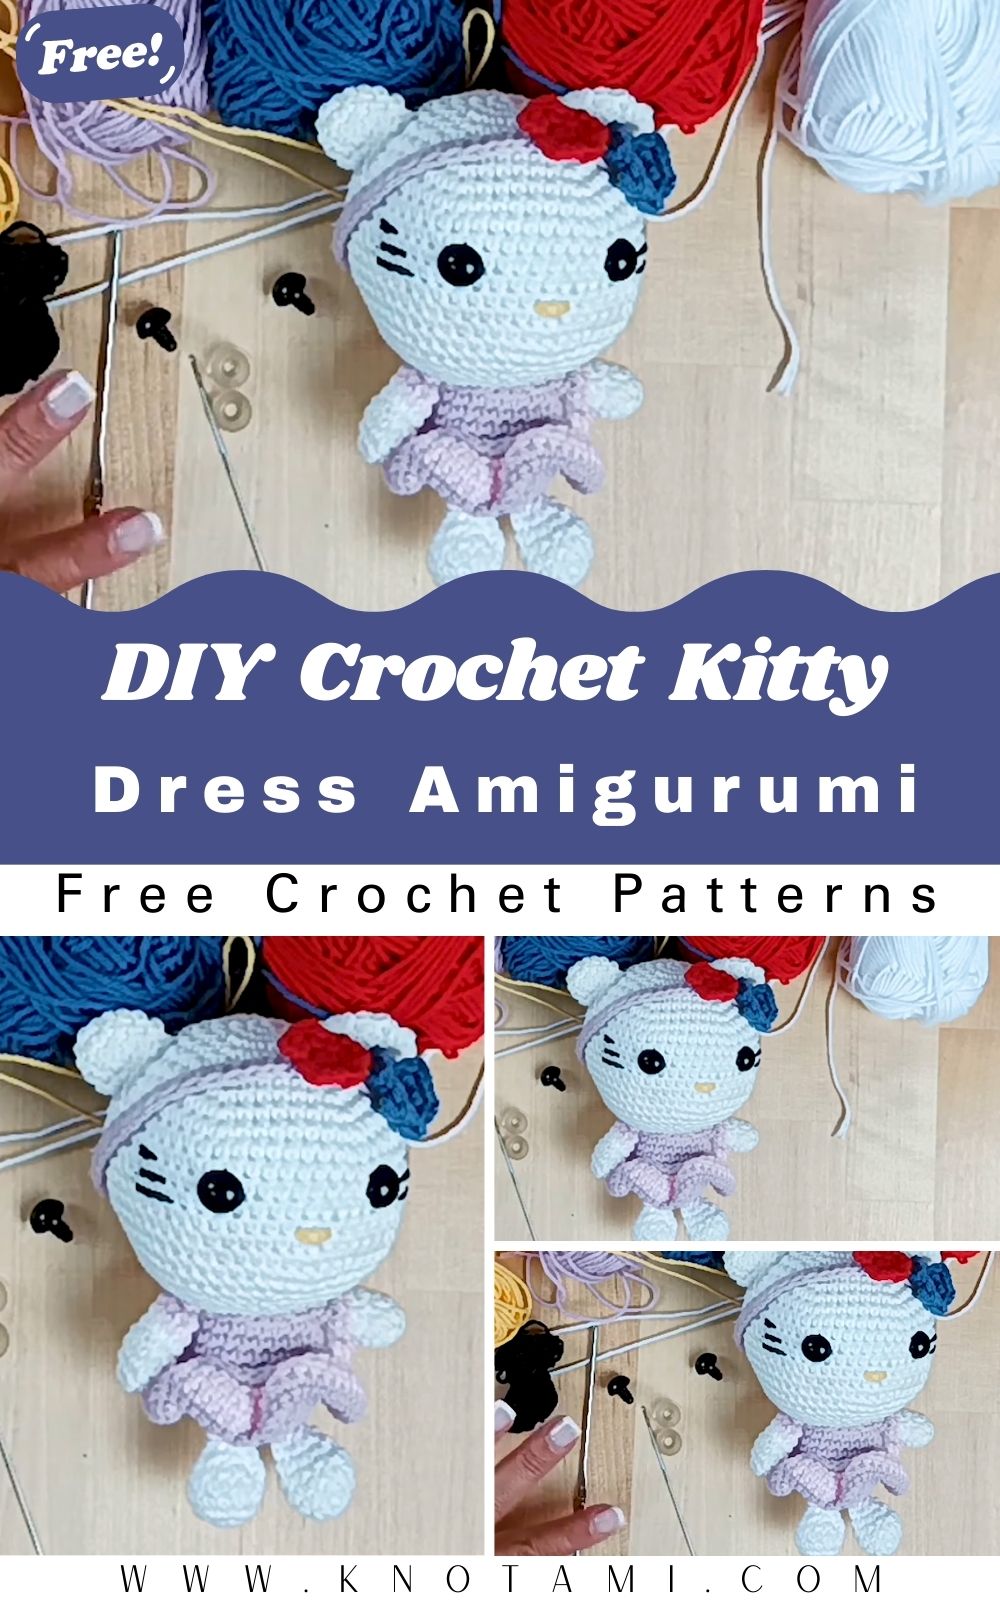
The video provided above is an excellent visual companion to this written guide. While the written instructions give you the structure, seeing the hand movements in the video will help you master the tension and the specific placements of the safety eyes. Watching the video ensures that you do not miss the subtle transitions between the white yarn of the body and the colorful yarn of the dress. Consequently, you will feel much more confident as you move from one round to the next. We highly recommend keeping the video open as a reference while you read through the detailed steps below.
Skill Level: Level of Difficulty
We categorize this Crochet Kitty Dress Amigurumi Kitty project as Intermediate-Beginner. This means that if you know the basic stitches like the single crochet, increase, and decrease, you are ready to go. The most challenging part is the “BLO” (Back Loop Only) technique used for the skirt, but we will explain that clearly. If you are patient and take your time with the assembly, you will find this project very manageable and rewarding.
Tutor’s Suggestions for Success
Before you start your Crochet Kitty Dress Amigurumi Kitty, our top suggestion is to always use a stitch marker. Because we work in continuous rounds, it is very easy to lose your place. Furthermore, make sure you choose a high-quality cotton yarn. Cotton provides better definition for the stitches, which makes the kitty look neat and professional. Another great tip is to stuff the head firmly but leave the limbs slightly softer. This allows the kitty to sit down properly and look more natural. Lastly, always count your stitches at the end of every round to ensure the shape stays perfectly symmetrical.
Materials Needed for Your Amigurumi
To create the perfect Crochet Kitty Dress Amigurumi Kitty, you must gather the following supplies:
-
White Yarn: High-quality cotton for the head and body.
-
Malva (Mauve) and Pink Yarn: For the dress and the hair ribbon.
-
Red and Blue Yarn: For the decorative flowers.
-
Yellow Yarn: A small amount for the nose.
-
Black Thread: For the whiskers.
-
Crochet Hook: 2.5mm (or 3mm for the skirt if you want more volume).
-
Safety Eyes: 8mm or 12mm depending on your preference for a “big eye” look.
-
Fiberfill Stuffing: To make your kitty soft and huggable.
-
Stitch Marker: To keep track of your rounds.
-
Yarn Needle: For sewing the pieces together and hiding tails.
Step by Step Guide to Your Crochet Kitty Dress Amigurumi Kitty
Phase 1: Crafting the Perfect Head
You will begin the head by creating a Magic Ring with 6 single crochet stitches. For the second round, perform an increase in every stitch until you have 12 points. In the third round, follow a pattern of one single crochet and one increase to reach 18 points. Continue this expansion logic until you reach 54 points in round 9.
Once you have the diameter ready, you will work rounds 10 through 18 without any increases. This creates the height of the head. Afterward, you will start the decreases. For example, in round 19, you will do 7 single crochets and then one decrease. As you close the head, remember to insert the safety eyes between rounds 13 and 14, leaving about seven holes of distance between them. Stuff the head firmly before you close the final 6 stitches with your yarn needle.
Phase 2: Building the Body and the Dress
The body of your Crochet Kitty Dress Amigurumi Kitty starts similarly to the head with a magic ring of 6. You will expand this until you have 24 stitches. From rounds 5 to 8, maintain those 24 stitches using your Malva or Pink yarn.
Round 9 is the most important part for the dress. You must work in BLO (Back Loop Only). By doing this, you leave a visible front loop where you will later attach the skirt. After round 9, continue with normal stitches for a few more rounds to finish the torso. This structural choice is what allows the dress to look like it is actually being worn rather than just being part of the body.
Phase 3: Creating the Flared Skirt
Go back to the front loops you left exposed in round 9. Attach your pink yarn and perform an increase in every single stitch. This will double your stitch count and cause the fabric to ruffle. For the second round of the skirt, do a pattern of one stitch and one increase. Finally, add a few rounds of plain stitches. For a decorative touch, you can switch back to the Malva yarn for the very last round. This contrast makes the Crochet Kitty Dress Amigurumi Kitty look much more detailed and stylish.
Phase 4: Limbs and Ears
The arms and legs are small and do not require stuffing. For the arms, start with white yarn and switch to the dress color at the very end to simulate sleeves. For the legs, create a small oval shape starting with a magic ring of 6 and expanding to 12. The ears should be triangular; you achieve this by starting with 5 stitches and increasing gradually. Once all these parts are finished, you are ready for the final assembly.
Phase 5: Final Assembly and Details
Now you must use your yarn needle to join the parts. Attach the head to the body securely. Sew the ears onto the top of the head between rounds 4 and 11. Position the arms on the sides and the legs slightly toward the front so your kitty can sit. Finally, embroidery the yellow nose and the black whiskers. Add the pink ribbon and the colorful flowers near the ear to complete the signature look. Your Crochet Kitty Dress Amigurumi Kitty is now finished!
Where Can You Use Your Amigurumi?
This Crochet Kitty Dress Amigurumi Kitty is incredibly versatile. Because it is so cute, it makes for a wonderful birthday gift for young children or fans of classic characters. Moreover, you can use it as a decorative piece on a nursery shelf or a work desk to add a touch of “Kawaii” style to your environment. Some people even add a metal ring to the top to turn it into a large, statement keychain for their backpacks. Since you made it yourself, it also serves as a fantastic portfolio piece if you plan on selling your crafts at local fairs or online shops.
Tips and Tricks for Professional Results
To make your Crochet Kitty Dress Amigurumi Kitty look like it came from a high-end toy store, pay close attention to your tension. If your stitches are too loose, the stuffing will peek through the holes. Conversely, if they are too tight, your hands might get tired. Additionally, when you are changing yarn colors, always pull the new color through the last two loops of the previous stitch. This creates a seamless transition that looks much cleaner. Another great trick is to use a blush makeup brush to add a tiny bit of pink to the kitty’s cheeks for an extra dose of cuteness.
Common Mistakes to Avoid
One common mistake when making a Crochet Kitty Dress Amigurumi Kitty is placing the eyes too high. If the eyes are too close to the ears, the kitty loses its “baby-like” charm. Always aim for the middle or lower half of the head. Another error is overstuffing the body to the point where the stitches stretch out. Furthermore, many beginners forget to secure their yarn tails inside the body. If you do not weave them in properly, the toy might unravel after some play. Finally, ensure the ears are symmetrical; use pins to hold them in place before you start sewing to check the alignment.
Frequently Asked Questions (FAQs)
1. What is the best yarn for this project?
We recommend 100% cotton yarn. It is durable, shows stitch definition clearly, and is less likely to pill over time compared to acrylic yarn.
2. How long does it take to finish the kitty?
For an intermediate crocheter, it usually takes between 4 to 6 hours to complete the entire Crochet Kitty Dress Amigurumi Kitty, including the assembly.
3. Can I wash my amigurumi?
Yes, if you use cotton yarn and safety eyes, you can hand wash it gently in cold water. However, avoid the dryer to maintain the shape of the stuffing.
4. What if I don’t have safety eyes?
You can easily embroider the eyes using black yarn or cut small circles out of felt and glue them on with fabric-safe silicone.
5. How do I make the dress bigger?
If you want a longer skirt, simply add more rounds of single crochet after the increase rounds in the skirt section.
Conclusion
Creating a Crochet Kitty Dress Amigurumi Kitty is a joyful experience that combines skill, patience, and creativity. By following this guide, you have learned how to structure the body, create a beautiful dress, and assemble the pieces into a cohesive character. Remember that every handmade item is unique, so do not worry if yours looks a little different from the picture. The imperfections are what make handmade gifts special. We hope you enjoyed this tutorial and feel inspired to continue your crochet journey. Happy stitching!