
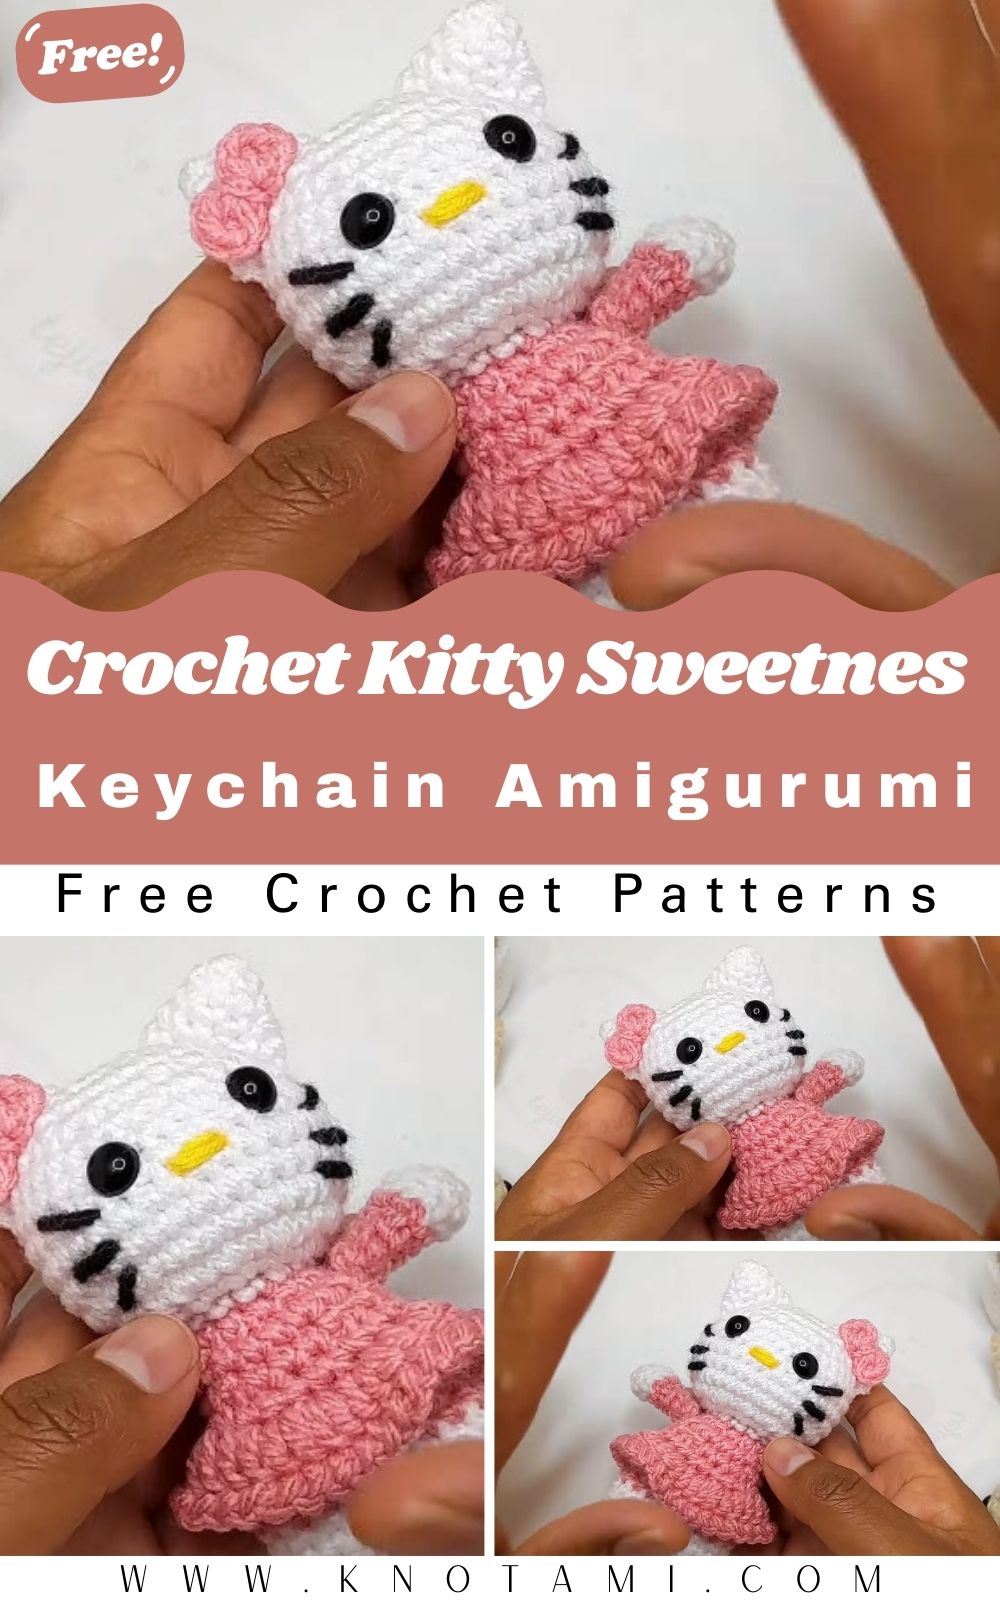
Hello there, fellow crafter! I am so happy you decided to join me today for this delightful project. If you have been searching for a way to add a touch of charm to your accessories, you are in the perfect place. We are diving into the world of Japanese-inspired cuteness with our Crochet Kitty Sweetness Keychain Amigurumi. This project is not just a simple craft; it is a way to bring a smile to your face every time you reach for your keys. Whether you are an experienced crocheter or someone just picking up a hook for the first time, this guide is designed to help you succeed.
In this tutorial, we will explore how to create a tiny, 10 cm masterpiece that captures the iconic look of everyone’s favorite feline friend. Using the Crochet Kitty Sweetness Keychain Amigurumi technique ensures that your finished product is sturdy, adorable, and professional-looking. We will go through every stitch together, from the magic ring to the final embroidery of the whiskers. Consequently, you will feel confident and inspired as you watch your little kitty come to life. So, grab your yarn, find a cozy spot, and let us get started on this sweet journey together.
Once you have watched the video above, you will have a much clearer vision of how the stitches should look. This Crochet Kitty Sweetness Keychain Amigurumi tutorial is designed to be visual, so seeing the hand movements is incredibly helpful. However, do not worry if you missed a specific count while watching. The detailed steps below will provide all the written instructions you need to complement the video. By combining the visual cues from the video with the written guide, you are setting yourself up for total success.
Skill Level: Easy to Intermediate
This project is rated as easy to intermediate. While the basic stitches are simple, working on a small scale for a Crochet Kitty Sweetness Keychain Amigurumi requires some patience and fine motor skills. If you know how to make a magic ring, a single crochet, and an increase, you are already halfway there!
Tutor’s Suggestions
Before you begin your Crochet Kitty Sweetness Keychain Amigurumi, I suggest you choose a high-quality cotton or acrylic yarn that does not split easily. Since this is a keychain, it will be handled frequently, so durability is key. Also, try to keep your tension consistent throughout the project. If your stitches are too loose, the stuffing might show through; if they are too tight, your hands might get tired. Most importantly, remember to have fun with it! You can change the colors of the skirt or the bow to match your personal style or to give as a personalized gift to a friend.
Materials Needed for Success
To create your very own Crochet Kitty Sweetness Keychain Amigurumi, please gather the following supplies:
-
White Yarn: For the head, arms, and legs.
-
Color Yarn of Choice: For the cute skirt and bow (Jade or Rosewood are great options).
-
Black Yarn: For the embroidered whiskers.
-
Yellow Yarn: For the tiny nose.
-
Safety Eyes: Size 9 mm.
-
Fiberfill: Synthetic cotton to give your kitty its shape.
-
Crochet Hook: Size 1.6 mm.
-
Wool Needle: For sewing and hiding ends.
-
Stitch Marker: To keep track of your rounds.
-
Scissors: For trimming.
-
Optional: Cold silicone glue for the bow.
Guide to Your Amigurumi
Phase 1: The Tiny Arms
To start your Crochet Kitty Sweetness Keychain Amigurumi, we begin with the arms. Create a magic ring and place 6 single crochets inside. For the second round, follow a pattern of two single crochets followed by an increase. By the end, you should have 8 stitches. Continue with a single crochet in each stitch for the third round. Before you finish, switch your yarn to the jade or skirt color. This adds a “sleeve” effect to the arm. Complete rounds four through seven with simple single crochets, then fasten off. You will need two of these!
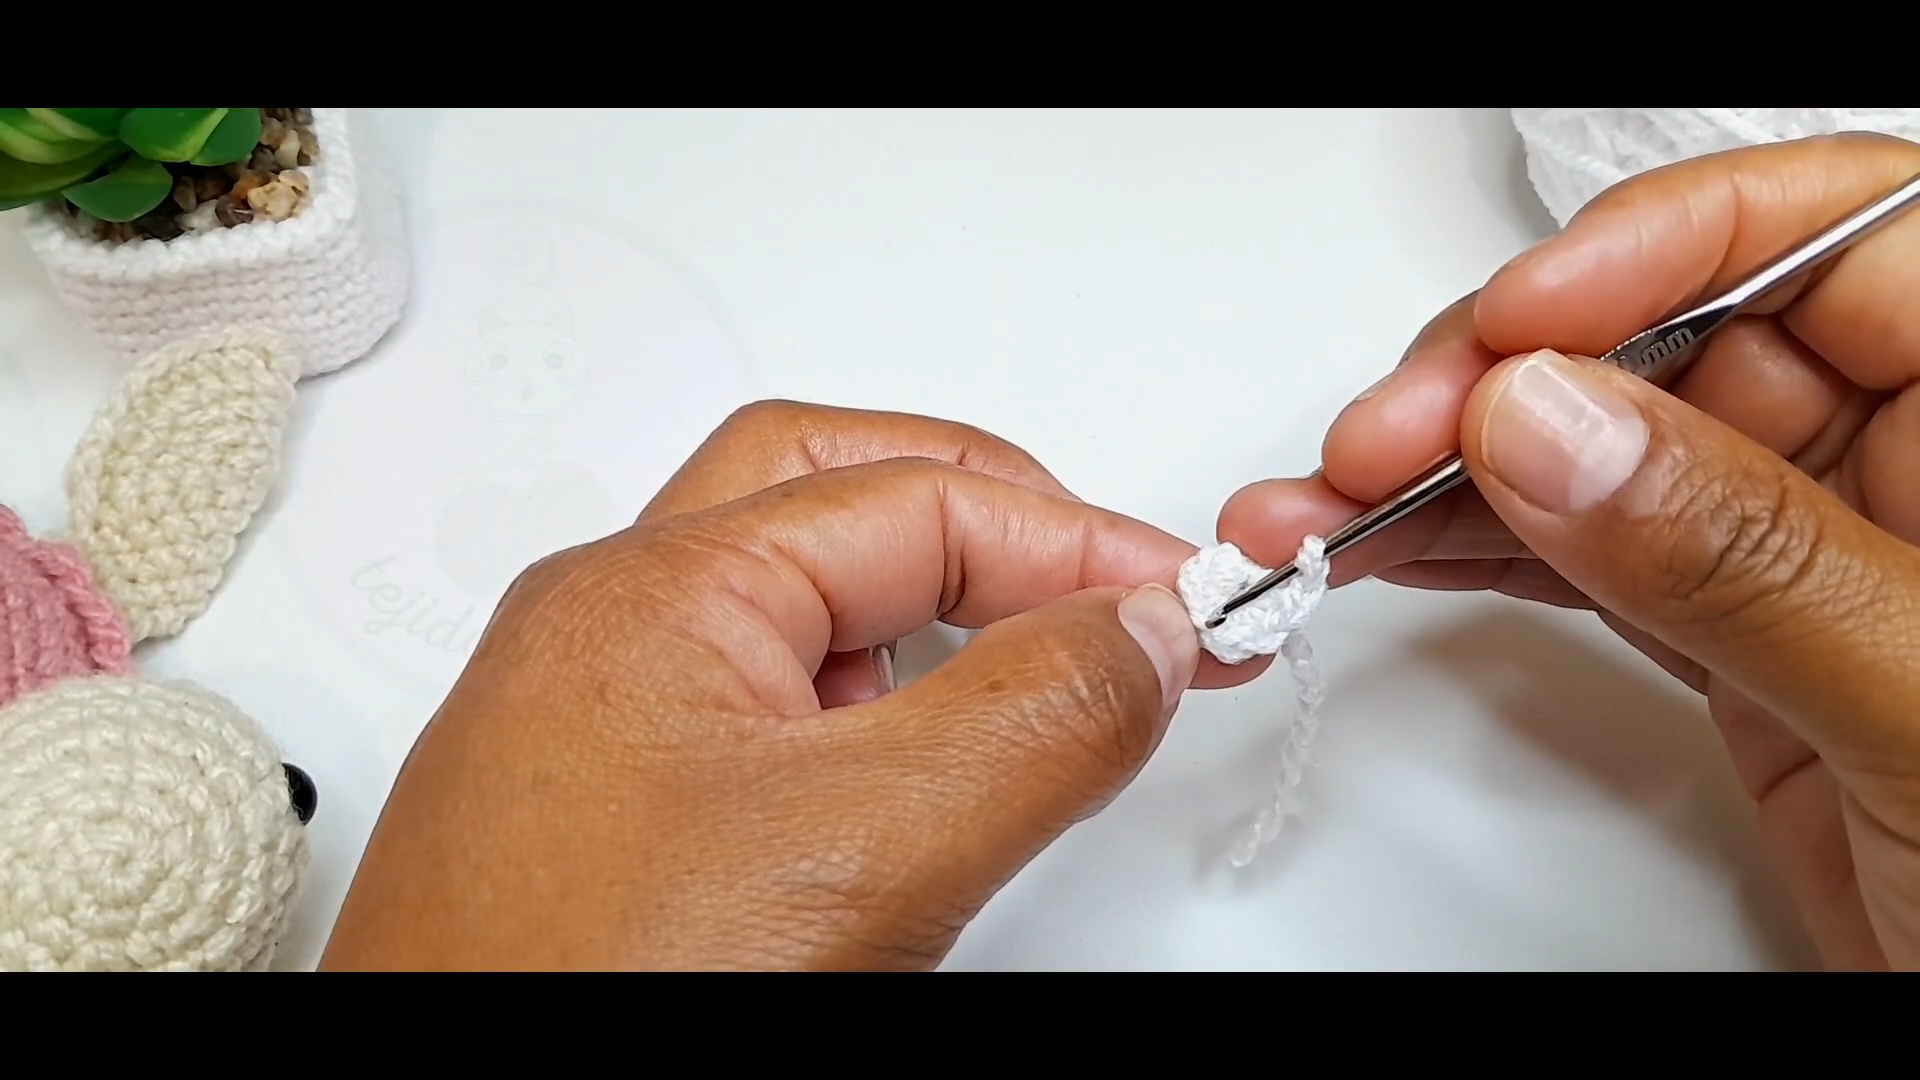
Phase 2: Crafting the Ears
The ears give the Crochet Kitty Sweetness Keychain Amigurumi its signature look. Start with a magic ring of 4 stitches. In the second round, perform a single crochet then an increase, repeated twice to reach 6 stitches. In the third round, increase to 8 stitches by following a “two single crochet, one increase” pattern. Continue expanding until you reach 12 stitches in round five. Make sure to leave a long tail of yarn when you finish, as you will use this to sew the ears onto the head later.
Phase 3: The Bow and Skirt
No Crochet Kitty Sweetness Keychain Amigurumi is complete without a bow. Inside a magic ring, chain two, then make two double crochets, followed by two more chains and a slip stitch. Repeat this on the other side of the ring and pull tight. For the skirt, you will work into the front loops of the body rounds. Using double crochets and increases will create a ruffled, “sweet” look that makes the keychain stand out.
Phase 4: Legs and Body Assembly
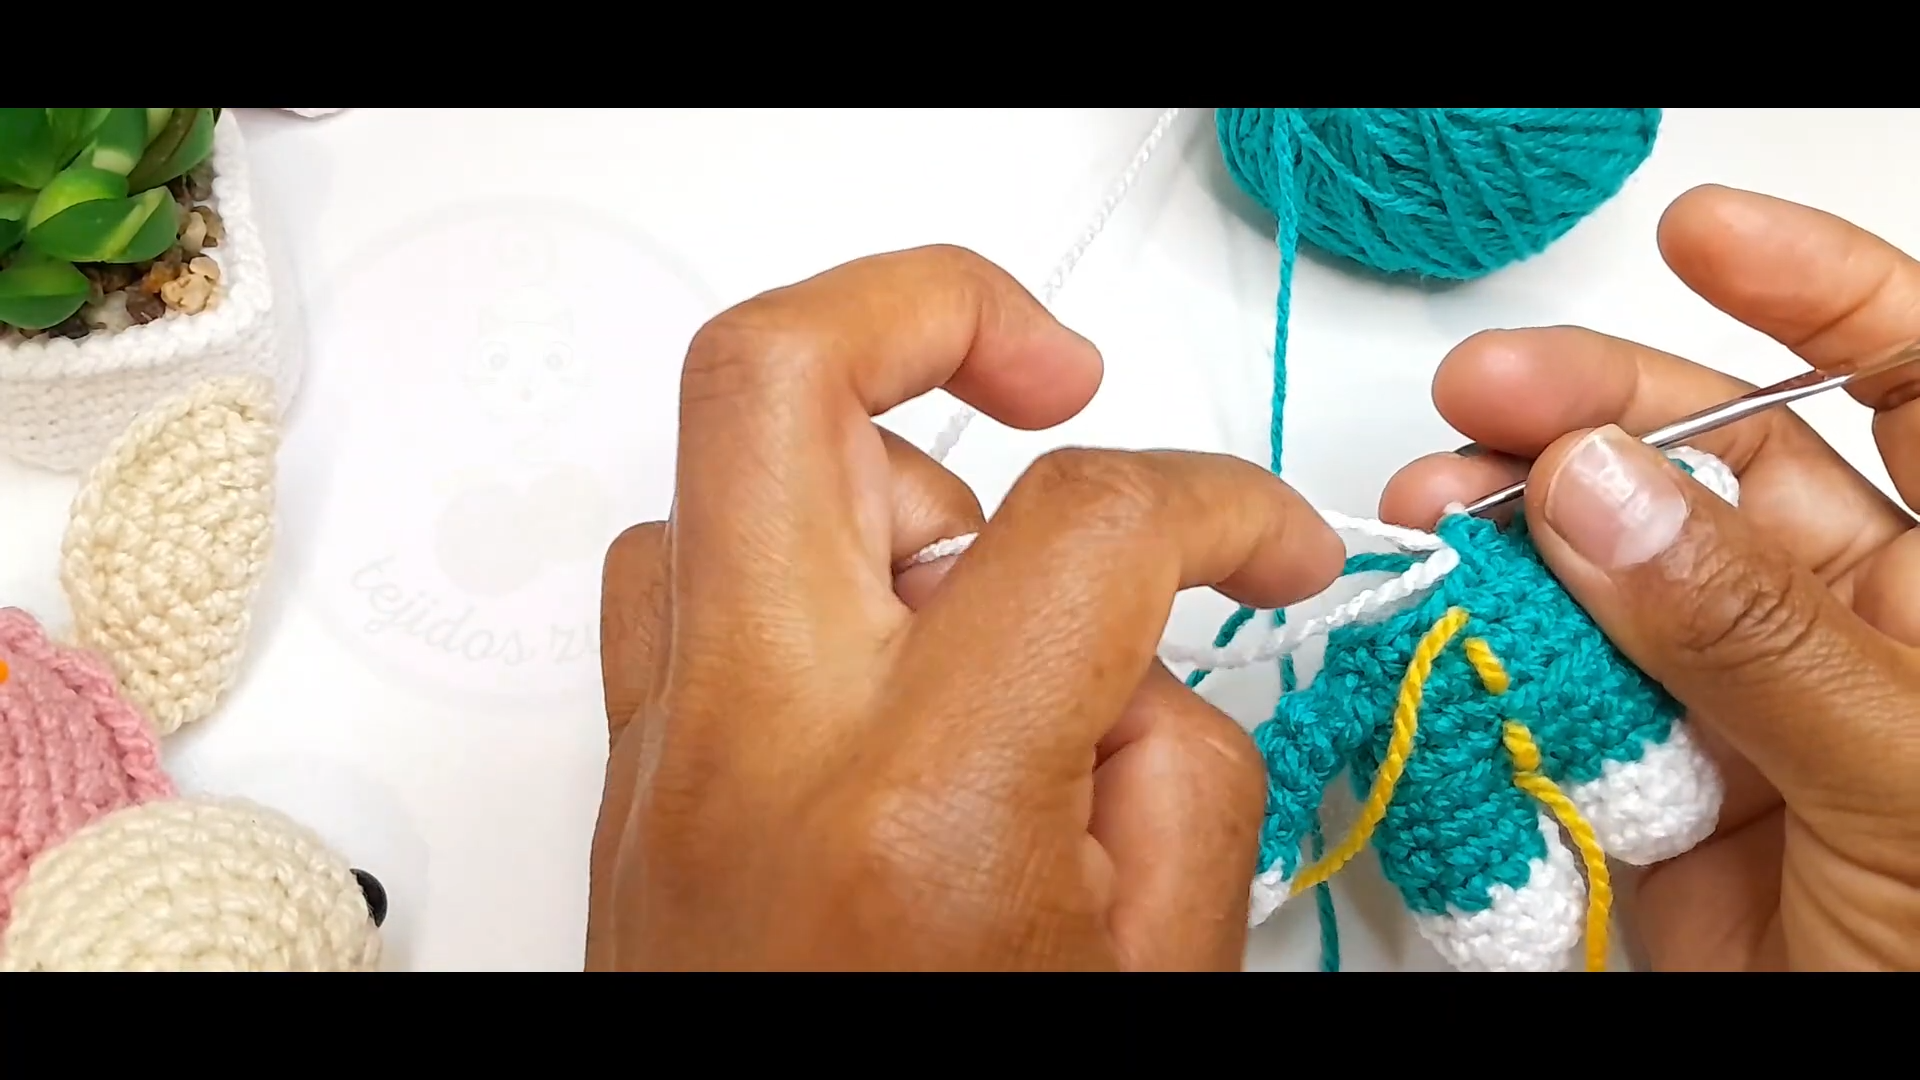
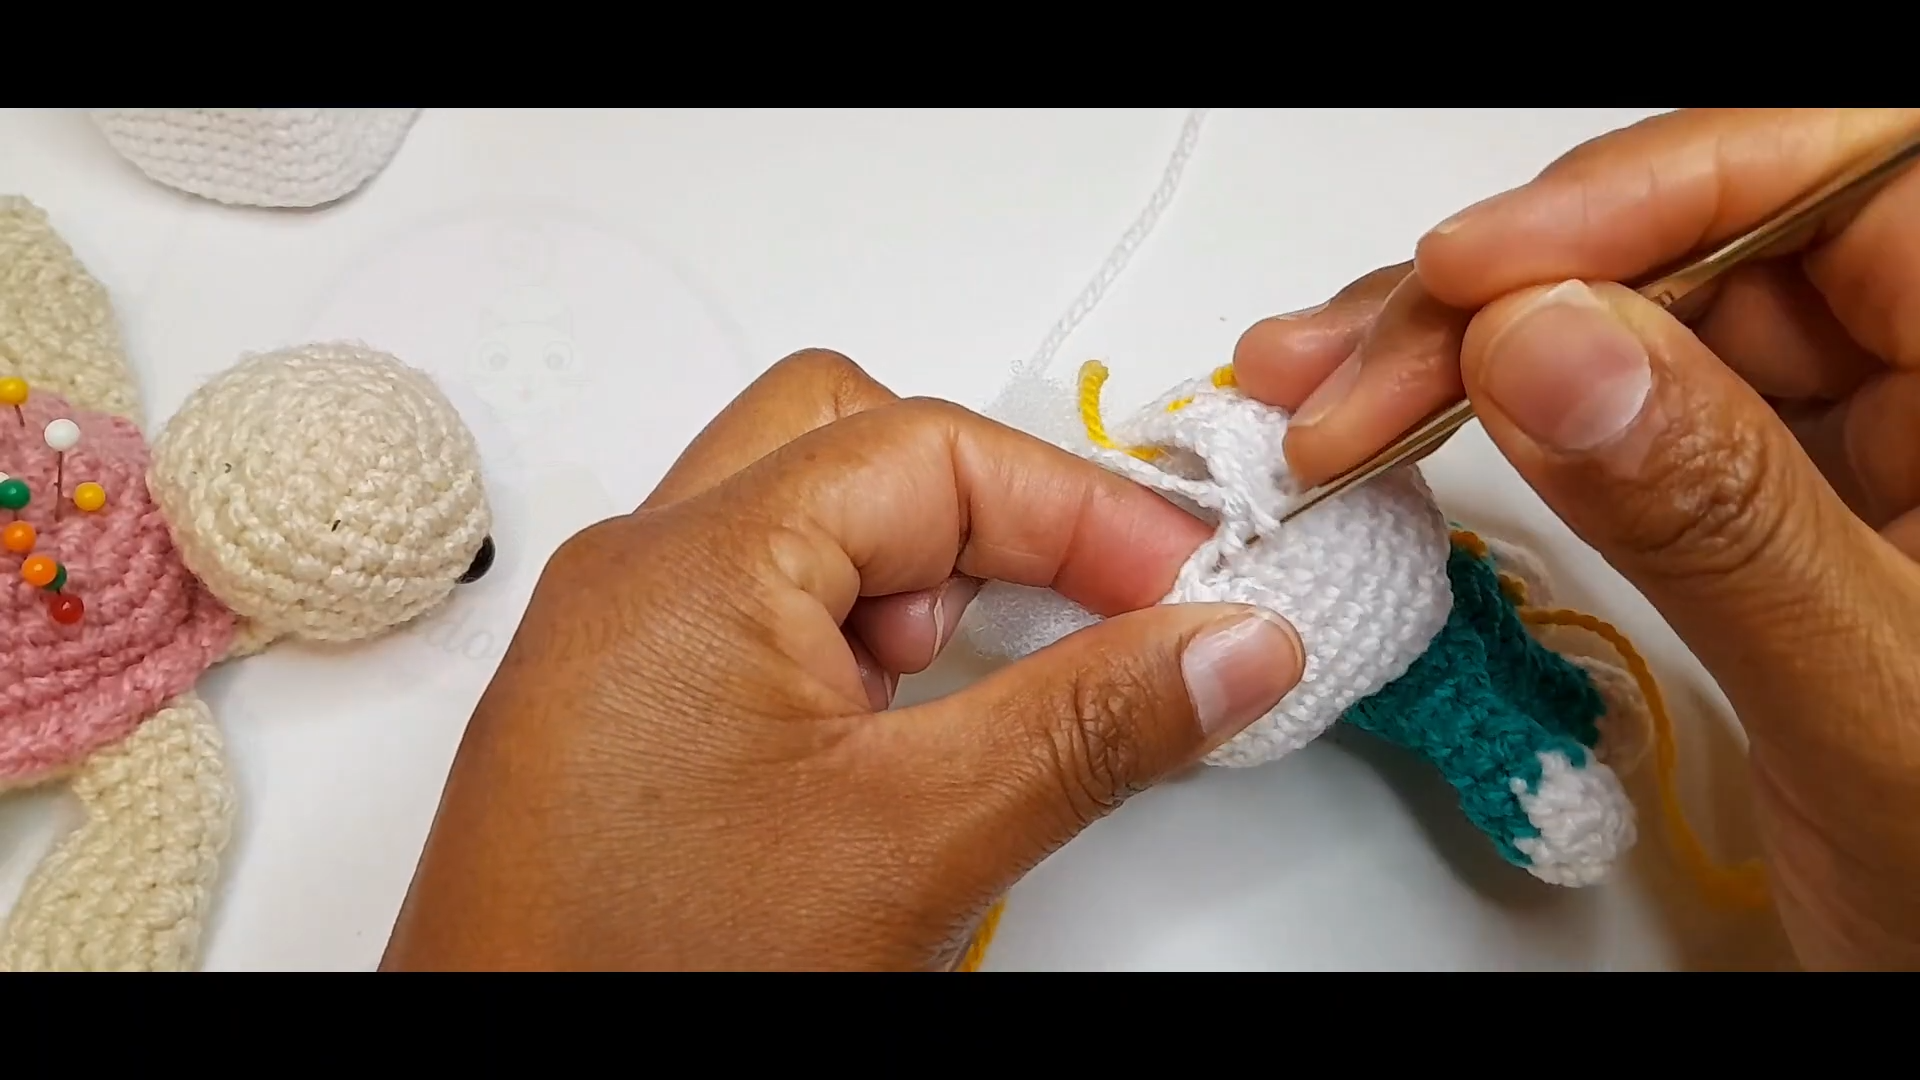
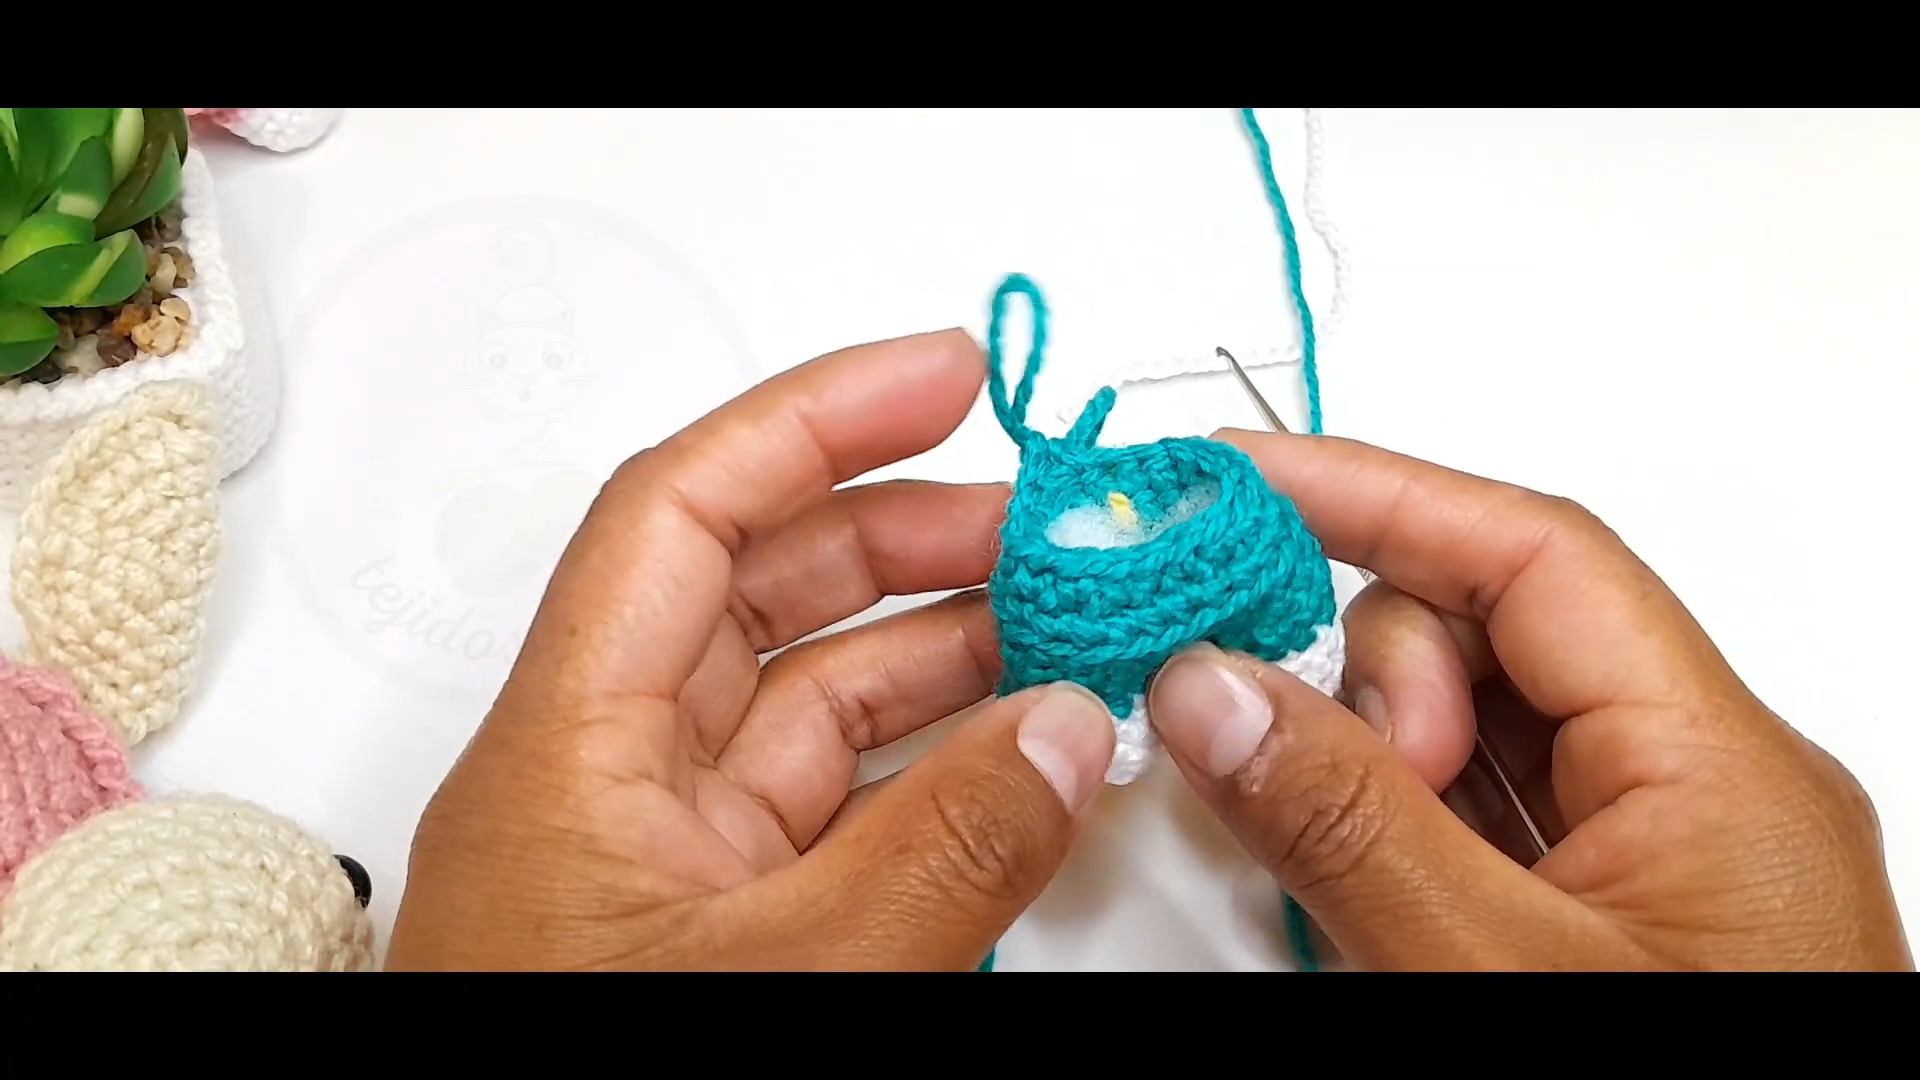
Start the legs with a magic ring of 5. Increase in every stitch for round two. Once both legs are done, join them with a chain. This is a crucial step for your Crochet Kitty Sweetness Keychain Amigurumi, as it forms the body’s base. Work your way up the body, changing back to white yarn for the head. Insert the safety eyes between rounds 20 and 21, spaced about 6 stitches apart.
Phase 5: Finishing Touches
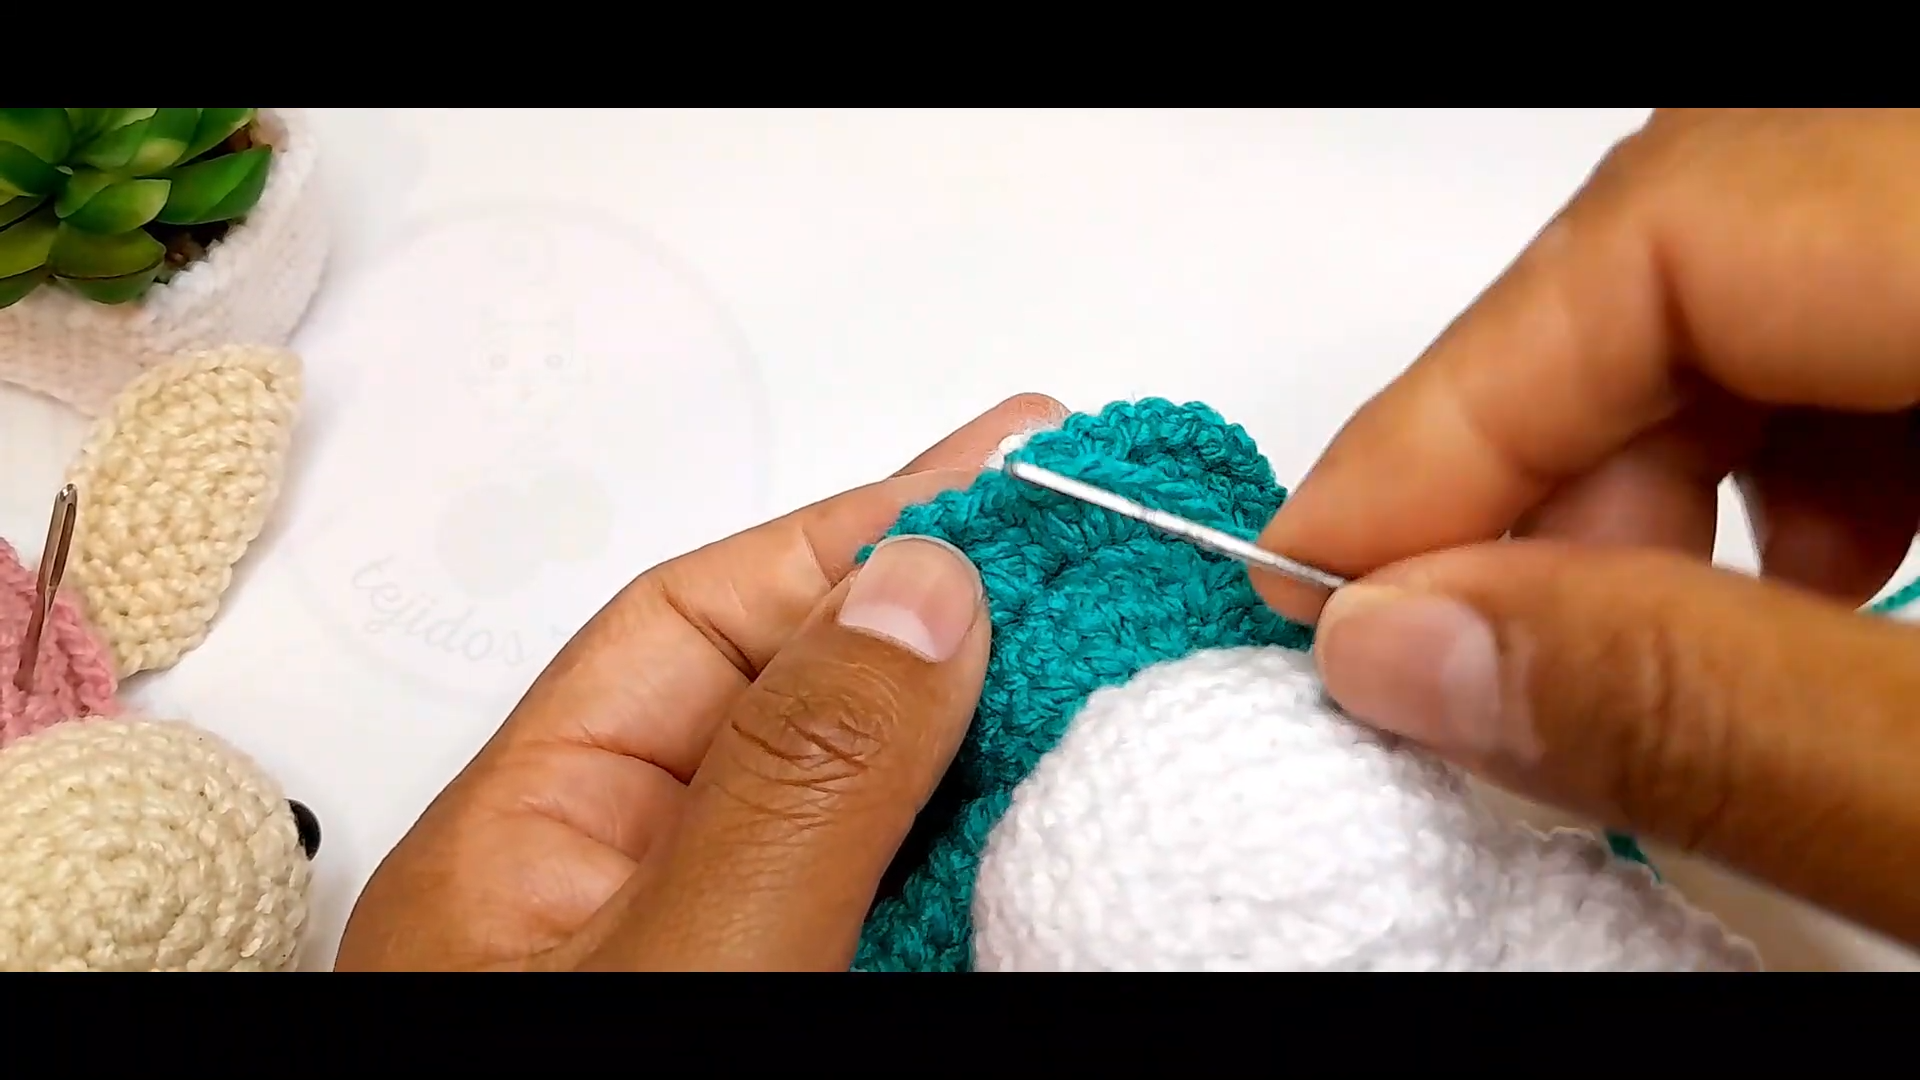
After stuffing the head firmly, close the top using your wool needle. Now, use your yellow yarn to embroider a small horizontal nose right between the eyes. With the black yarn, add three whiskers on each side of the face. Finally, sew or glue the bow next to one ear. Your Crochet Kitty Sweetness Keychain Amigurumi is now ready to be attached to a metal keychain ring!
<
Where Can You Use Your New Creation?
The beauty of the Crochet Kitty Sweetness Keychain Amigurumi is its versatility. Obviously, it looks fantastic on a set of house keys, but you can also hang it on a backpack or a purse for some “cottagecore” or “kawaii” flair. Additionally, these make wonderful stocking stuffers or “just because” gifts for coworkers and friends. Because they are small and lightweight, they are perfect for hanging inside a car as a rearview mirror charm.
Tips and Tricks for Perfection
-
Tension Control: Keep your stitches tight enough so the stuffing stays hidden.
-
Marker Usage: Always use a stitch marker, as amigurumi is worked in continuous rounds.
-
Invisible Decreases: Use the front-loop-only method for decreases to keep the surface smooth.
-
Stuffing: Use small bits of fiberfill at a time to avoid lumps in your Crochet Kitty Sweetness Keychain Amigurumi.
-
Embroidery: Do not pull the whisker thread too tight, or it will “pinch” the face.
Common Mistakes to Avoid
One common error when making a Crochet Kitty Sweetness Keychain Amigurumi is forgetting to switch colors at the right moment. Always start the color change on the last pull-through of the previous stitch. Another mistake is placing the safety eyes too high or too low. If the eyes are not aligned with the nose properly, the “expression” of the kitty might look a bit off. Lastly, ensure you don’t overstuff the arms, as they should lay somewhat flat against the body.
Frequently Asked Questions (FAQs)
1. Can I use a larger hook for this pattern?
Yes, you can, but it will make the Crochet Kitty Sweetness Keychain Amigurumi larger and the stitches looser. If you use a larger hook, ensure you use thicker yarn to match.
2. How do I wash my amigurumi keychain?
It is best to hand wash it gently with mild soap and let it air dry. Do not put it in a dryer, as the stuffing might clump or the safety eyes might get scratched.
3. Is this project suitable for children?
While the finished product is great for kids, safety eyes can be a choking hazard for children under three. In that case, I recommend embroidering the eyes with black yarn instead.
4. How long does it take to finish one kitty?
For most crafters, a Crochet Kitty Sweetness Keychain Amigurumi takes about two to three hours from start to finish.
5. Can I sell the items I make from this tutorial?
Absolutely! Handmade items are wonderful for craft fairs. Just be sure to give credit to the pattern style if asked.
Final Thoughts
Creating a Crochet Kitty Sweetness Keychain Amigurumi is a rewarding experience that combines skill, patience, and creativity. Consequently, you end up with a tangible piece of art that you can carry with you everywhere. Furthermore, the joy of gifting something handmade is incomparable. I hope you found this guide helpful and easy to follow. Remember, every stitch you make is a step toward mastering the art of crochet. Thank you so much for spending your time with me today. Happy hooking, and I cannot wait to see your beautiful kitties!