
Crocheting an amigurumi figure feels like creating a tiny soft sculpture with yarn. You start with a magic ring and slowly build the body round by round. This chubby cat design is small, squishy, and perfect to hold. Unlike plastic toys, the real beauty lies in the careful eyes, even tension, and soft yarn. When stitched neatly, it becomes a heartfelt, cuddly treasure.
What’s Required
Here’s a clear list you can gather before you start:
- Yarn (main color): Soft worsted or DK yarn works well for a plush finish. Choose a solid shade for that classic “cat loaf” look.
- Yarn (accent colors): Small amounts for ears, nose/muzzle detail, stripes, or paw accents.
- Crochet hook: Match your yarn, then go one size smaller than the label suggests to keep stitches tight (great for amigurumi).
- Stuffing: Polyester fiberfill gives a smooth, plush shape.
- Safety eyes (optional): Pick a size that fits the face without overpowering it. You can also embroider eyes if you prefer.
- Yarn needle: For sewing parts and weaving in ends.
- Stitch marker: Keeps you on track in continuous rounds.
- Scissors: Small, sharp pair for clean snips.
- Pins (optional): Helpful for positioning ears, tail, and facial features before sewing.
Procedure
Step 1: Build the loaf body base
Start with a magic ring and crochet in continuous rounds so the seam line stays subtle. Work a few increase rounds to create a rounded oval “base,” then maintain the stitch count to grow the body length. You want a low, smooth shape rather than a tall sphere. Follow the video tutorial for stitch counts and round-by-round accuracy.
Step 2: Shape the top and close the body
After the body reaches the right length, begin gradual decreases to curve the top into a loaf silhouette. Add stuffing in small handfuls as you go, then press and smooth the shape so it stays even. Avoid overstuffing because it can stretch stitches and distort the loaf. Use the video for the exact decrease pacing so the cat keeps that neat, compact profile.
Step 3: Create and attach ears, tail, and tiny details
Crochet two small ears—simple triangles or rounded points depending on the style shown in the tutorial. Make a short tail that sits close to the body, because loaf cats look best when everything stays tucked and tidy. Pin each piece in place before sewing so the face reads “cat” right away. The full tutorial video shows placement angles that make the expression feel balanced.
Step 4: Add the face (eyes, nose, and expression)
Install safety eyes before you fully close if the pattern requires inside washers; otherwise, embroider eyes with black yarn for extra softness. Stitch a small nose and mouth with embroidery thread or thin yarn, then adjust the mouth curve until it feels friendly. Take your time here because a few millimeters shift can change the entire personality. Check the video for face spacing so your loaf cat matches the intended look.
Step 5: Finish seams and refine the loaf shape
Weave in ends securely, then massage the plush gently to settle the stuffing. If the base wobbles, flatten it with light hand pressure and add a touch more stuffing toward the underside. Trim stray fibers and tighten any loose embroidery stitches. Use the video tutorial to compare your final silhouette and make small adjustments.
Design & Look
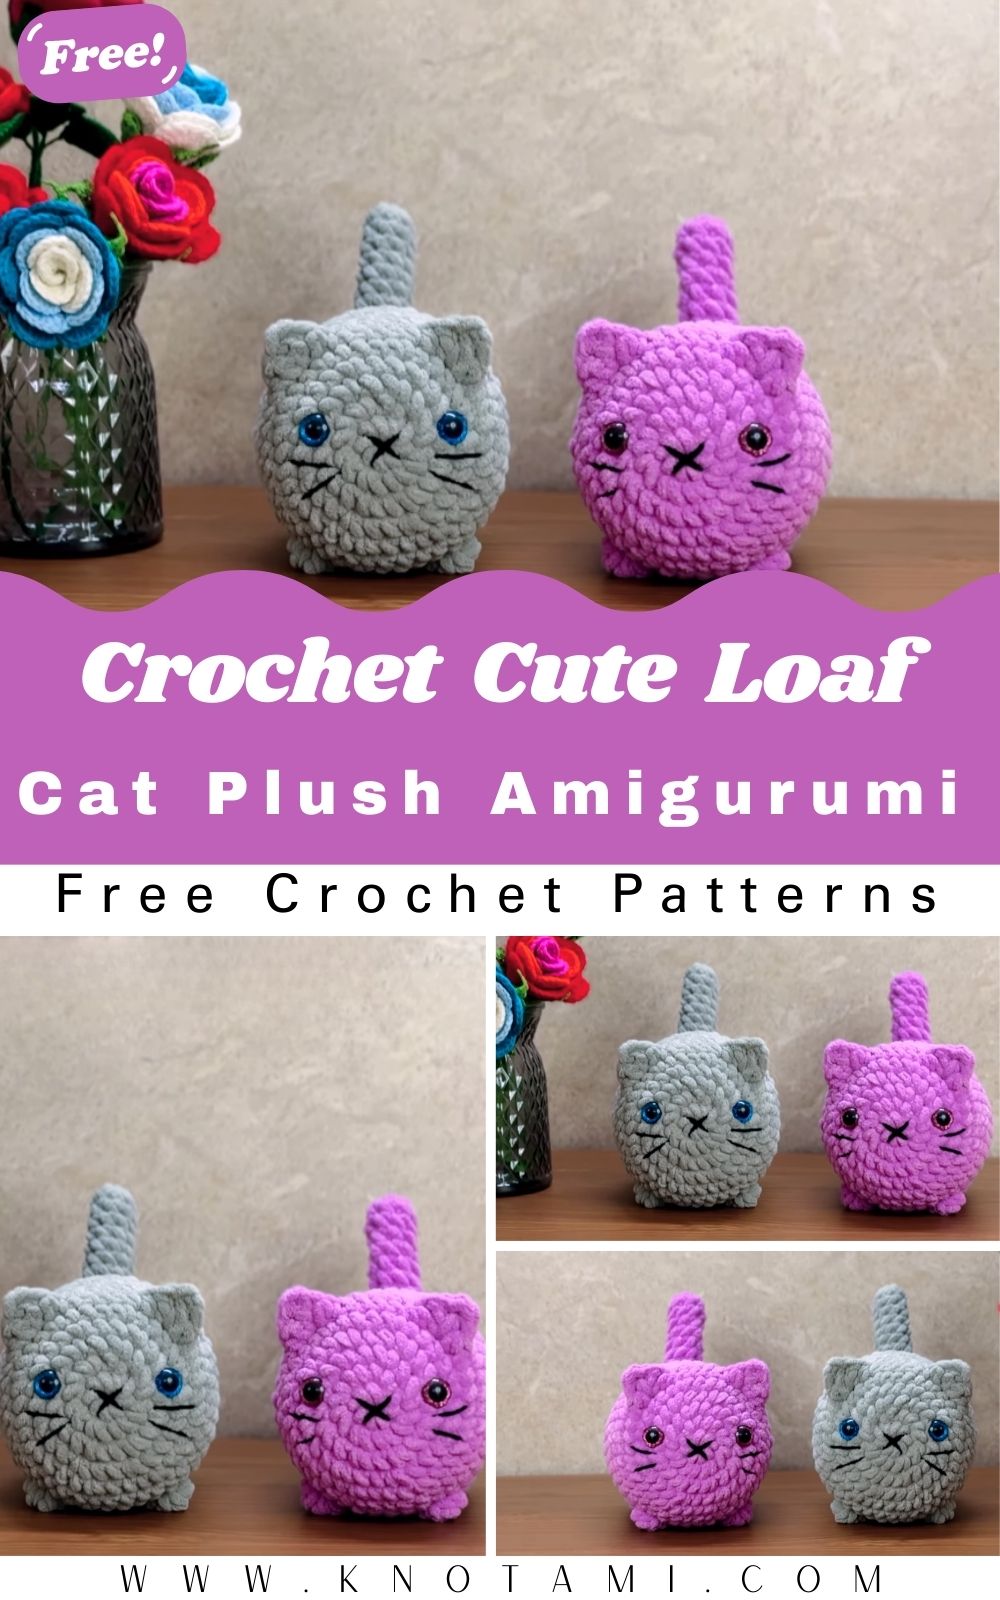
The loaf cat plush works because it keeps everything simple and intentional. The body looks like a rounded rectangle with softened edges, like a cat tucked into itself with paws hidden underneath. That compact shape gives the project an “elegant” feel—no complicated limbs, no fussy joints, just clean lines and a smooth surface. When you use a soft yarn and a slightly smaller hook, the stitch texture turns dense and velvety instead of holey. The face stays minimal: wide-set eyes, a small nose, and a gentle mouth line that reads sweet without looking cartoonish. Even tiny ears and a short tail can shift the mood, so careful placement creates that calm, cozy loaf-cat expression.
Uses & Benefits
- Toy: The loaf shape feels comfortable in small hands and stays easy to grab, cuddle, and carry from room to room.
- Gift: A handmade loaf cat sends a clear message—your yarn choice, the stitched expression, and the stuffing firmness make it feel thoughtfully made for one person.
- Decor: Set it on a shelf, desk, or nightstand and it holds its shape neatly, unlike plushies with long limbs that slide and flop.
- Skill builder: You practice tight rounds, simple shaping, and tidy sewing without dealing with complicated parts or tricky construction.
- Repeatable project: Once you finish the first one, you can reuse the same base and change colors, facial expressions, or small accessories to create a whole collection.
Time & Skill Level
- Skill level: Beginner-friendly (basic single crochet, increases, decreases, sewing)
- Time estimate: About 2–4 hours for most beginners, depending on comfort with counting rounds and sewing details
- Pace tip: Treat the face and assembly as their own mini-session so you don’t rush the part everyone notices first
Yarn & Tools
A loaf cat looks best with yarn that feels soft but still shows stitch definition. Choose worsted weight for a slightly larger plush and faster progress, or DK for a tighter, more delicate look. Use a hook that creates dense fabric; loose stitches let stuffing peek through, especially on lighter yarn colors. A stitch marker saves you from the classic beginner mistake of losing the start of the round. If you plan to embroider facial details, keep a smaller blunt needle on hand so you can stitch clean lines without snagging fibers.
Final Size & Look
Final size depends on yarn and hook, but the loaf cat typically lands in the “palm-to-hand” plush range—small enough for a desk buddy, big enough to feel satisfying when you squeeze it. The finished look should read as a smooth loaf: low profile, slightly rounded top, and a stable base. The ears need to feel proportional, not oversized, and the tail should look tucked rather than dramatic. When you nail the spacing of the eyes and the curve of the mouth, the plush comes across calm and cozy instead of surprised.
Usage Ideas
- Set it on your work desk as a soft stress-squeeze companion during calls.
- Use it as a nursery shelf accent in neutral yarns like cream, gray, or tan.
- Add a keyring or strap (with reinforced stitching) for a bag charm-style plush.
- Pair two loaf cats as a “his and hers” gift with different expressions.
- Create a seasonal set: pastel spring loaf, orange autumn loaf, and snowy white winter loaf.
Common Mistakes
- Loose tension that shows stuffing: Tighten your stitch tension or use a smaller hook to keep the fabric dense.
- Losing track of rounds: Use a stitch marker and count every round; continuous spirals fool even careful beginners.
- Overstuffing the body: Too much stuffing stretches stitches and makes the loaf look lumpy instead of smooth.
- Misplaced facial features: Pin or lightly mark eye placement before you commit; tiny shifts change the expression fast.
- Crooked ears or tail: Pin both ears at the same angle and distance from the center line before sewing.
- Visible seams from messy sewing: Use a yarn needle and sew through stitch bars neatly so the join blends in.
Care Instructions
- Spot clean with mild soap and cool water; press gently instead of scrubbing.
- Let it air dry fully on a towel; reshape the loaf while it dries.
- Avoid hot water or high heat; heat can warp fibers and loosen stitches.
- Keep it away from Velcro and rough surfaces that can snag yarn.
- If you use safety eyes, check them occasionally to ensure they stay secure.
Customization Ideas
- Add stripes, a tuxedo belly patch, or a calico color block with simple yarn changes.
- Embroider sleepy eyes for a relaxed look or wide eyes for a curious kitten look.
- Stitch tiny blush marks with pink thread for a soft “kawaii” style face.
- Add a miniature scarf, bow tie, or collar with a tiny bell charm (decor use only).
- Create themed loaf cats: strawberry cat, pumpkin cat, or galaxy cat with speckled yarn.
Safety Tips for ( Crochet Loaf Cat Amigurumi )
- Use embroidered eyes instead of safety eyes for children under 3.
- Secure all embroidery with multiple back stitches and tight knots inside the plush.
- Keep small add-ons (bells, buttons, charms) for display items, not child toys.
- Choose washable yarn if the plush will see daily handling.
- Inspect seams before gifting; reinforce any area that separates under gentle tugging.
Why It’s Trending
Loaf cat amigurumi trends because it matches how people craft right now: quick projects, clean shapes, and results that photograph well. The loaf silhouette feels instantly recognizable, even with minimal facial features, so beginners get a satisfying “yes, that’s a cat” moment early on. Makers also like repeatable patterns, and the loaf body offers that—once you learn the base shape, you can churn out different colors and expressions without relearning the entire build. Social media pushes the trend further because the plush looks cute from every angle, especially on desks, bookshelves, and pastel backgrounds. On top of that, the project scratches the comfort-crafting itch: small, soft, and calming to stitch while you unwind.
FAQs for ( Crochet Loaf Cat Amigurumi )
Q1: Can a beginner really finish this loaf cat in one day?
Yes. Most beginners can complete the body quickly, then spend extra time on sewing and face placement. Split it into two sessions if you want a more relaxed pace.
Q2: What stitch do I need most for this amigurumi project?
Single crochet does most of the work, plus simple increases and decreases to shape the loaf. The project stays beginner-friendly because it avoids complex textures.
Q3: How do I stop stuffing from showing through my stitches?
Use a smaller hook than the yarn label recommends and keep tension firm. You can also choose yarn with a slightly fuzzy halo to soften stitch gaps.
Q4: Should I use safety eyes or embroidery for the face?
Use safety eyes for a clean, polished look on display plushies. Use embroidered eyes for toddler-safe toys and a softer, sleepier expression.
Q5: How do I make the loaf cat look more “elegant” and less cartoonish?
Keep the face minimal, space the eyes evenly, and choose calm yarn colors like cream, gray, beige, or muted pastels. A smooth stuffing job and tidy seams do most of the elegance work.
Conclusion for ( Crochet Loaf Cat Amigurumi )
This elegant Crochet Loaf Cat Amigurumi proves you don’t need complicated shaping to create something memorable. You build a simple form, then bring it to life with careful tension, neat sewing, and a face that shows personality in just a few stitches. That process sparks creativity because every small choice of color, eye style, ear angle changes the final character. Handmade charm shows up in the tiny imperfections that make your plush feel warm and real, not factory-cloned. When you finish, you hold a one-of-a-kind amigurumi that fits gifting, decorating, and collecting.