
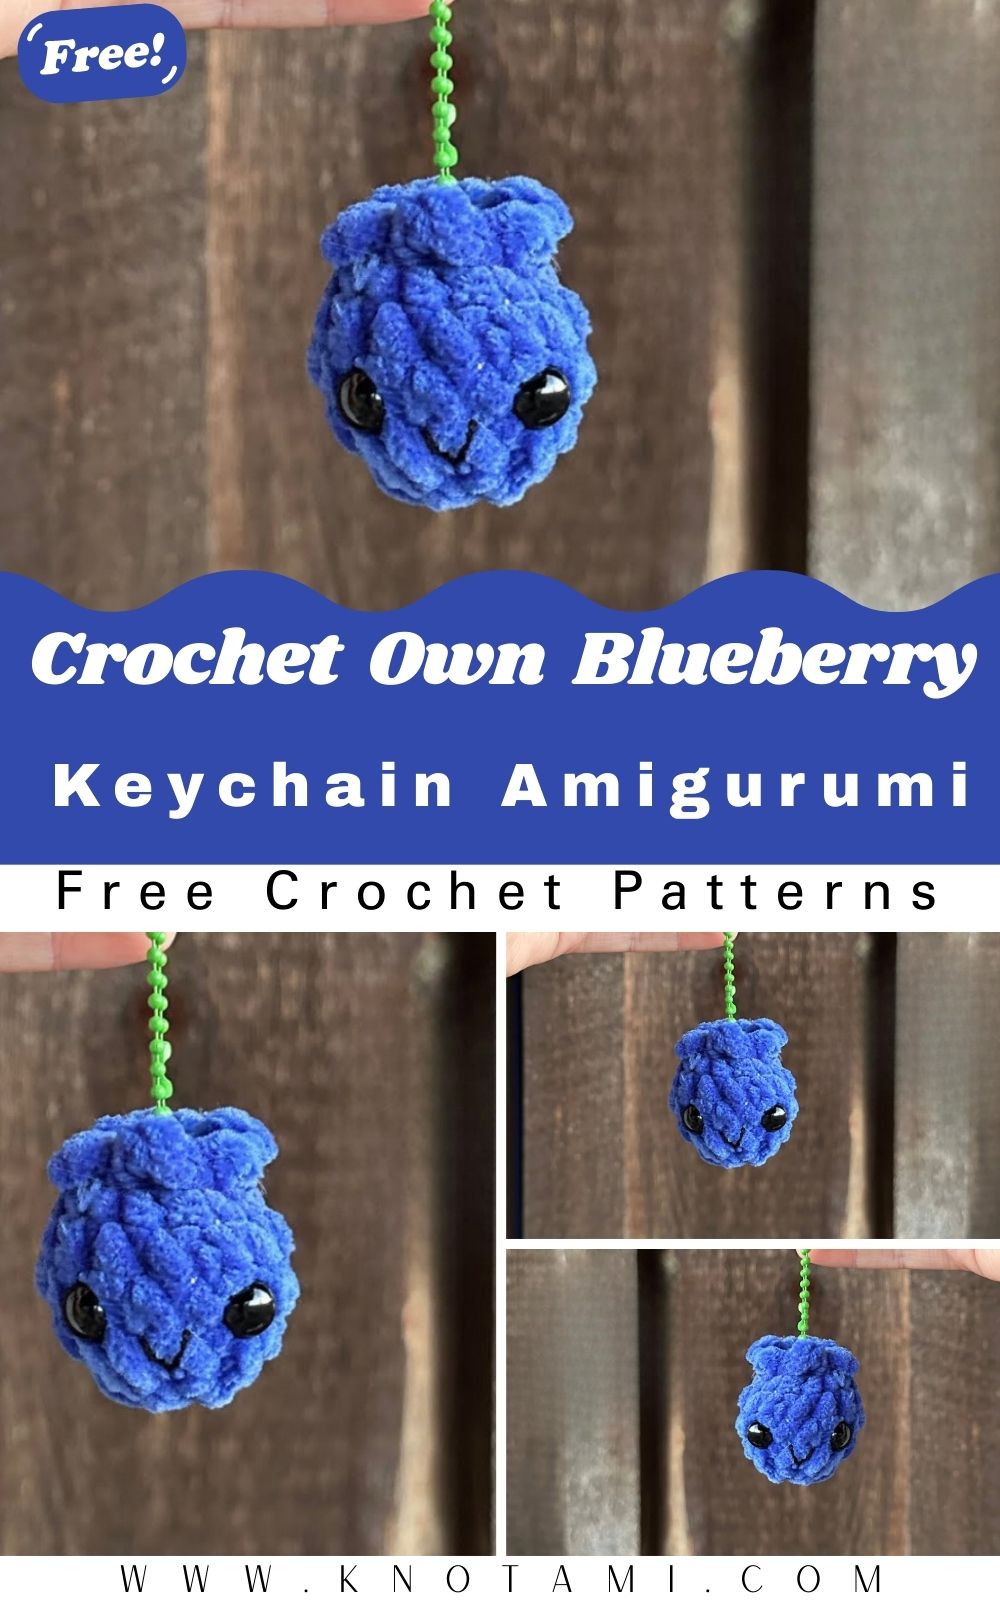
Have you ever wanted to crochet your own blueberry keychain amigurumi but felt intimidated by complex patterns? You are in the right place because this project is specifically designed for crafters who love quick, adorable, and functional art. Making a tiny fruit friend is not only a great way to use up your scrap yarn, but it also results in a high-quality accessory that you can carry with you every single day. Consequently, this tutorial focuses on simplicity and clear instructions so that you can achieve a professional look even if you are relatively new to the world of amigurumi.
Furthermore, creating a handmade fruit keychain tutorial like this allows you to personalize your belongings or create thoughtful gifts for your friends and family. Because blueberries are naturally small and round, they make the perfect subject for a beginner-friendly crochet project. You will find that the repetitive stitches are quite soothing, while the final assembly provides a wonderful sense of accomplishment. Therefore, let us gather our materials and get ready to dive into this delightful craft that combines creativity with practical utility.
Before you begin working through the written steps, you should take a moment to watch the embedded video provided above. This visual guide is incredibly helpful because it demonstrates the specific hand movements and tension required to make your mini crochet fruit amigurumi look perfectly plump. In addition to the written word, seeing the hook move through the stitches helps clarify any confusion regarding the back-loop-only technique or the closing process.
Skill Level / Level of Difficulty
The skill level for this crochet blueberry keychain amigurumi is definitely “Beginner.” If you know how to make a magic ring, a single crochet, and a slip stitch, you are already halfway there. Even if you are a total novice, this project is a fantastic starting point. The scale is small and manageable. Although there is some fine detail work with a smaller hook, the overall shape is a simple sphere. Since spheres are the foundation of almost all amigurumi, you should feel encouraged to try this regardless of your experience.
Tutor’s Suggestions for Success
To get the best results, I highly suggest using a high-quality baby cotton yarn. Cotton provides excellent stitch definition. This is vital for making the blueberry look realistic and crisp. Additionally, make sure you maintain a consistent tension. If your stitches are too loose, the fiberfill might peek through the gaps. Conversely, if they are too tight, your hands might tire out quickly.
Another suggestion is to use a stitch marker. Because we are working in rounds, it is very easy to lose track of where a row ends. Marking the first stitch of every row ensures your counts stay accurate. Finally, do not rush the finishing touches. The way you hide your threads and sculpt the “crown” makes a huge difference. Taking your time during assembly will lead to a much more professional-looking keychain.
Essential Materials for Your Blueberry
To successfully crochet your own blueberry keychain, you will need the following supplies:
-
Baby Cotton Yarn: Deep blue or purple for the berry and a tiny bit of green or matching blue for the top.
-
Crochet Hook: A 1.6 mm hook is recommended for a tight, neat finish.
-
Fiberfill: To give your blueberry its round, squishy shape.
-
Large-Eye Needle: For sewing ends and closing the berry.
-
Scissors: To trim your yarn.
-
Keychain Ring: To turn your amigurumi into a functional accessory.
Step-by-Step Guide: How to Crochet Your Own Blueberry
Phase 1: Creating the Foundation

First, start by creating a magic ring with your blue yarn. This is the standard beginning for any easy amigurumi. Inside that magic ring, crochet eight single crochet stitches. Once finished, pull the thread tight to close the center hole. Make a slip stitch into the first stitch to join the round, followed by one chain stitch to prepare for the next level.
Phase 2: Expanding the Shape
In the second row, the goal is to expand the circle. You will perform eight increases by putting two single crochets into every stitch. However, a key detail here is to crochet only in the back loops. This creates a specific texture that helps the blueberry look more authentic. By the end of this row, you should have sixteen stitches. Close the row with a slip stitch and a chain.
Phase 3: Building the Height
Now that you have your width, you need to build the body. For rows three, four, and five, simply crochet sixteen single crochet stitches in each round. This “even” stitching allows the flat circle to curve upwards into a cup shape. Remember to close each row with a slip stitch to keep your work neat. At this stage, your project will start looking like a tiny blue bowl.
Phase 4: Decreasing and Stuffing
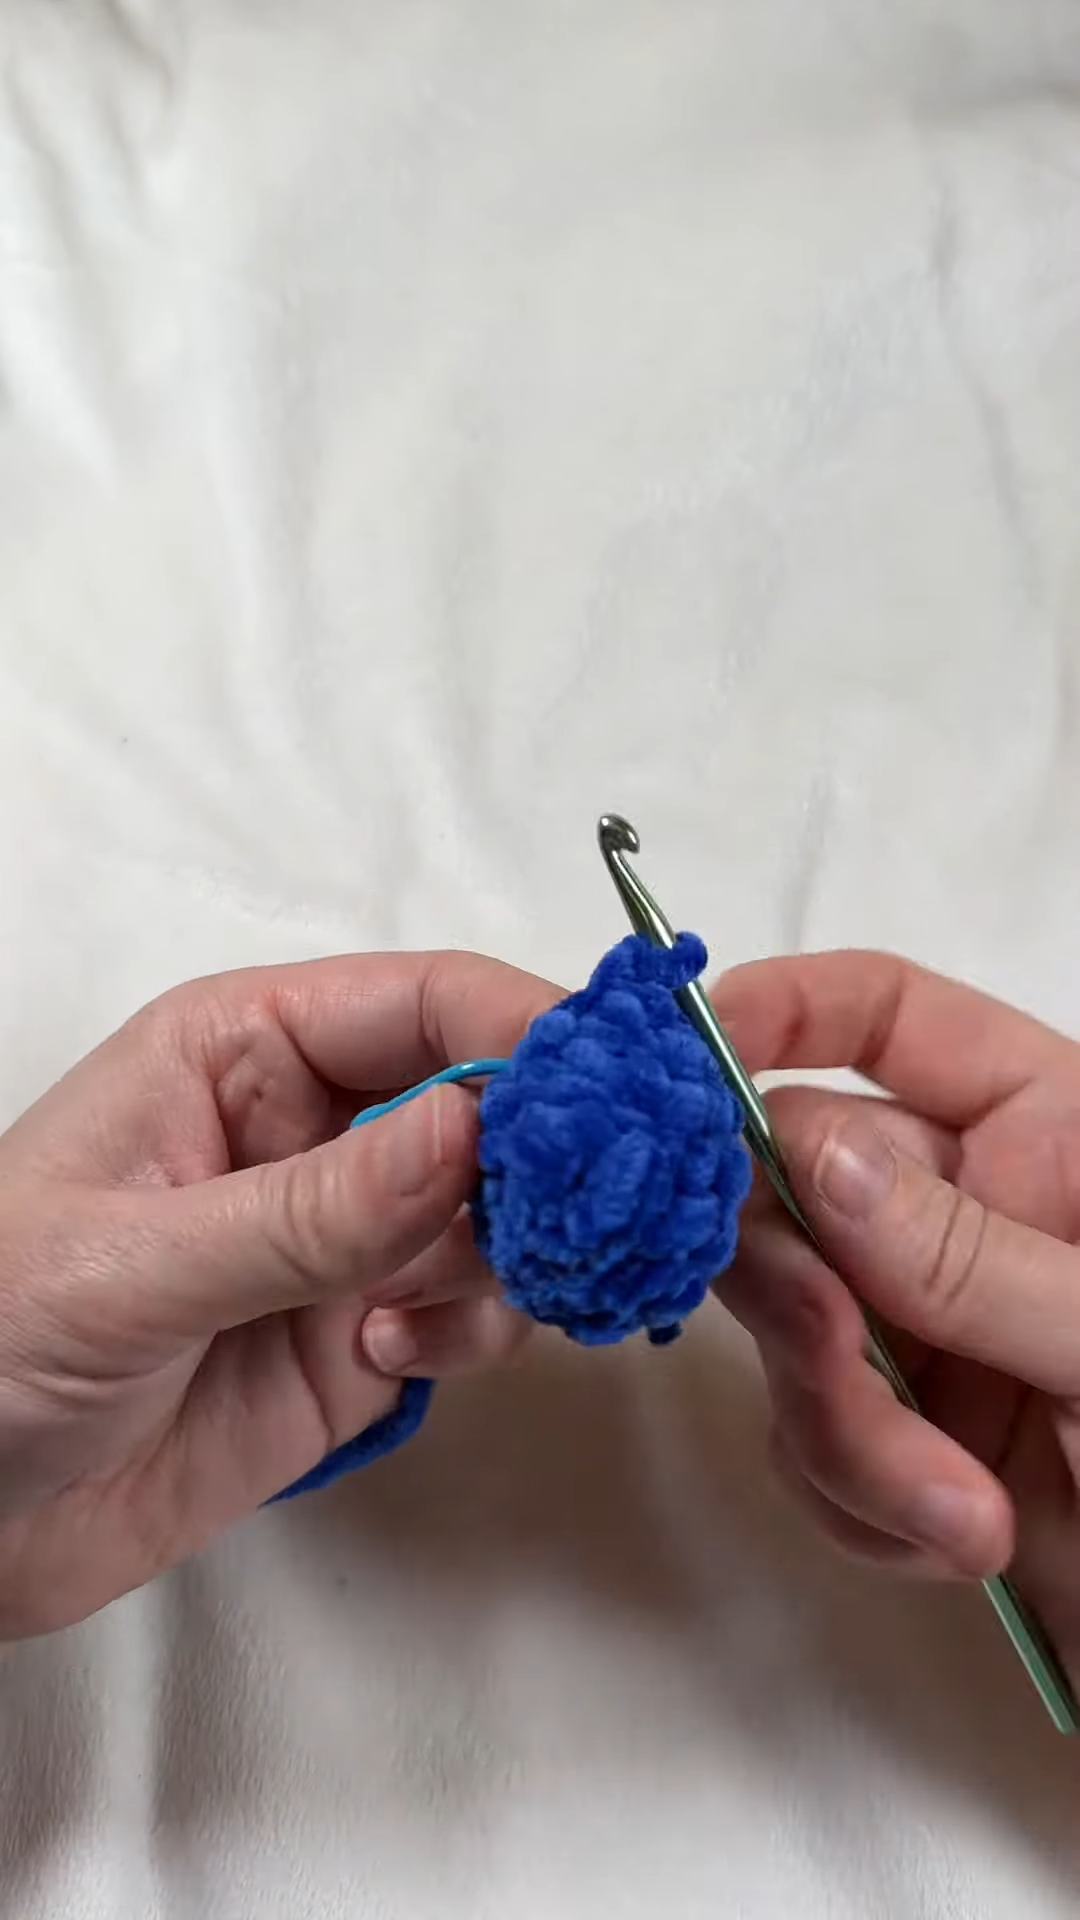
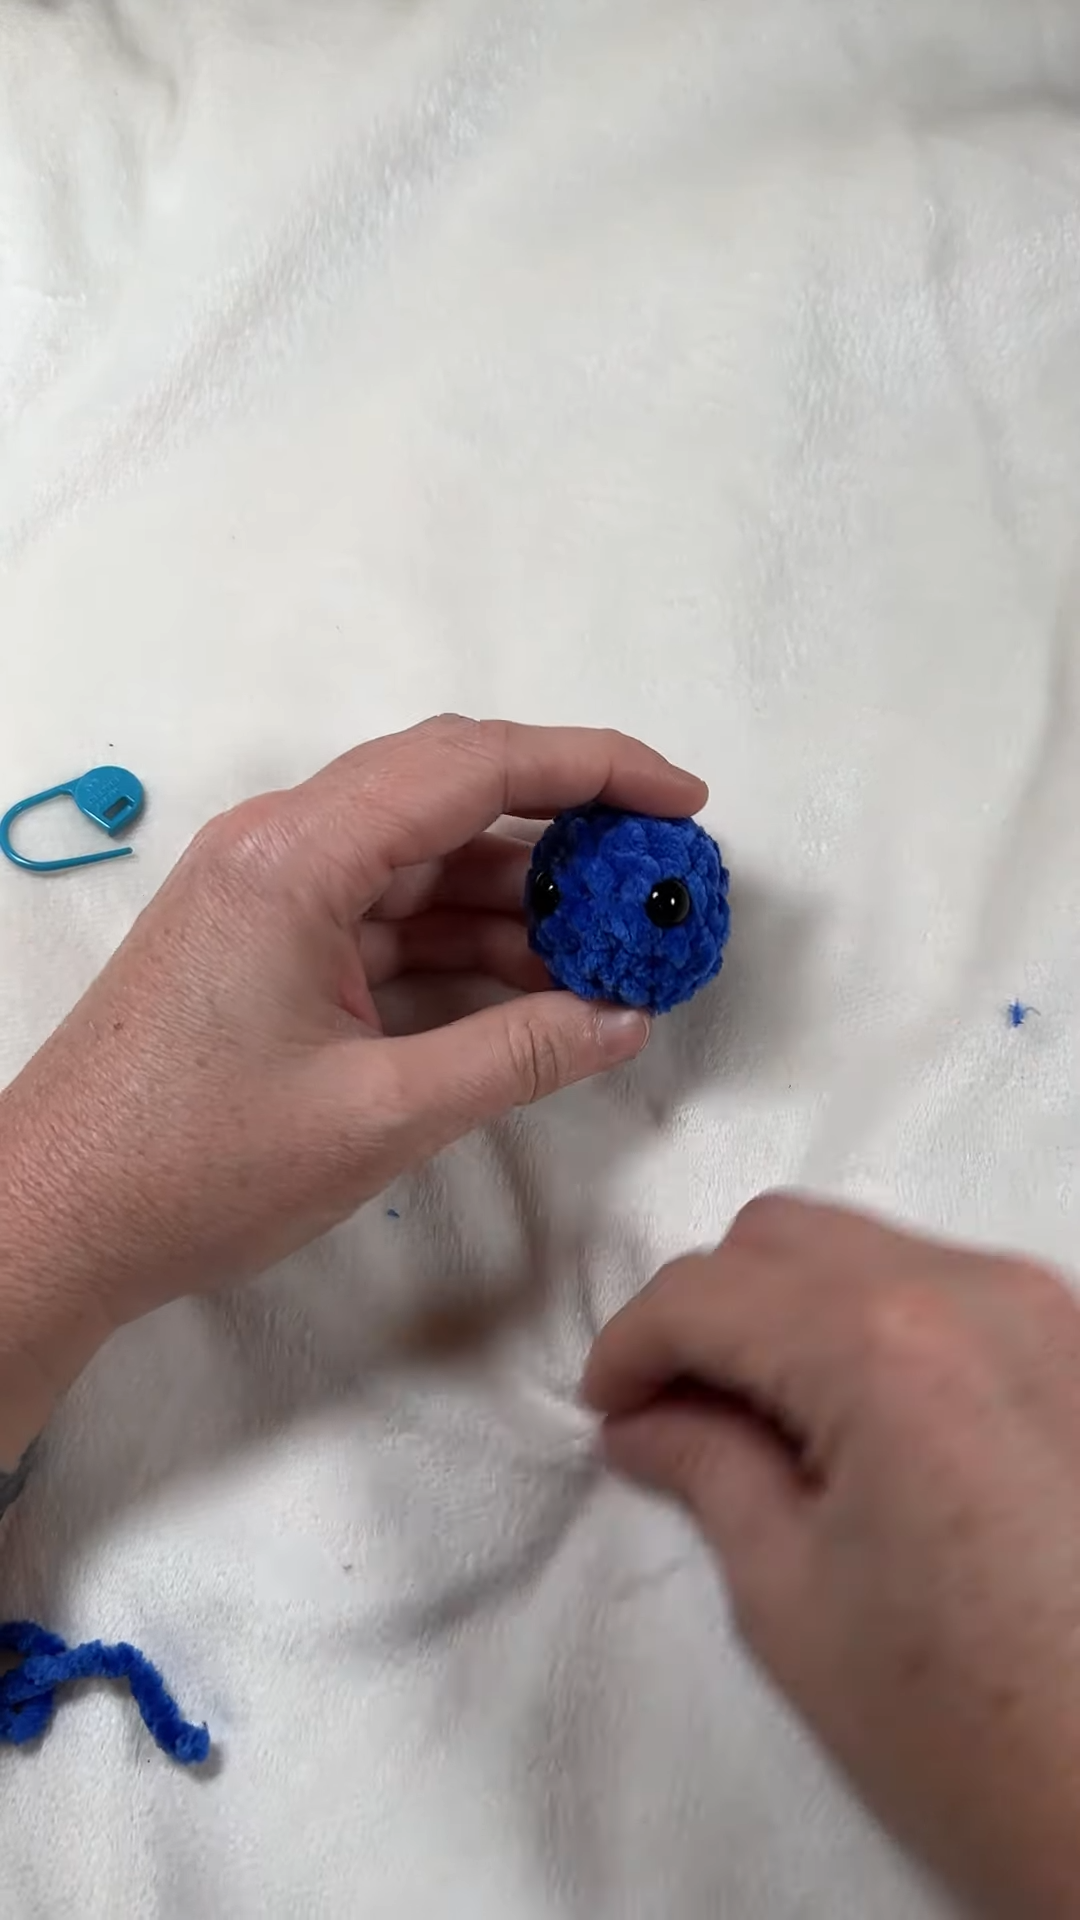
After completing the height, it is time to close the berry. In row six, you will perform eight decreases. This means you will crochet two stitches together eight times until the opening is small. Before you close it completely, add your fiberfill. Use your fingers or a hook to push the stuffing inside until the berry is firm. Once stuffed, cut the thread, leave a long tail, and use your needle to pull the hole shut.
Phase 5: Adding the Blueberry Crown
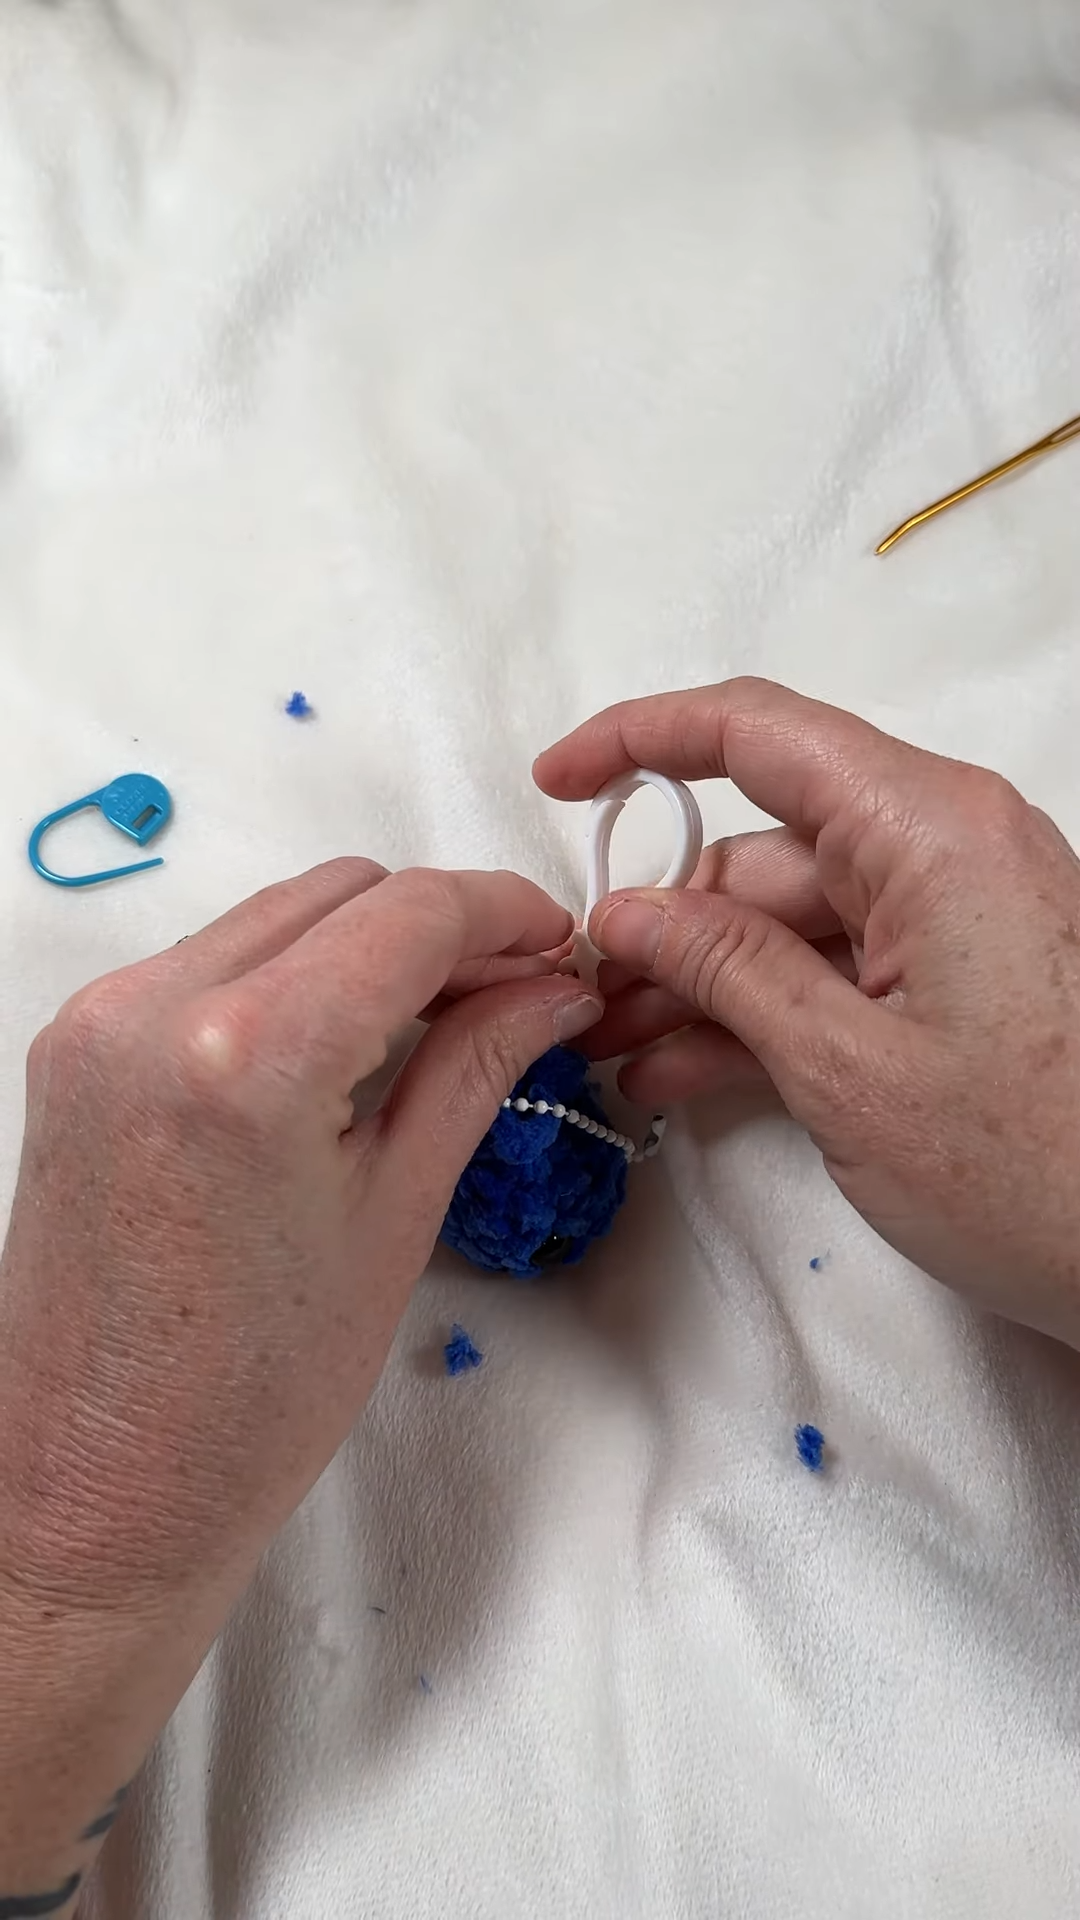
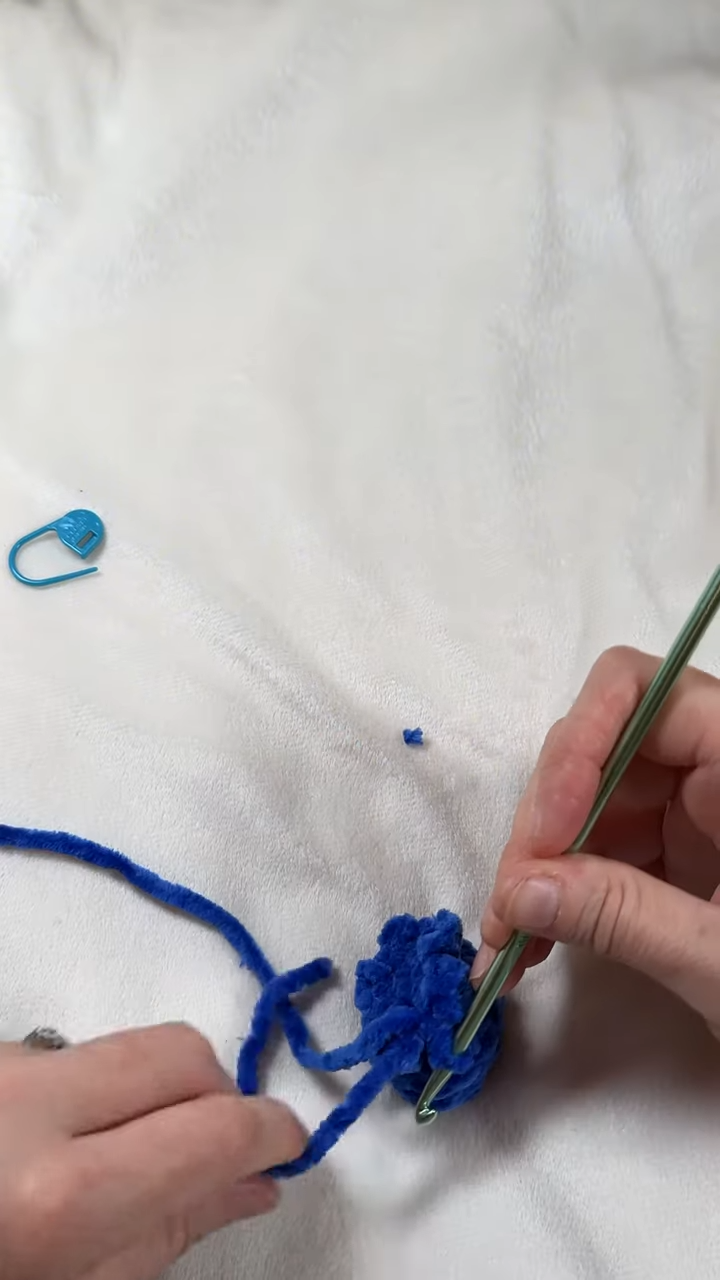
To finish, return to the front loops you left at the top center. Attach your yarn and create a pattern of three chains followed by a slip stitch in the next stitch. Repeat this around the center to create a ruffled “crown” effect. Finally, hide all your loose threads inside the body. Attach your keychain ring, and your masterpiece is complete
video pattern
Where Can You Use Your Blueberry?
Once finished, you will realize just how versatile this little item is. Primarily, it serves as a wonderful keychain that makes your keys easier to find in a crowded bag. Because of its bright color and soft texture, it stands out visually. Moreover, you can attach these blueberries to zippers on backpacks or pencil cases to add personality to your gear.
Besides being a keychain, these mini blueberries work perfectly as “bag charms” or desk decor. You could make a whole bowl of them to sit on your workspace as a stress-reliever. Additionally, they make excellent small gifts for teachers or friends. Since they are so quick to make, you can easily produce a dozen for craft fairs or party favors.
Tips and Tricks for Perfect Amigurumi
To ensure the best result, always check your stitch count at the end of every row. It is easy to accidentally skip a stitch, which can make the blueberry look lopsided. Furthermore, when stuffing the berry, avoid overstuffing to the point where stitches stretch. A firm but slightly squishy berry is the ideal goal.
Another great trick is to use “invisible decreases” instead of standard ones. This technique makes the closing of the berry look much smoother. Also, if you want a “frosted” look, choose a yarn with a matte finish. By experimenting with different shades of blue and purple, you can create a diverse harvest of berries.
Common Mistakes to Avoid
One common mistake is forgetting to work in the back loops during the increase row. If you crochet through both loops, you lose the ridge that adds character to the fruit. Additionally, many beginners struggle with hiding yarn tails. If you simply cut the yarn short, the berry might eventually unravel with heavy use.
Another error is using a hook that is too large for the yarn weight. If your hook is too big, the stitches will be loose and the white fiberfill will show through. This takes away from the “solid” look of the fruit. Lastly, do not skip the “crown” step. That tiny detail is what truly transforms a blue ball into a recognizable blueberry.
Frequently Asked Questions (FAQs)
Can I use a different type of yarn like acrylic?
Yes, but cotton is usually preferred for keychains. If you use acrylic, ensure the hook size matches the yarn thickness so stitches stay tight.
How long does it take to crochet one blueberry?
It usually takes about 20 to 30 minutes. Because the rounds are small, it is an extremely fast project.
Do I really need a 1.6 mm hook?
A 1.6 mm hook is great for a tight finish, but you can use a 2.0 mm hook instead. Just keep in mind that a larger hook will result in a slightly larger blueberry.
How do I clean my crochet keychain?
Gently hand wash the blueberry with mild soap and cool water. Let it air dry completely so the stuffing doesn’t stay damp.
Is this project suitable for children?
Absolutely! This is an excellent project for older children or teenagers. The steps are repetitive and easy to follow.