
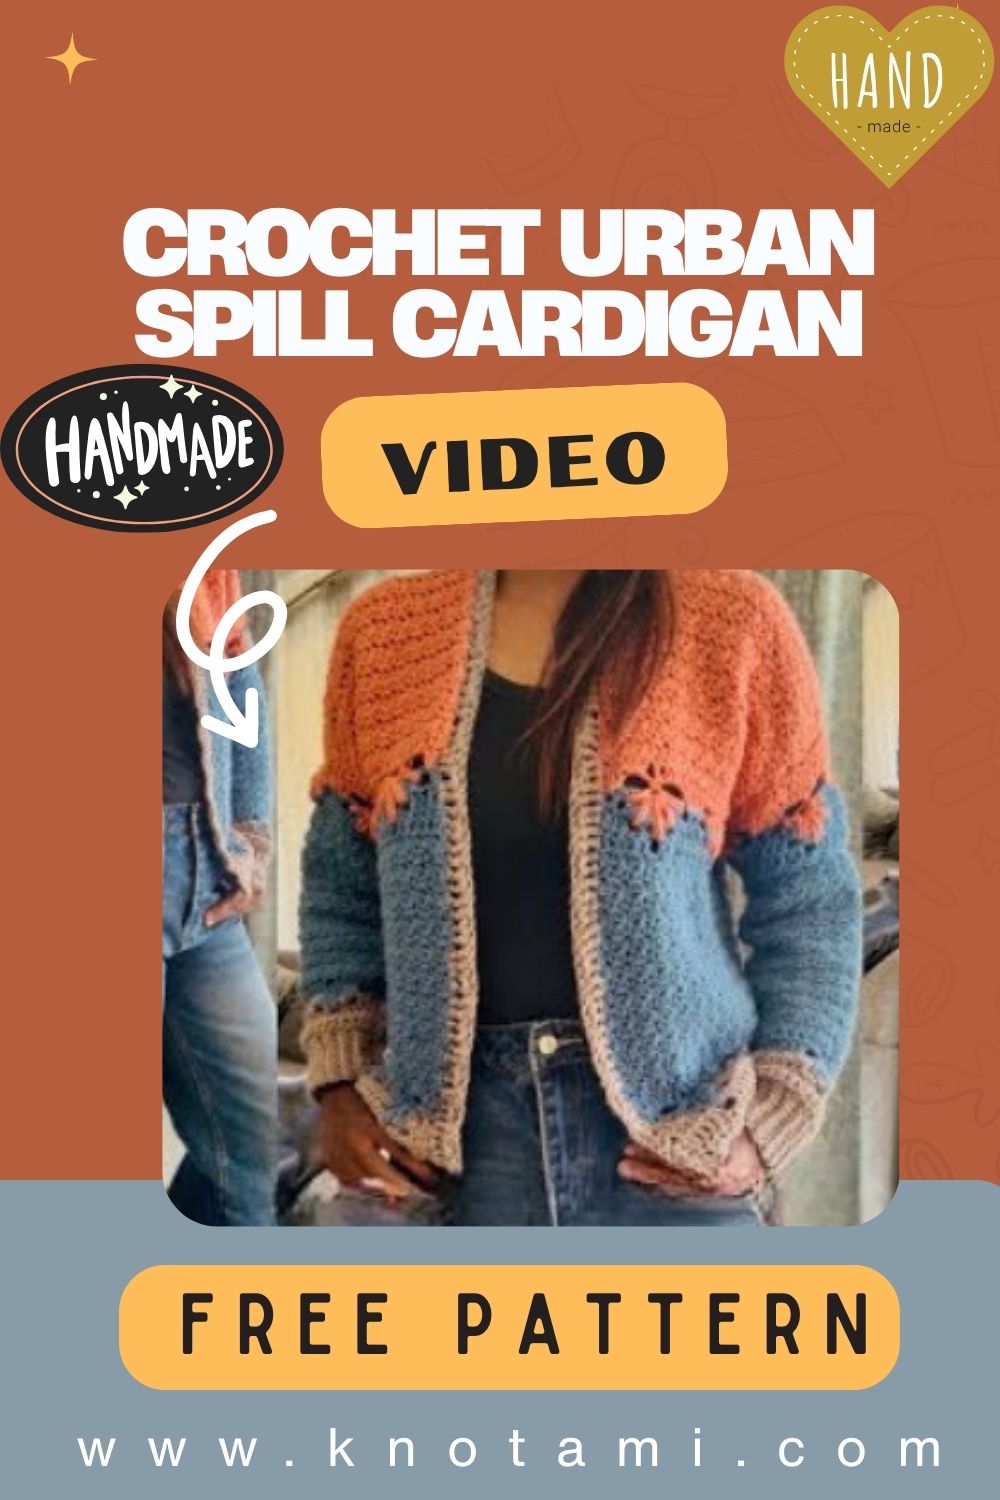
Unveil the Honest Crochet Urban Spill Cardigan Wide Shoulder Pattern, featuring a sleek, slouchy, and city-chic effortless drape, bold shoulders, and beginner-friendly steps for an instant wardrobe wow.
Meet the Honest Crochet Urban Spill Cardigan Wide Shoulder Pattern, an effortlessly cool, drapey layer with bold shoulders and modern lines. Designed for confident beginners, it works up quickly, flatters every silhouette, and invites easy customization in length and texture.

Expect clean edges, cozy movement, and a fashion-forward fit that pairs with everything. Plus, the pattern is size-inclusive and stash-friendly, so you can stitch your signature style without stress.
Uses:
- Elevate basics: throw over tees and high-waist jeans.
- Desk-to-dinner polish: layer atop a slip dress.
- Travel-ready warmth: comfy, crushable, and chic.
Honest Crochet Urban Spill Cardigan Wide Shoulder Pattern: Easy, Modern, and Beginner-Friendly
Firstly, welcome to your cozy, city-chic, make the Honest Crochet Urban Spill Cardigan Wide Shoulder Pattern. Secondly, this approachable design gives you the relaxed “spill” at the shoulders that feels fashion-forward yet wonderfully comfortable. Moreover, you’ll work simple shapes, add clean edges, and finish with a drapey neckline that frames every outfit. Additionally, the wide-shoulder silhouette flatters many body types and layers beautifully over tees, dresses, and turtlenecks. Consequently, this cardigan becomes a versatile piece you’ll wear on repeat. Finally, for extra guidance and visual help, you can reference the project link here: https://youtu.be/i02UHRBgi3M.
What to Expect
Firstly, this Honest Crochet Urban Spill Cardigan Wide Shoulder Pattern blends modern style with beginner-ready construction. Secondly, the wide-shoulder cardigan shape drapes easily, while the open-front design streamlines fit. Moreover, the pattern uses straightforward stitches and generous ease so your first cardigan can look polished without stress. Additionally, the step-by-step instructions cover the neckline, body, and finishing in clear language with time estimates, so your workflow stays smooth. Consequently, you’ll enjoy an Urban Spill Cardigan that feels soft, looks sleek, and layers effortlessly with your everyday wardrobe.
Materials and Exact Measurements
Firstly, choose yarn that gives a soft drape and smooth stitch definition; worsted-weight (Category 4) yarn works beautifully with a slightly larger hook for flow.
- Yarn: Worsted weight (Category 4), 100% acrylic or a cotton-acrylic blend for drape
- Yardage by size (approximate, but sized for wide shoulders and hip-length):
- XS: 900 yd (825 m)
- S: 1000 yd (915 m)
- M: 1100 yd (1005 m)
- L: 1200 yd (1095 m)
- XL: 1300 yd (1190 m)
- 2X: 1450 yd (1325 m)
- 3X: 1600 yd (1465 m)
- 4X: 1750 yd (1600 m)
- 5X: 1900 yd (1735 m)
- Approximate grams (assuming 200 m per 100 g skein): XS 415 g, S 455 g, M 505 g, L 550 g, XL 595 g, 2X 660 g, 3X 730 g, 4X 800 g, 5X 865 g.
- Yardage by size (approximate, but sized for wide shoulders and hip-length):
- Hook: 6.0 mm (J/10) for body; 5.5 mm (I/9) optional for ribbing or tighter edges
- Notions: 4 locking stitch markers, tape measure, yarn needle, scissors, optional 2–4 lightweight buttons (or leave open-front)
- Gauge: 12 hdc × 9 rows = 4 in × 4 in (10 cm × 10 cm) in half double crochet with 6.0 mm hook, lightly blocked
- Finished garment ease: 8–12 in (20–30 cm) positive ease at chest for a relaxed, wide-shoulder spill
- Target length: hip-length, approximately 24–28 in (61–71 cm) from the shoulder, adjustable
- Optional accents: contrasting yarn for edging, or tonal buttons for a minimalist look
Sizing Tips (Choose Your Size Confidently)
Firstly, measure your full bust and add 8–12 in (20–30 cm) to find your finished garment circumference. Secondly, choose the size that gives you your preferred ease; size up for extra slouch and size down for a cleaner fit. Moreover, if you are between sizes, you can adjust the front panel width by adding or removing 4–8 stitches per panel. Additionally, for extra shoulder spill, you can extend the shoulder seam by 1–2 in (2.5–5 cm) before seaming. Consequently, your cardigan will fall just right for your style.
- Suggested finished chest by size (approximate):
- XS: 44 in (112 cm); S: 48 in (122 cm); M: 52 in (132 cm); L: 56 in (142 cm)
- XL: 60 in (152 cm); 2X: 64 in (163 cm); 3X: 68 in (173 cm); 4X: 72 in (183 cm); 5X: 76 in (193 cm)
- Fit note: Because this is an open-front cardigan, the front edges do not meet fully; therefore, ease reads larger but wears lightly.
Before You Start (Simple Prep)
Firstly, make and block a quick swatch in HDC to confirm your gauge, because drape depends on it. Secondly, read through the steps so timing and flow make sense before you begin. Moreover, place markers as suggested, because markers keep edges straight and help when seaming. Additionally, wind skeins into cakes if they tangle easily. Consequently, your crochet session stays calm and efficient.
Construction Overview
Firstly, this pattern uses a straightforward drop-shoulder method that is ideal for beginners. Secondly, you will crochet three flat rectangles for the back and two fronts, then seam the shoulders to create the wide-shoulder spill. Moreover, you will add sleeves from the armholes and work them in the round for simplicity. Additionally, you will finish with a clean neckline band and tidy edges that frame the cardigan. Consequently, you get a relaxed, modern silhouette without complex shaping.
Abbreviations (US Terms)
- ch = chain
- sl st = slip stitch
- sc = single crochet
- hdc = half double crochet
- dc = double crochet (optional for faster growth)
- BLO = back loop only
- RS/WS = right side/wrong side
Step-by-Step Instructions for Making Time
Firstly, choose a size and follow the stitch counts that align with your finished chest goal. Secondly, if you prefer a custom approach, use the width and length targets below.
- Back panel width by size (approximate): XS 20 in, S 22 in, M 24 in, L 26 in, XL 28 in, 2X 30 in, 3X 32 in, 4X 34 in, 5X 36 in.
- Front panel width by size (each panel): XS 10 in, S 11 in, M 12 in, L 13 in, XL 14 in, 2X 15 in, 3X 16 in, 4X 17 in, 5X 18 in.
- Body length to hem: 24–28 in, adjustable.
- Sleeve length from armhole: 16–19 in, adjustable; sleeve opening is generous for a relaxed fit.
- Swatch and Plan (Making time: 20–30 minutes)
Firstly, ch 18 and work hdc rows until your swatch measures about 5 in high. Secondly, block lightly and measure 4 in across the center to check for 12 hdc. Moreover, adjust your hook size up if your stitches are too tight or down if too loose. Additionally, note how the fabric drapes when you hold it up vertically. Consequently, you’ll confirm the cardigan will relax softly at the shoulders. - Back Panel (Making time: 2–3 hours)
Firstly, ch to match the desired back width (multiple of 2 helps keep edges even). For example, for 24 in width at gauge 3 hdc per inch, ch 72 plus 1 turning chain. Secondly, Row 1: hdc in second ch from hook and across; turn. Moreover, Row 2: ch 1, hdc across through both loops for a smooth, sturdy fabric; turn. Additionally, repeat Row 2 until the panel measures your desired body length to hem (24–28 in). Consequently, the back sets your overall size and shoulder spill.
- Optional texture: work every fourth row in BLO hdc for a subtle rib that drapes well.
- Edge tip: Place a marker in the first and last stitch of each row to keep edges straight.
- Front Panels (Left and Right) (Making time: 1.5–2.5 hours total)
Firstly, make two identical rectangles, each half the width of your back (see width guide). Secondly, for a slightly overlapping front, add 1–2 in to each panel. Moreover, Row 1: hdc across; turn. Additionally, repeat hdc rows until both fronts match the back length. Consequently, you will have three clean panels ready to seam.
- Neckline prep: stop 1–2 in short of the back’s total length if you want a subtle high-low effect; alternatively, keep them equal for classic lines.
- Marker tip: mark the panel corners so later seaming stays tidy.
- Shoulder Seams for the Wide-Shoulder Spill (Making time: 15–25 minutes)
Firstly, lay the back panel RS up and place the front panels on top RS down, aligning the top edges. Secondly, seam shoulders from the outer edge inward using whipstitch or slip stitch, leaving a generous neck opening (8–10 in) atthe center. Moreover, stop when each shoulder seam measures 4–6 in for smaller sizes and 6–8 in for larger sizes to encourage shoulder “spill.” Additionally, try the piece on now if possible and widen or narrow the neck as preferred. Consequently, the cardigan will sit wide and relaxed across the shoulders.
- Checkpoint: the shoulder seam should sit slightly past your natural shoulder point.
- Side Seams and Armhole (Making time: 20–30 minutes)
Firstly, fold the cardigan at the shoulder seams with the RS together. Secondly, measure down from the shoulder seam and mark your desired armhole depth: 9 in (XS/S), 10 in (M/L), 11 in (XL/2X), 12 in (3X/4X/5X). Moreover, seam from the hem up to the armhole marker, leaving the armhole open. Additionally, turn RS out and smooth the seams with your fingers. Consequently, your cardigan now has clean sides and generous armholes for easy sleeves. - Sleeves in the Round (Making time: 1–1.5 hours each)
Firstly, with the RS facing, join the yarn at the underarm. Secondly, Round 1: ch 1, sc evenly around the armhole to create a neat base, then sl st to join; switch to hdc for the next round. Moreover, Round 2: ch 1, hdc around, placing approximately 2–3 hdc per inch; sl st to join. Additionally, continue in hdc in the round, decreasing 2 stitches every 4–5 rounds for a gentle taper if desired. Consequently, you’ll reach wrist length in 16–19 inches of work.
- Optional cuff: work 6–10 rounds of BLO sc or BLO hdc for a stretchy rib.
- Fit tip: Try the sleeve on after every 4 rounds and adjust decreases for a slimmer or wider fit.
- Neckline and Front Band (Making time: 45–60 minutes)
Firstly, with the RS facing, join the yarn at the bottom corner of the front opening. Secondly, Row 1 setup: sc evenly up the front edge, around the back neck, and down the opposite front edge; turn. Moreover, Row 2: ch 1, work hdc across for a slightly thicker band that drapes beautifully; turn. Additionally, repeat for 5–10 rows depending on how bold you want the neckline; add 2–3 extra rows at the back neck only for a shawl-like shape by turning before the very bottom corners. Consequently, your neckline looks polished and frames the face elegantly.
- Button option: on one front band, work a row of evenly spaced buttonholes (ch 2, skip 2, hdc to next; size holes to your buttons).
- Edge tip: keep stitch counts consistent on both bands so the edges hang evenly.
- Hem and Edge Clean-Up (Making time: 20–30 minutes)
Firstly, turn the cardigan so the hem faces you. Secondly, Round 1: join yarn and sc evenly along the bottom edge for structure. Moreover, Round 2–3: work BLO sc for a neat, subtle rib that sits flat. Additionally, fasten off and weave in ends carefully along seams and band edges. Consequently, the cardigan gains a crisp finish that holds up to frequent wear. - Blocking and Final Touches (Making time: 20–30 minutes active, plus drying time)
Firstly, soak or steam-block according to your yarn’s fiber. Secondly, shape the shoulders so they “spill” gracefully beyond your natural shoulder line. Moreover, align the front bands and let them dry flat under a towel to prevent rippling. Additionally, once dry, sew on optional buttons and clip any stray ends. Consequently, your Honest Crochet Urban Spill Cardigan Wide Shoulder Pattern project looks professional and city-ready.
Basic Tips for a Smooth Make
Firstly, keep your tension relaxed to encourage drape; a tight hand will stiffen the fabric. Secondly, use stitch markers at the first and last stitches of each row to avoid edge creep. Moreover, count rows for each panel and match them so seaming remains easy. Additionally, weave ends as you go for a clean inside and faster finishing. Consequently, the final blocking will require minimal fuss.
- Yarn choice tip: Pick a yarn with good swing, like acrylic, bamboo blends, or soft cotton blends.
- Hook swap tip: if your fabric feels stiff, move up to a 6.5 mm hook; if it feels holey, move down to 5.5 mm.
Common Mistakes and Quick Fixes
Firstly, uneven edges happen when turning chains replace stitches inconsistently; therefore, always ch 1 for hdc and do not count it as a stitch. Secondly, tight seams can shorten the shoulder line; consequently, seams with a larger hook or a loose whipstitch. Moreover, floppy bands appear when stitch pickup is too generous; therefore, rip back and pick up fewer stitches per inch. Additionally, twisted sleeves occur when joining in the round carelessly; therefore, lay the sleeve flat and double-check orientation before joining. Finally, if the cardigan pulls at the upper back, add 1–2 in of width to the back panel next time.
Variations for Personal Style
Firstly, try a tonal color-block: back panel in a deep hue and fronts in a lighter shade. Secondly, add contrast ribbing by switching to a different color for cuffs, hem, and neckline band. Moreover, swap stitches to change texture: use dc for speed and drape, or use linen stitch (sc, ch 1, skip 1) for a subtle woven look. Additionally, add patch pockets by crocheting two rectangles (about 6–7 in wide × 7–8 in tall) and stitching them to the fronts 2–3 in above the hem. Consequently, your cardigan feels custom and looks boutique-level.
- Cropped version: reduce body length to 18–20 in and work a deeper hem rib for balance.
- Longline duster: extend body to 32–36 in, add side slits by leaving the last 3–4 in unseamed, and work extra rows on the band.
Neckline Notes and Sizing Adjustments
Firstly, if you want a wider neckline, pick up fewer stitches across the back neck to let it relax more. Secondly, for a closer neckline, pick up more stitches and add 2–3 decrease rows near the back neck (hdc2tog every 12–14 stitches). Moreover, taller makers may prefer an extra 2–3 inches in the back length to keep coverage balanced. Additionally, petite makers can remove 2–3 in in length and reduce sleeve length accordingly. Consequently, your cardigan will hang proportionally while retaining the wide-shoulder look.
Care and Wear
Firstly, wash according to your fiber; most acrylics can be machine-washed cold and laid flat to dry. Secondly, refresh the drape with a quick steam after laundering. Moreover, store folded rather than hung to prevent band stretching. Additionally, trim any pilling with a fabric shaver to keep the surface smooth. Consequently, your Urban Spill Cardigan stays fresh and stylish through many wears.
Quick Reference: Stitch Recipe
Firstly, choose hdc throughout for a consistent, beginner-friendly fabric. Secondly, add occasional BLO rows for texture without complexity. Moreover, keep edges to sc or BLO sc for structure. Additionally, keep the neckline band in hdc for a luxe feel. Consequently, the pieces assemble easily and look cohesive.
Time Budget Recap
Firstly, total active time for a medium size averages 6–9 hours, depending on pace. Secondly, schedule your make-up in short sessions to avoid hand strain. Moreover, remember that blocking transforms the drape, so plan drying time. Additionally, if you crochet loosely, expect slightly faster growth. Consequently, even as a beginner, you can finish this cardigan over a relaxed weekend.
- Swatch and plan: 20–30 minutes
- Back panel: 2–3 hours
- Front panels: 1.5–2.5 hours
- Shoulder seams: 15–25 minutes
- Side seams: 20–30 minutes
- Sleeves (each): 1–1.5 hours
- Neckline band: 45–60 minutes
- Hem and edge clean-up: 20–30 minutes
- Blocking and final touches: 20–30 minutes active
Friendly Wrap-Up with SEO in Mind
Firstly, the Honest Crochet Urban Spill Cardigan Wide Shoulder Pattern delivers an easy, flattering, and modern layer you’ll love to wear. Secondly, the wide-shoulder silhouette, the clean neckline band, and the relaxed open front make it a wardrobe hero for every season. Moreover, the beginner-friendly steps, the exact material guides, and the clear time estimates help you work confidently from start to finish. Additionally, with options for sleeves, length, texture, and color, you can customize the look to match your personal style. Consequently, your finished cardigan will feel soft, look elevated, and pair perfectly with jeans, dresses, and everything in between.