
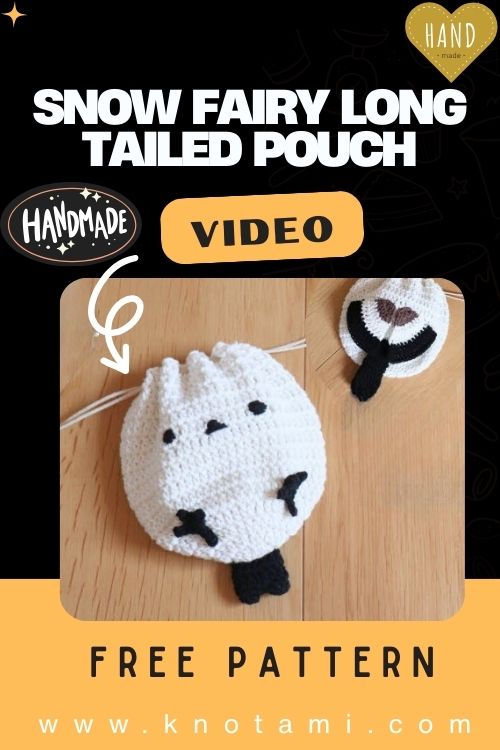
Welcome to this cozy crafting corner where we turn soft yarn into something truly magical. If you are looking for a project that combines functionality with absolute cuteness, you have come to the right place. Today, we are going to learn how to create a Snow Fairy Crochet Pouch. This design is inspired by the Shima Enaga, a tiny, fluffy bird from Hokkaido, Japan, often called the “snow fairy” because of its round, white appearance. By following this guide, you will be able to make a drawstring bag that looks exactly like this adorable little bird, complete with tiny wings, a tail, and even little feet.
Creating a Snow Fairy Crochet Pouch is a wonderful way to practice your stitches while making something useful. Whether you want to store your makeup, small tech gadgets, or even your spare yarn, this pouch is the perfect size. Furthermore, the round shape provides a satisfying 3D effect once you fill it with your belongings. Because the face is embroidered, you can give your snow fairy a unique expression, making every single pouch a one-of-a-kind creation. Let us dive into the details and get your crochet hooks ready for this delightful journey.
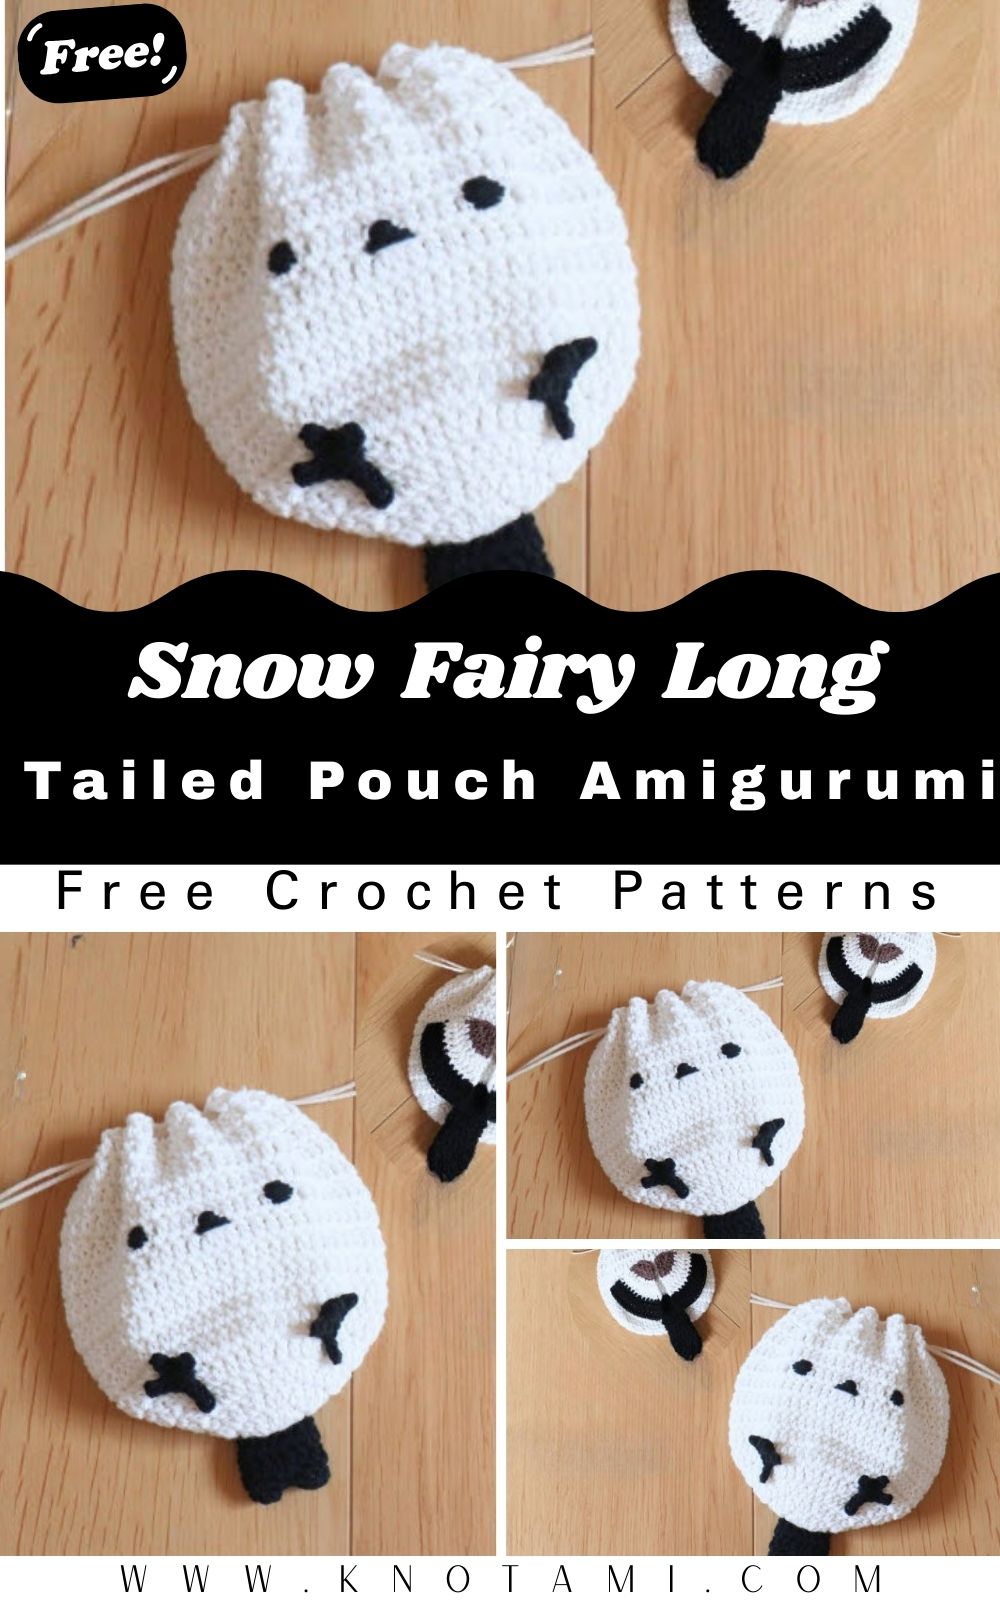
After watching the video above, you will notice that the beauty of the Snow Fairy Crochet Pouch lies in the small details. The way the wings wrap around the body and the tiny legs peek out from the bottom gives it a lifelike quality. Additionally, using cotton yarn ensures that the pouch remains durable and keeps its shape over time. Consequently, you will have a high-quality accessory that looks professional despite being handmade. Now, let us break down everything you need to know to start your own project.
Skill Level: Intermediate Beginner
The Snow Fairy Crochet Pouch is categorized as an intermediate beginner project. While the main body uses basic long stitches, the assembly of the wings and the double-circle tail requires a bit more focus. However, do not let that intimidate you. If you know how to make a magic ring and work in rounds, you will find this very manageable.
Tutor’s Suggestions for Success
I highly recommend using a high-quality cotton yarn for this project. Cotton provides excellent stitch definition, which is vital for seeing the roundness of the bird’s body. Also, make sure to keep your tension consistent. If your stitches are too loose, the stuffing or items inside might peek through. Conversely, if they are too tight, the pouch might feel stiff. Lastly, take your time with the embroidery. The eyes and beak are what truly bring the Snow Fairy Crochet Pouch to life.
Materials Needed
To create your very own Snow Fairy Crochet Pouch, gather the following supplies:
-
White Cotton Yarn: This is for the main body of the “snow fairy.”
-
Black Cotton Yarn: For the eyes, feet, and parts of the wings.
-
Brown Cotton Yarn: To add natural color to the wings and tail.
-
Crochet Hook: A 2.5mm or 3.0mm hook works best for this yarn weight.
-
Wax Cord: Two pieces, approximately 35cm each, for the drawstring.
-
Tapestry Needle: Essential for sewing the parts together.
-
Scissors: For trimming your ends.
Step by Step Guide to the Snow Fairy Crochet Pouch
Phase 1: Crafting the White Body
To begin your Snow Fairy Crochet Pouch, start with a magic ring using your white yarn.
-
Round 1: Chain 3 (counts as first stitch) and work 12 long stitches into the ring. Pull tight.
-
Round 2: Increase in every stitch. You should now have 24 stitches.
-
Round 3: Follow a pattern of one regular stitch and one increase. Total 36 stitches.
-
Round 4: Work two regular stitches then one increase. Total 48 stitches.
-
Round 5: Work three regular stitches then one increase. Total 60 stitches.
-
Rounds 6 to 14: Simply work one stitch in each stitch around. This builds the height of your Snow Fairy Crochet Pouch.
-
Round 15: This is the drawstring row. Work three stitches, chain one, skip one, work one stitch, chain one, skip one, then repeat.
Phase 2: The Tri-Color Wings
The wings use brown, white, and black yarn to mimic real feathers.
-
Start with brown yarn in a magic ring and work 4 long stitches.
-
In the next row, increase in every stitch to create a semi-circle.
-
Switch to white yarn and continue increasing on the edges to expand the width.
-
Finish with black yarn for the final two rows to give the wing that signature “fairy” look. Make two of these.
Phase 3: The Unique Tail and Feet
The tail of the Snow Fairy Crochet Pouch is made by joining two small circles and then working upwards to create a flat, wide feather shape. For the feet, you will create a small chain with “toes” by using slip stitches and small chain clusters. Always leave long tails of yarn for sewing.
Phase 4: Assembly and Embroidery
Now, use your black yarn to embroider two round eyes and a small triangular beak on the 10th row of the body. Next, sew the tail to the back and the wings to the sides. Finally, attach the feet to the bottom front so they peek out when the bird sits.
Where Can You Use This Pouch?
This Snow Fairy Crochet Pouch is not just a decorative item; it is incredibly versatile. You can use it as a “dice bag” for gaming nights or a “jewelry holder” for traveling. Because it is so soft, it is also perfect for carrying delicate items like earbuds or crystals. Moreover, it makes a fantastic gift for bird lovers or fans of Japanese culture. Imagine giving this as a birthday present; the recipient will surely be impressed by the handcrafted detail and the adorable “snow fairy” theme.
Tips and Tricks for a Perfect Finish
To make your Snow Fairy Crochet Pouch look its best, try these tips. First, when embroidering the eyes, split the yarn strands to make the stitches finer and smoother. Second, use a “ghost” stitch technique when sewing the wings so the black thread doesn’t show on the white body. Third, if you want the pouch to stand up on its own, you can place a small plastic disc at the bottom of the inside. Furthermore, light steam blocking can help the wings lay flat against the body for a more polished appearance.
Common Mistakes to Avoid
One frequent error when making the Snow Fairy Crochet Pouch is skipping the drawstring holes. If you forget Round 15, you will have nowhere to thread your cord. Another mistake is sewing the wings too low. If they are too low, the bird won’t look like it is “flying” or sitting properly. Additionally, be careful not to over-tighten the magic ring at the very start, or the base might pucker. Lastly, ensure you use the same brand of yarn for all colors to keep the thickness consistent.
Frequently Asked Questions
1. What is the best yarn for the Snow Fairy Crochet Pouch?
Cotton yarn is the best choice because it is sturdy and doesn’t pill as much as acrylic. This keeps the “snow fairy” looking clean and white.
2. Can I wash my crochet pouch?
Yes, but you should hand wash it in cool water and lay it flat to dry. This prevents the embroidered face from shifting or the wings from losing their shape.
3. How long does it take to finish?
For most crafters, the Snow Fairy Crochet Pouch takes about 3 to 5 hours from start to finish, including assembly.
4. Can I use safety eyes instead of embroidery?
Certainly! If you prefer a plastic look, 6mm safety eyes work well. However, embroidery is safer if the pouch is for a small child.
5. What size is the finished pouch?
Without the tail, the pouch is about 13cm tall. With the tail, it reaches approximately 15cm, making it a perfect palm-sized accessory.
Conclusion
In conclusion, crafting a Snow Fairy Crochet Pouch is a rewarding experience that results in a beautiful and functional piece of art. By following these steps, you have transformed simple materials into a charming character. Not only have you learned new assembly techniques, but you also now have a wonderful handmade item to show off or give away. Remember, practice makes perfect, so do not be afraid to experiment with different expressions for your snow fairy. Happy crocheting, and may your new pouch bring a bit of winter magic to your daily life!