
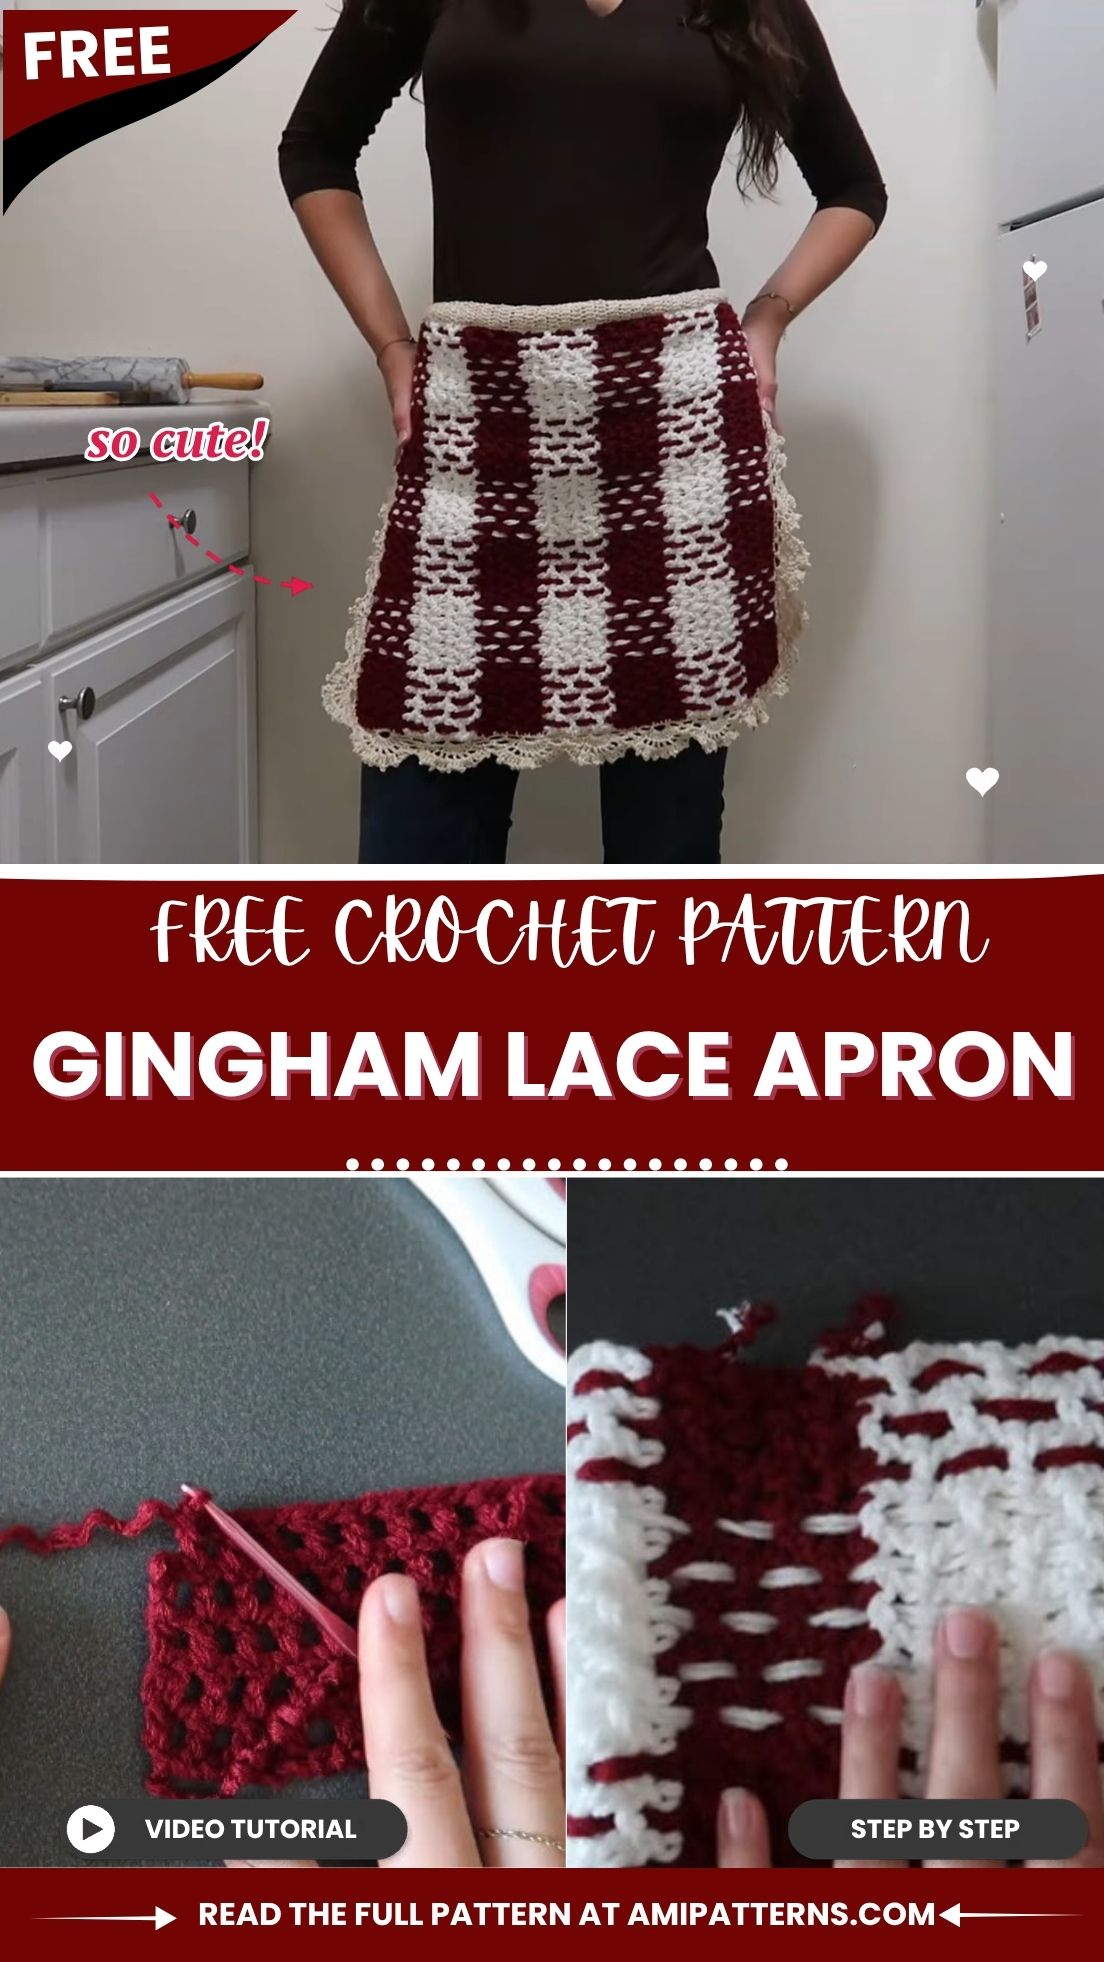
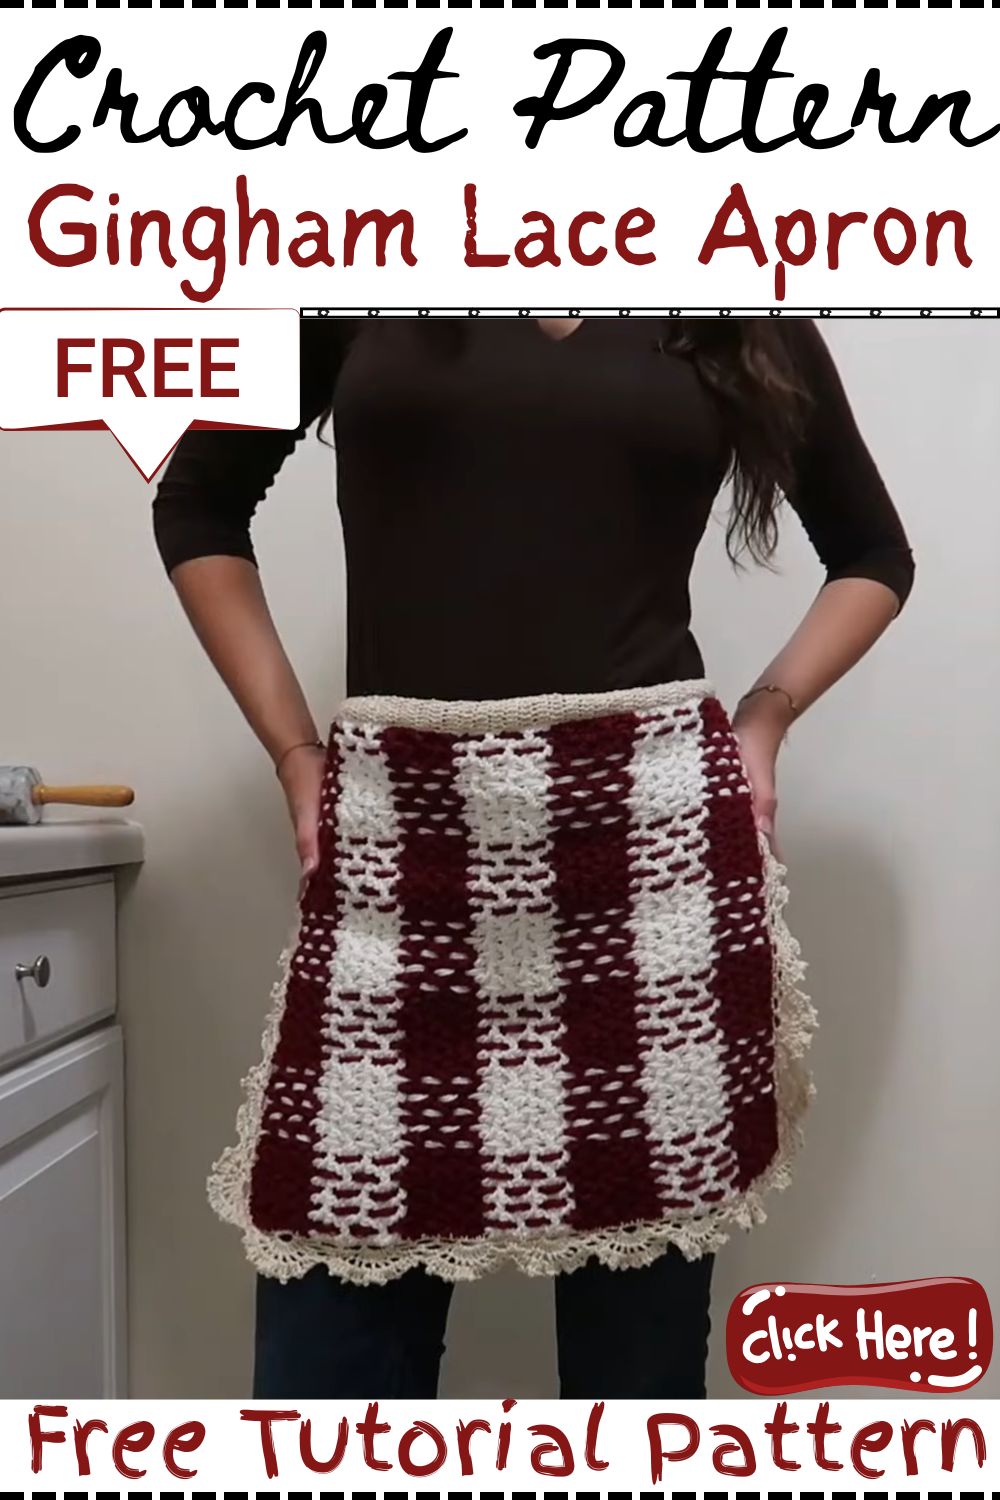
This crochet gingham lace apron brings old-fashioned kitchen charm into modern homes. Designed by Calluna Crochet, the high-waisted style mixes woven plaid texture with dainty scalloped edging for a timeless look.
Vintage lovers, cottagecore fans, and gift makers will all enjoy it. First, you build an open mesh panel. Next, you weave contrasting yarn through the spaces. Finally, you finish the edges with delicate cotton lace. Clear steps, sizing advice, weaving tips, and finishing details follow below, so every stage feels manageable for crocheters ready to move beyond basic starter projects.
Crochet Gingham Lace Apron Pattern and Key Features
Fillet mesh sits at the heart of this waist apron. That open grid of chains and double crochets forms square boxes, and two contrasting colours build the panel in blocks. After that, doubled yarn is woven through the boxes to create the plaid look. Three pieces come together at the end: the body, the tie strap, and the lace border.
Key features:
- Woven gingham texture in two contrasting colours
- High-waisted shape with a strap that ties into a bow at the back
- Scalloped lace border with tiny picot loop tops
- Fine cotton lace and tie for a dainty, non-stretchy finish
Skill Level for This Crochet Gingham Lace Apron
Intermediate is the right label for this crochet gingham lace apron. The mesh rows use only chains and double crochet, so the body moves along quickly. The challenge comes later, because the weaving stage rewards patience and the four-row lace edging needs careful stitch placement. Crocheters who are comfortable with turning chains, working into chain spaces, and building shells will feel right at home. Newer makers can still succeed, as long as they practice the lace rows on a small swatch first.
Materials for the Crochet Gingham Lace Apron
- Main body: Weight 4 medium yarn in two contrasting colors, such as red and white
- Lace and tie: Weight 2 fine cotton yarn
- Hooks: 4.5 mm hook for the apron body, plus a smaller hook suited to Weight 2 yarn for the lace and tie strap
- Extras: Darning needle (or crochet hook) for weaving, scissors, and an optional sewing machine with thread for joining the pieces
The pattern does not give the smaller hook size or the yardage, so the yarn label is your best guide for hook choice. It also helps to buy extra of both body colours, since the weaving uses doubled strips. Cotton suits the lace and tie because it does not stretch. As a result, the scallops stay neat, and the waistband stays steady.
Crochet Gingham Lace Apron Size and Sizing Options
No fixed measurements are given, because the size depends on the foundation chain and the number of rows. The example chain is 66, plus 2 turning chains, and it reaches from the waist down to above the knee.
Easy ways to adjust the fit:
- Length: Start with a longer or shorter even-numbered chain.
- Width: Keep adding colour blocks until the panel covers the front of the waist.
- Waist tie: Work the strap until it wraps around the waist and ties into a bow at the back.
Stitches and Abbreviations
Standard US crochet terms apply throughout.
- ch: chain
- sc: single crochet
- dc: double crochet
- sl st: slip stitch
- Picot loop: chain 4, then slip stitch back into the last double crochet
- Skip: pass over the stated stitches without working into them
Gauge Information
Gauge is not listed for this crochet gingham lace apron. Since aprons are not fitted garments, exact numbers matter less than overall proportions. Even so, swatching a few mesh rows is worthwhile. The open spaces must be roomy enough for a darning needle carrying doubled yarn, and a swatch shows quickly whether your tension needs loosening.
Tips Before Starting Your Crochet Gingham Lace Apron
- Keep the chain-1 spaces open and even, because they become the weaving channels.
- Count the rows in every colour block, since consistency makes the gingham read clearly.
- Cut the doubled yarn strips slightly longer than needed. Trimming is easier than starting over.
- Choose cotton for the tie and lace so the waistband holds its shape.
- Use a blunt darning needle so the stitches do not split during weaving.
Step-by-Step Crochet Gingham Lace Apron Instructions
Step 1: Crochet the Base Grid (Fillet Mesh Panel)
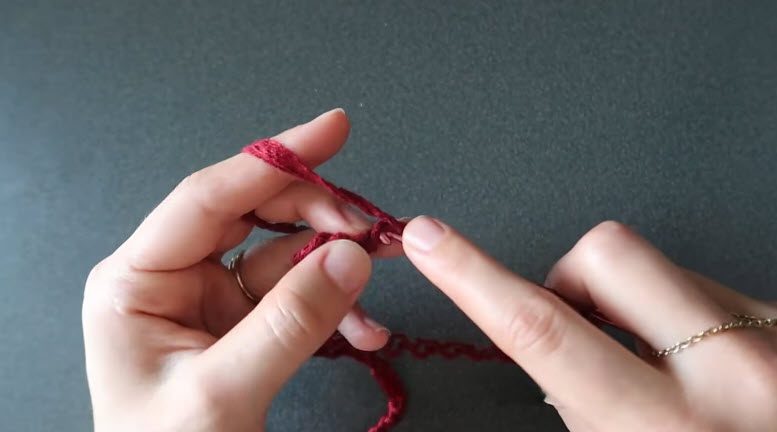
Foundation: Chain any even number to reach the length you want, from the waist down to above the knee. The example uses chain 66. Then add 2 extra turning chains.
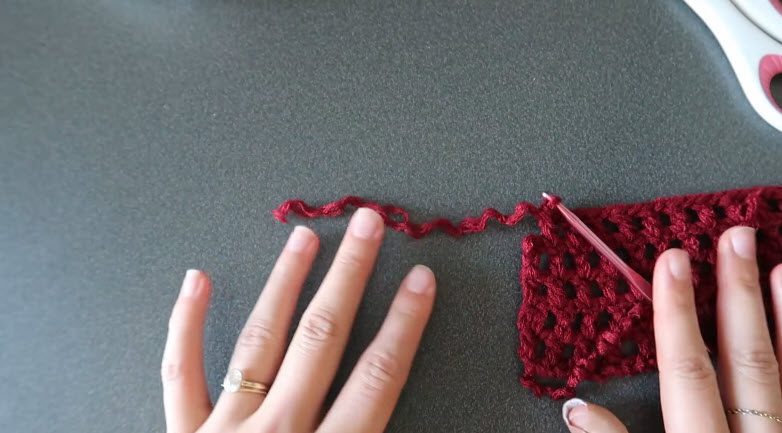
Row 1: Double crochet into the 3rd chain from the hook. Chain 1, skip 1 stitch, then double crochet in the next stitch. Repeat to the end of the row.
Row 2: Chain 2 and turn. Double crochet in the first double crochet, chain 1, then double crochet in the next double crochet. Repeat across. As you continue, each row stacks square boxes on top of the last.Colour block: Work 5 rows in Colour A, then switch to Colour B. Keep alternating every 5 rows until the panel is wide enough to cover the front of the waist.
Step 2: Weave the Gingham Pattern
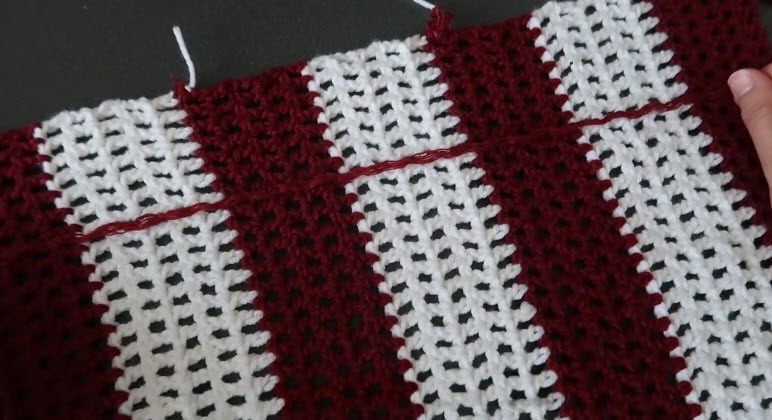
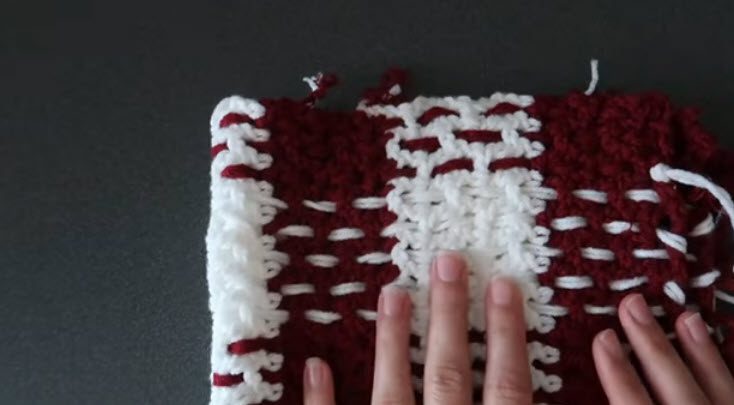
Turn the panel vertically so the rows run top to bottom. Colour blocks now appear as vertical stripes. Next, measure yarn strips, doubled up for thickness, long enough to span the length of 5 rows.
Thread the darning needle with the doubled yarn and weave horizontally through the mesh grid, passing under and over the grid spaces. Then alternate colours every 5 rows to build the classic woven gingham texture.
Step 3: Make the Waist Tie Strap
Using the Weight 2 yarn and the smaller hook, chain 9, or any number that gives the strap width you want. Then work double crochet rows until the strap is long enough to wrap around the waist and tie into a bow behind the back.
Assembly: Align the top edge of the gingham panel with the middle of the tie strap, overlapping slightly. After that, sew them together by machine or by hand.
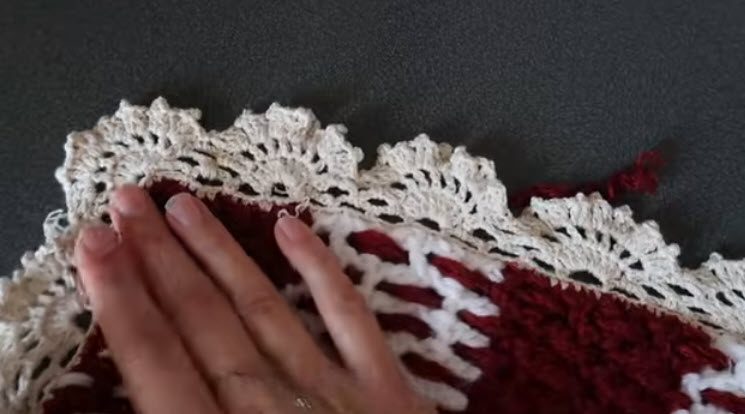
Step 4: Add the Scalloped Lace Edging
Foundation round: Join the Weight 2 yarn at a corner. Work single crochets evenly around the entire apron perimeter.
Row 1 (chain arches): Chain 5, skip 3 stitches, then single crochet into the 4th stitch. Repeat around.
Row 2 (shell base): In alternating chain-5 spaces, work 8 double crochets to form rainbow shells. Then anchor each side with a single crochet into the adjacent chain loops.
Row 3 (expanded shells): Work a double crochet plus chain 1 into each of the 8 double crochets from the previous row. This spreads the shells open.
Row 4 (picot loop edging): In each chain-1 space of the shell, work 3 double crochets, chain 4, and slip stitch back into the last double crochet to form tiny decorative loop tops. Chain 2 between spaces.
Step 5: Finish the Crochet Apron
Fasten off and weave in all loose ends. Then gently block or steam the apron if needed to flatten the lace edging.
How the Crochet Gingham Lace Apron Comes Together
Three parts make up this crochet gingham lace apron: the woven panel, the tie strap, and the lace border. First, overlap the panel’s top edge with the middle of the strap and sew them together. Once they are joined, the lace foundation round travels around the full outer edge. This way, every side ends up framed by the same scalloped border.
Customisation Options for the Crochet Gingham Lace Colour
- Color pairs: Red and white is the classic choice, but any two contrasting colours create the gingham effect.
- Length: Change the starting chain for a short café style or a longer cut above the knee.
- Strap width: Start with more or fewer than 9 chains for a slimmer or wider waistband.
- Lace shade: Cream or white cotton gives soft contrast against bold body colours.
Bonus: Gift and Kitchen Set Ideas
Coordinating tea towels or pot holders in the same two body colours turn this project into a full kitchen set. For gifting, fold the finished apron neatly and wrap the long strap around it once, then tie it into a small bow. Add a few baked goods alongside, and the present feels thoughtful and personal.
Common Mistakes and Troubleshooting
Uneven mesh boxes. Inconsistent chain-1 spaces cause this problem, so keep your tension steady across every row.
Difficult weaving. Tight stitches block the needle. In that case, try a slightly larger hook for the panel or loosen the tension on the chain spaces.
Uneven gingham blocks. Count the rows before eachcolourr change. Five rows per block keeps the stripes crisp.
Flaring or ruffled lace edge. Uneven single crochet spacing around the perimeter usually causes it. Space the stitches evenly and give the corners extra attention.
Crowded or loose shells. Confirm that each shell holds exactly 8 double crochets and that the arches were worked over consistent stitch counts.
Finishing and Care for Your Crochet Gingham Lace Apron
Weave in every end with the darning needle so nothing pokes through the mesh. Then steam or block the lace of your crochet gingham lace apron gently so the scallops lie flat and the picot loops stand out. Cotton lace responds well to light steam, but direct heat should never touch the stitches. When it needs cleaning, wash it gently, reshape it while damp, and follow the care instructions printed on the yarn labels.
FAQs About the Crochet Gingham Lace Apron
Is this crochet gingham lace apron beginner-friendly?
It is rated intermediate. The mesh rows are simple, but the weaving and the four-row lace edging call for some experience.
Which yarn works best for the lace and tie?
Weight 2 fine cotton is recommended because it gives a dainty, non-stretchy finish.
How can I change the size of the apron?
Adjust the foundation chain for length, add or remove 5-row blocks for width, and extend the strap as needed.
Does the panel need sewing to the strap?
Yes. The pattern calls for sewing by machine or by hand, with the panel’s top edge overlapping the strap’s middle.
A Little Vintage for Your Kitchen
Woven plaid, soft cotton lace, and a bow at the back give this apron real vintage appeal. To begin, pick two contrasting yarns, work a quick swatch, and start the mesh grid. Once the panel is done, the weaving and scalloped edging turn it into something special. Then share your finished crochet gingham lace apron with fellow makers, and keep browsing more crochet patterns for your next project.