How to Free Crochet Christmas Tree for Holiday Decor
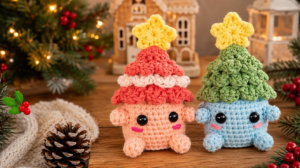
If you have never made a stuffed piece before, this free crochet Christmas tree is a very good place to begin. It uses just one basic stitch and one simple increase, so you can work the whole thing in a single piece. In the end, you get a firm green cone that looks right at home on a shelf, in a wreath, or on a real tree.
Along the way, you will also practice skills that show up in almost every amigurumi pattern. For example, you will start a magic ring, crochet in a spiral, and add stitches evenly. So take your time with each part, and the tree will come together smoothly.

Why This Free Crochet Christmas Tree Is a Great First Project
A cone gets wider as you work upward from the tip, so you add stitches at regular points. Because each increase has a clear purpose, the pattern is easier to understand than a flat practice square. You can also watch the shape grow, which helps you spot a mistake early.
Since the tree is worked in the round, there are no straight edges to keep neat and no turning chains to track. Instead, you simply keep stitching in one direction. As a result, even a complete beginner can finish this little tree in one sitting.
Crochet Terms Used in This Pattern
All terms here are standard US crochet terms. However, if you have used a British pattern before, keep in mind that the same stitch has a different name there.
- sc (single crochet): the short basic stitch used for the whole tree. UK patterns call this stitch a double crochet.
- inc (increase): two single crochets worked into the same stitch, which adds one stitch to the round.
- st / sts: stitch / stitches.
- MR (magic ring): an adjustable loop that lets you start a round with a tightly closed center.
- sl st (slip stitch): a flat, very short stitch.
- * *: repeat the steps between the asterisks the number of times given.
What You Need for the Free Crochet Christmas Tree
- Yarn: any green yarn will do. A smooth, medium-weight yarn makes the stitches easy to see and count. You only need a small amount, so leftovers are fine. The exact yardage depends on your yarn and how tall you make the tree.
- Crochet hook: stuffed projects look best when the fabric is dense enough to hide the filling. For that reason, many crocheters pick a hook one or two sizes smaller than the yarn label suggests. Treat the label as a starting point, and test a few rounds before you commit.
- Stuffing: polyester fiberfill.
- Stitch marker: a safety pin or a short piece of contrasting yarn works too.
- Yarn needle and scissors.
Your finished size will depend on your yarn, hook, and tension, so no single measurement applies to every tree. Still, if you want a taller one, you can add rounds, as explained below the pattern.
Basic Skills to Learn Before You Start
Single Crochet
First, slide your hook under both loops at the top of the next stitch. Next, yarn over and pull a loop through, which leaves two loops on the hook. Then yarn over again and pull through both loops. One loop stays on the hook, and you have made one single crochet.
Crocheting in a Spiral
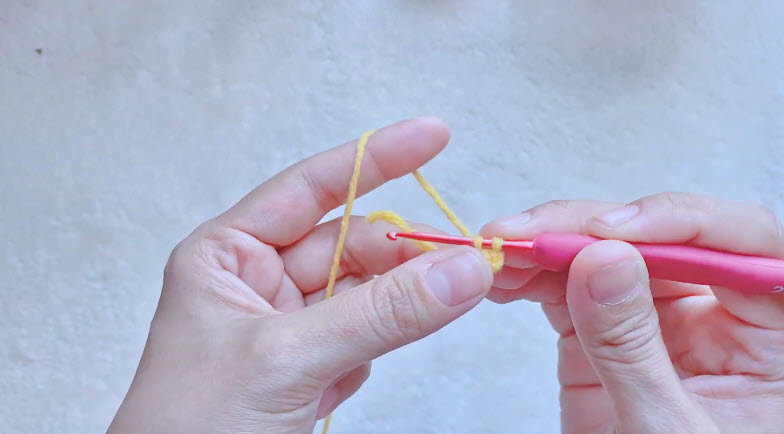
You do not join rounds or turn your work here. Rather, you just keep going around. However, nothing marks where a round ends, so a stitch marker becomes your guide. Place it in the first stitch of each round, and then move it up as you begin the next round.
Increasing Evenly
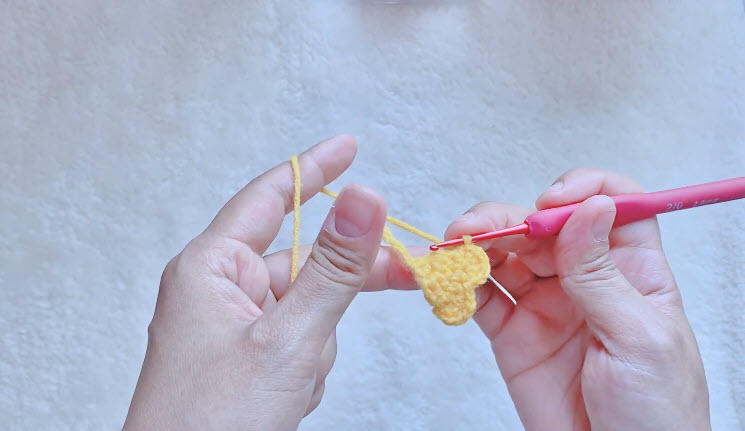
An increase is simply two single crochets in one stitch. In this pattern, the increases are spaced out around each round. Consequently, the cone stays smooth and does not bulge on one side.

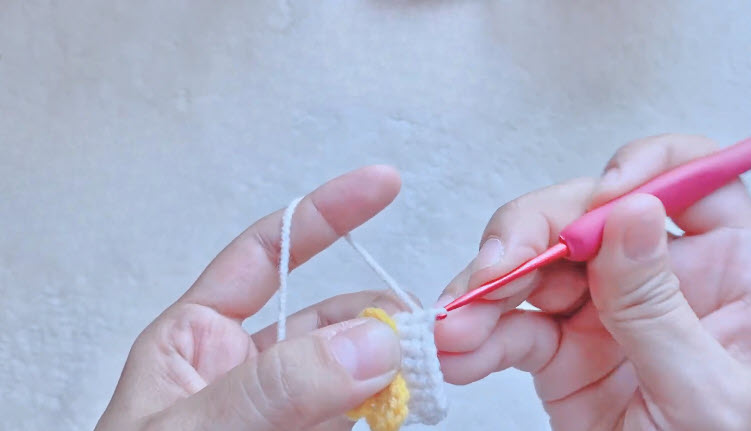
Starting the Free Crochet Christmas Tree With a Magic Ring
The magic ring leaves the tip of your tree closed, with no hole at all.
- Wrap the yarn around two fingers to make a loop. Let the tail hang toward you, with the working yarn (the strand attached to the ball) behind.
- Next, put your hook through the loop, yarn over with the working strand, and pull up a loop.
- Then yarn over once more and pull through the loop on your hook. This locks the ring in place and does not count as a stitch.
- After that, crochet your first round into the ring, working over the ring and the tail together.
- Finally, once the round is finished, pull the tail firmly. The ring closes like a drawstring.
If the center will not tighten, you may be pulling the wrong strand. In that case, tug each one gently until the ring closes.
The Free Crochet Christmas Tree Pattern
Work every round in a continuous spiral, and place your marker in the first stitch of each round. The number in parentheses at the end of each round is the stitch count you should have when you finish it.
- Round 1: 6 sc in a magic ring. Pull the tail to close. (6)
- Round 2: *sc in next st, inc in next st*, repeat 3 times. (9)
- Round 3: sc in each st around. (9)
- Round 4: *sc in next 2 sts, inc in next st*, repeat 3 times. (12)
- Round 5: sc in each st around. (12)
- Round 6: *sc in next 3 sts, inc in next st*, repeat 3 times. (15)
- Round 7: sc in each st around. (15)
- Round 8: *sc in next 4 sts, inc in next st*, repeat 3 times. (18)
- Round 9: sc in each st around. (18)
- Round 10: *sc in next 5 sts, inc in next st*, repeat 3 times. (21)
- Round 11: sc in each st around. (21)
The rhythm is easy to remember. After the first round, every even-numbered round adds three stitches, and the plain round after it lets the shape settle. Meanwhile, the run of plain stitches before each increase grows by one each time. For a taller, fuller tree, keep that same pattern going for a few more rounds before you finish.

Closing and Stuffing Your Crochet Christmas Tree
- After Round 11, cut the yarn and leave a tail about 8 inches long. Then pull the last loop all the way through.
- Before you close the cone, stuff it. Start with small pieces at the tip and work down toward the opening. A firmly stuffed tree holds its shape and stands better than a soft one.
- Next, thread the tail onto your yarn needle and pass it through the front loop of every stitch around the opening. Go in the same direction as your rounds.
- Pull the tail to gather the opening shut. However, if the cone still feels soft, add a little more stuffing before you pull tight.
- Then take the needle through the center of the base and out along the side, and trim the tail close to the fabric.
- Lastly, weave in the starting tail at the tip in the same way.

Display and Gifting Ideas
Once the tree is finished, a few simple touches can turn it into a decoration or a small gift.
- Make it an ornament: chain a length you like, join the ends with a slip stitch, and sew the loop to the tip so the tree can hang.
- Make a small group: work a few trees in different shades of green, or add a couple of extra rounds for height. Then set them together as a little forest.
- Tuck it into a wreath or gift wrap: a hanging loop makes it easy to tie onto a package.
- Add a little color: use a contrasting yarn and a yarn needle to stitch tiny French knots. Bring the needle up where you want the knot, wrap the yarn around the needle twice, and push the needle back down right beside the starting point.
If the tree will go to a young child, skip beads and other small add-ons, since they can come loose.
Bonus: Care Tips to Keep Your Crochet Christmas Tree Looking Fresh
A handmade tree can stay pretty for many holiday seasons, as long as you treat it gently. For instance, spot clean it with a damp cloth and a drop of mild soap instead of soaking the whole piece. Water can soak into the stuffing and take a long time to dry.
After the holidays, store the tree in a breathable cotton bag or a cardboard box. In contrast, a sealed plastic bin can trap moisture and leave the yarn smelling stale. Also, keep it away from direct sunlight, because strong light can fade green yarn over time.

Common Beginner Mistakes
The cone leans to one side. When all the increases land in the same place, the shape pulls over. To fix this, count your stitches at the end of each round and space the increases evenly.
The stitch count is wrong. Spirals make it easy to skip or double a stitch. Therefore, count after every round. If the number is off, undo back to the last correct round instead of hoping it will even out.
Stuffing shows through the stitches. Your fabric is too loose. Try a smaller hook, and keep your tension snug without forcing the hook through.
The hook splits the yarn. Make sure you go under both loops at the top of each stitch. Also, do not let your working loop slide too far back on the hook.
Troubleshooting
- A hole at the tip: pull the magic ring tail more firmly. If the ring has loosened completely, redo Round 1 and secure the tail well.
- The tree will not stand straight: add more stuffing, since soft areas are the usual cause.
- You lost your place: find the stitch marker first. If it has fallen out, look at where the last round’s increases sit to locate the start of the round.
Tips for Neater Stitches
- Move the stitch marker at the start of each round, not after.
- Let the yarn feed evenly through your fingers so every stitch ends up the same size.
- Count every round, even when the work feels easy.
- Add stuffing a little at a time as you near the end, instead of waiting until the opening is almost closed.
More Christmas Crochet Ideas to Try Next
Once you finish this tree, you may want to keep the holiday spirit going. For a pocket-sized version, try the crochet Christmas tree keychain. If you like a bit of personality, the festive tree amigurumi and the winter tree doll are fun follow-ups. Likewise, the crochet Christmas snowman and the holiday candle amigurumi look lovely beside your tree on a mantel.
Frequently Asked Questions
What yarn is best for a free crochet Christmas tree?
Choose a smooth, medium-weight yarn in a mid-tone green. It shows each stitch clearly. By comparison, very dark or fuzzy yarn makes counting much harder.
Can I make a bigger crochet Christmas tree?
Yes. Use thicker yarn with a larger hook, or continue the same increase rhythm for more rounds. Either way, the shape stays the same and only the size changes.
Do I have to start with a magic ring?
No. If the ring is frustrating, chain 2 and work your first round into the first chain. The tip will have a small opening, which you can close with the tail afterward.
Why do I need a stitch marker?
A spiral has no visible end to each round. For this reason, the marker is the most reliable way to know where a round begins.
Your Little Green Tree Is Ready to Shine
You now have a finished tree and a set of skills for many other projects. The magic ring, the single crochet, and the steady increase turn up in countless patterns, so they will feel familiar the next time you meet them. So set your tree somewhere you can see it, and enjoy having made it yourself.