Tiny Crochet Bat Amigurumi Pattern With Poseable Wings
A single magic ring grows into a round little head, and a second ball grows right out of it for the body. That’s how this tiny crochet bat amigurumi pattern with poseable wings begins, before flat, wireable wings are added so your bat can hold any pose.
The head and body are worked as one continuous spiral, followed by eye placement, ears and a pair of flat wings. Along the way, you’ll find a practical fix for each tricky spot: the neck join, wing symmetry and ear placement.

Pattern Overview
The bat has five pieces: a head and body worked as one continuous piece, two flat wings, and two small ears. The head starts with a magic ring and grows into a ball. The work then narrows at the neck and widens again for the body, which gives a classic peanut shape with no seam between head and body. The safety eyes go in before the head closes, the wings are worked flat in rows and can be wired for posing, and the ears are tacked on last.
- Size: Roughly 4–5 inches with DK yarn, or 6–7 inches with worsted, depending on your tension
- Time: About 1.5–2 hours for an experienced maker, a bit longer for a first attempt
Materials
- Worsted or DK yarn in your bat color. Blue, as in the sample, looks playful, while dark purple, black or charcoal give a classic Halloween look.
- A small amount of contrast yarn for wing lining or belly detail (optional)
- A hook one to two sizes smaller than your yarn label suggests: around 3.0–3.5 mm for DK or 4.0 mm for worsted
- A pair of 6–9 mm safety eyes, sized to the head
- Polyester fiberfill
- Yarn needle, stitch marker and pins
- Optional: thin craft wire or two pipe cleaners for poseable wings
Smooth, tightly plied yarn gives the cleanest stitches on a small amigurumi and hides gaps better than fuzzy yarn. Cotton-acrylic blends hold their shape well for stuffed pieces this size. Swatch a few rounds first, and go down a hook size if you can see stuffing through the stitches.
Abbreviations
- MR – magic ring
- ch – chain
- sc – single crochet
- inc – increase (2 sc in one stitch)
- dec – decrease (invisible or standard sc2tog)
- sl st – slip stitch
- st(s) – stitch(es)
- FO – fasten off
Before You Start
The head and body are worked in a continuous spiral, so a stitch marker at the start of each round is essential. The wings are worked in rows with turning chains, which is a different rhythm, so slow down there if you usually work only in spirals.
Bats look cutest with their eyes fairly close together and slightly toward the upper middle of the head. “Fairly close” depends on how wide your rounds turn out, so lay the eyes against your actual piece before fixing them.
Watch the Video Tutorial
The video shows the exact stitch counts for the head, body, wings and ears. Keep it open as you follow the steps below.
Step-by-Step Instructions
Step 1: Start the Head With a Magic Ring
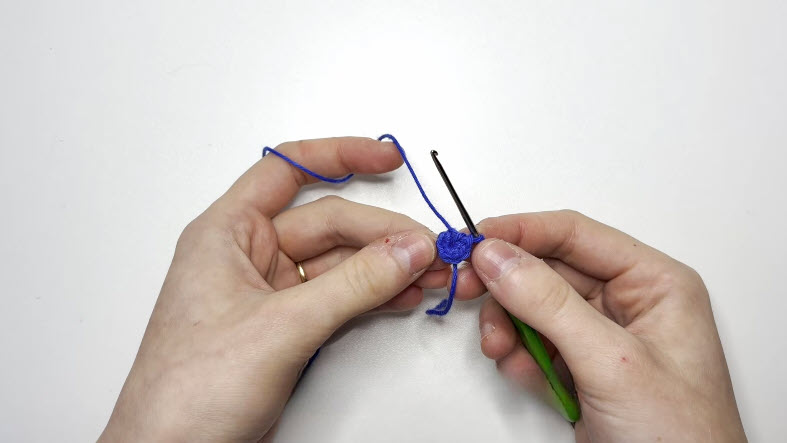
Make a magic ring, work the first round of sc into it, and pull the tail to close it tight. Place your stitch marker.
Step 2: Work the Increase Rounds
Increase evenly for the next few rounds. At this stage the piece stays flat, like a disc. That’s normal, because increase rounds widen the circle.

Step 3: Shape the Head Into a Ball
Once the circle is wide enough, stop increasing and work even rounds. This is what makes the edge curve up into a dome. Work in a continuous spiral without twisting the piece, so the rounds don’t shift off-center.
Step 4: Insert the Safety Eyes
While the head is at its widest point, and before you start decreasing, place the safety eyes between two stitches, the same distance from the center front on each side. Hold the head up and compare the height and spacing from directly in front before snapping on the washers. Small adjustments now save you from a crooked face later.

Step 5: Decrease to the Neck, Then Grow the Body
Decrease evenly to narrow the bottom of the head, stuffing it firmly as the opening gets smaller. Don’t close it. Instead, keep going from the narrow neck and increase again to grow a second ball for the body. Because the body grows straight out of the head, there’s no seam at the neck.

Work even rounds for the body, then decrease to close, stuffing as you go.
Tip: Before you close the last round, gently squeeze the head and body. If either feels soft or lopsided, add a little more stuffing. It’s much harder to fix the shape after the opening is closed.

Step 6: Crochet the Wings
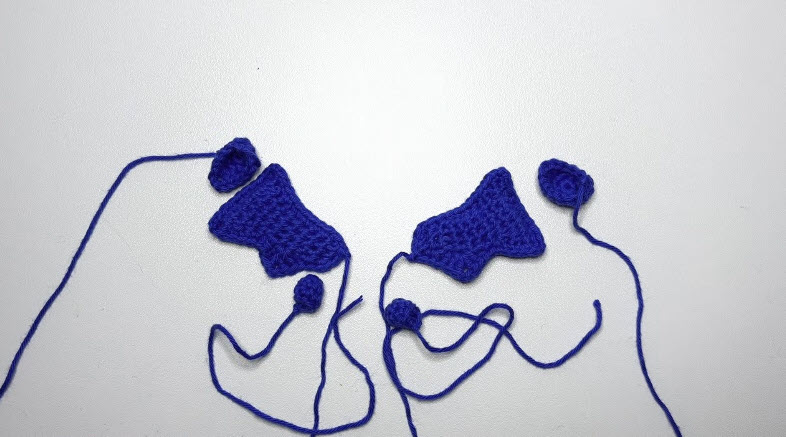
Starting from a foundation chain, work each wing flat in rows, increasing along one edge to create the curved wing shape. Keep the yarn tensioned over your finger for even stitch height.
Stitch check: Count your stitches at the end of every row on both wings. Flat pieces worked separately are the easiest place for two “matching” pieces to drift apart in size.

Step 7: Make the Second Wing and the Ears
Make a second wing with exactly the same row counts, plus two small pointed ears worked from a tiny magic ring or a short chain. Leave long tails on all four pieces for sewing.
Step 8: Make the Wings Poseable (Optional)
A single flat wing has no inside to hide wire, so choose one of these methods:
- Edge wire: Lay a length of thin craft wire along the top edge of the wing on the back side, and whip stitch over it with matching yarn so it’s fully covered.
- Double-layer wing: Make two identical pieces for each wing, sandwich a bent pipe cleaner between them, and sc or whip stitch around the edge to close.
Fold the wire ends back on themselves so no sharp tips can poke through. Now the wings can be bent spread wide, folded in, or wrapped around the body Dracula-style.
Step 9: Attach the Ears and Wings
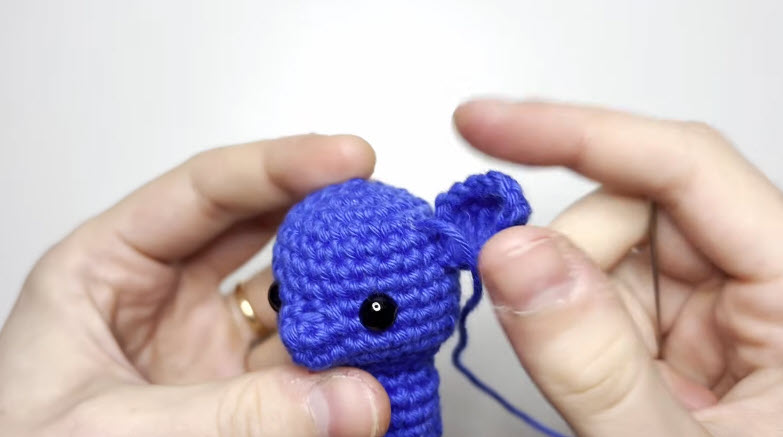
Pin the ears to the top of the head first, checking that they sit level and the same distance apart before sewing them on. Then pin the wings to the sides of the body and make sure both extend at matching angles before stitching them down. Attaching the wings last lets you check the whole silhouette first.
For a finishing touch, embroider a tiny nose or mouth in black thread just below and between the eyes. Keep it minimal, because bats look cutest with a simple face.
Keeping the Pairs Even
The bat’s whole silhouette depends on two wings and two ears matching each other, so uneven shaping is the biggest risk to a clean finish. The fix is a habit rather than a trick: lay both pieces of a pair side by side every few rows and compare them. Tension shifts from row to row even for experienced crocheters. Catching a drift after three rows takes thirty seconds, while catching it at the end means frogging finished work.
Common Mistakes
- Losing the round marker, so a spiral seam climbs visibly up the head
- Locking the safety eyes before checking symmetry
- Letting the two wings drift to different row counts
- Overstuffing the head until gaps open around the eye posts
- Sewing ears on without pinning first, so one sits higher
Troubleshooting
- A lumpy head: The stuffing is uneven. Pull out small bits and redistribute them rather than adding more on top.
- A curling wing: The increases along the edge are uneven. Frog back to where the row counts differ, which is faster than trying to block it flat.
- Uneven ears: Unpick them and re-pin. It’s easier than hiding the difference with extra stitches.
Size and Color Ideas
To make a bigger bat, use a heavier yarn and larger hook with the same counts. For a keychain-sized bat, use fingering or sport weight with a smaller hook, and embroider the eyes, since tiny heads may not fit standard safety eye backs.
A solid black or dark purple bat reads as classic Halloween. A two-tone bat, with a dark body and gray or tan wing lining, adds interest without changing the construction. Metallic or variegated yarn gives the wings extra dimension, since they’re the largest flat surface.
Spooky Display Ideas
With poseable wings, this little bat can perch almost anywhere for Halloween. Here are a few ideas.
- Hanging upside down: Sew a thread loop to the bottom of the body and hang it from a bare branch in a vase, just like a real bat.
- Pumpkin perch: Bend the wings wide and set the bat on top of a small pumpkin by the front door.
- Glowing jar: Place the bat in a glass jar with a string of warm fairy lights for a spooky night-light.
- Candy bowl guard: Wrap the wings around the rim of a trick-or-treat bowl.
- Bat colony: Make three in different sizes and hang them at staggered heights in a window or doorway.
For more characters with a mischievous streak, try the crochet goblin doll. The penguin amigurumi and the tiny turtle use the same round shaping skills, and the octopus amigurumi is another fun, quick make.
Finishing and Care
Weave all tails through the inside of the stitches rather than trimming them close to the surface. If the wings don’t lie quite flat, hold a steam iron a few inches away without pressing directly on the yarn. Skip the steam if you used wire inside. Hand wash in cool water only if needed, and lay the bat flat to dry, since a wet stuffed piece can stretch under its own weight.
FAQs
Do I need safety eyes, or can I embroider them?
Either works. Safety eyes look neater and are quicker, while embroidered eyes are safer for tiny versions or homes with young children. With safety eyes or wire, this bat is best for older kids and adults.
Why do my two wings keep coming out different sizes?
Almost always because the stitch or row counts drifted. Count at the end of every row on both wings before moving on.
Can I make the bat without wiring the wings?
Yes. The wings still hold a general shape, but they won’t bend into a custom pose without wire or pipe cleaners.
What yarn weight gives the best detail?
DK or worsted on a slightly smaller hook than recommended gives tight, clean stitches without stuffing showing through.
Ready to Hang Around This Halloween
One continuous peanut body, two matching wings and a pair of pointy ears are all it takes to bring this little bat to life. Bend its wings into a pose, give it a spot on the shelf, and let it keep watch all October long. Once you’ve made one, a whole colony is only a few evenings away.