
Try this crochet bald eagle keychain amigurumi pattern quick beginner steps, tiny wings, white head, and a neat keyring finish for gifts.
Want a quick mini project that looks impressive but stays simple? This tiny bald eagle keychain is fast, beginner-friendly, and fun to customize. It’s ideal for easy crochet patterns for beginners and a clear amigurumi keychain tutorial too.
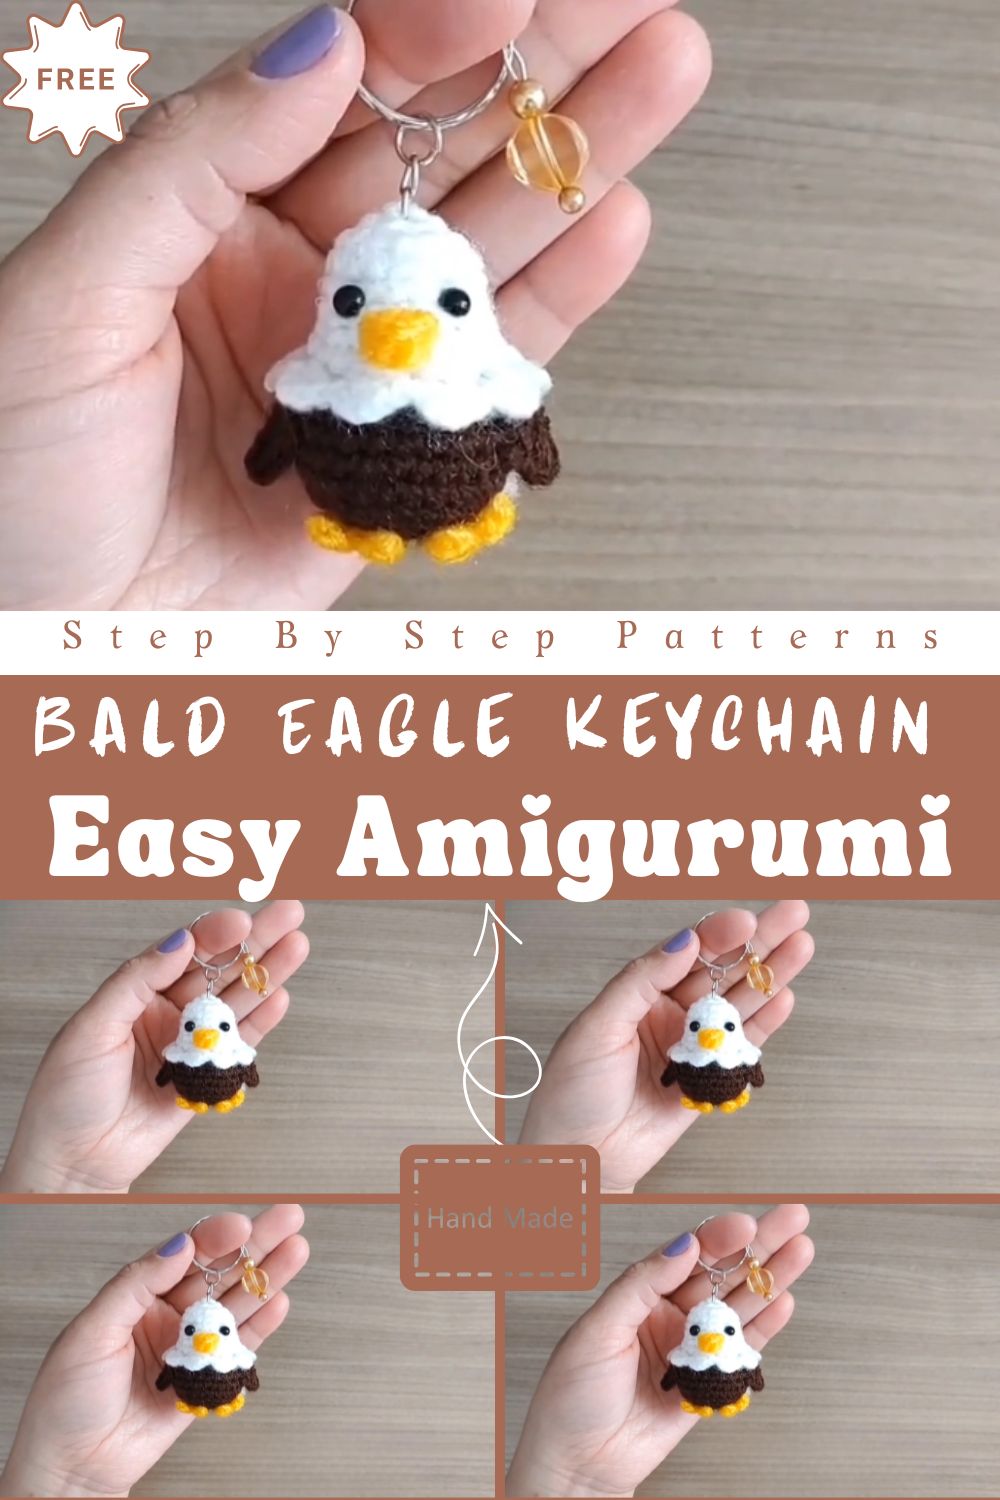
This cute bird is a simple, round crochet pattern with easy add-ons, so you won’t get stuck on complicated shaping. If you’ve wanted a crochet eagle pattern keychain that actually looks like a bald eagle, the white head and yellow beak do the job instantly. The stitches are beginner-safe, making it a true beginner-friendly amigurumi. It’s also great for crochet gift ideas when you need something small, handmade, and meaningful.
Skill Level
Beginner.
You should be comfortable with:
- Crocheting in the round (spiral)
- Single crochet, increases, and decreases
- Sewing small parts (basic assembly)
If you like learning visually, the YouTube video in the reference link is a helpful guide for seeing the piece come together and checking your part placement. Use it as a companion to the written steps below.
Materials
- Yarn:
- Brown (body)
- White (head)
- Yellow (beak + feet)
- A small amount of black (eyes) if not using safety eyes
- Stuffing: polyfill or scrap yarn ends (for a firm mini)
For a classic bald eagle look, choose a medium brown and bright white so the color blocks read clearly even at keychain size.
Hook Sizes
- 2.5 mm to 3.5 mm (choose the smallest size that still feels comfortable)
- Smaller hook = tighter stitches = stuffing won’t show
Other Supplies
- Keyring or lobster clasp
- Stitch marker (or a piece of contrasting yarn)
- Yarn needle (tapestry needle)
- Scissors
- Optional: Safety eyes (6–8 mm for a mini)
- Optional: Small jump ring for extra-strong keychain attachment
Key Abbreviations (US Crochet Terminology)
- MR = magic ring
- ch = chain
- sc = single crochet
- inc = increase (2 sc in same stitch)
- dec = decrease (sc2tog; invisible decrease recommended)
- sl st = slip stitch
- rnd = round
- st(s) = stitch(es)
- FLO = front loop only
- BLO = back loop only
Special Notes
- Work in continuous rounds unless noted—don’t join rounds.
- Use a stitch marker to track the first stitch of each round.
- This is an original beginner pattern written based on the project description and the image context you provided. It does not copy the YouTube content, but the video can still help you confirm the overall look and assembly.
- For the cleanest color change (brown to white), switch colors on the last yarn-over of the final brown stitch.
Step-by-Step Instructions
Head + Body (One Piece)
Start with brown for the body.
Rnd 1: MR, 6 sc (6)
Rnd 2: inc around (12)
Rnd 3: (sc, inc) x6 (18)
Rnd 4: (2 sc, inc) x6 (24)
Rnd 5: (3 sc, inc) x6 (30)
Rnd 6–9: sc around (30) for 4 rounds
Switch to White for the Head
Change to white.
Rnd 10: sc around (30)
Rnd 11–13: sc around (30) for 3 rounds
Place eyes now (or plan to embroider later). For a cute look, position them between Rnds 11–12, about 6–7 stitches apart.
Close the Top
Begin stuffing firmly, shaping a smooth round head.
Rnd 14: (3 sc, dec) x6 (24)
Rnd 15: (2 sc, dec) x6 (18)
Rnd 16: (sc, dec) x6 (12)
Rnd 17: dec x6 (6)
Fasten off. Thread tail through remaining stitches, pull tight to close, and weave in.
Wings (Make 2)
Use brown.
Rnd 1: MR, 6 sc (6)
Rnd 2: (sc, inc) x3 (9)
Rnd 3: sc around (9)
Rnd 4: (sc, dec) x3 (6)
Fasten off, leave a tail for sewing. Lightly flatten—wings look best slightly curved against the body.
Beak (Make 1)
Use yellow.
Rnd 1: MR, 4 sc (4)
Rnd 2: (sc, inc) x2 (6)
Rnd 3: sc around (6)
Fasten off, leave a tail. Don’t stuff the beak; keep it flat so it sits neatly on the face.
Feet (Make 2)
Use yellow. These are tiny and quick.
Rnd 1: MR, 5 sc (5)
Rnd 2: sc around (5)
Fasten off, leave a tail. Flatten slightly before sewing.
Optional claws (extra cute): embroider 2–3 small lines on each foot with a darker yellow or brown thread.
Keychain Hanging Loop
Attach yarn at the top center of the head (slightly behind the face).
- ch 12–18 (enough to fit your keyring)
- sl st back into the same spot to form a loop
- Sew through the base of the loop a few times for strength
Slide onto the keyring (or add a jump ring), then knot and weave the ends in securely.
Assembly
Attach the Beak
Sew the beak centered on the white head area, slightly below eye level. A small upward tilt makes the eagle look friendly.
Attach the Wings
Sew one wing to each side of the brown body, roughly around the widest part. Double-check they’re even before tightening stitches.
Attach the Feet
Sew feet near the bottom front of the body, spaced slightly apart so the bird looks balanced when hanging.
Tips for Beginners
- Go down a hook size if you can see stuffing through your stitches.
- Use stitch markers every round—mini projects are easy to miscount.
- For smoother shaping, use invisible decreases.
- Pin parts in place (or tack them with a few loose stitches) before fully sewing.
- If you’re unsure about placement, check the YouTube video for a quick visual reference of where the face, wings, and loop look best.
Creative Variations
- Patriotic version: add a tiny red-and-blue scarf for a fun themed charm.
- Cartoon style: oversized beak and bigger eyes for extra cuteness.
- Texture swap: use plush yarn for a puffy, soft keychain (just sew more securely).
- Add a belly patch: a small white or tan oval on the front for extra detail.
- Make a set: pair it with other mini birds for a cute collection gift.
Conclusion
This crochet bald eagle keychain amigurumi pattern is a quick, beginner-friendly make that still looks detailed thanks to the strong color contrast white head, brown body, and yellow beak. It’s small enough for last-minute gifting, but polished enough to sell or swap.